Build Dynamic Tables in Snowflake with Coalesce
What are Dynamic Tables?
Snowflake's Dynamic Tables allows you to automatically keep your tables up to date by defining a query that continuously processes data from one or more base tables. The Dynamic Table updates regularly based on a query through refreshes. This automation simplifies your data pipelines and removes the need for manual refreshes.
Dynamic Tables Package
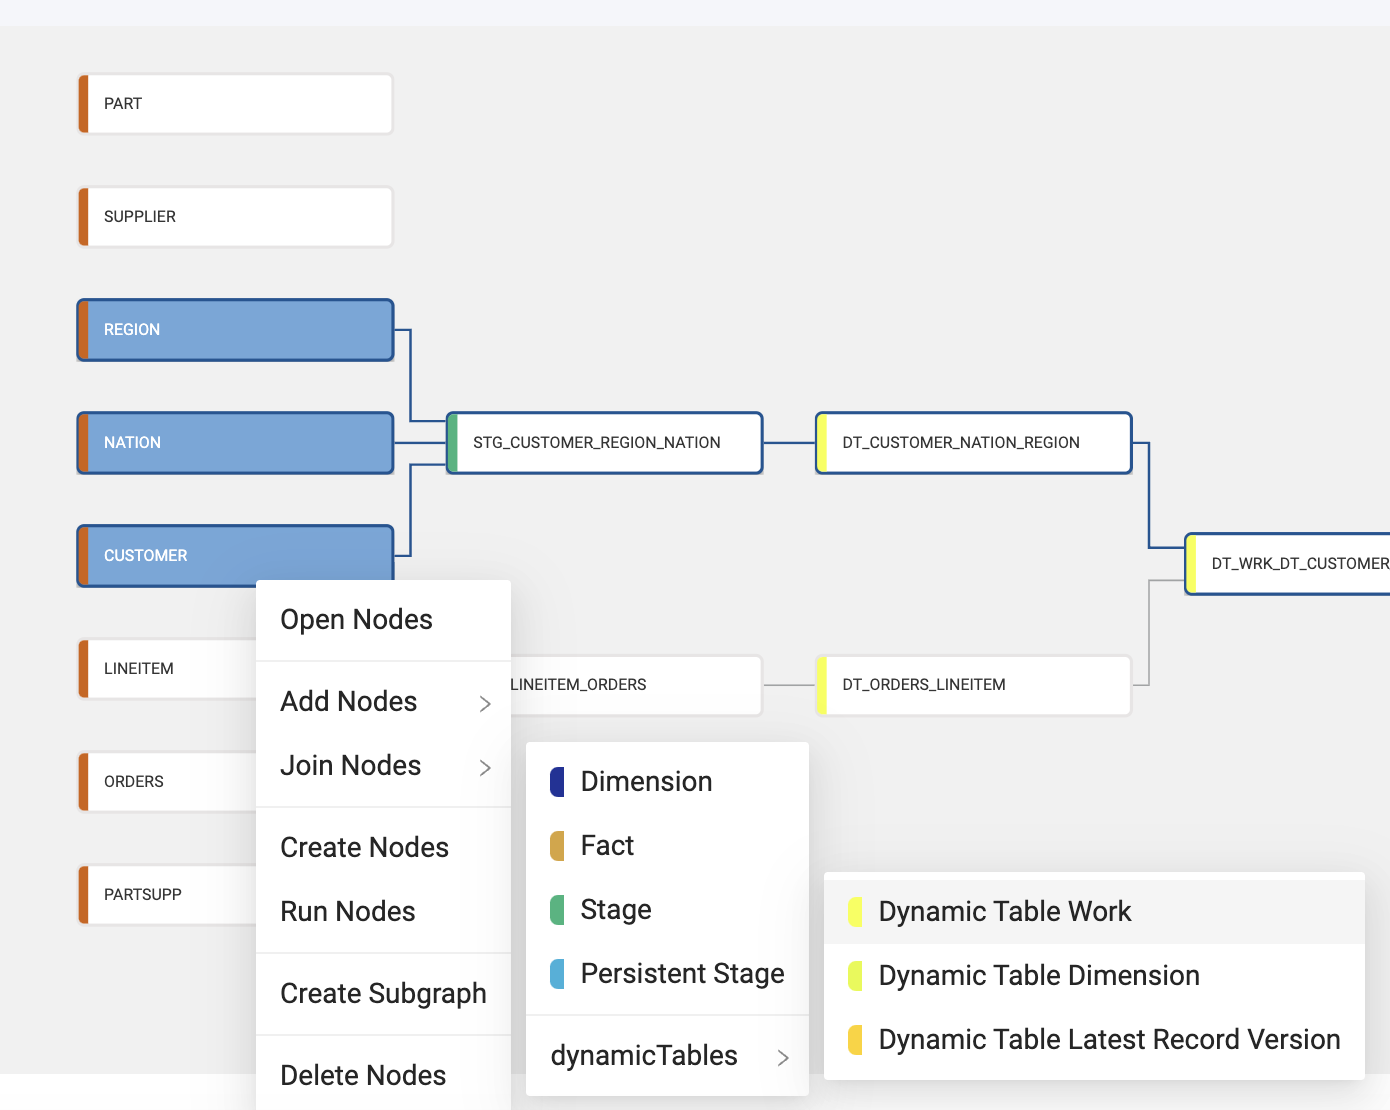
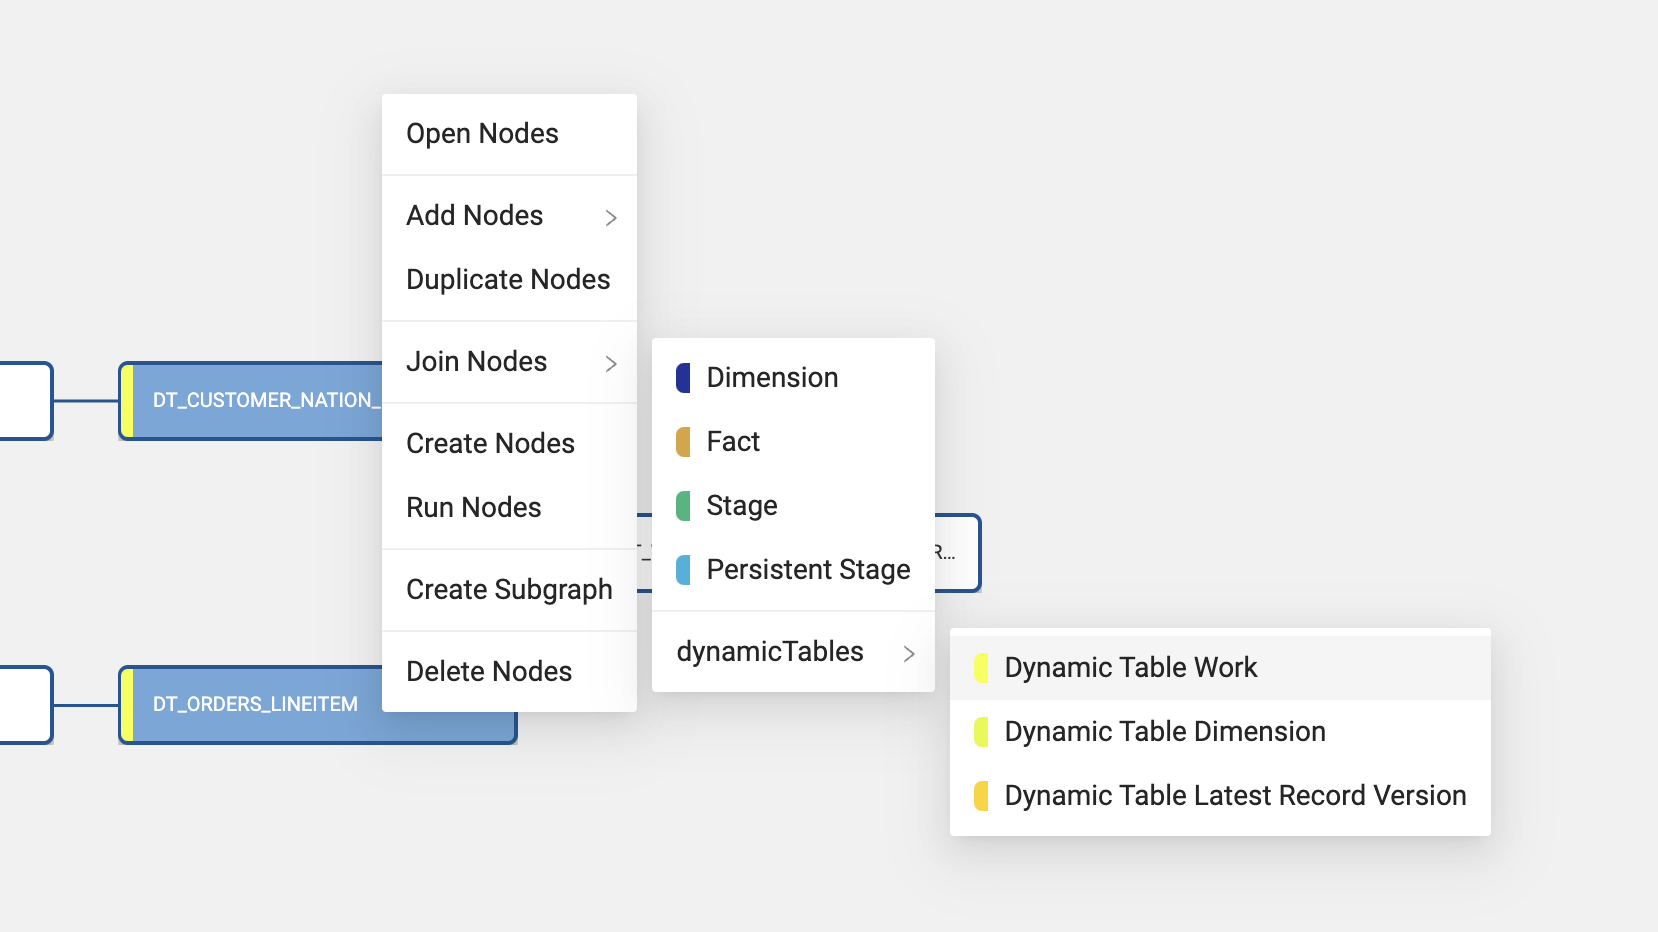
Coalesce offers a Dynamic Table Package through the Coalesce Marketplace. The package contains three node types:
- Dynamic Table Work
- Dynamic Table Dimension
- Dynamic Table Latest Record Version
Dynamic Table Work
Dynamic Table Work is used to deploy single dynamic tables or a DAG (Direct Acyclic Graph).
A few features of the Dynamic Work Table:
- Downstream: You can set the table to refresh when other dynamic tables need to refresh or you can set the Lag specification.
- Refresh Mode: Set the mode to auto, incremental, or full. Decide if you want a full refresh or incremental.
- Initialize: Run at creation or at the next scheduled Refresh.
Dynamic Table Dimension
Dimension tables are a type of dimension in a data warehouse where the data changes slowly over time. They can be used to track things like product details and financial data. This is a Type 2 Slowly Changing Dimension table.
A few features of the Dynamic Table Dimension:
- Downstream: You can set the table to refresh when other dynamic tables need to refresh or you can set the Lag specification.
- Refresh Mode: Set the mode to auto, incremental, or full. Decide if you want a full refresh or incremental.
- Initialize: Run at creation or at the next scheduled Refresh.
- Record Versioning: You can track changes over time using the date and time based on a column. The history of the records are kept.
Dynamic Table Latest Record Version
The Dynamic Table Latest Record Version keeps the most recent version of a record. Use this table when you only want the most recent record. Latest record version does this by identifying the most recent record based on a specified date time or timestamp column.
A few features of the Dynamic Table Dimension:
- Downstream: You can set the table to refresh when other dynamic tables need to refresh or you can set the Lag specification.
- Refresh Mode: Set the mode to auto, incremental, or full. Decide if you want a full refresh or incremental.
- Initialize: Run at creation or at the next scheduled Refresh.
- Record Versioning: Unlike the Dynamic Table Dimension, this only keeps the most recent version of the record.
How to use Dynamic Tables in Coalesce
You’ll learn how to use the Dynamic Tables package, specifically the Dynamic Work Table.
Before You Begin
- You need a Coalesce account. You can sign up through Snowflake’s partner connect.
- This assumes you’ve completed your account setup and have a project created with Storage Locations and Storage Mappings.
- Snowflake account with
ACCOUNTADMINprivileges. You’ll need the following privileges on the table:- USAGE on the table you will use.
- CREATE DYNAMIC TABLE on the schema
- SELECT on the existing tables and views that you plan to query
- USAGE on the warehouse that you plan to use to refresh the table.
- We’ll be using the Snowflake trial account data.
Update Your Parameters
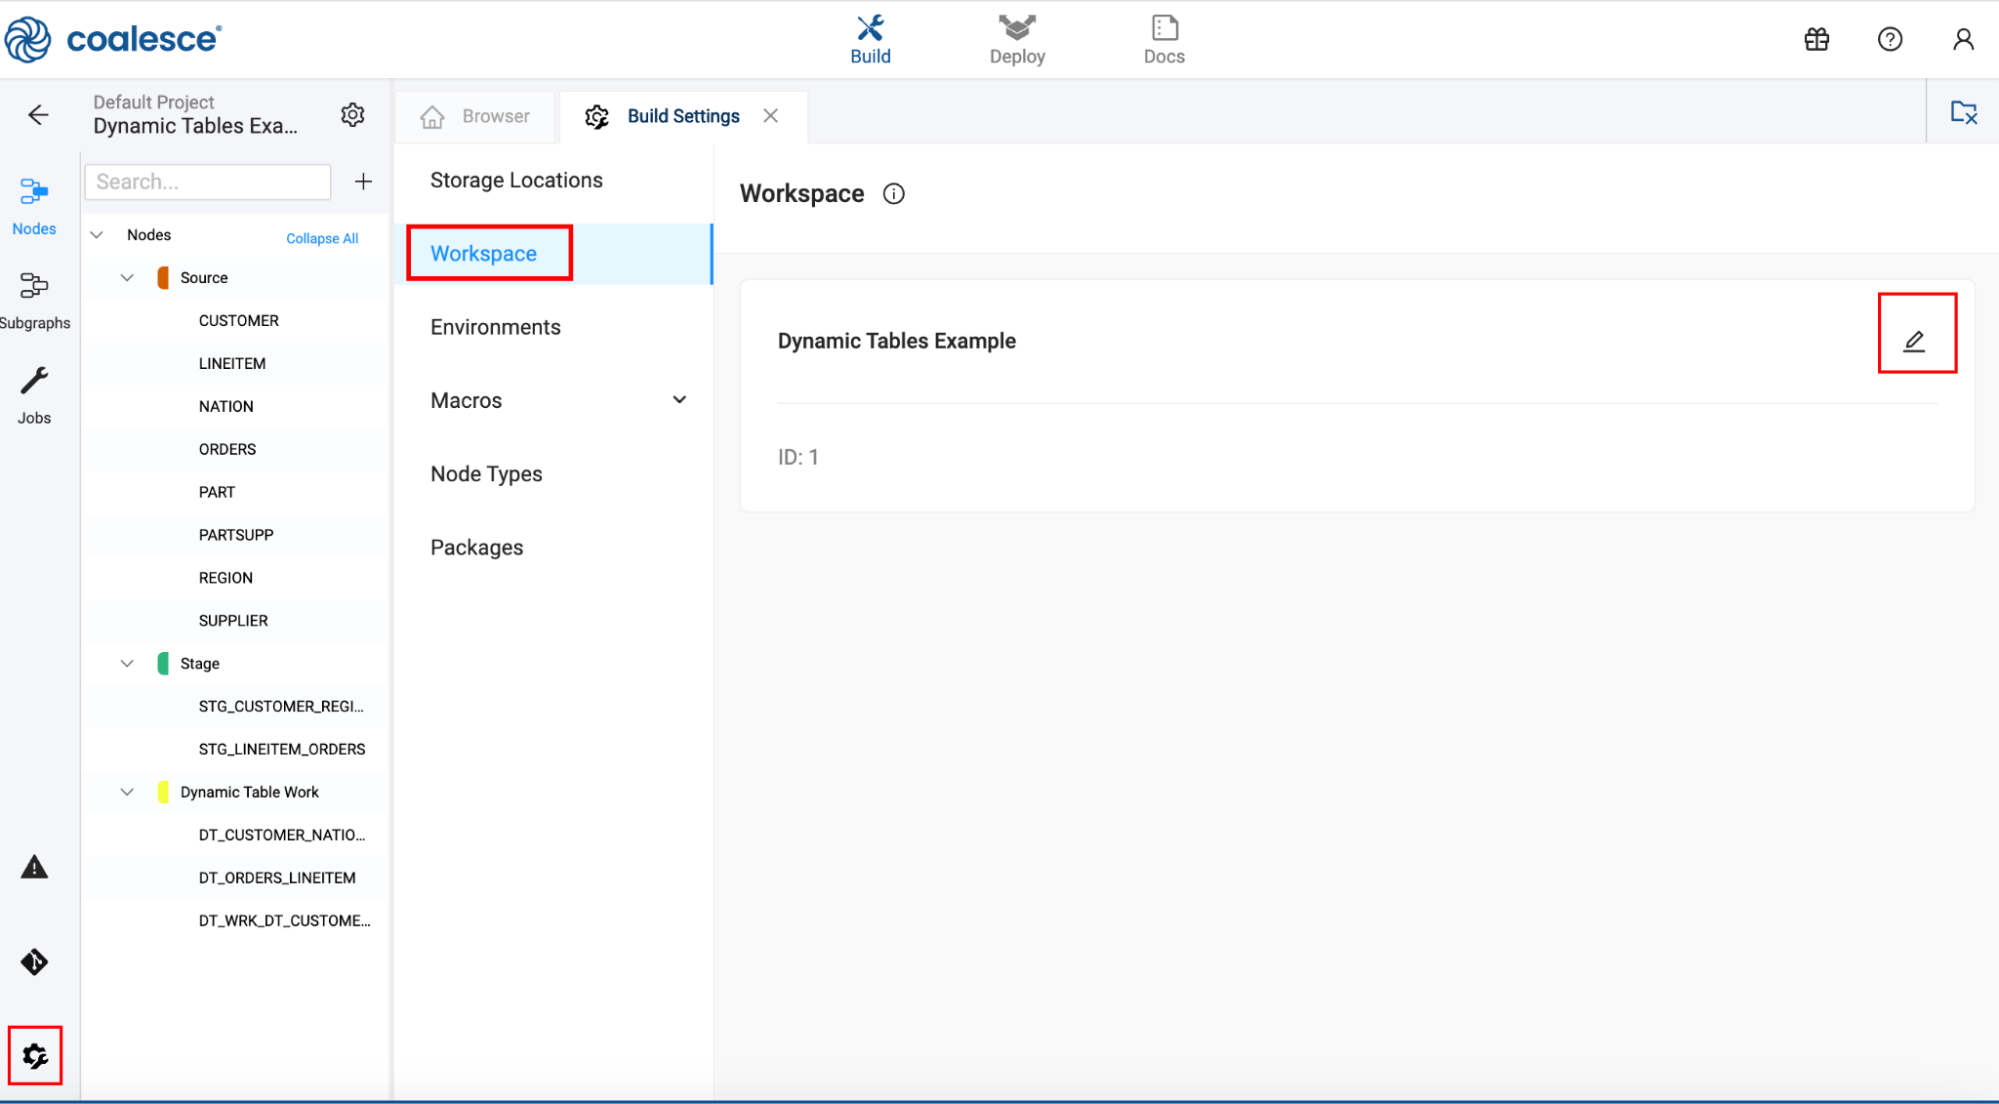
For the Dynamic Tables node to work, you need to update the workspace parameters.
-
Click the Build Settings > Workspace. Then click the pencil to edit Workspace.
-
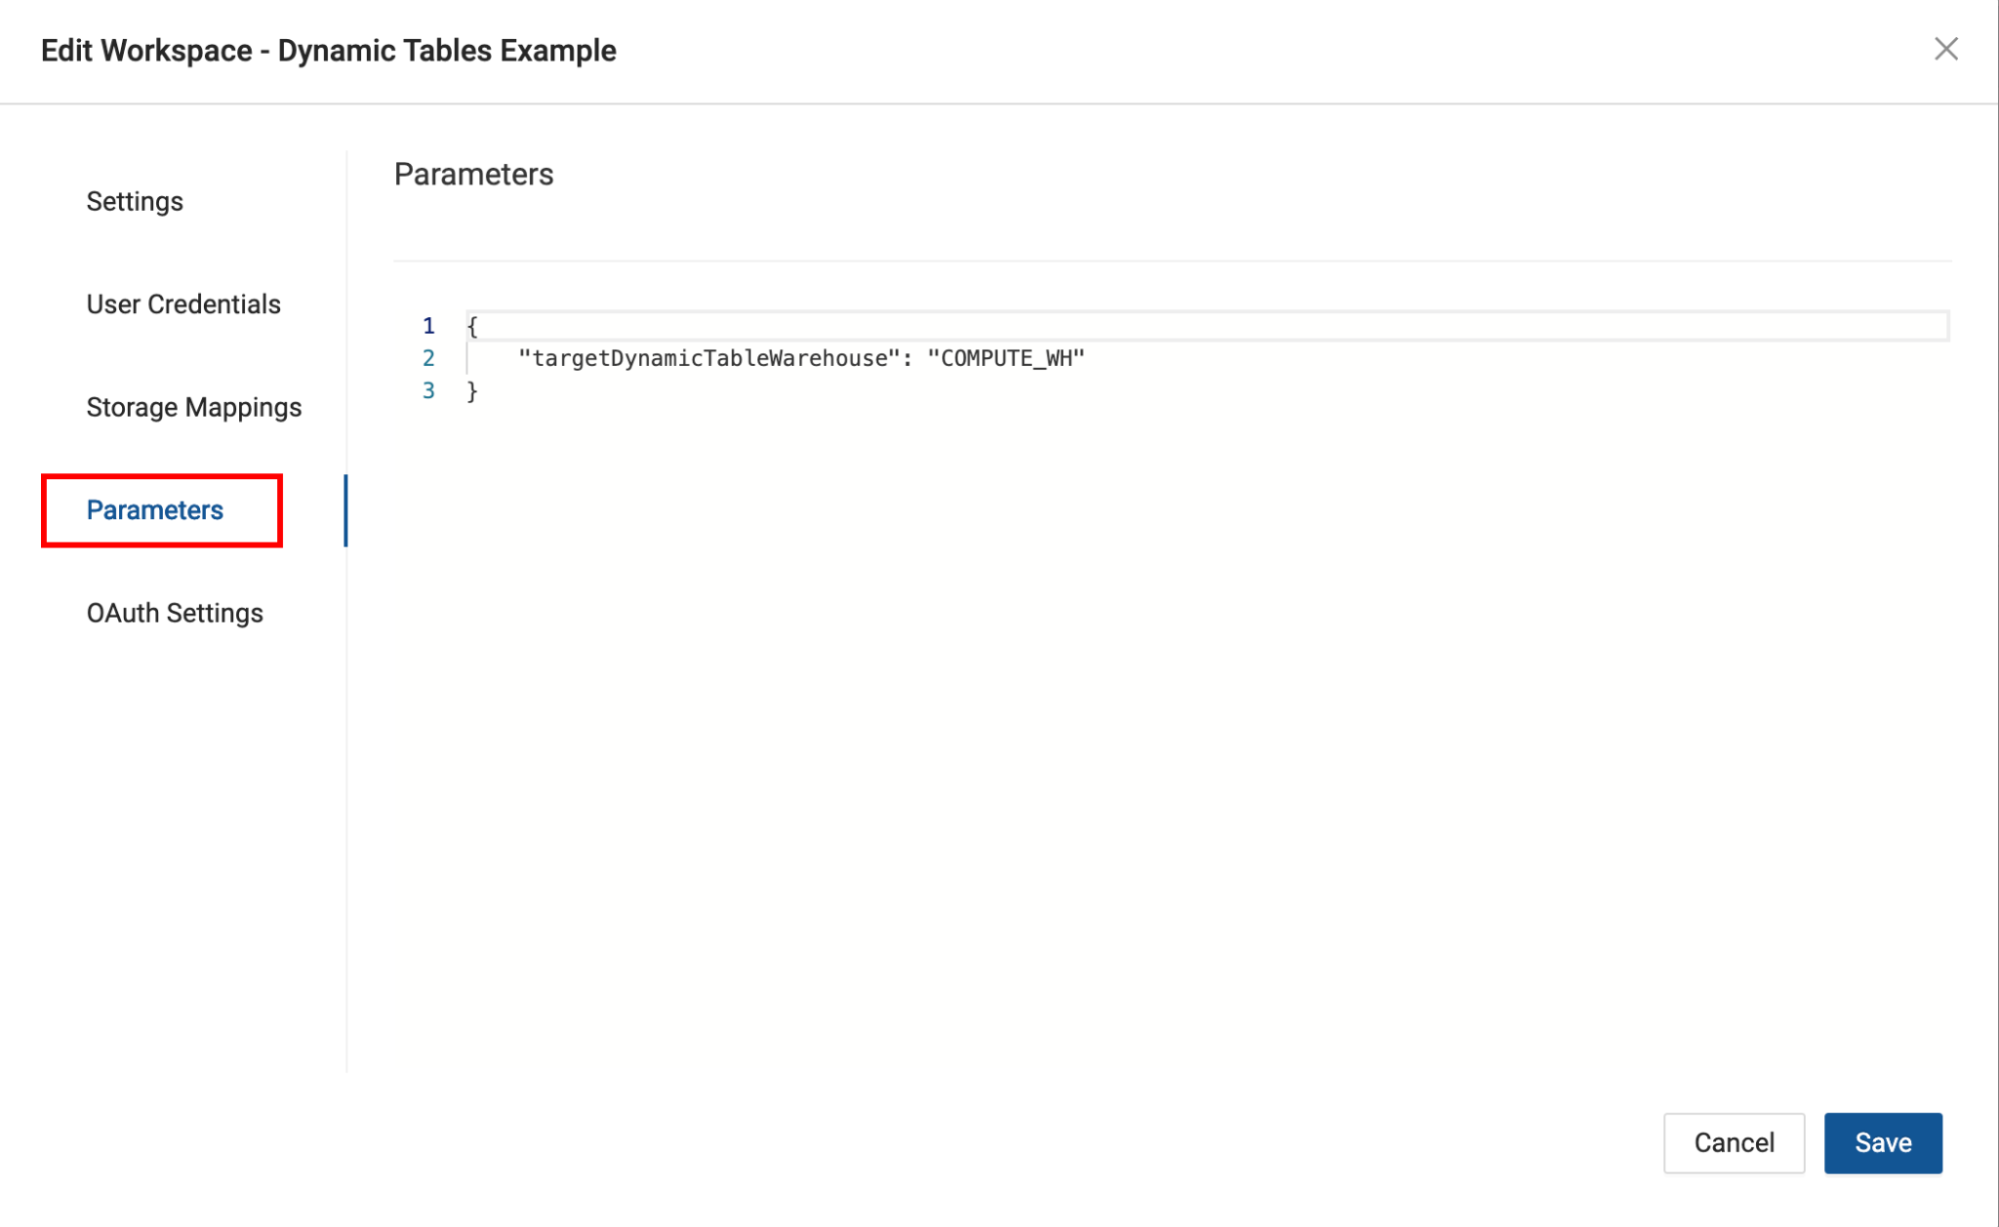
Select Parameters and update it to match the warehouse you’re using. In this example, it’s
COMPUTE_WH.Dynamic Tables Package Paramter{
"targetDynamicTableWarehouse": "COMPUTE_WH"
}
Add Your Data Sources
-
From the Build screen, make sure you are on Node Graph. Select the
+plus sign. Then Add Sources.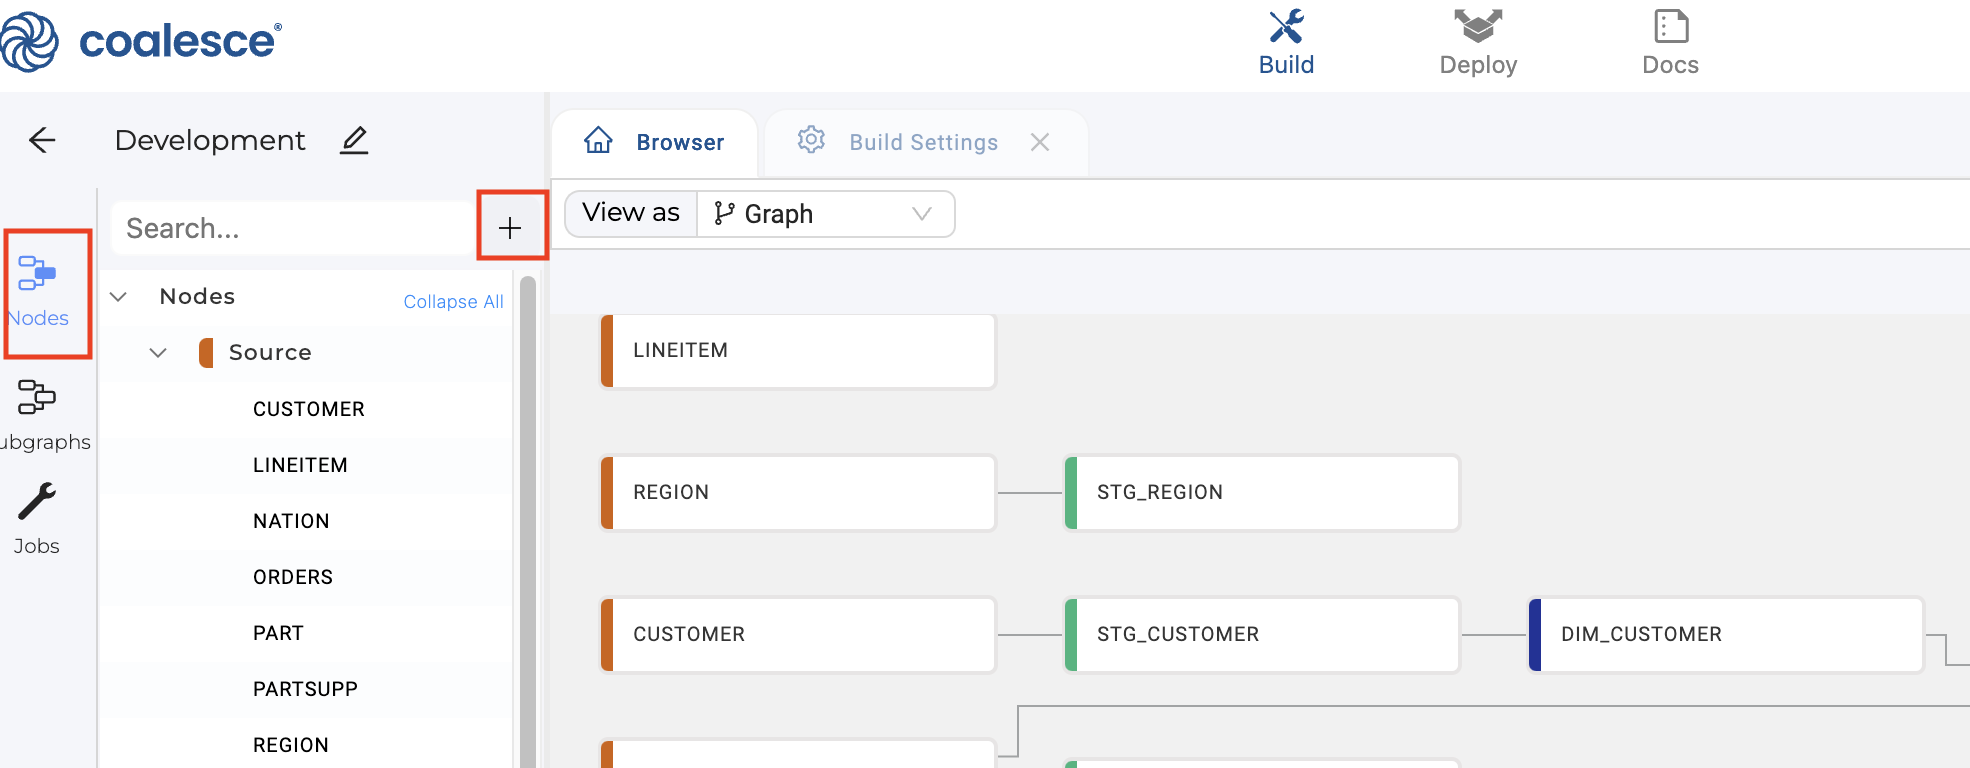
-
Select the sources you want to add, then Add Sources. You can get a preview of each source by selecting them.

-
Add the all the Snowflake sample datasets.
Add the Dynamic Tables Package
-
Go to the Dynamic Tables package page and make note of the package ID.
@coalesce/dynamic-tables.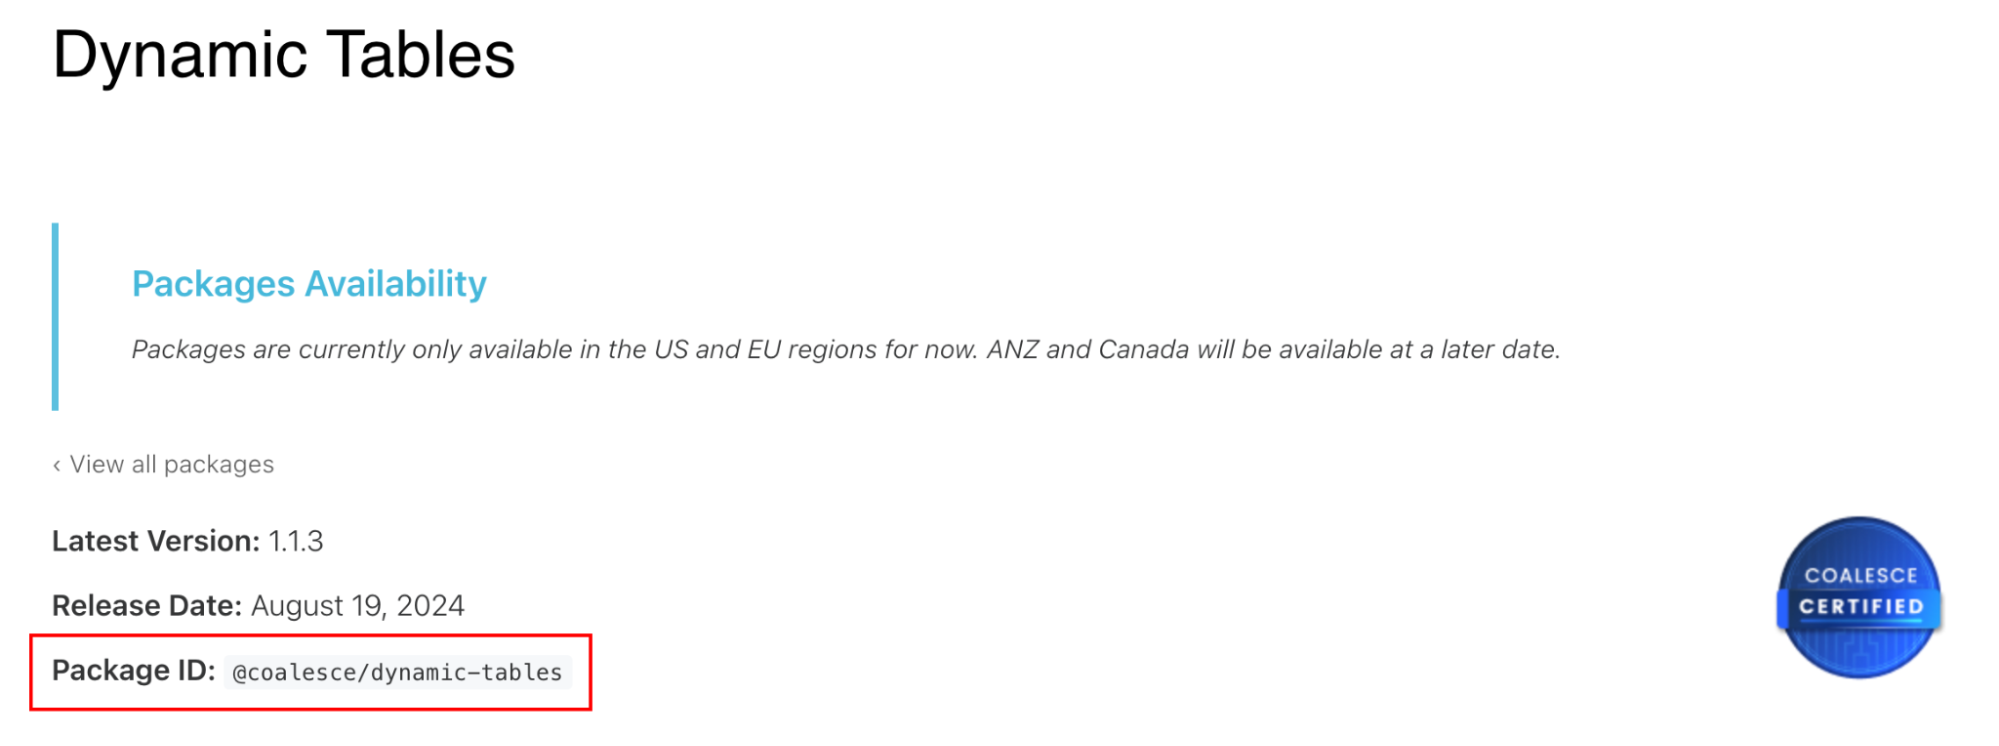
-
On the Build page, click Build Settings.
-
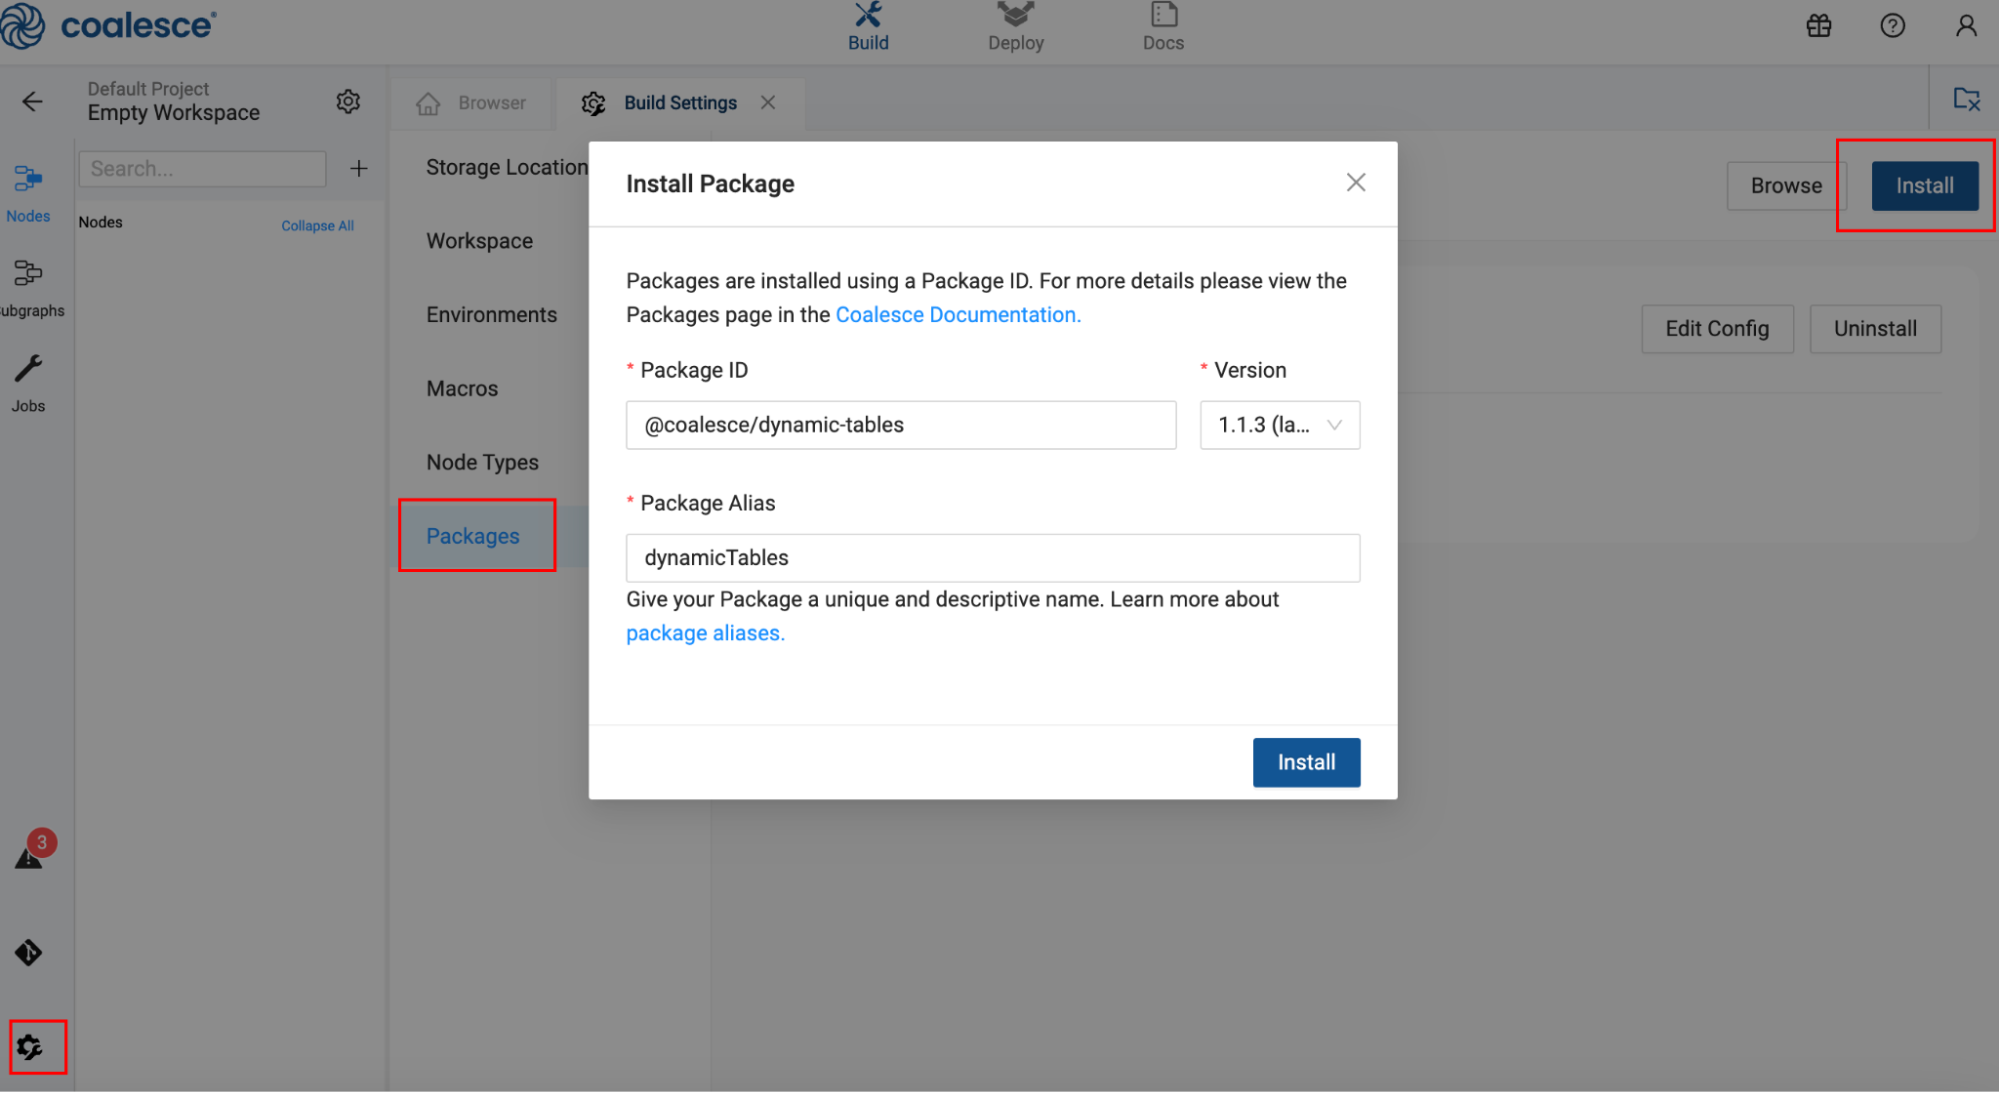
Select Packages, then click Install.
-
Enter the package ID you copied from the package page.
-
Give the package a unique name to make it easy to identify later.
-
The package will automatically default to the most recent version.
-
Go to Build Settings > Node Types. To see the three Dynamic Table node types installed. It shows the node type name, storage location, and the unique name with the installed version.

Create Your Dynamic Tables
In this section you’ll create two dynamic tables from your source data.
-
Select the
Region,Nation, andCustomersource nodes using the Shift key. -
Then Right-Click > Join Nodes > Dynamic Table > Dynamic Table Work.
-
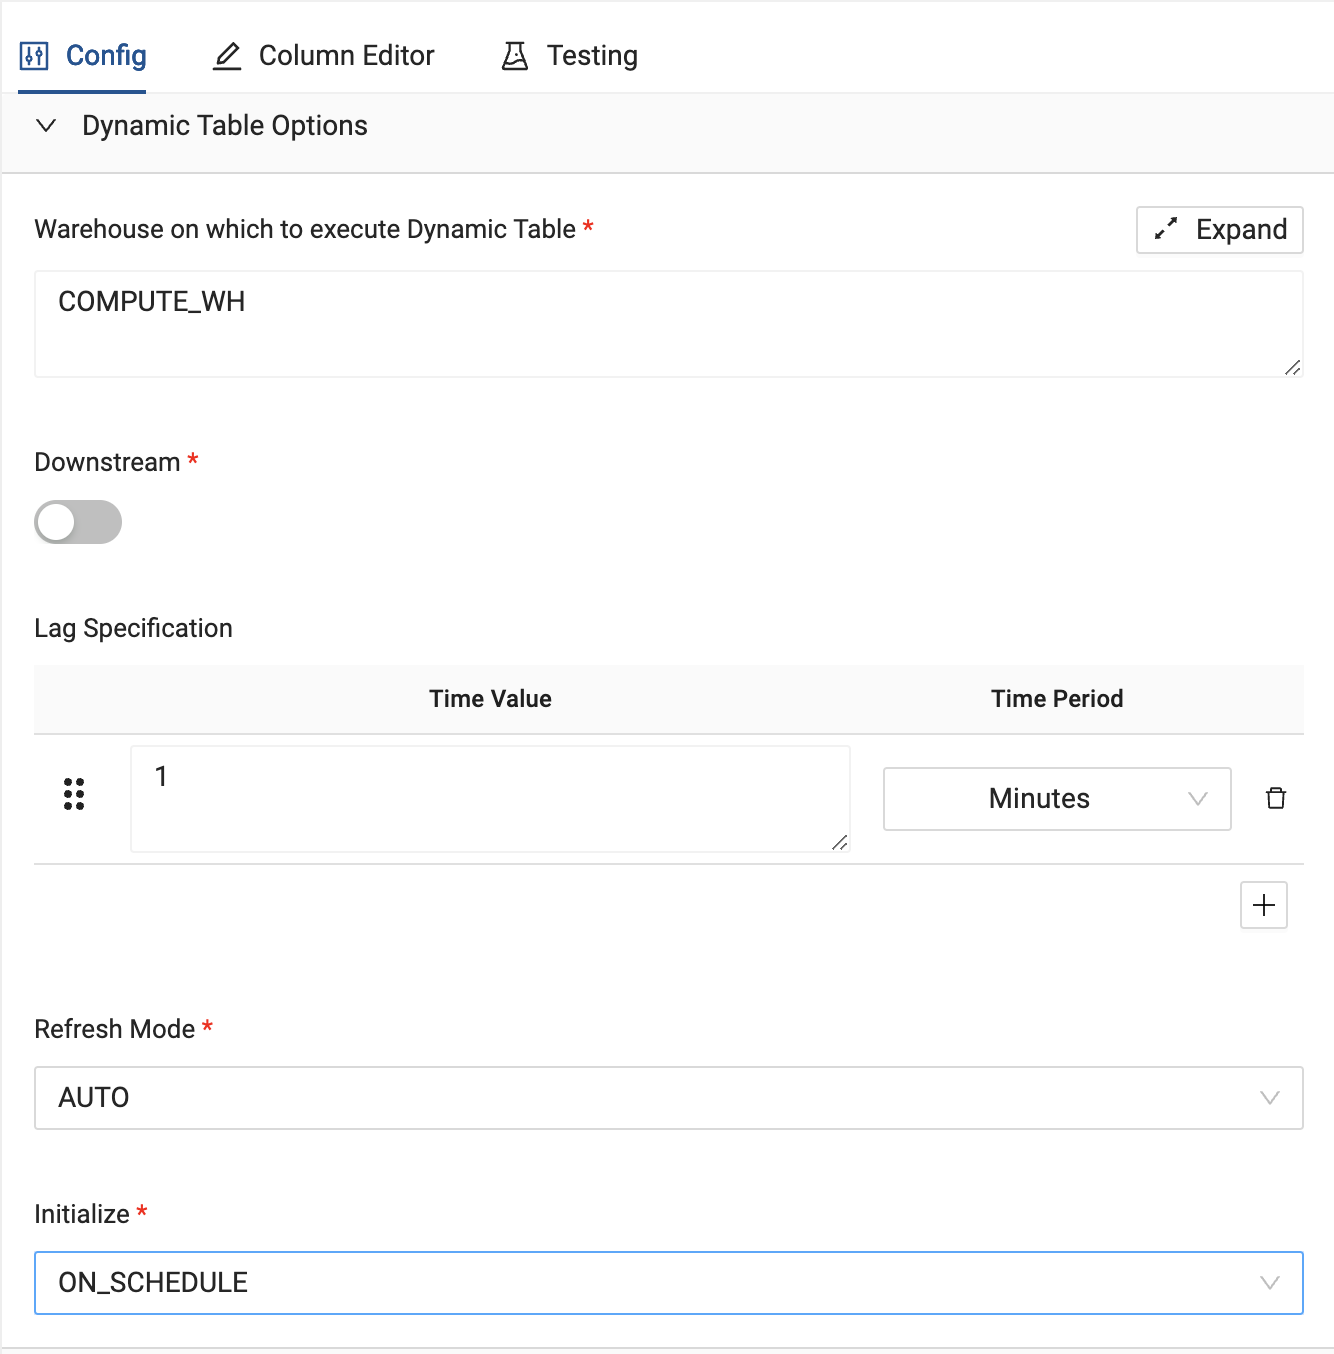
Update the Dynamic Table Options to:
- Warehouse to the one you are using. In this example it’s
COMPUTE_WH. - Downstream - Toggled off
- Lag Specification -
1 Minutes - Refresh Mode -
Auto - Initialize
ON_SCHEDULE
- Warehouse to the one you are using. In this example it’s
-
Because there are three tables, we need to Join them. In the Join Tab of the node, enter your Join statement. If your table names are different from the example, make sure to update the names.
FROM {{ ref('SAMPLE', 'NATION') }} "NATION"
INNER JOIN {{ ref('SAMPLE', 'REGION') }} "REGION"
ON "NATION"."N_REGIONKEY" = "REGION"."R_REGIONKEY"
INNER JOIN {{ ref('SAMPLE', 'CUSTOMER') }} "CUSTOMER"
ON "NATION"."N_NATIONKEY" = "CUSTOMER"."C_NATIONKEY"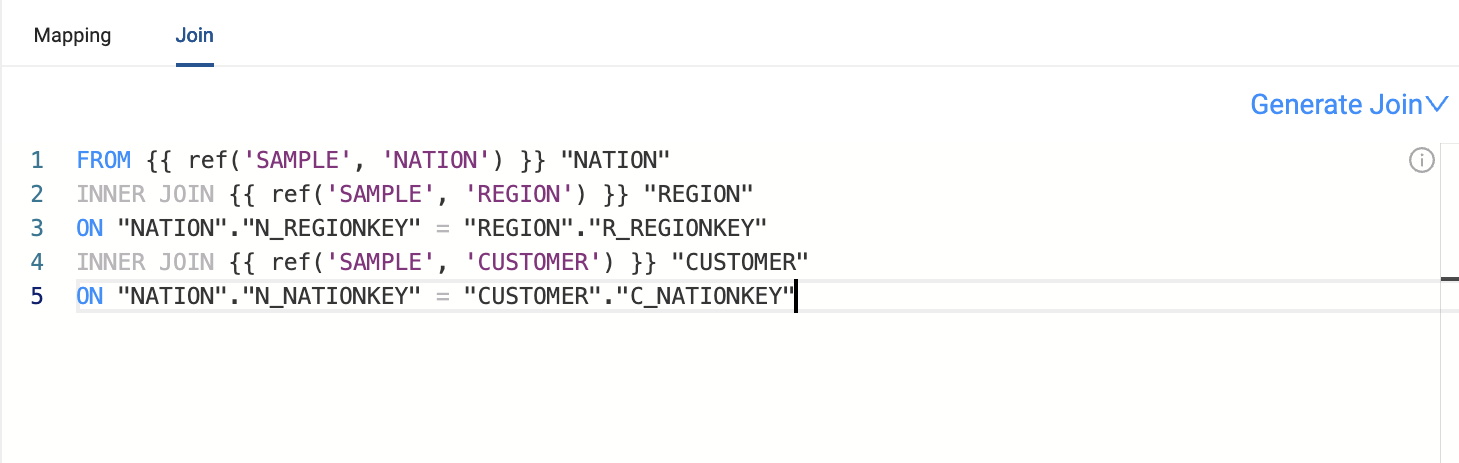
-
You need to delete columns that aren’t needed or don’t need to be updated.
-
Press the Command key to multi-select the columns
N_NATIONKEY,N_REGIONKEY,N_COMMENT,R_REGIONKEYandR_COMMENTthen right-click to delete them from your node. -
Click Create to create your Dynamic Table.
-
For the next steps, you’ll create your second Dynamic Table.
-
Go back to the Browser Tab, and select
LINEITEMandORDERS, thenRight-Click > Join Nodes > Dynamic Table > Dynamic Table Work. -
Update the Dynamic Table Options to:
- Warehouse to the one you are using. In this example it’s
COMPUTE_WH. - Downstream - Toggled off.
- Lag Specification -
1 Minutes. - Refresh Mode -
Auto - Initialize
ON_SCHEDULE
- Warehouse to the one you are using. In this example it’s
-
In the Join Tab, update your join statement. If your table names are different from the example, make sure to update the names.
FROM {{ ref('SAMPLE', 'ORDERS') }} "ORDERS"
INNER JOIN {{ ref('SAMPLE', 'LINEITEM') }} "LINEITEM"
ON "ORDERS"."O_ORDERKEY" = "LINEITEM"."L_ORDERKEY" -
In the Mapping Tab, delete the columns you don’t need.
O_ORDERSTATUS,O_TOTALPRICE,O_ORDERDATE,O_CLERK,O_SHIPRIORITY,L_PARTKEYandL_SUPPKEY. -
Click Create to create your Dynamic Table.
Join Dynamic Tables
In this section you’ll Join the Dynamic Tables you created to aggregate the quantity of goods by customer.
-
On the Browse Tab, select the two tables you created. Then Right-Click > Join Nodes > Dynamic Table > Dynamic Table Work.
-
Update the Dynamic Table Options to:
- Warehouse to the one you are using. In this example it’s
COMPUTE_WH. - Downstream - Toggled off
- Lag Specification -
15 Minutes.This is so it refreshes less frequently than the other nodes. - Refresh Mode -
Auto - Initialize
ON_SCHEDULE
- Warehouse to the one you are using. In this example it’s
-
Update the General Options to:
- Toggle
Group By Allto on. This is different from the other tables you created.
- Toggle
-
Click on the Join Tab and update the statement. If your table names are different from the example, make sure to update the names.
FROM {{ ref('WORK', 'DT_ORDERS_LINEITEM') }} "DT_ORDERS_LINEITEM"
INNER JOIN {{ ref('WORK', 'DT_CUSTOMER_NATION_REGION') }} "DT_CUSTOMER_NATION_REGION"
ON "DT_ORDERS_LINEITEM"."O_CUSTKEY" = "DT_CUSTOMER_NATION_REGION"."C_CUSTKEY" -
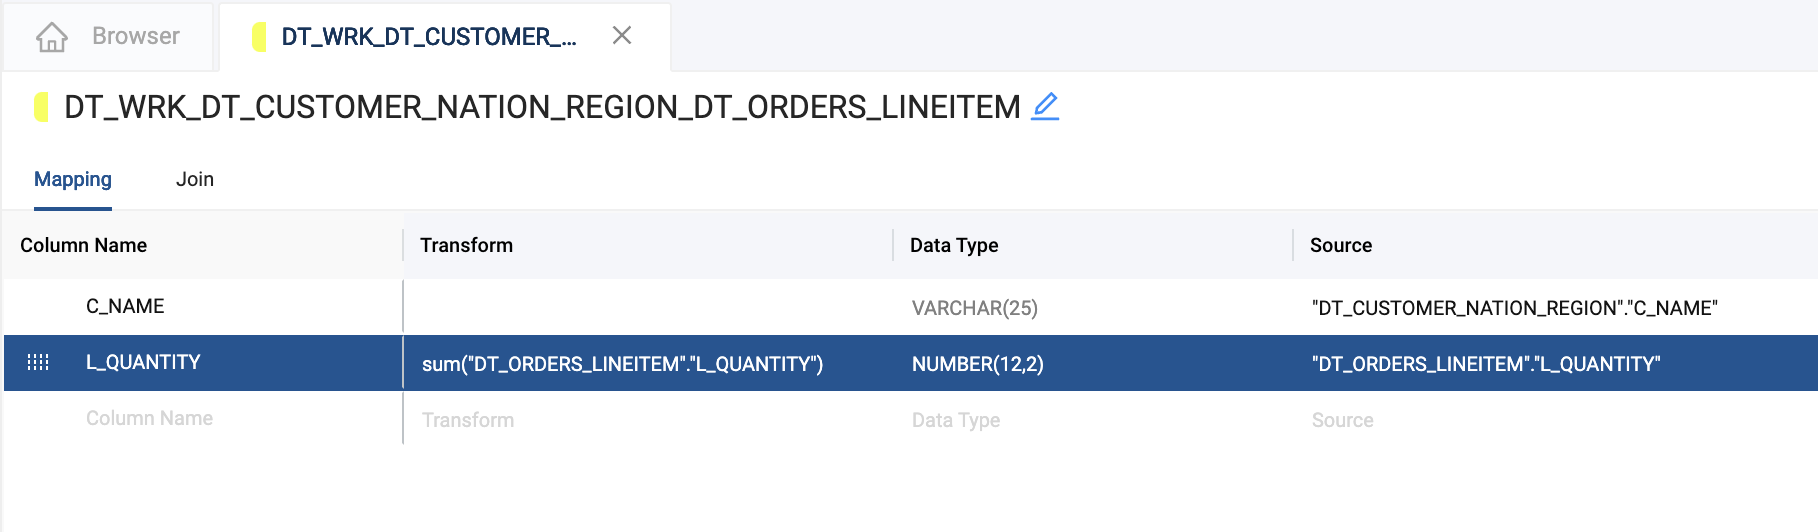
In the Mapping Tab, delete all columns except
C_NAMEandL_QUANTITY -
Make sure
C_NAMEappears first by dragging it to the top. -
Double click in the Transform column for
L_QUANTITYand enter:sum({{SRC}}) -
You’ll see the column resolve to the sum of values of SRC. SRC is a shorthand you can use in Coalesce called a Helper Token.
-
Click Create.
Run Your Dynamic Tables
Currently, your Dynamic tables are set up to run based on a lag specification. You can also change it so that the dynamic table is refreshed on demand when the other tables need to refresh.
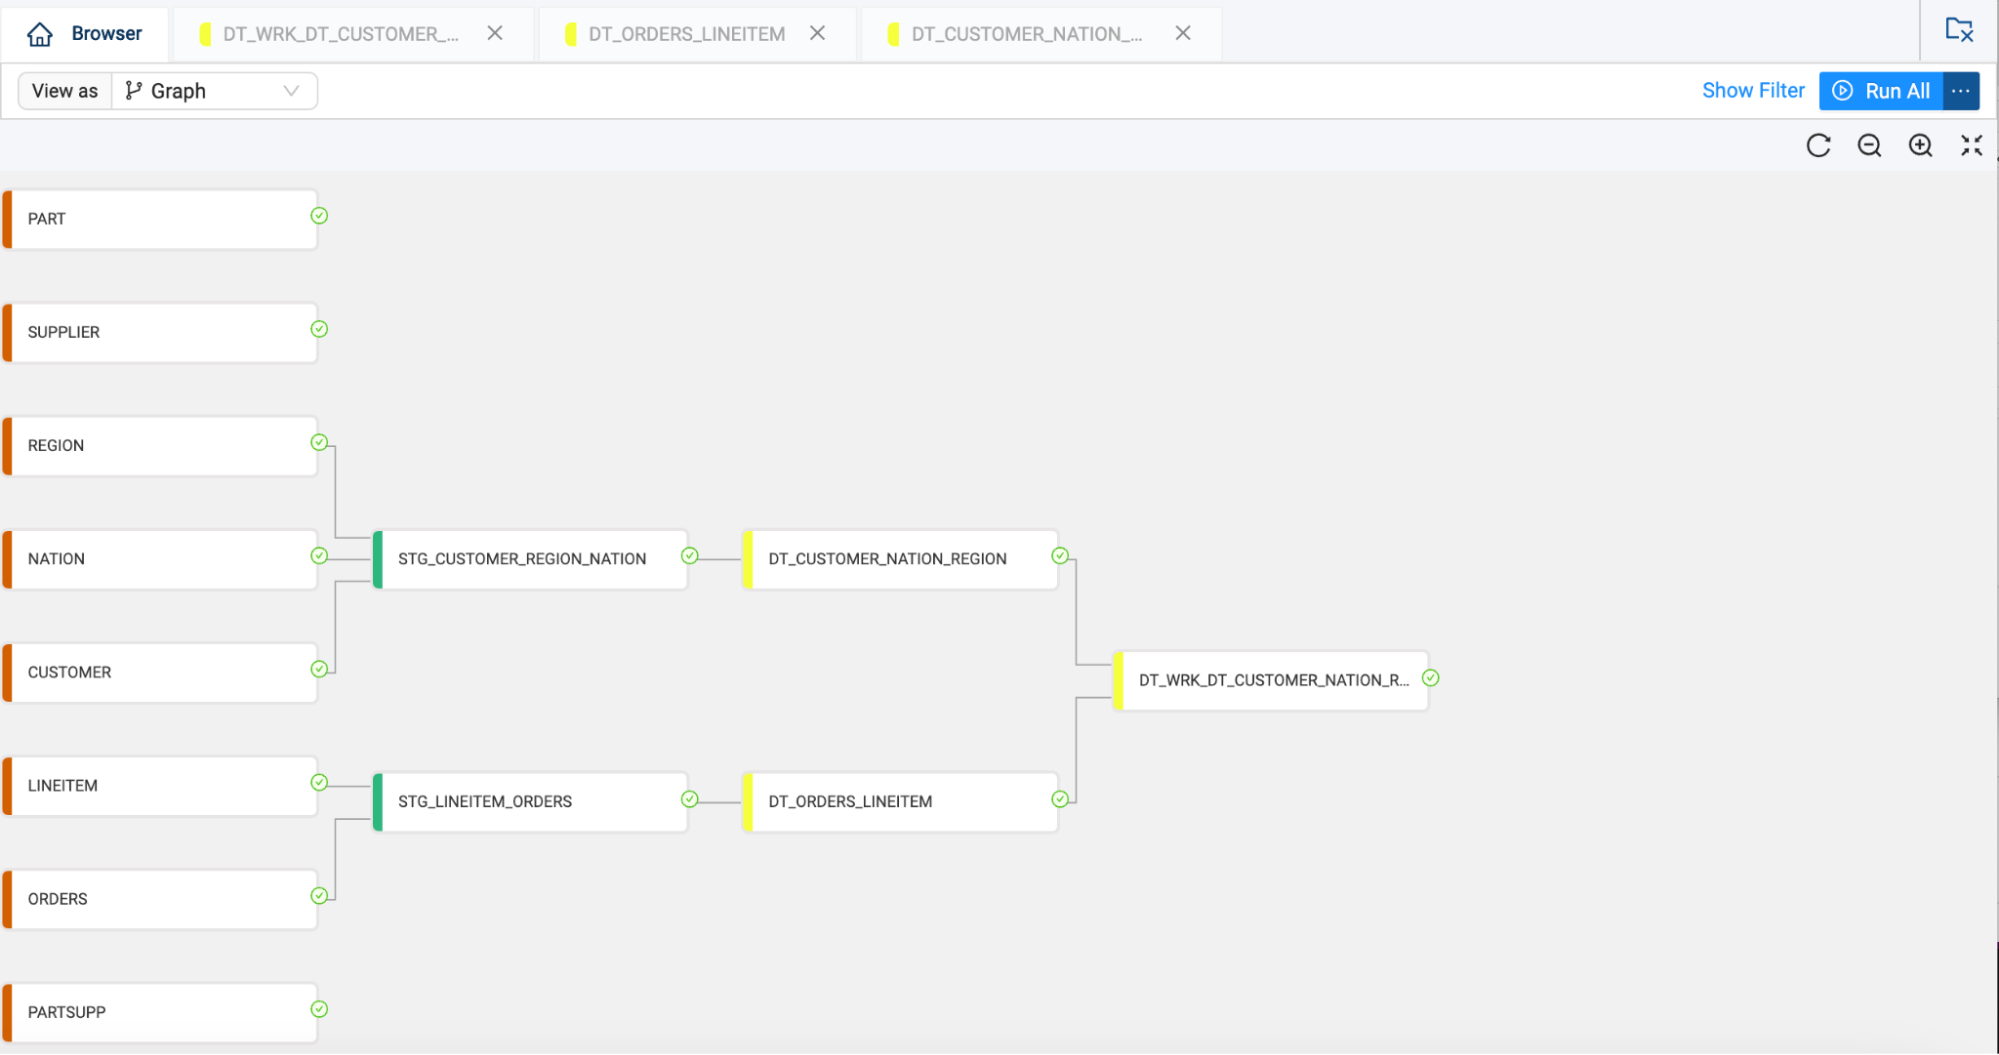
In this example, we can change our two tables (DT_ORDERS_LINEITEM and DT_CUSTOMER_NATION_REGION) to use Downstream and so they start updating based on the DT_WRK_DT_CUSTOMER_NATION_REGION_DT_ORDERS_LINEITEM table lag time.
-
Open the
DT_ORDERS_LINEITEMand update the Dynamic Tables Options to Downstream. -
Open the
DT_CUSTOMER_NATION_REGIONand update the Dynamic Tables Options to Downstream.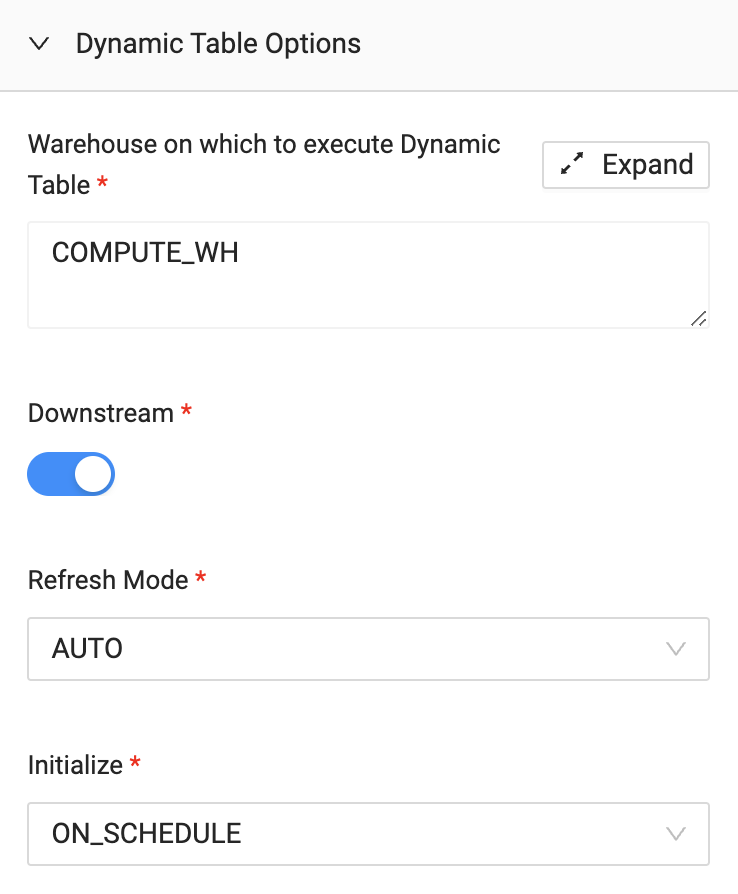
-
Go back to the Browser Tab and review your DAG. Your DAG might look different depending on the data you used for this example. Click Run All. You’ll be able to see the Nodes run.
Review the DAG in Snowflake
- In Snowflake go to Data > Databases and select the one containing your data.
- Open the schema, in this example it’s
DEV, open theDT_WRK_DT_CUSTOMER_NATION_REGION_DT_ORDERS_LINEITEMdynamic table. - Notice that the other tables now have a lag of 15 minutes instead of the 1 minute they were created with.

Conclusion
Thanks to the Dynamic Tables package, you can get a pipeline up and running quickly.