Documentation index: llms.txt. This page is also available as markdown: append .md to this URL or send Accept: text/markdown.
DataOps Best Practices with Git and Coalesce
Overview
What Is DataOps?
DataOps has emerged in recent years as a new approach improving the speed, efficiency, and quality of data analytics processes. It is a methodology that combines cross-functional teams, automated data workflows, and standardized data management practices to quickly and effectively process, analyze, and deliver data-driven insights.
In this guide, you will find best practices for applying the principles of DataOps within the context of Coalesce and how to best implement them by fully leveraging our Git integration for version control.
By saving (or committing) any code changes in Coalesce to Git, you will ensure that previous versions of your data warehouse are preserved and accessible. These changes are accessible through a dedicated Git repository, which is a collection of files that store the different versions of your data warehouse.
We strongly recommend setting up Git within your Coalesce instance to perform proper version control and avoid losing your work.
Introduction to Git
What Is Git?
Git is a widely used version control solution that is used to store, branch, and merge developers' work. Git maintains a centralized code "database" (known as a Git repository) on a hosted provider such as GitHub, Bitbucket, GitLab and Azure DevOps Git. This centralized repository is copied / cloned to a Git client (such as Coalesce) and used to manage development operations.
How Does Git Work?
Git allows developers working on the default / live version of their data warehouse (the main branch) to isolate code changes by creating new branches of work. Branches are then merged together to incorporate new changes into the main branch. All deployments to non-development environments (for example, Test / Production) are performed from the main branch.
Branching and Merging
Branching provides flexibility in team environments by separating development from deployment. Types of branches include:
- An integration branch is used to merge development for system testing and reviews.
- A feature branch is a temporary branch that is created from the integration branch.
- Feature branches track all changes consisting of a "deployable unit of work" (for example, a new or modified pipeline of nodes). All development should be committed and unit tested in a feature branch.
- Several feature branches can be worked on in parallel by different members of the team.
- Feature branches are merged into an integration branch for system testing and review.
- When development is complete and ready for integration, a feature branch is merged back into an integration or main branch.
Git Permissions
Git permissions and approvals can be set up directly on your Git platform (not through Coalesce). Any Git pipelines (also known as actions or runners) can be configured along with Coalesce's Command Line (CLI) utility to automate deployments and executions.
Git operations such as pull requests and merge conflict resolution can be done through Coalesce, or off of the platform via Git commands or other clients (VS Code).
Using Version Control in Coalesce
1. Create a Project
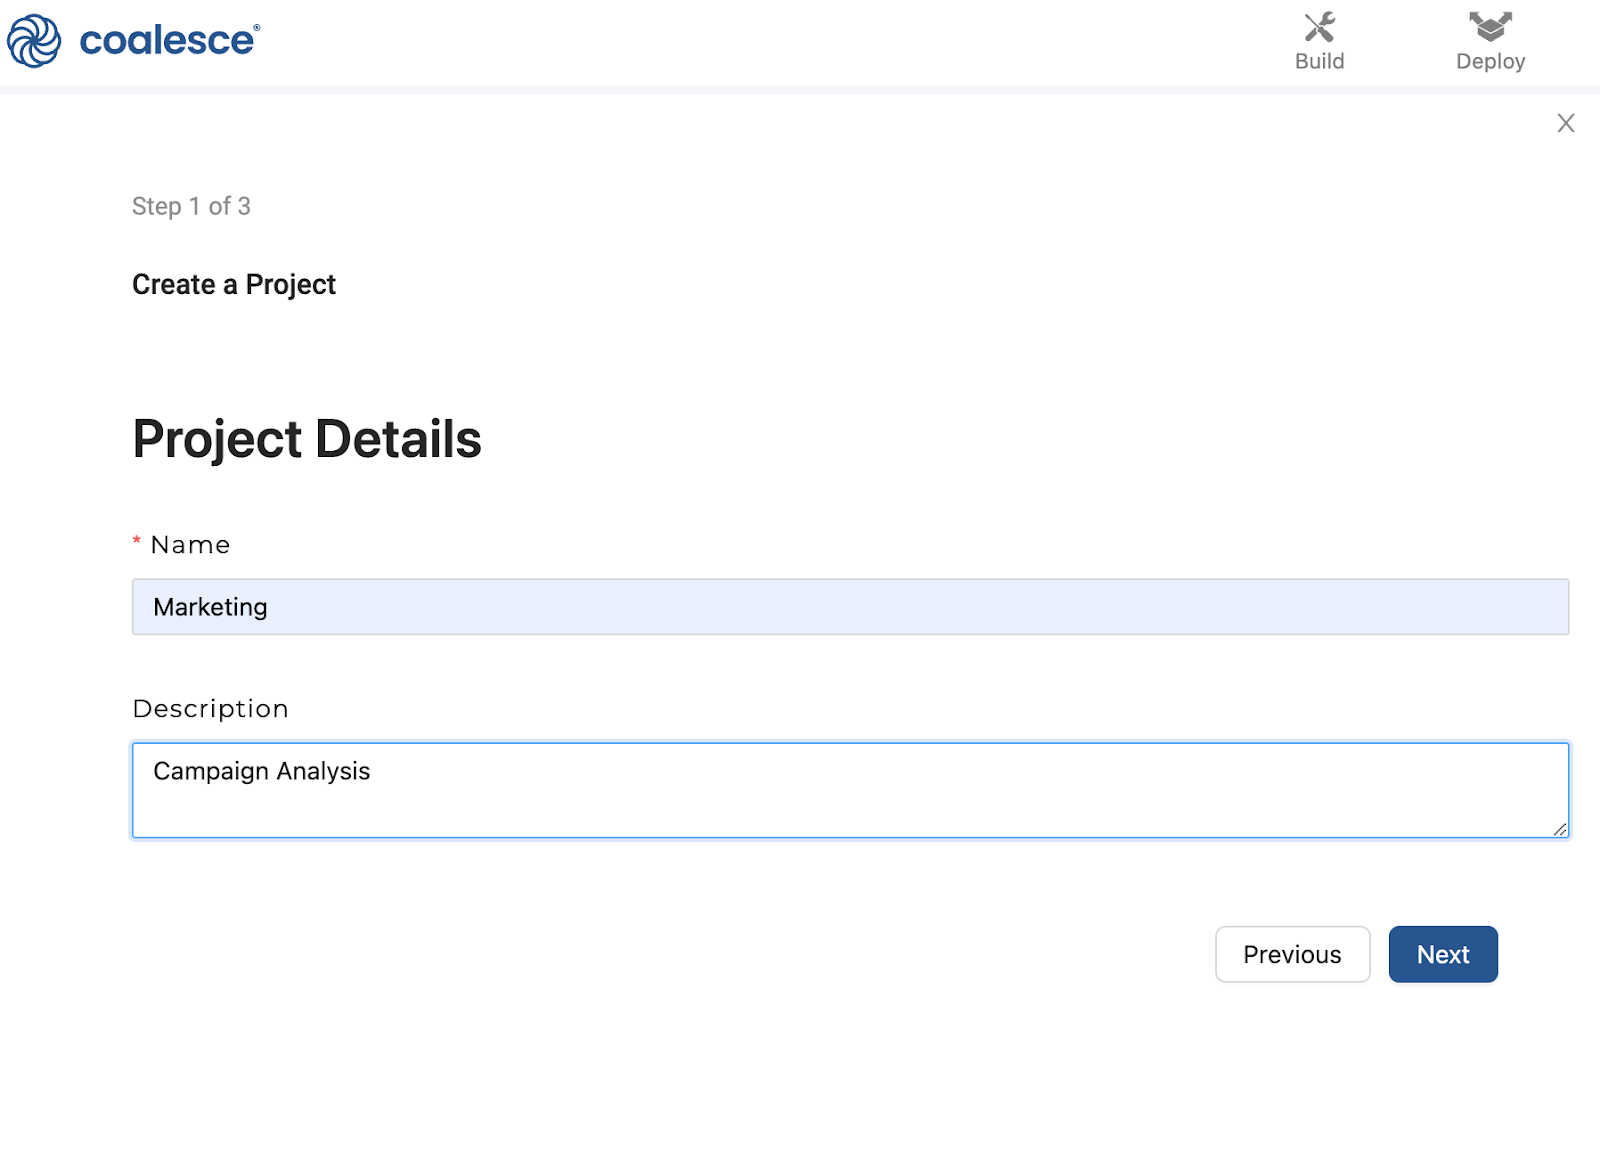
The first step to setting up version control is by creating a Project in Coalesce. Projects are logical groupings of data warehousing efforts in Coalesce, and a good way to organize your work by a particular initiative or team focus.
When you create a Project, you'll be asked for a Git repository URL. Git repository URLs are used by Git hosting services (GitHub) as a way of pointing to a Git repository. However, everyone still has a full copy of the repository on their own machine. Coalesce generates and manages metadata which is converted and executed as SQL code, its this metadata that is stored in Git as YAML files.
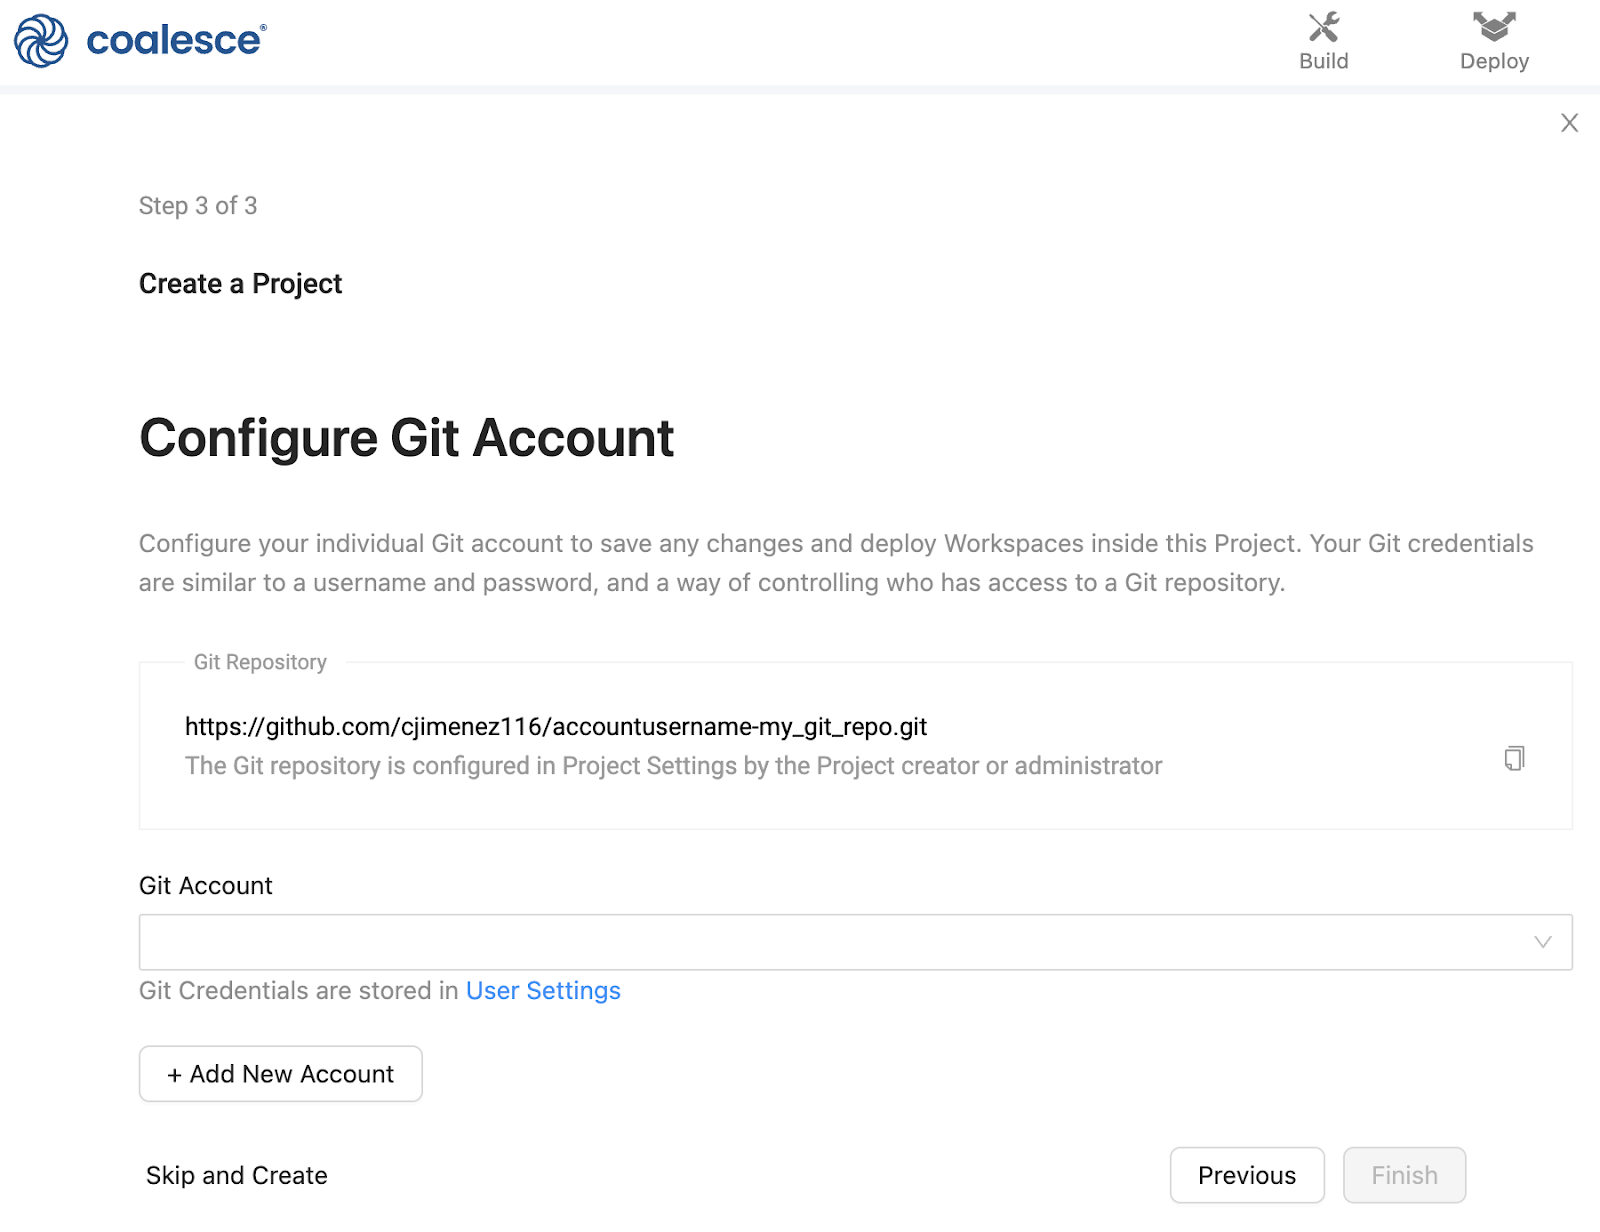
After adding the Git repository URL, you'll be asked to add your Git credentials. Your credentials are similar to a username and password, and a way of controlling access to the Git repository.
2. Create a Workspace Within Your Project
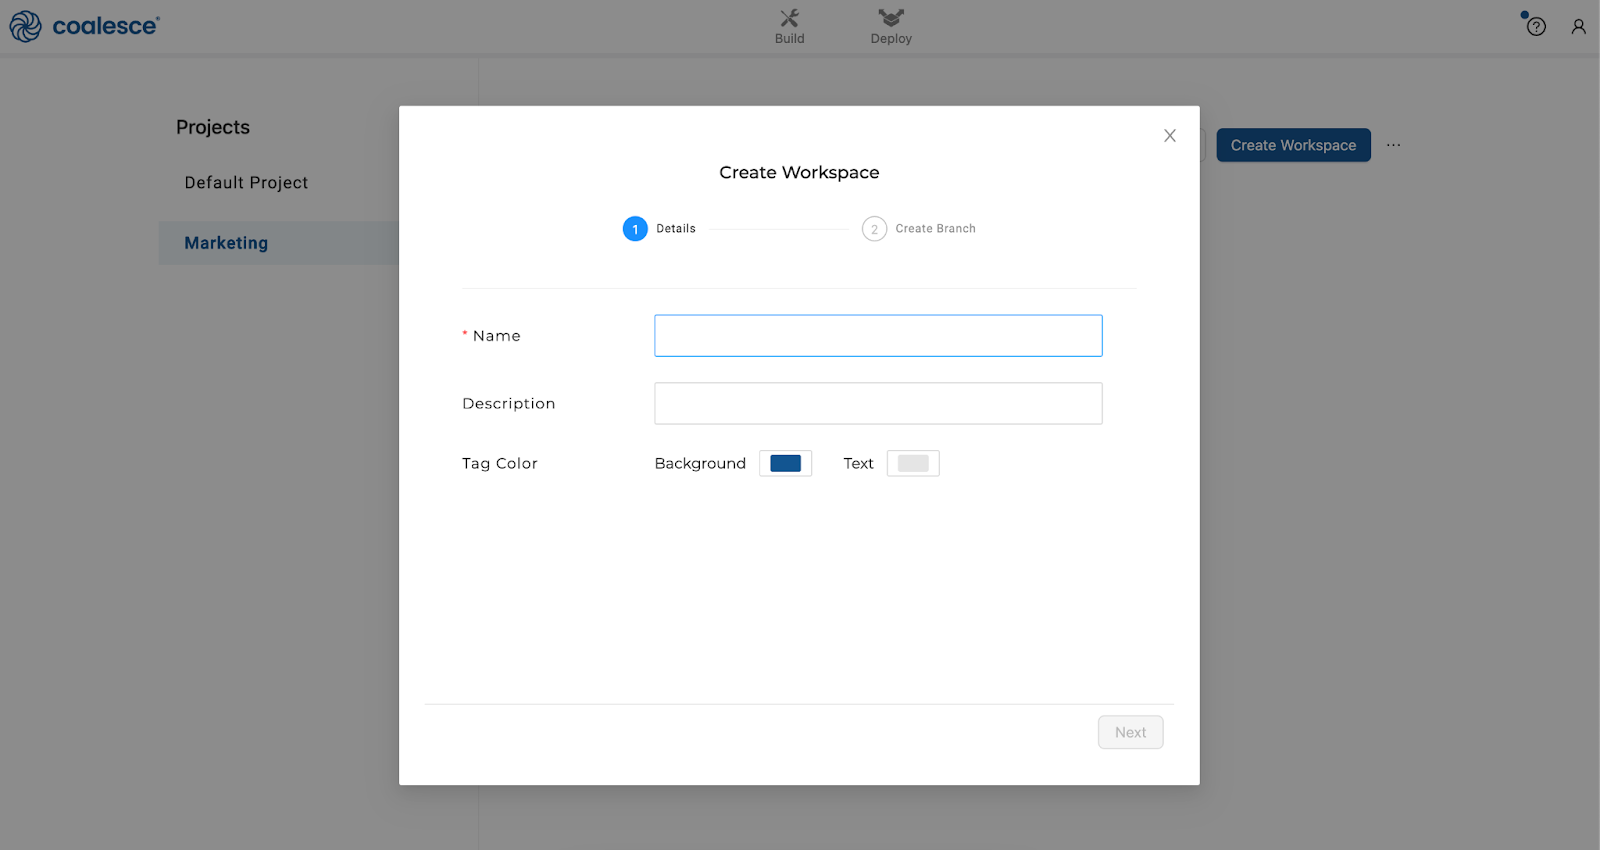
Workspaces are dedicated development areas within Coalesce where you can build out your data warehouse and apply transformations to data.
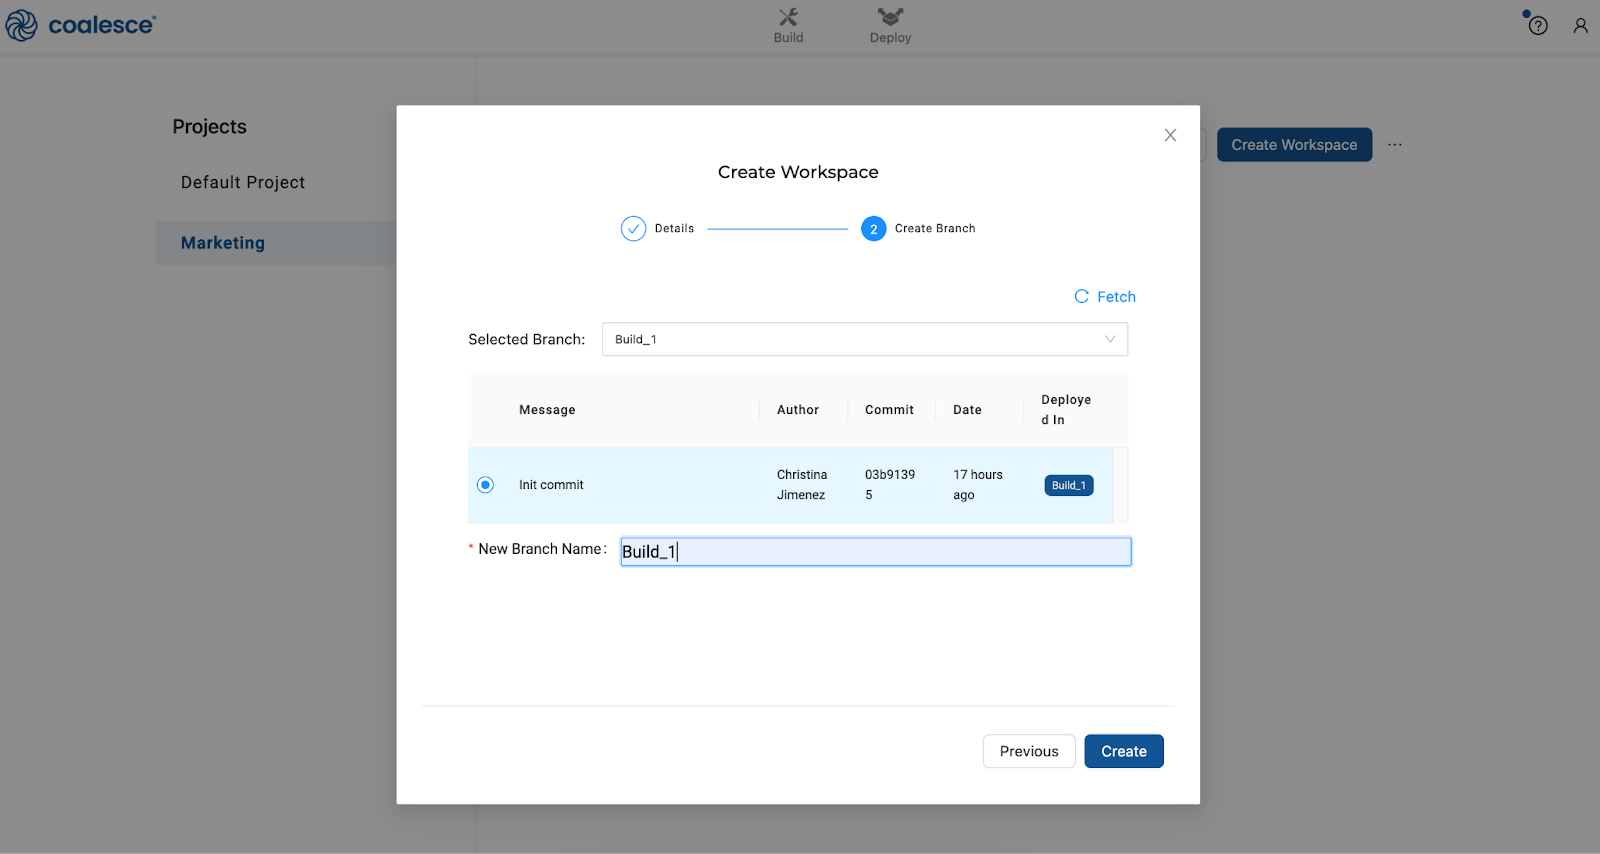
When you create a Workspace, you'll be asked to select a Git branch, and create a new branch from it.
Branches are one of the most powerful features of Git, as they allow different people to work on the same items at the same time, and later combine (merge) their changes. This is particularly useful if you need to work on a hotfix for your data warehouse, or need to add new items to it that shouldn't be exposed to end users just yet.
With feature branches, teams can make changes to the main data warehouse while other people work on hotfixes or new features. Any changes made to the main data warehouse can be synced with the new features, and vice-versa.
3. Transform Data in Your Workspace
Once your Workspace has been created, you can start creating or modifying your data warehouse. Although your workspace is linked to Git, Coalesce doesn't automatically save your changes to Git - changes are, however, saved somewhere else, and you won't risk losing your work. However, it is a good idea to commit your changes when you're at a good stopping point (for example, when creating a node or multiple nodes, mapping storage locations, building a subgraph, building a job). You should also consider committing if you need to work on another Workspace, or if you want to make your work visible to other members of your team.
4. Commit Your Changes to Git and Deploy to Non-Development Environment
A commit is a snapshot in time of your Workspace. You can use commits to go back to a previous version of a workspace, or to troubleshoot recent changes. Commits are also the mechanism Coalesce uses to deploy to non-development Environments.
When you trigger an environment deployment, you'll be asked to select a branch (a Workspace) and a commit (the snapshot in time of that Workspace). When you perform a commit, your work becomes visible to anyone else viewing the Workspace. Before a commit, only you can see those changes - so it is a good idea to commit often.
Anyone that has access to the Project your workspace is part of can also see those commits; they can use your commit as a starting point for a new workspace, and build on the work you've done.

Step-By Step: Basic Git Setup & Configuration
Starting a New Project
-
Create a new Project with a unique name and description.
-
Set up version control within your Project by creating and attaching a dedicated Git repository.

-
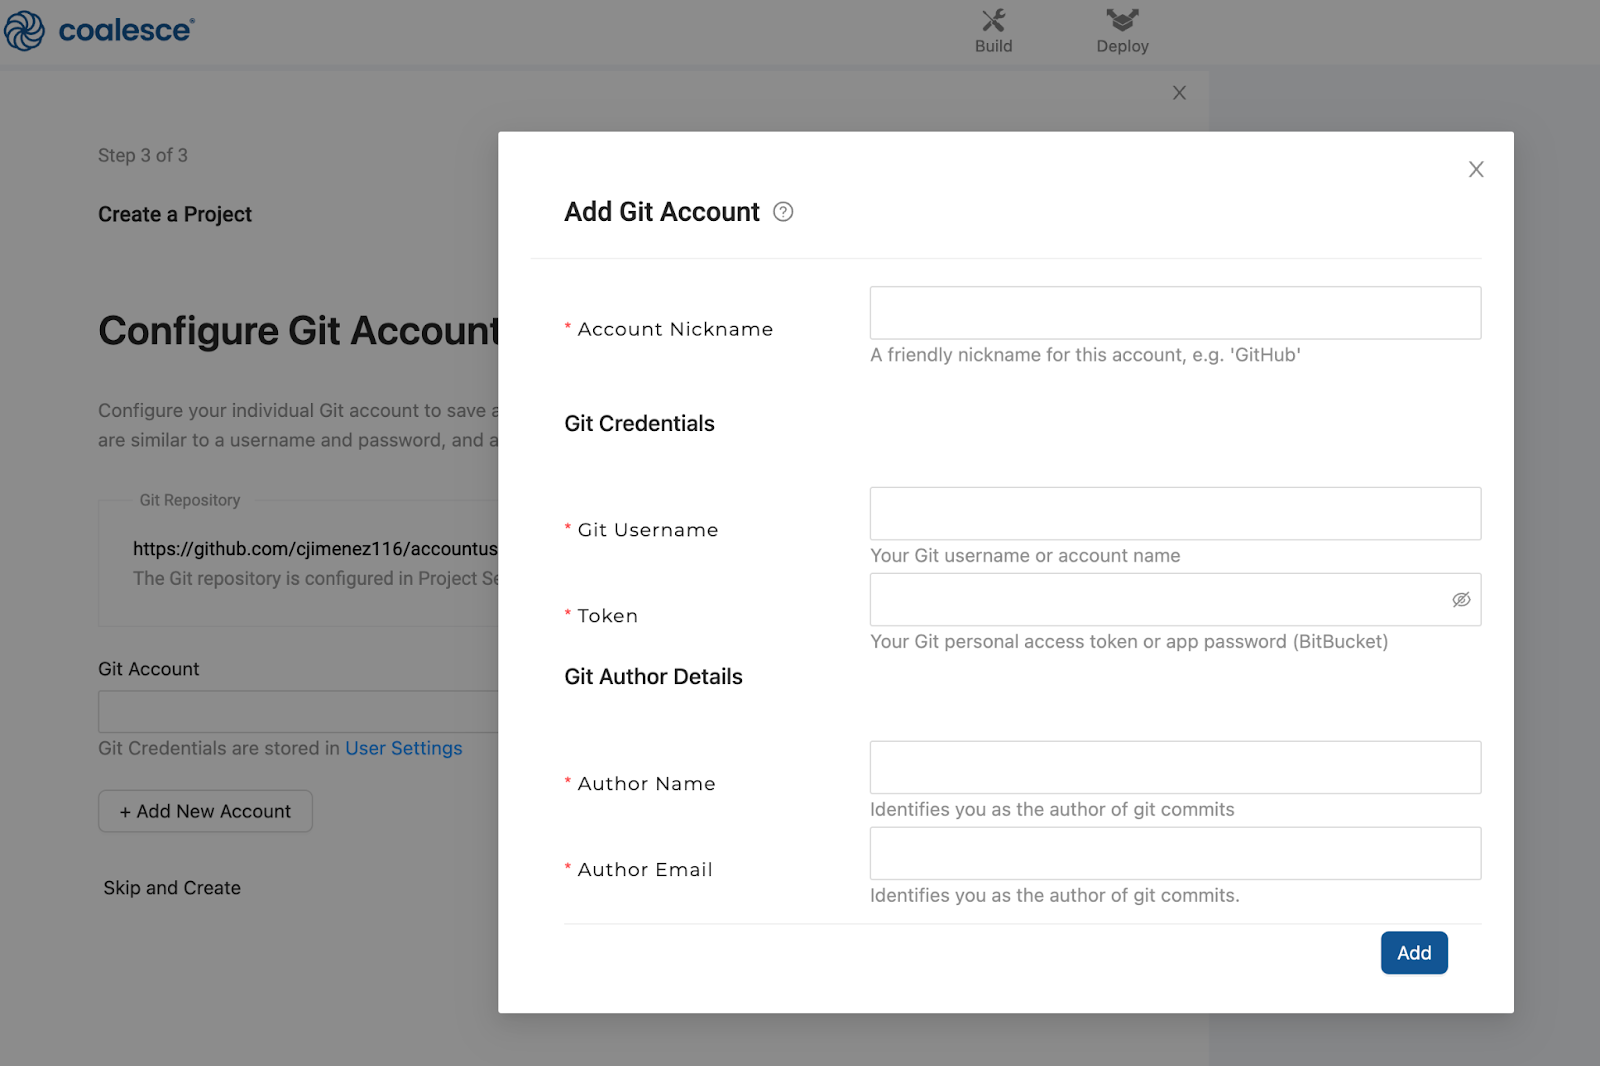
Next, link your Git account to your new Project and repository. Your Git credentials can be found in your User Settings if you have an existing account, or you can add a new account altogether.
-
Click on the question mark icon for instructions on how to add your credentials depending on your Git provider. Make sure to test your account before you finish creating the Project.
-
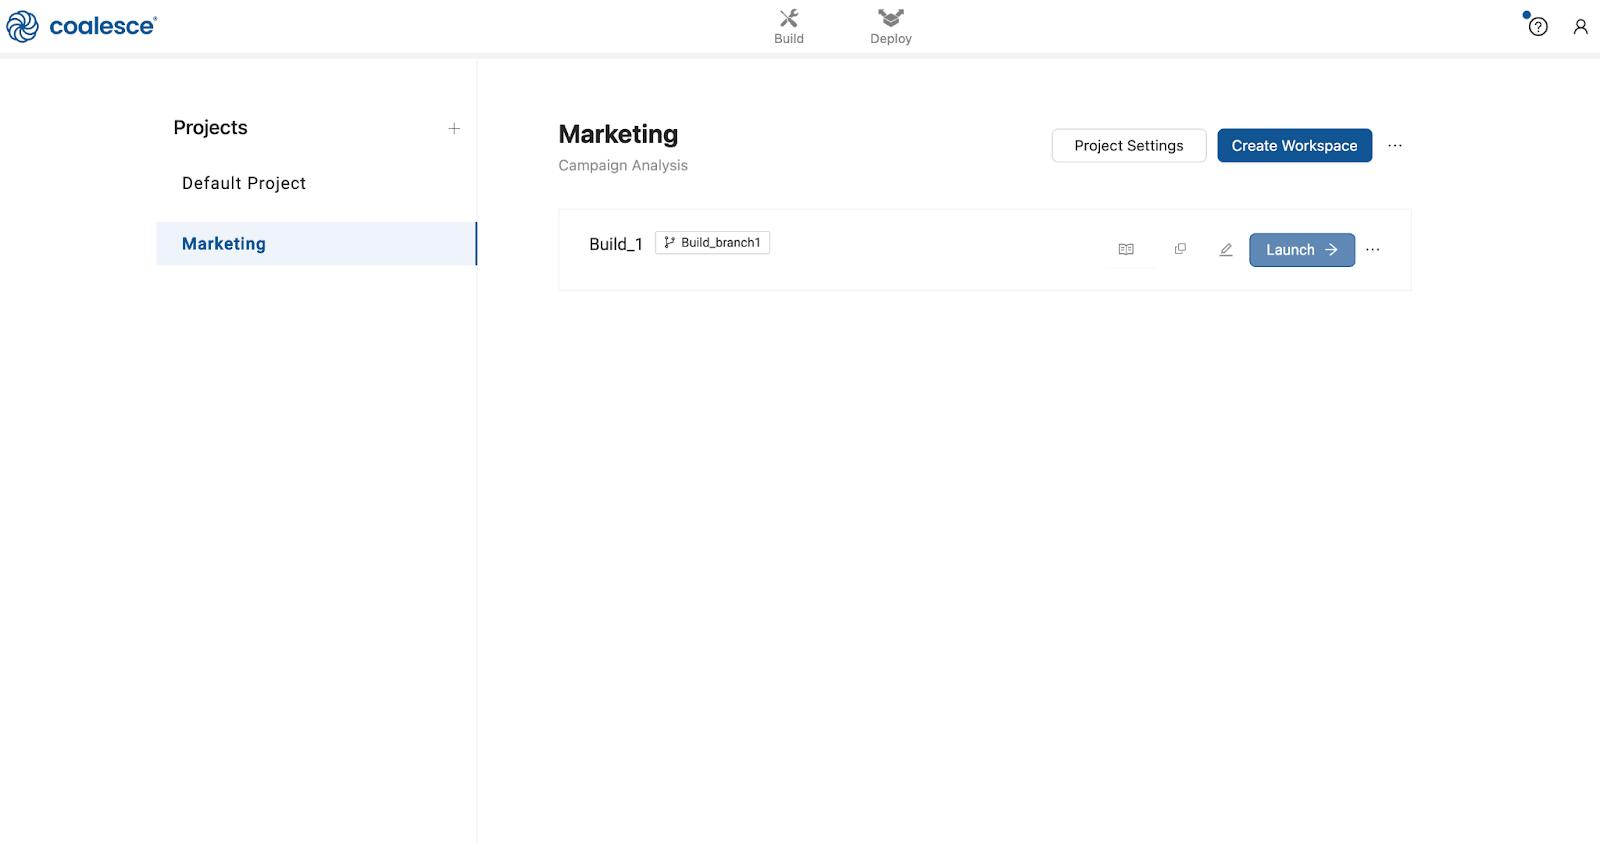
To start building, create a new Workspace in your Project.
-
Create a new Git branch associated with your Workspace. Every Workspace is attached to its own Git branch, meaning that you can have multiple branches of work happening in parallel across different Workspaces within your Project.
Naming WorkspacesName your Workspace the same as your branch to minimize confusion. This will be helpful as you work with many different Workspaces and branches.
-
Launch your new Workspace and complete your Build settings by connecting to data platform and adding storage locations.
-
Switch to your data platform (outside of Coalesce) and set up your environment to include the following:
- Target databases
- Target schemas
- Users / Permissions
- Warehouses
- Source databases
- Source schemas access
-
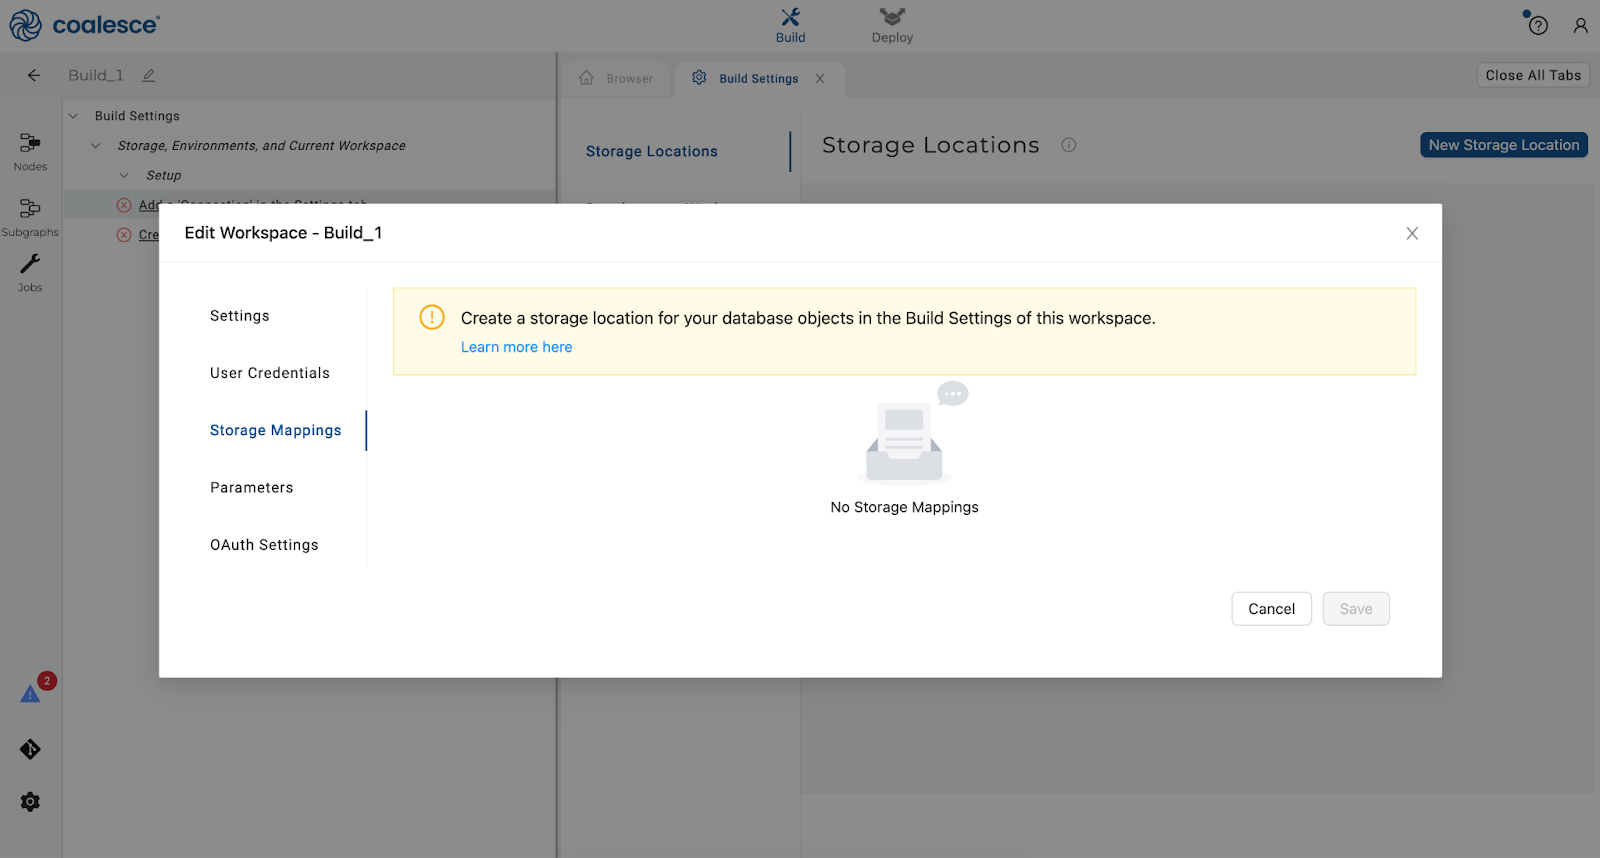
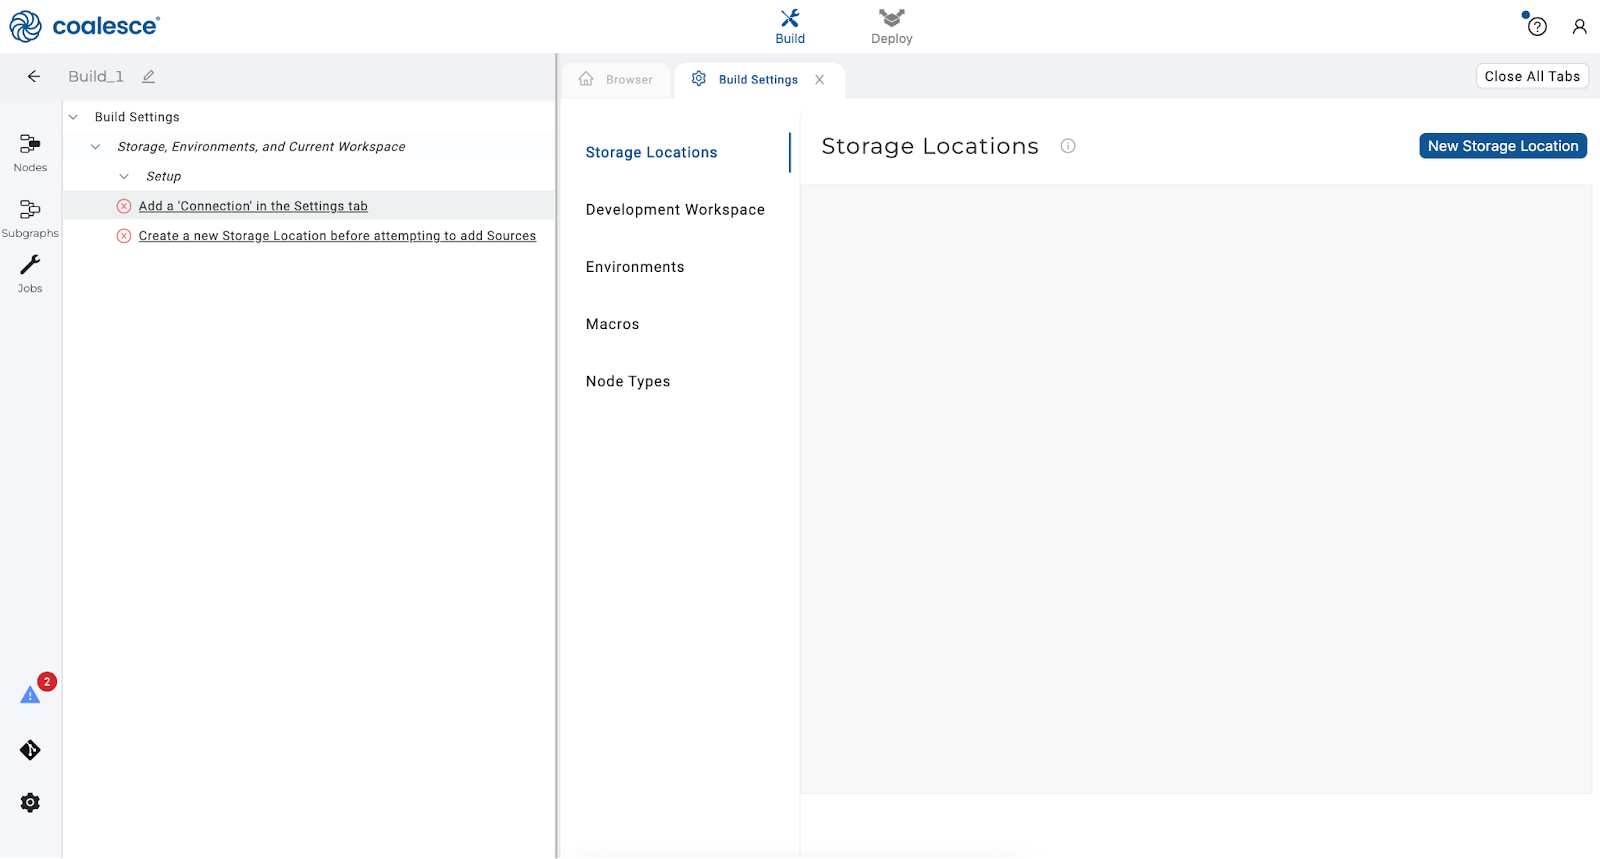
Create corresponding Storage Locations in Coalesce. There should be one for each unique database schema you plan to use in your data platform.
-
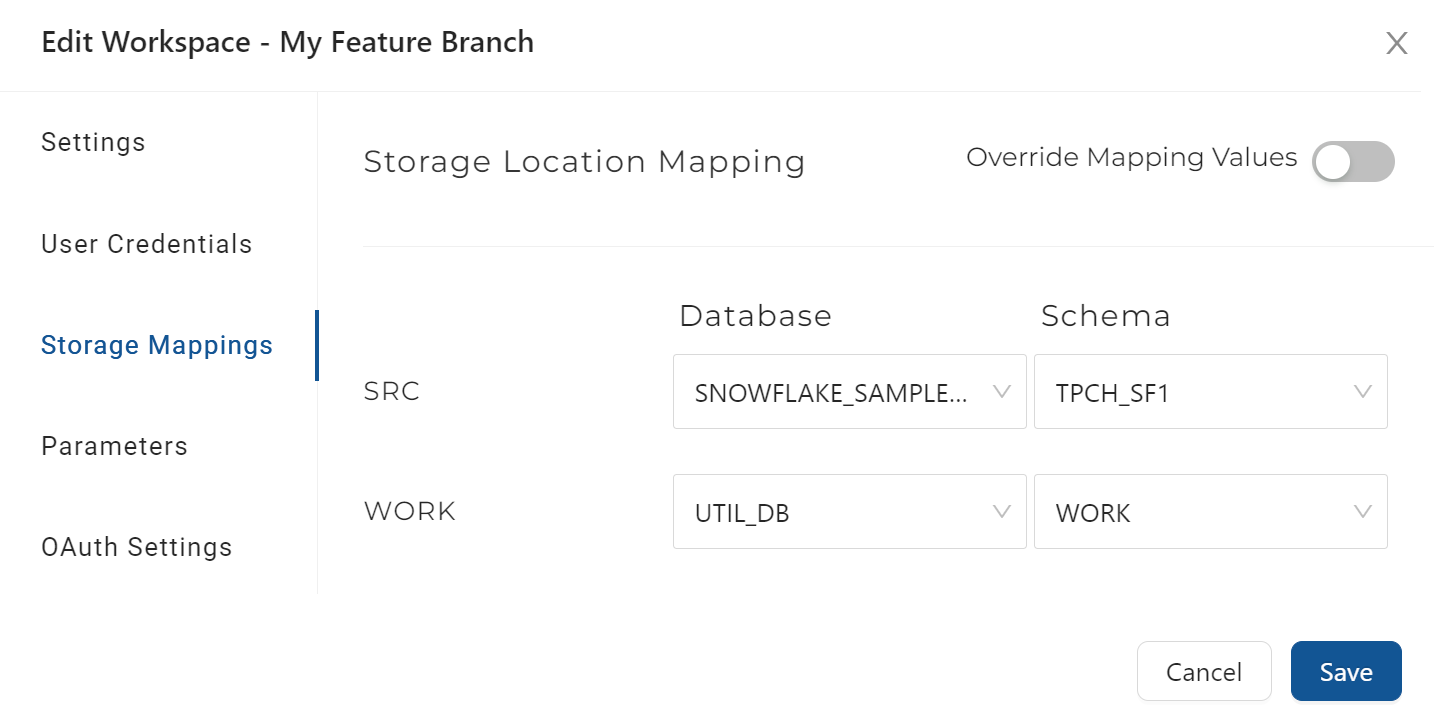
Click the gear icon in the lower left hand corner of the interface to open your Build settings and map any Storage Locations to databases / schemas.
 Workspace and Environments
There's a difference between a Workspace and an Environment in Coalesce.
A Workspace is a development area where you build your pipelines. You will commit code from Workspaces to feature branches in Git, and then deploy your committed code to a target Environment (such as UAT, Production, etc).
-
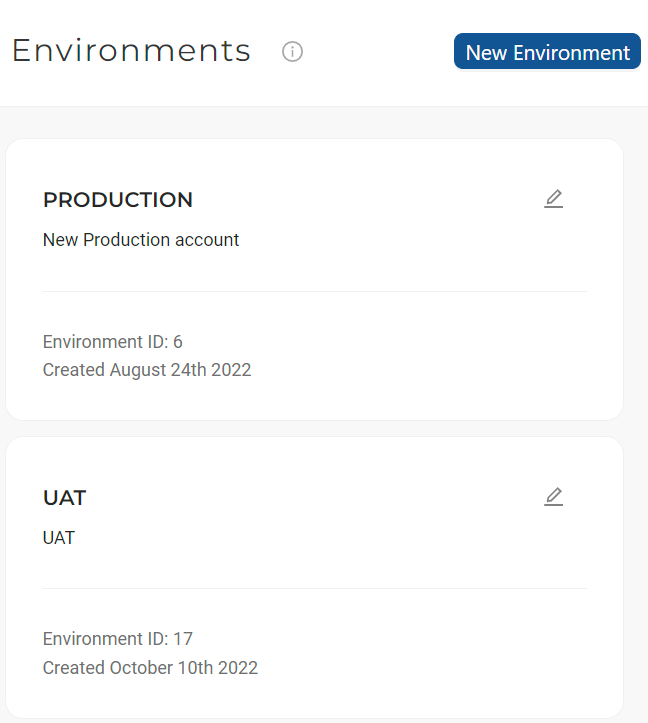
Create at least one target Environment and also map the Storage Locations to the corresponding databases / schemas.
-
Rename DEV branch to MAIN, fill in the configuration and Commit
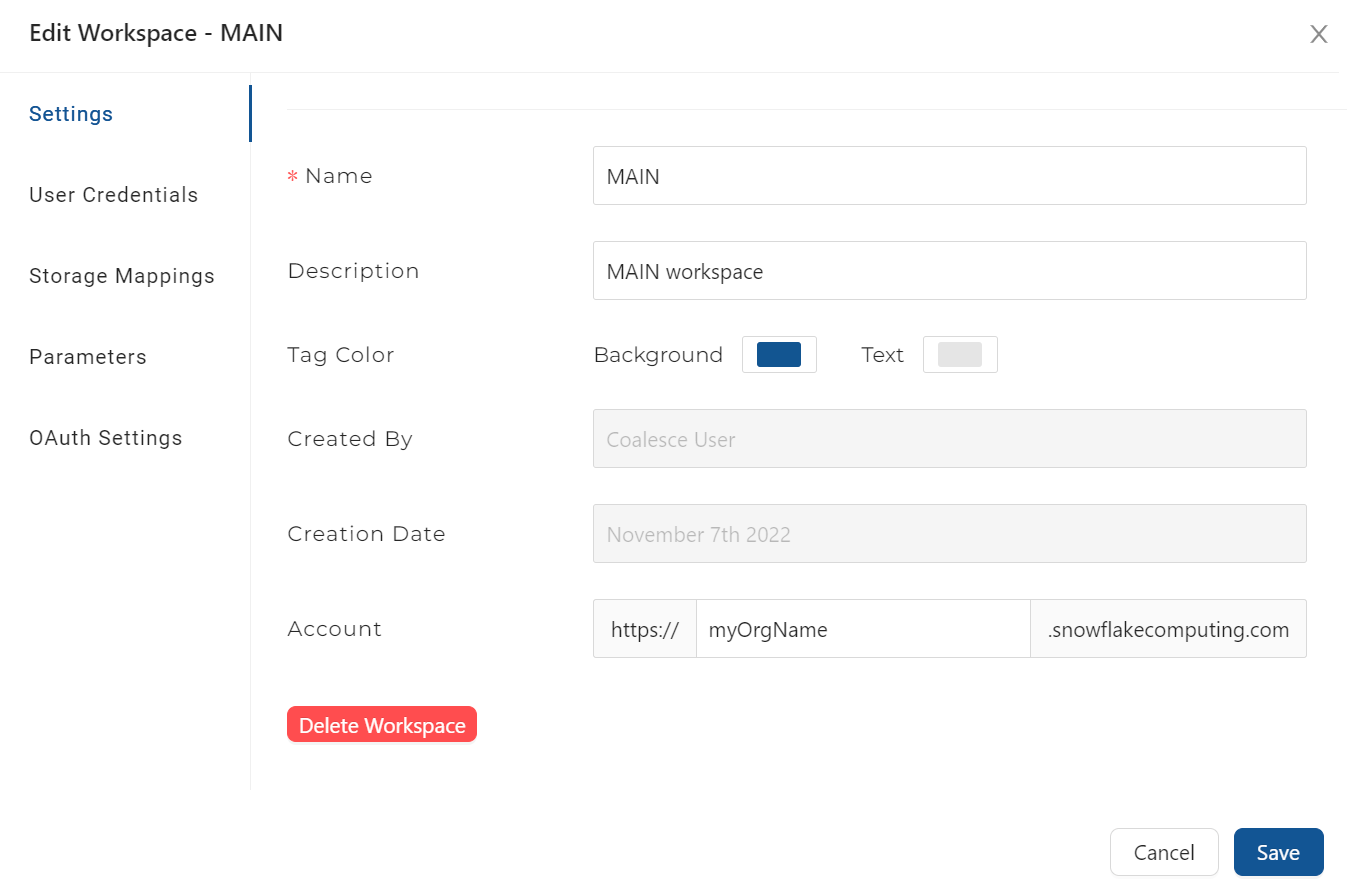
When you first set up your Organization in Coalesce, you'll notice that a single Workspace called DEV is created. Rename this to "Main."
Feature Branches for DevelopmentIf you plan to use feature branches for development, this step is required and usually completed by a user with Admin privileges.
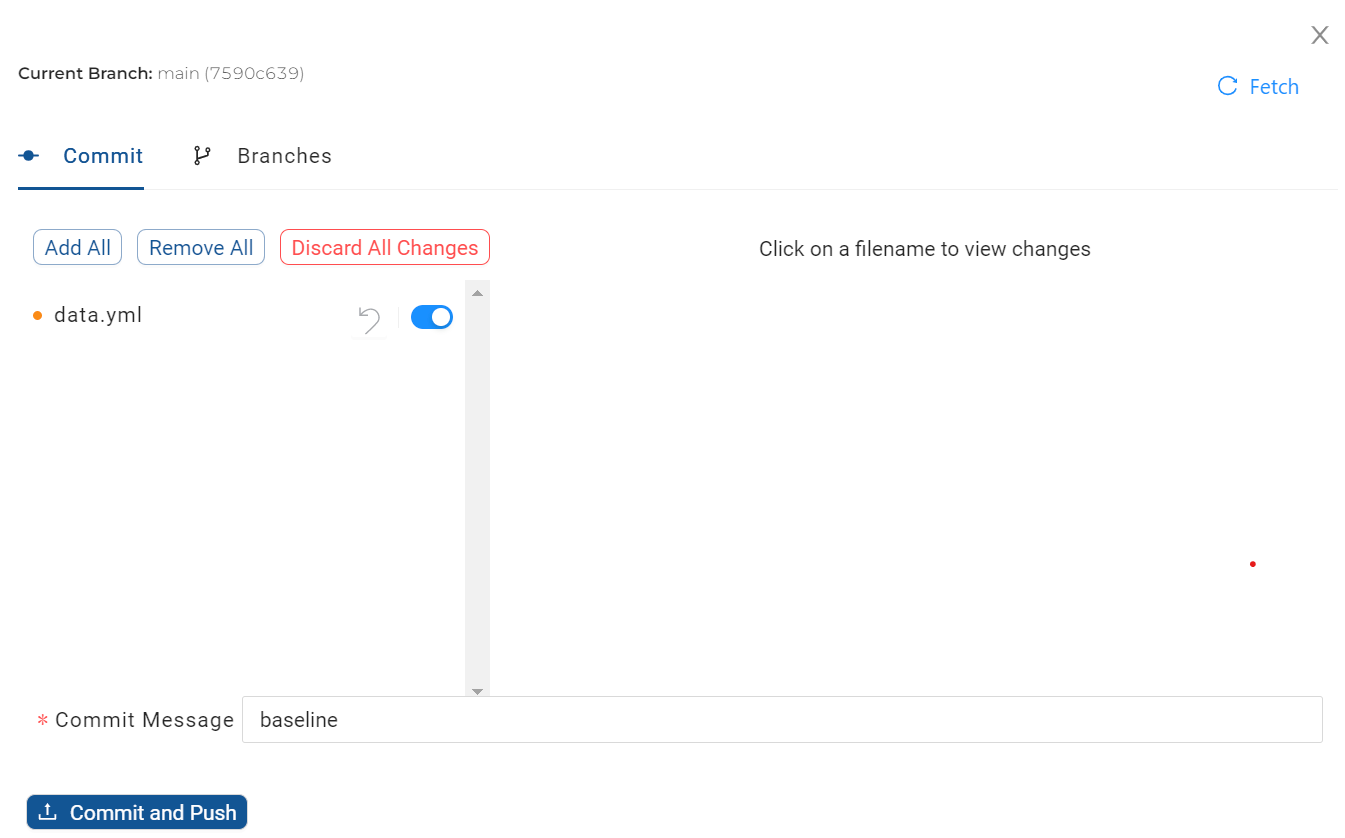
When Coalesce detects an empty Git repository, it will automatically generate a data.yml file to store all configuration information such as your connections, storage locations and mappings, node types, macros, and so on.
Because of this, it's important to perform an initial commit to add a valid data.yml file to Git. This will version all of the configurations currently set in the Main branch, and any feature branch Workspaces created from Main will inherit these configurations.
-
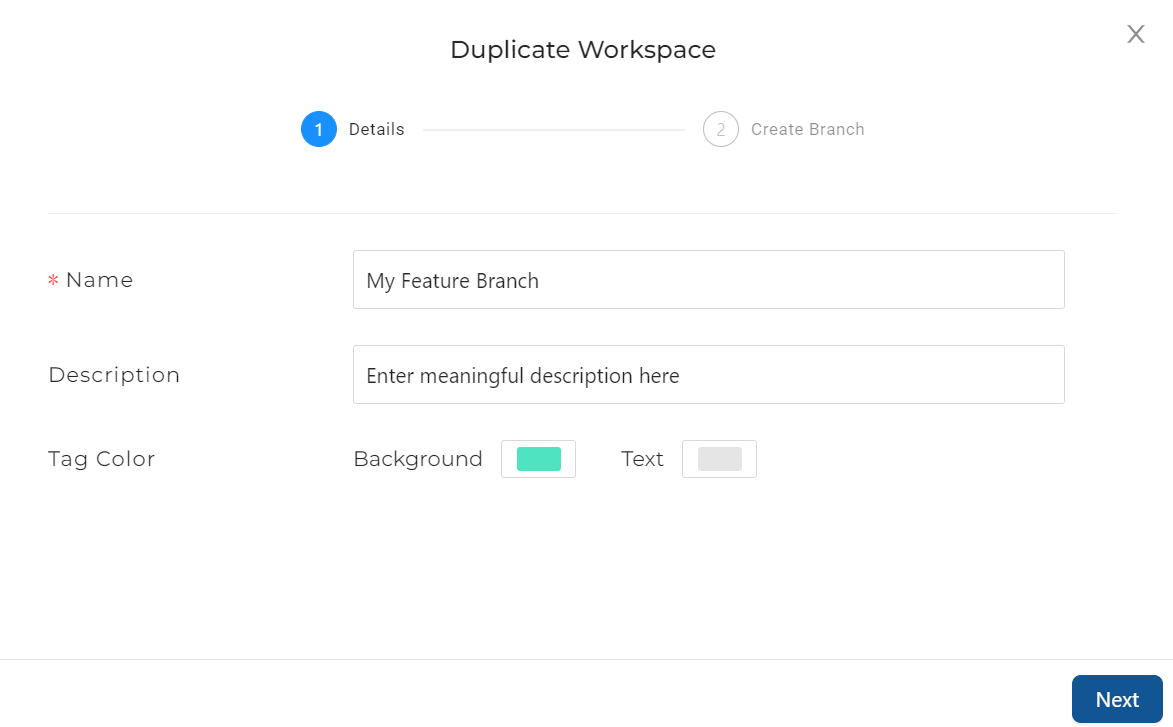
Create feature branches by duplicating the Main branch. Use a meaningful naming convention for your Workspaces and branches with descriptions. Tag colors can be used to provide additional context to the user based on the organization's preferences. For example, all feature workspaces could be BLUE, main Workspaces GREEN, testing Environments YELLOW, and production Environments RED.

-
Commit your configuration to Git (see illustrative workflow below).

Creating Your Development Strategy
Your development strategy will vary depending on team size, geographical location, communication frequency, and your organization's overall culture. We recommend developing a baseline strategy that can be used as a starting point and adjusted based on your needs.
Step-by-Step: Creating a Feature Branch
-
Create a feature branch by creating or duplicating a Workspace. Note that each branch is associated with a unique Workspace.
-
Re-confirm user credentials within your Workspace and test your connectivity before proceeding.

Update your target Storage Location mappings to point to a different set of database and schema pairs. This is recommended as a best practice so that developers are working in separate environments.
Starting the Development Process
Step-by-Step: Developing in Your Feature Branch
-
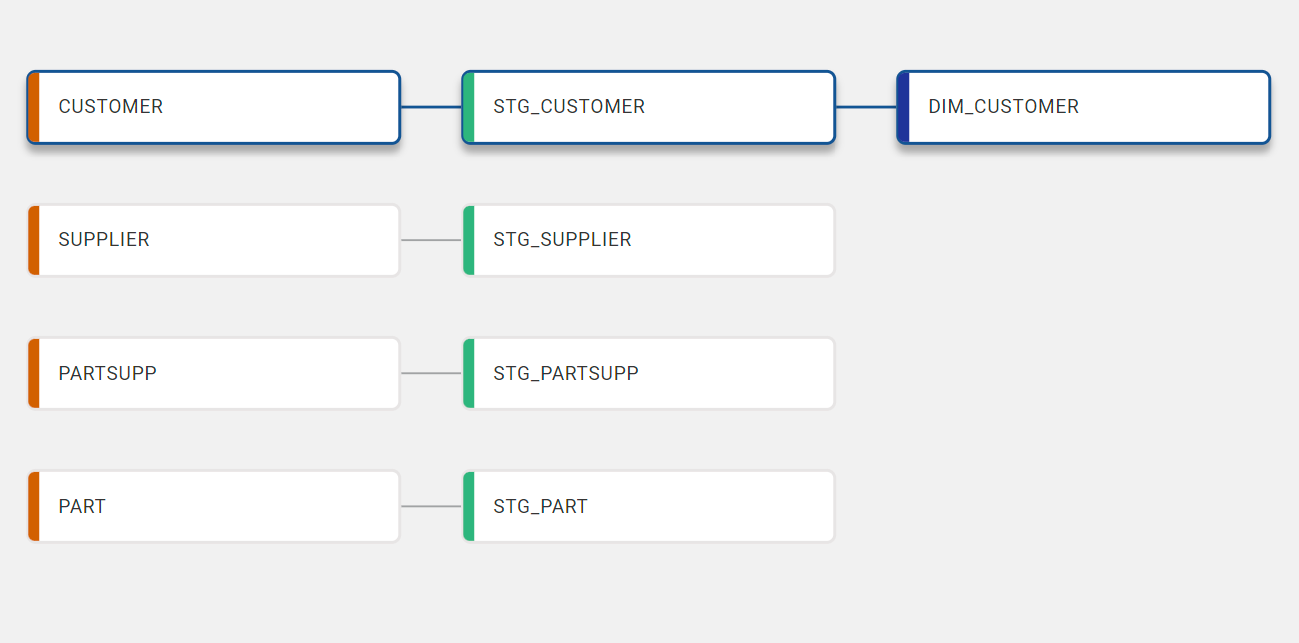
Start developing your graph in the Workspace / feature branch that you just created.
-
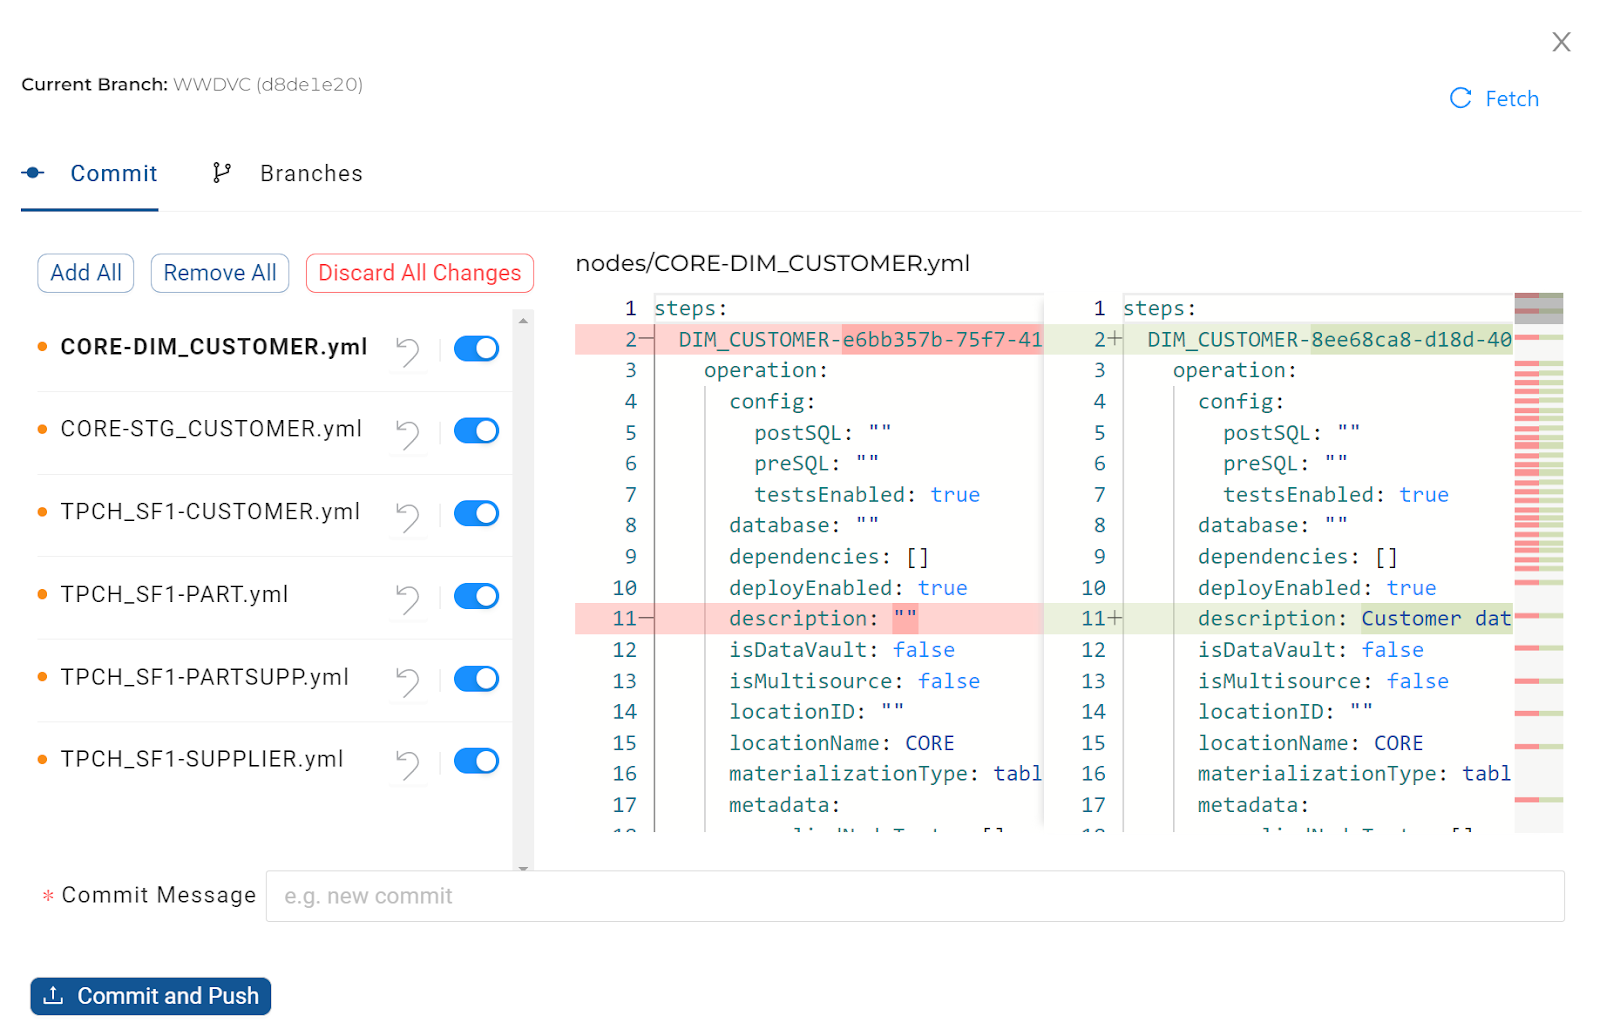
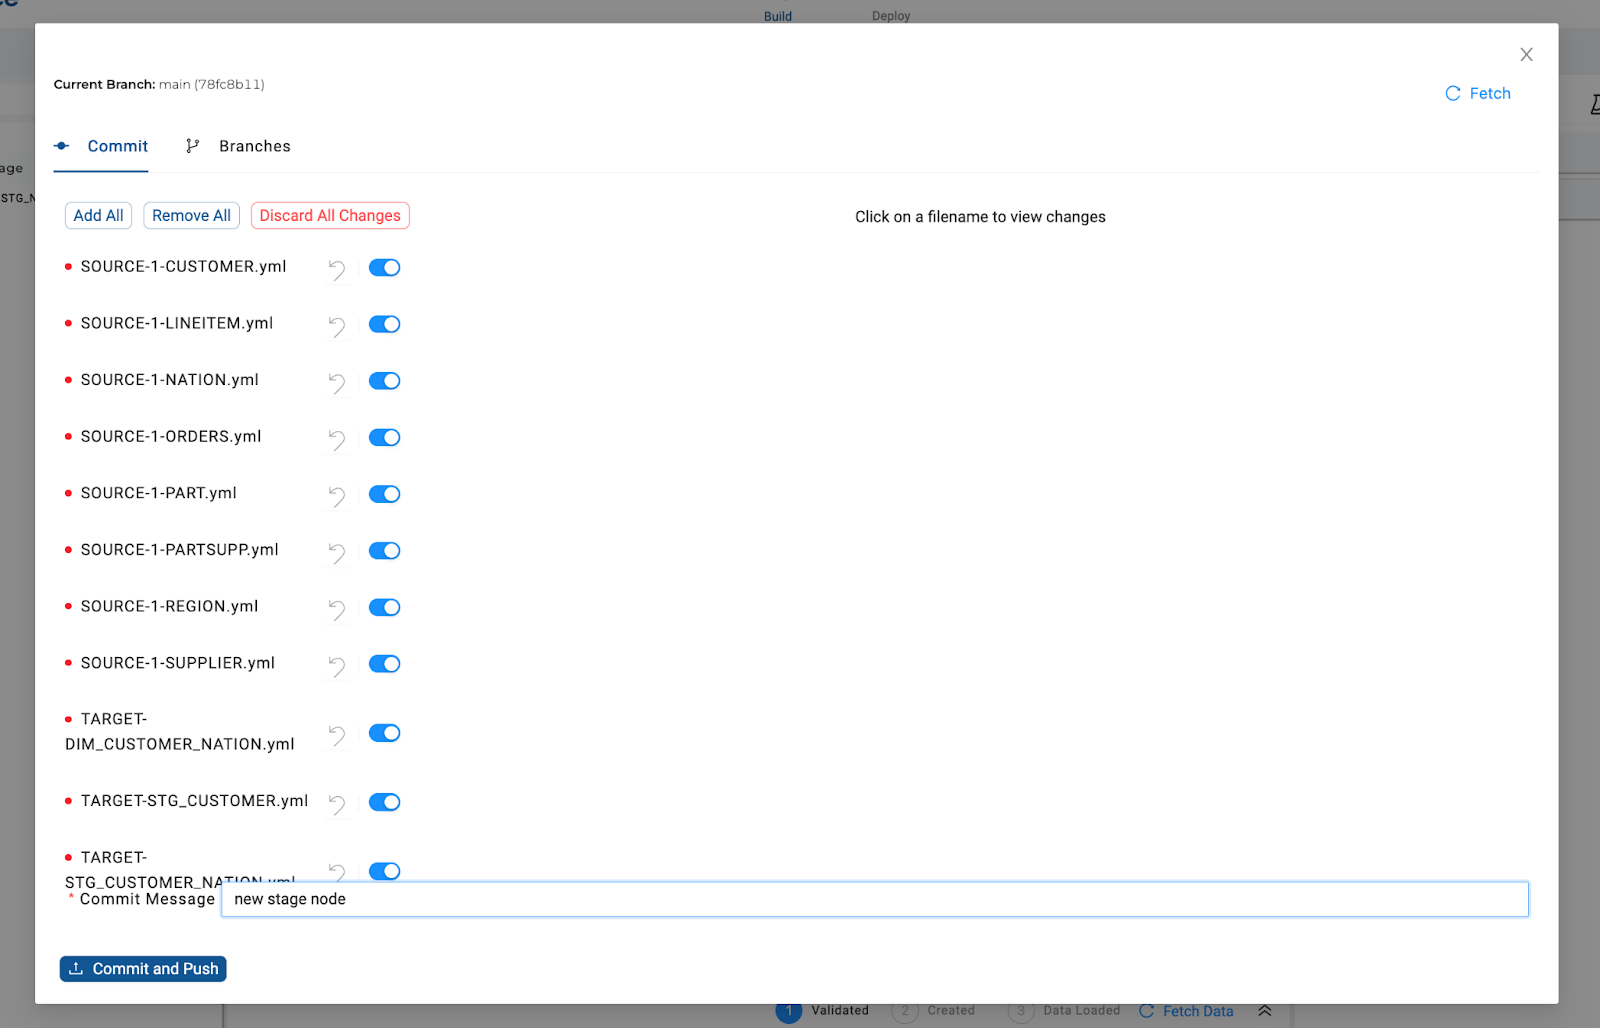
Commit your code using the Git modal. The list of YAML files will include changes made by any developer using the same Workspace.

When the Git modal is opened, a snapshot of the code for a particular Workspace is taken and is only refreshed by closing and re-opening the Git modal again. If changes were made in a different browser, they would not be reflected in the list.
 Commit Individual Files
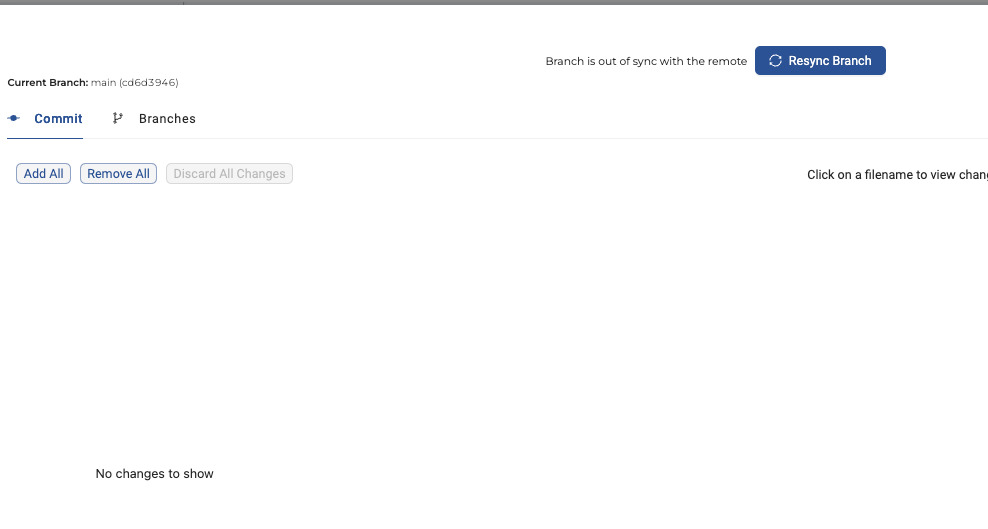
Instead of committing all changes, individual YAML files can be excluded from the commit, by sliding the switch to the right of the file.
The ‘Add All' button will add any excluded files back and the ‘Remove All' button will exclude everything. Excluded files will reappear as a change, the next time the Git modal is opened.
The Fetch button can be used to re-sync the Git modal with any changes that have been made outside of Coalesce.
To permanently discard changes (and effectively roll back the code to the last commit), choose the Discard All Changes button. Alternatively, the changes to individual YAML files, can be discarded by using the reverse icon next to the file. Discarding changes cannot be recovered and could potentially undo other developers' code who may have worked in the same Workspace.
Commit Tips- Make frequent commits using meaningful commit descriptions.
- Ensure that all members of the development team are aware that a commit is planned, so that all code for the Workspace is in a ‘commit ready' state.
- Consider allocating a single developer the task of performing commits to the Main branch, to avoid any possible conflicts.
- Do not have more than one instance of the Git modal open for a single Workspace, at the same time.
-
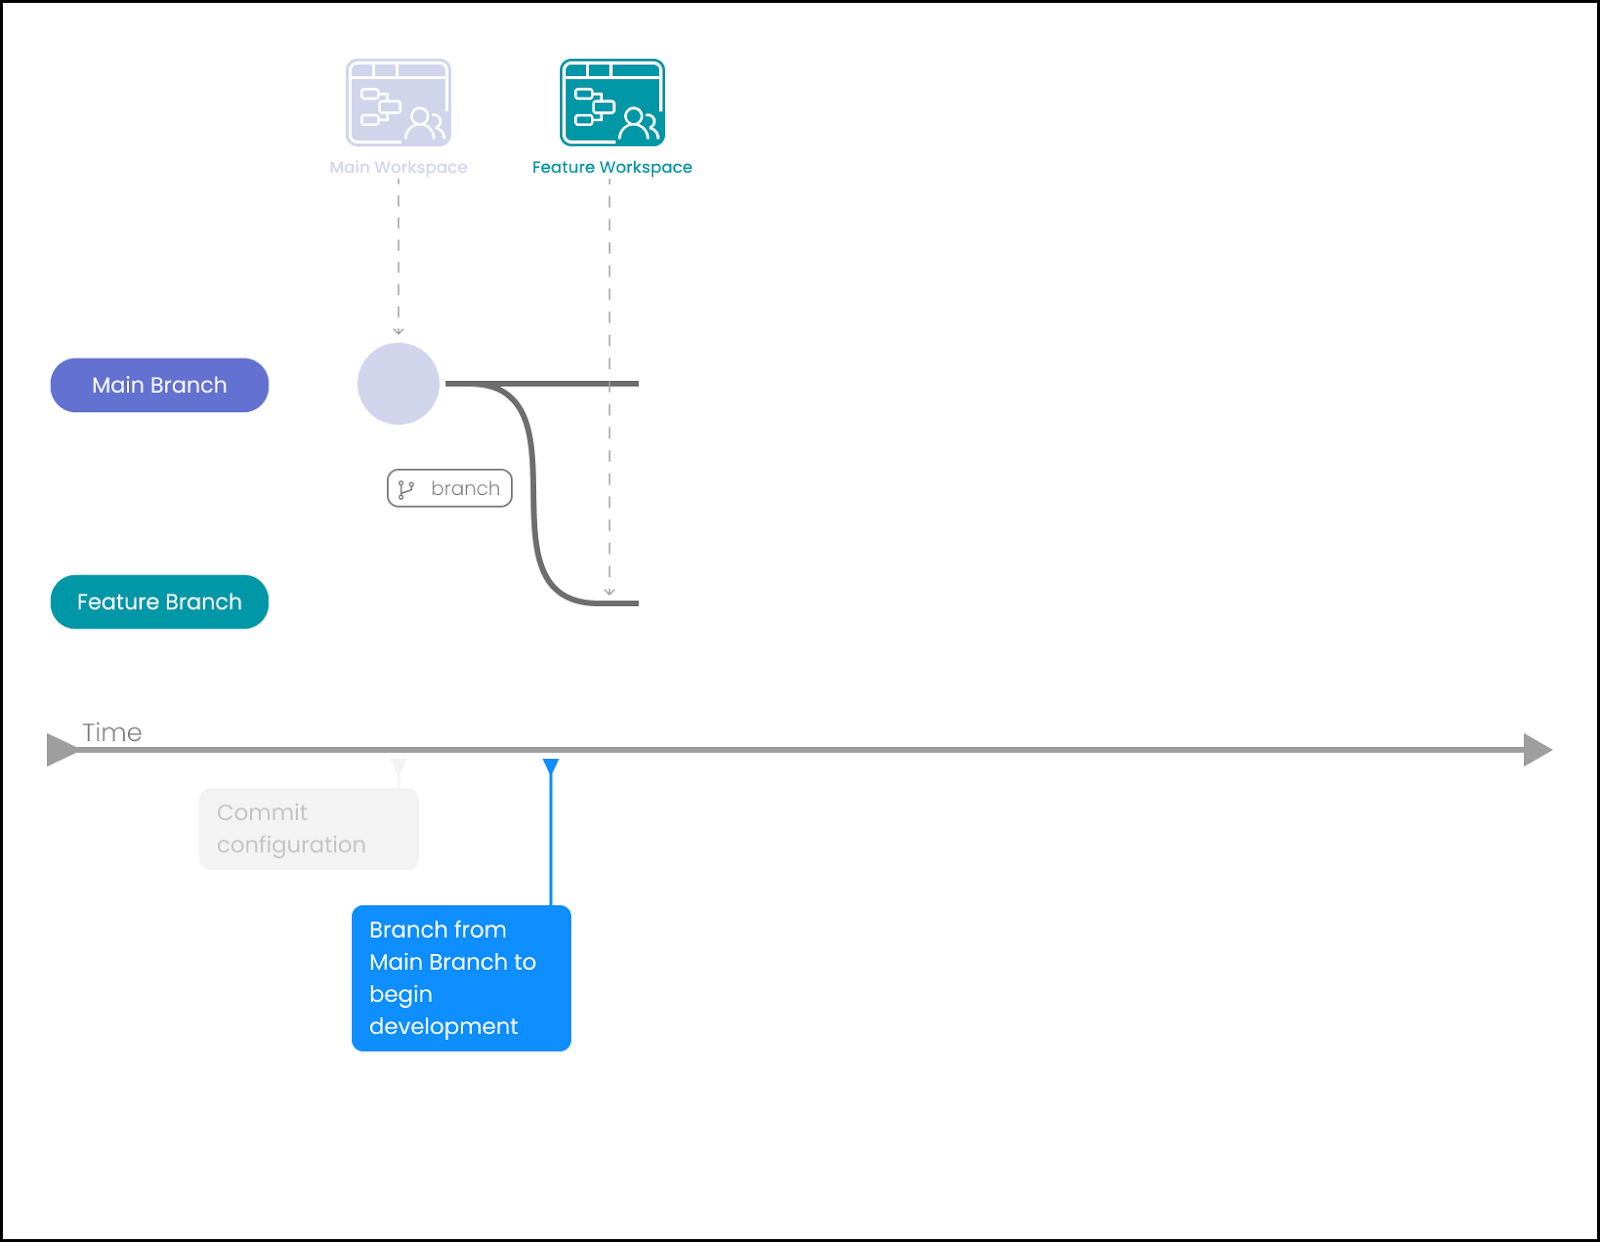
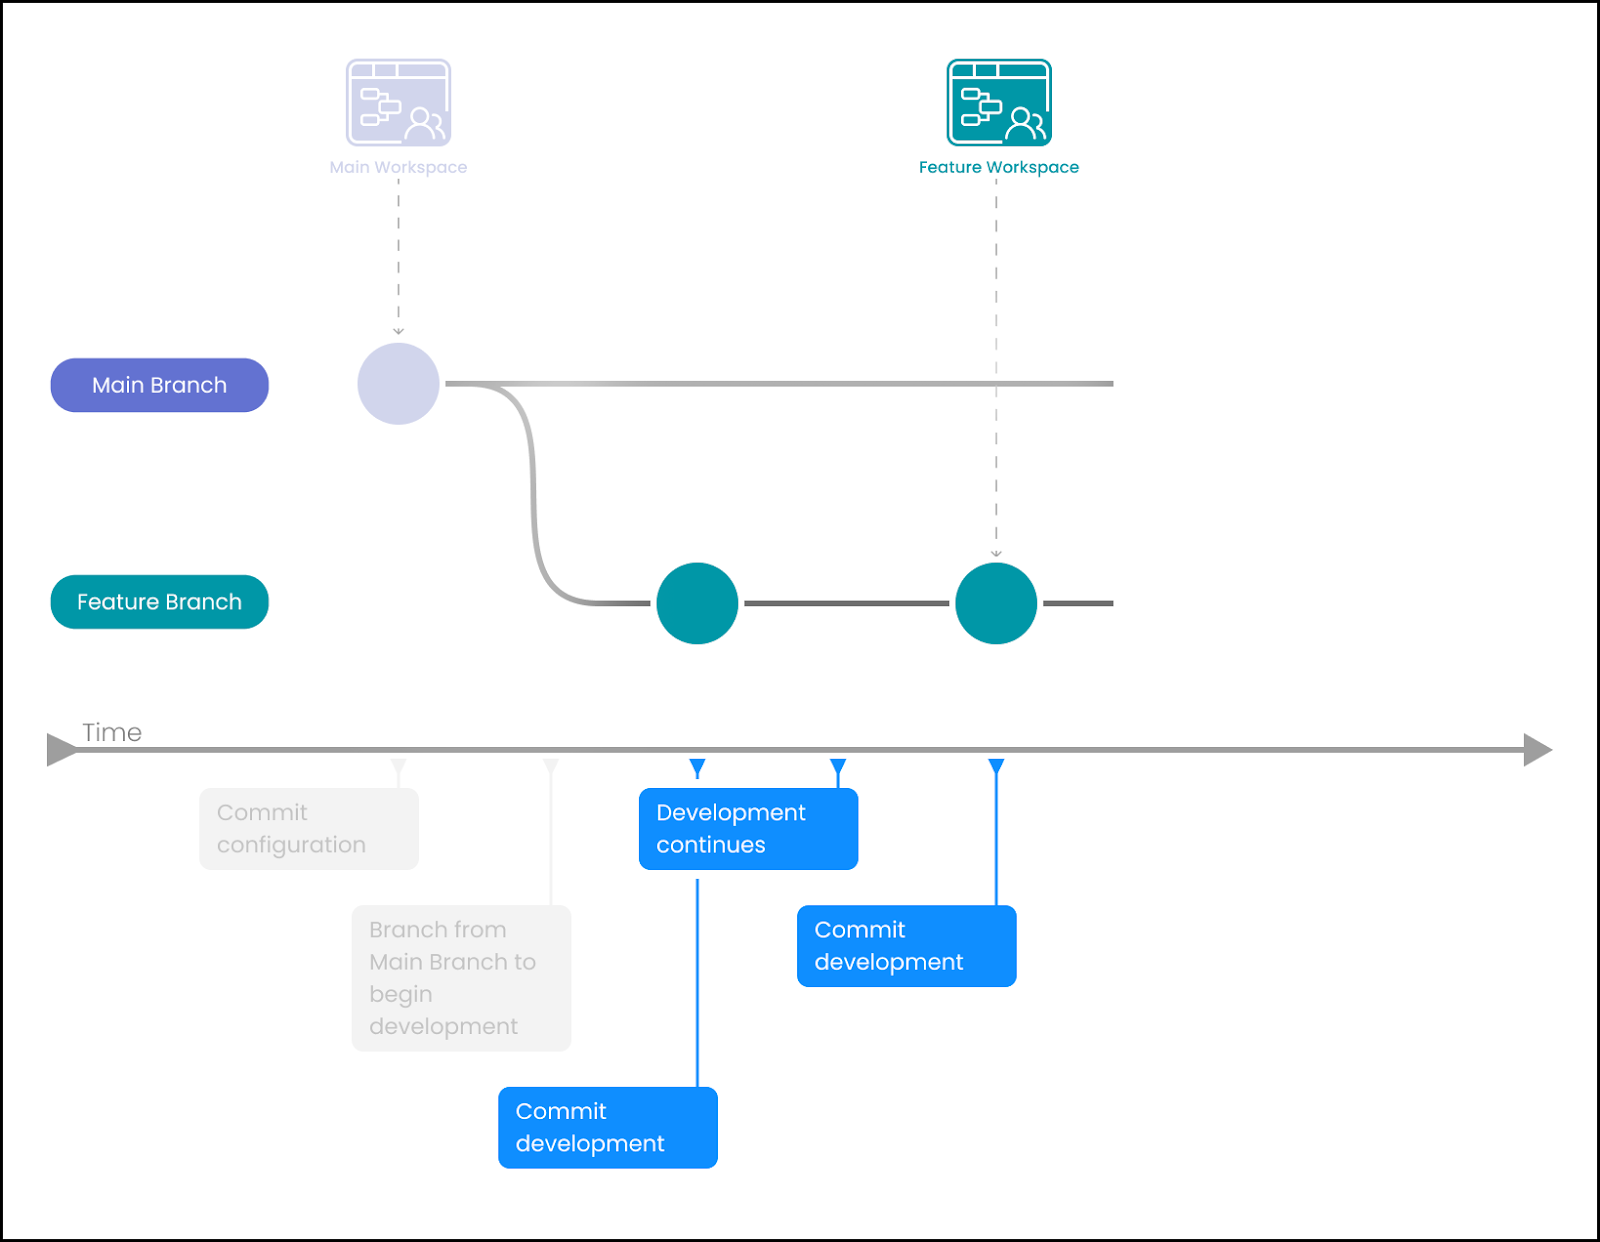
Make an Initial commit of data.yml (containing configuration), into the ‘Main' branch.
-
Branch ‘Main' into a feature branch and begin development.
-
Make frequent commits as development continues on the particular feature.
-
When the feature is complete, merge the code back into ‘Main' and discard the feature Workspace.

-
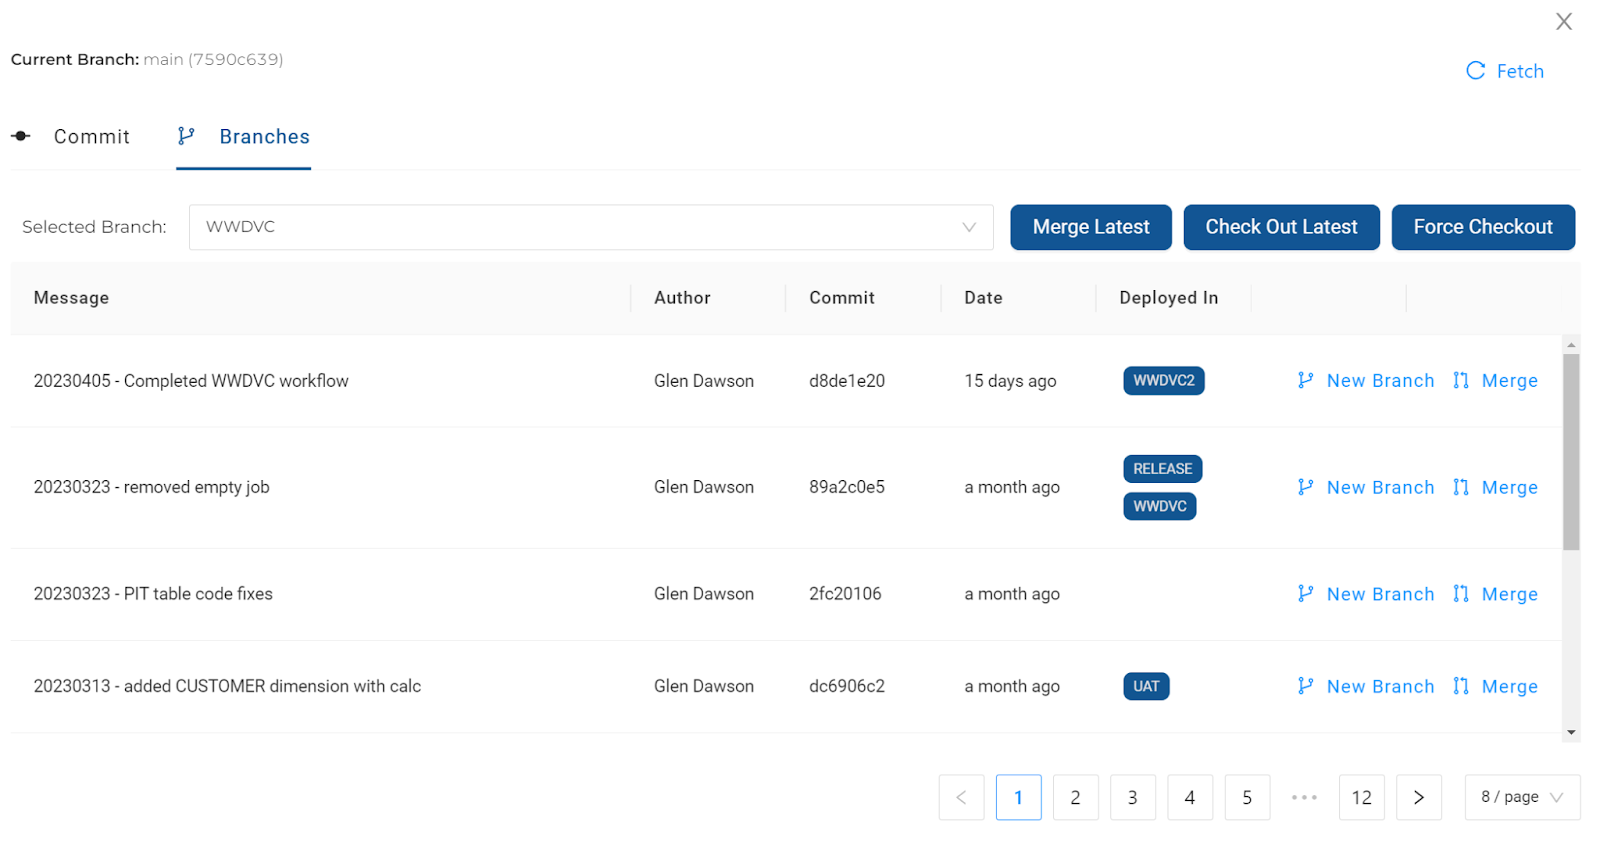
Merge back to Main Workspace by opening the target Workspace (associated with ‘Main'). Then, from within the Git modal, choose the required commit from the source feature branch and click on ‘Merge'.
Alternatively, if the latest commit is being merged, choose the ‘Merge Latest' button.
Merge and ConflictsIf the code can be merged, it will happen instantly and there will not be an option to view the changes beforehand (Pull Requests are not supported in Coalesce).
If there is a conflict, then the differences will be displayed in a separate window. It is recommended that all conflicts are handled outside of Coalesce (for example, in GitHub).
 Deploy to Target Environments
Only deploy to target Environments from a ‘Main' branch, rather than from feature branches.
Deployment Process
-
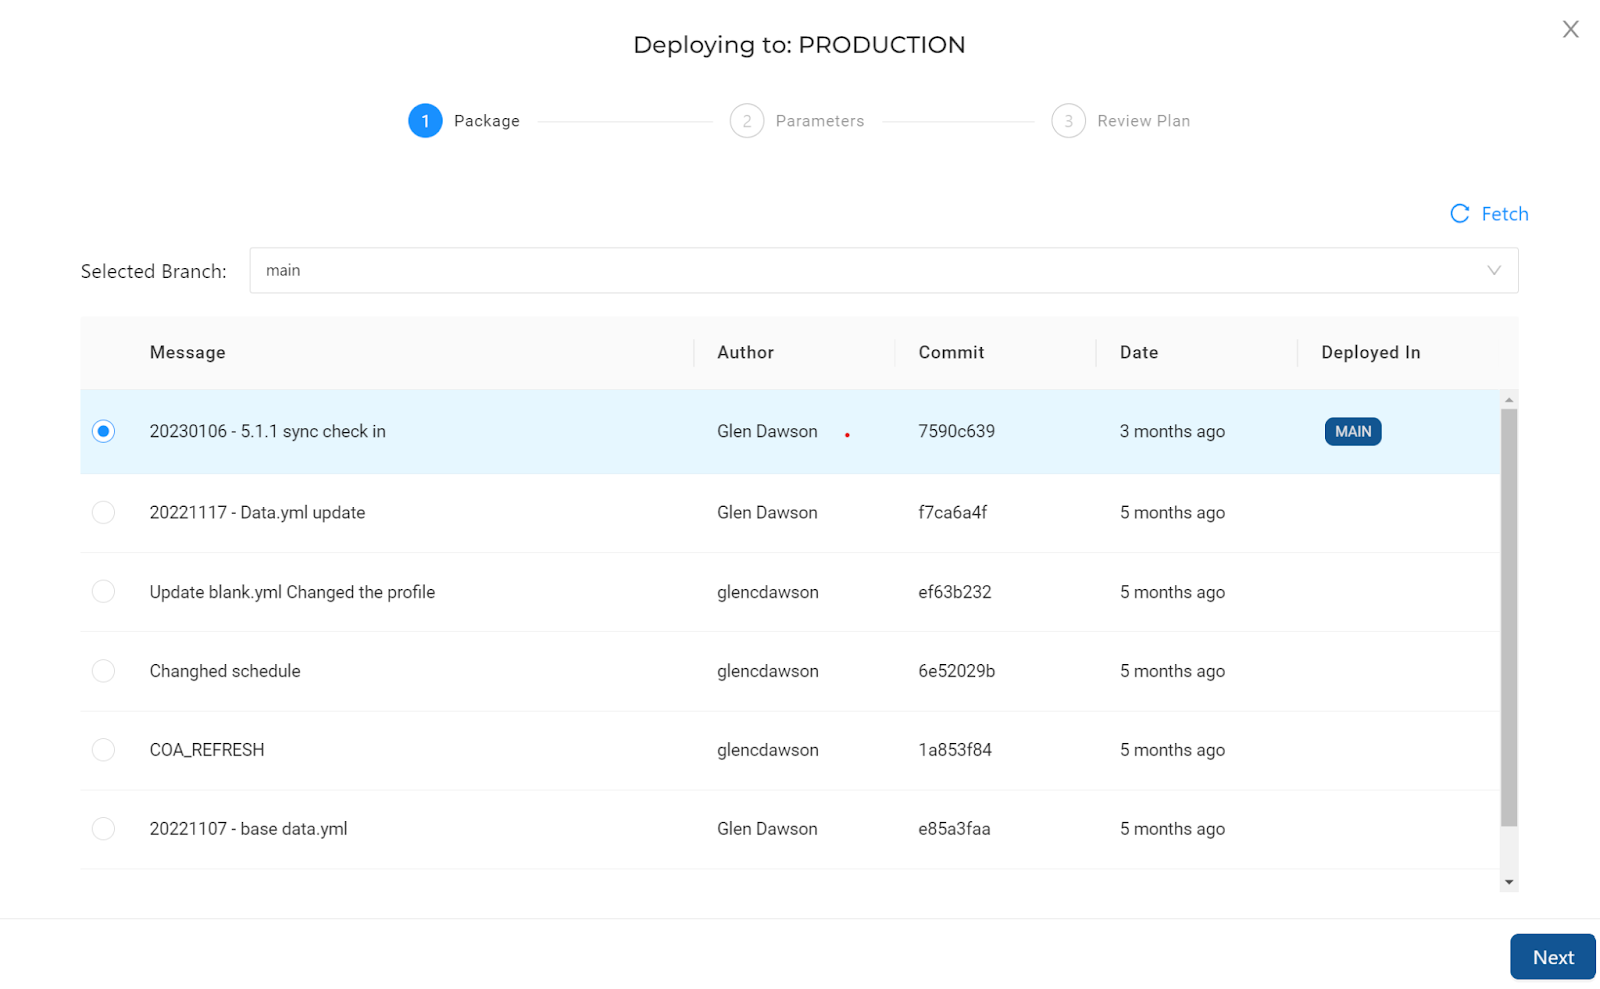
Deploy code into a target Environment. Code can be deployed from a development Workspace into a target Environment, by using the GUI, the CLI tool or by using the API.
-
By choosing a particular commit to deploy, a comparison between the previous deploy (also considering the state of the target environment) and the later version of the code is made, before a ‘plan' of the changes is generated. The plan will contain all of the SQL steps that will be executed to deploy the changes that can be reviewed before the actual deployment takes place.
Be sure to set up all Storage Locations in advance.
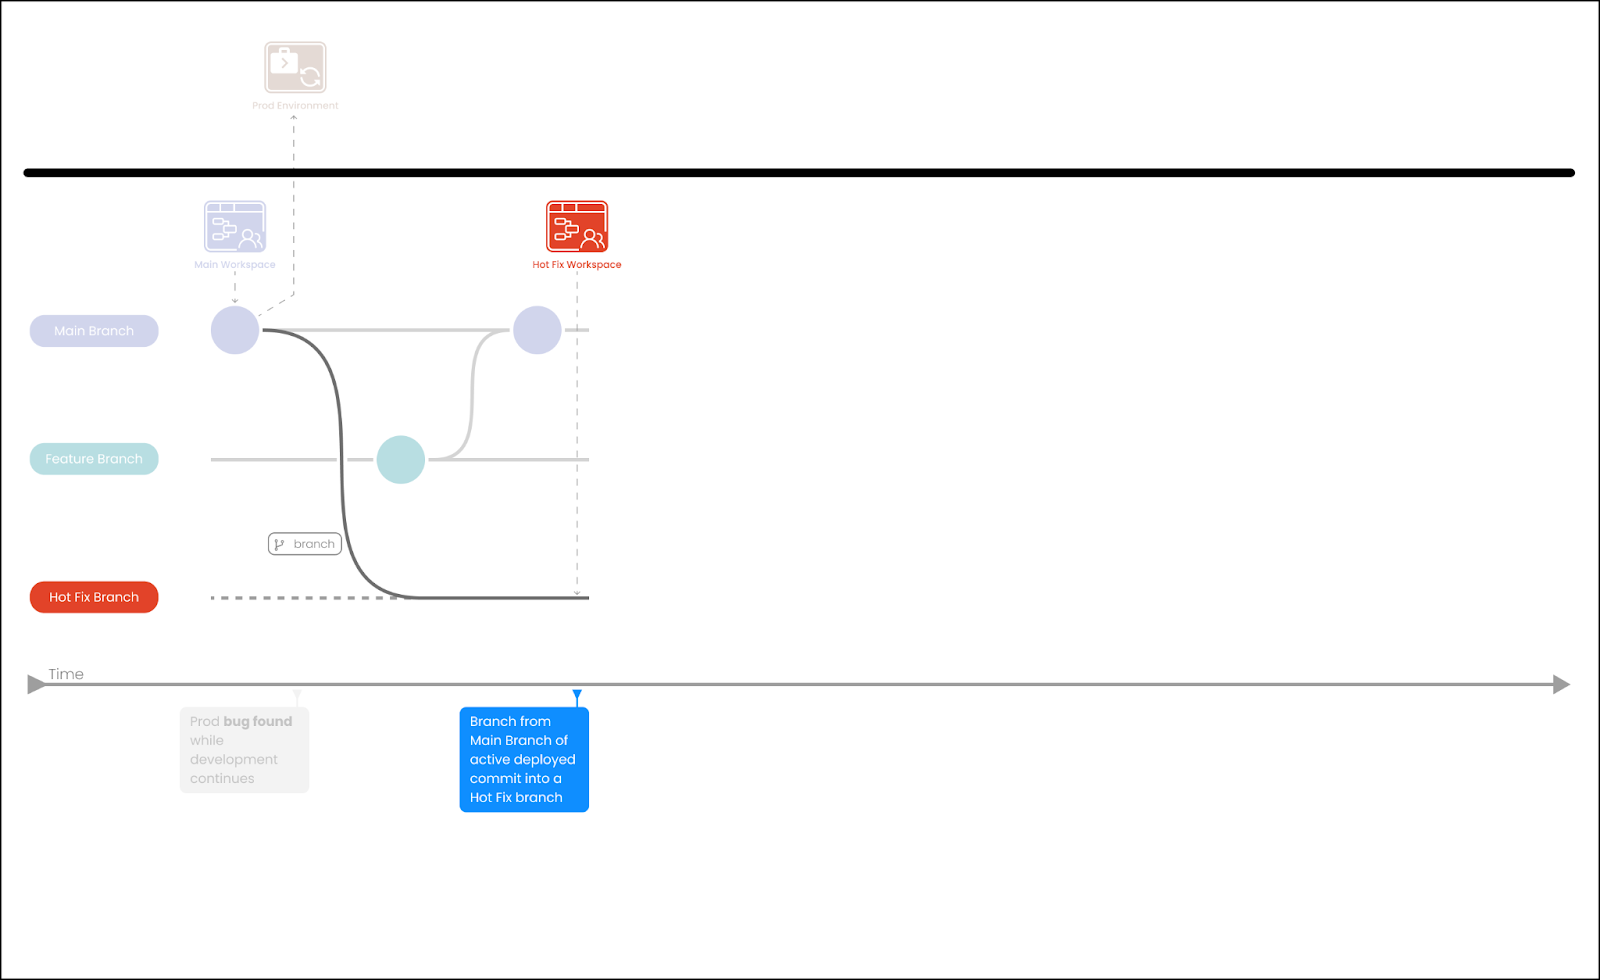
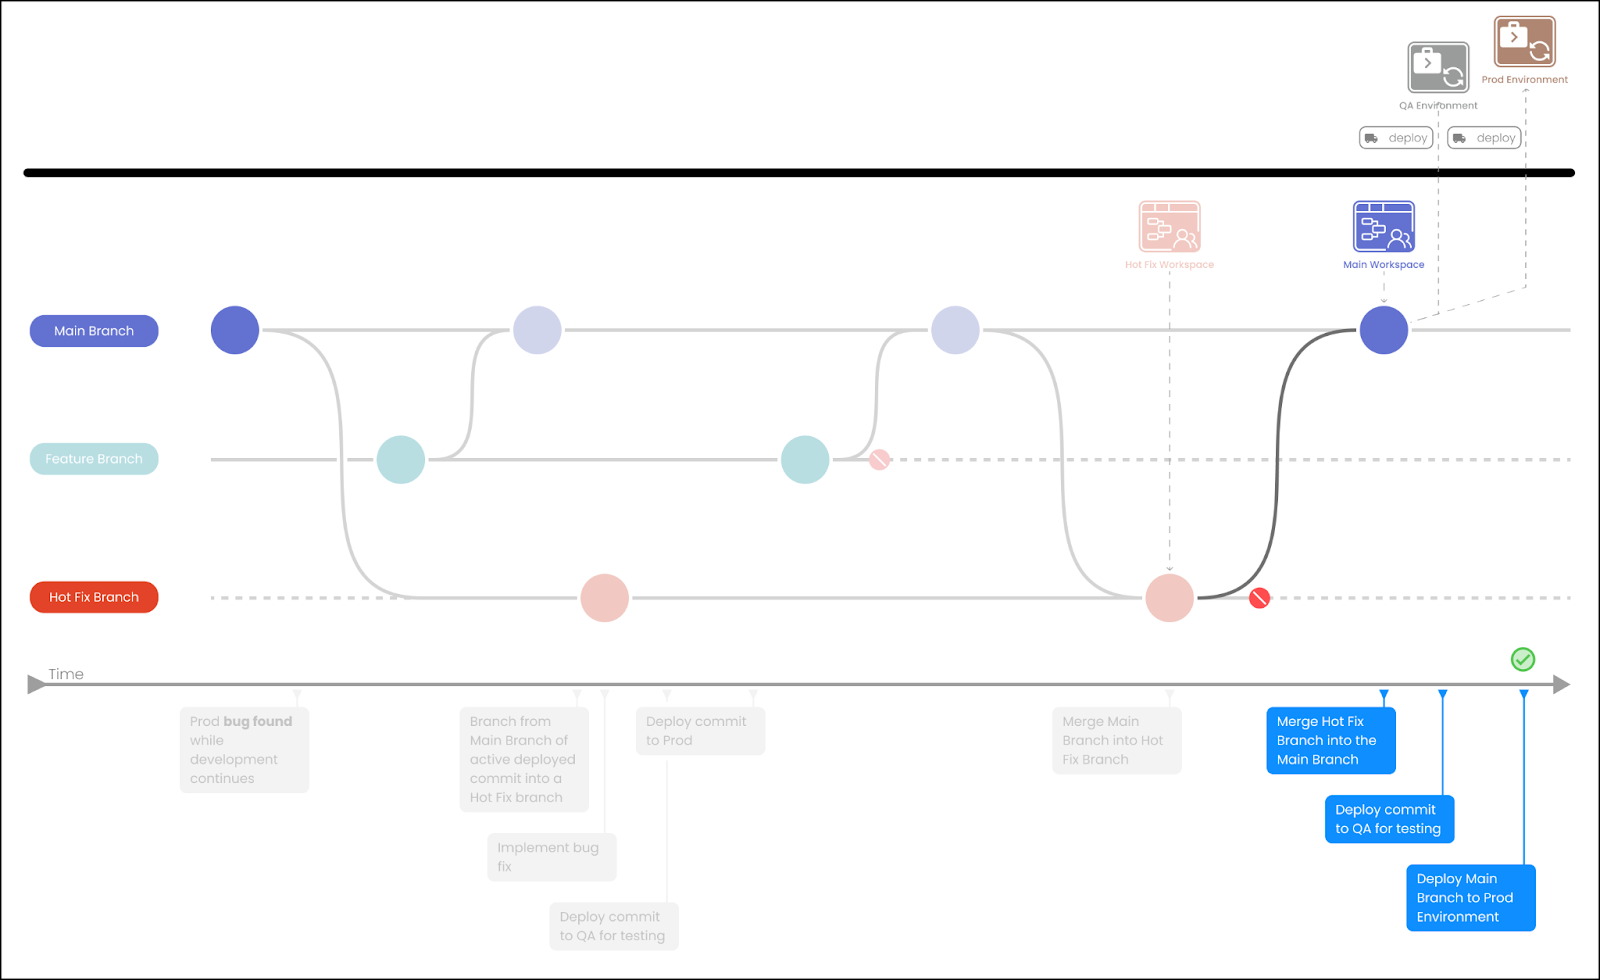
Hotfix Management
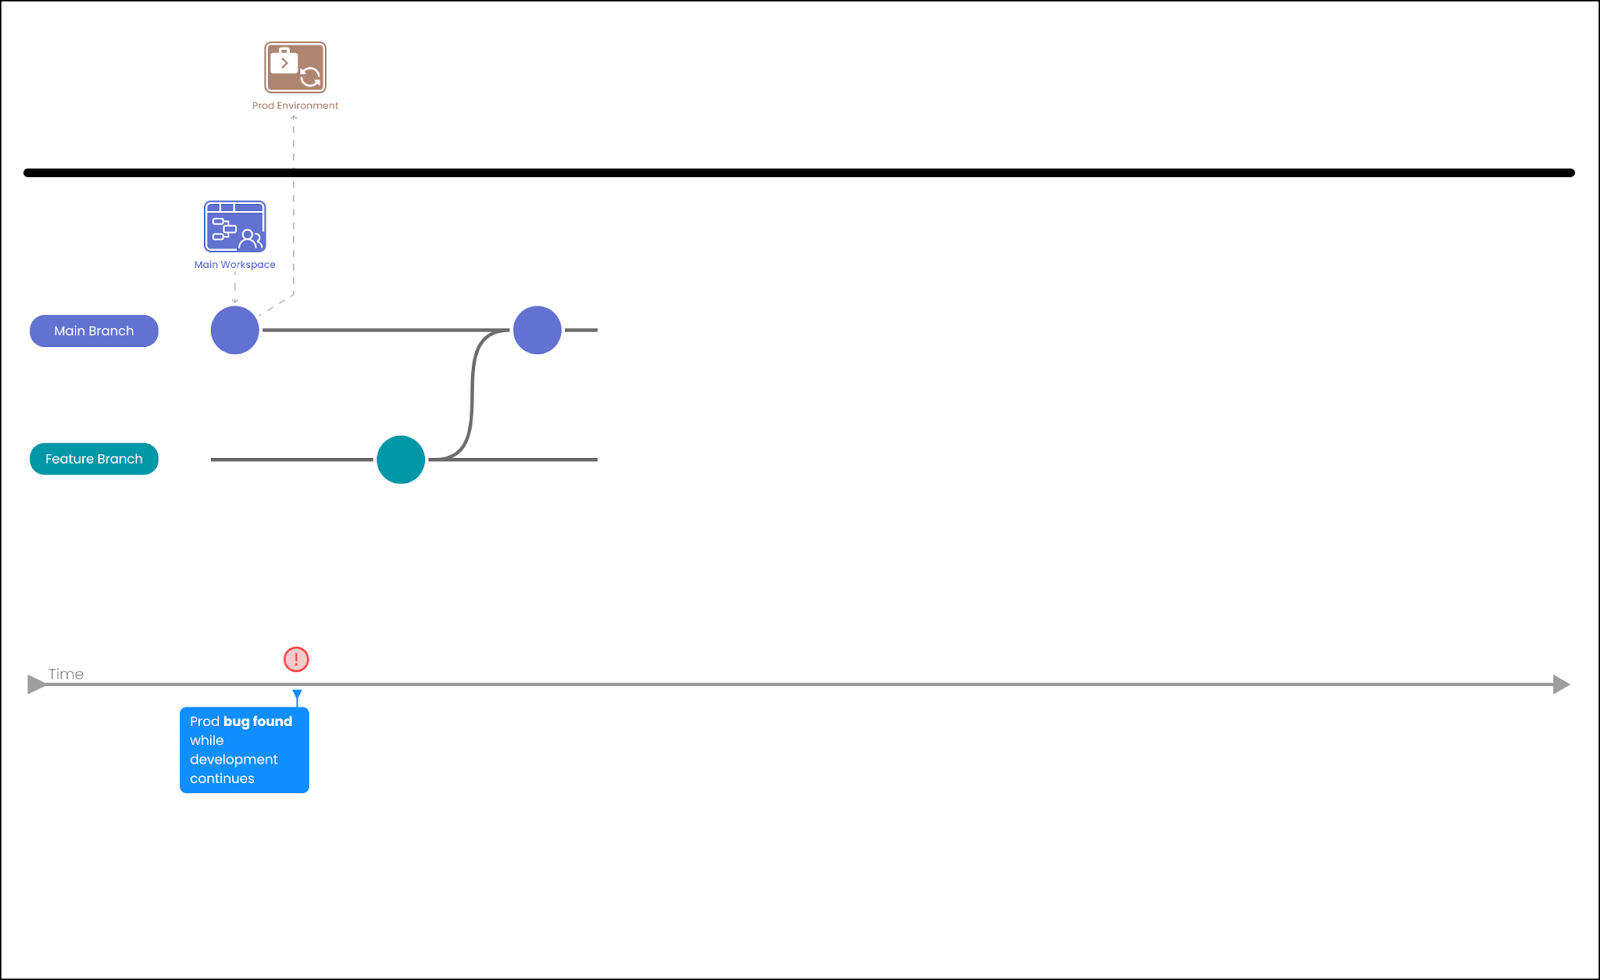
Hotfixes are typically released in response to urgent issues that cannot wait for the next scheduled software update or release. They are designed to quickly resolve a specific problem without requiring a full software update or installation.
Hotfixes are usually smaller and less comprehensive than regular software updates, and they are often focused on fixing a single issue or a small set of related issues. They are usually distributed to customers as a standalone patch or a small package that can be easily installed on top of the existing software installation.
We recommend that you follow these steps to resolve hotfixes.
-
Determine the scope of the hotfix.
-
Branch from Main to create a hotfix branch.
-
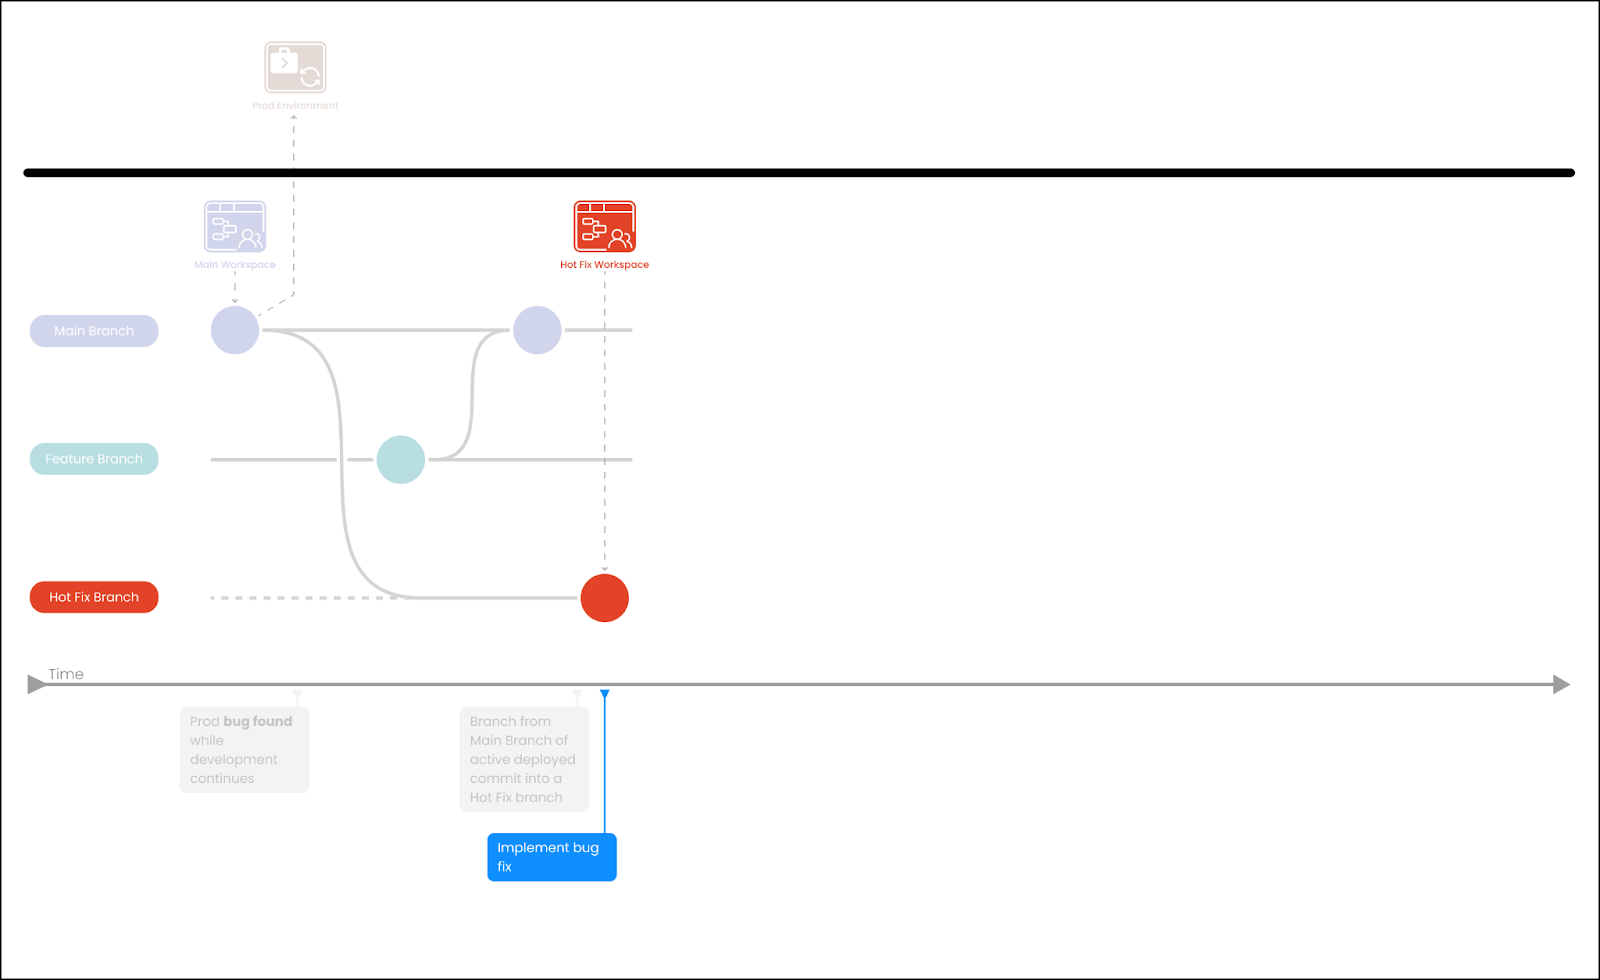
Implement the code to resolve the hotfix.
-
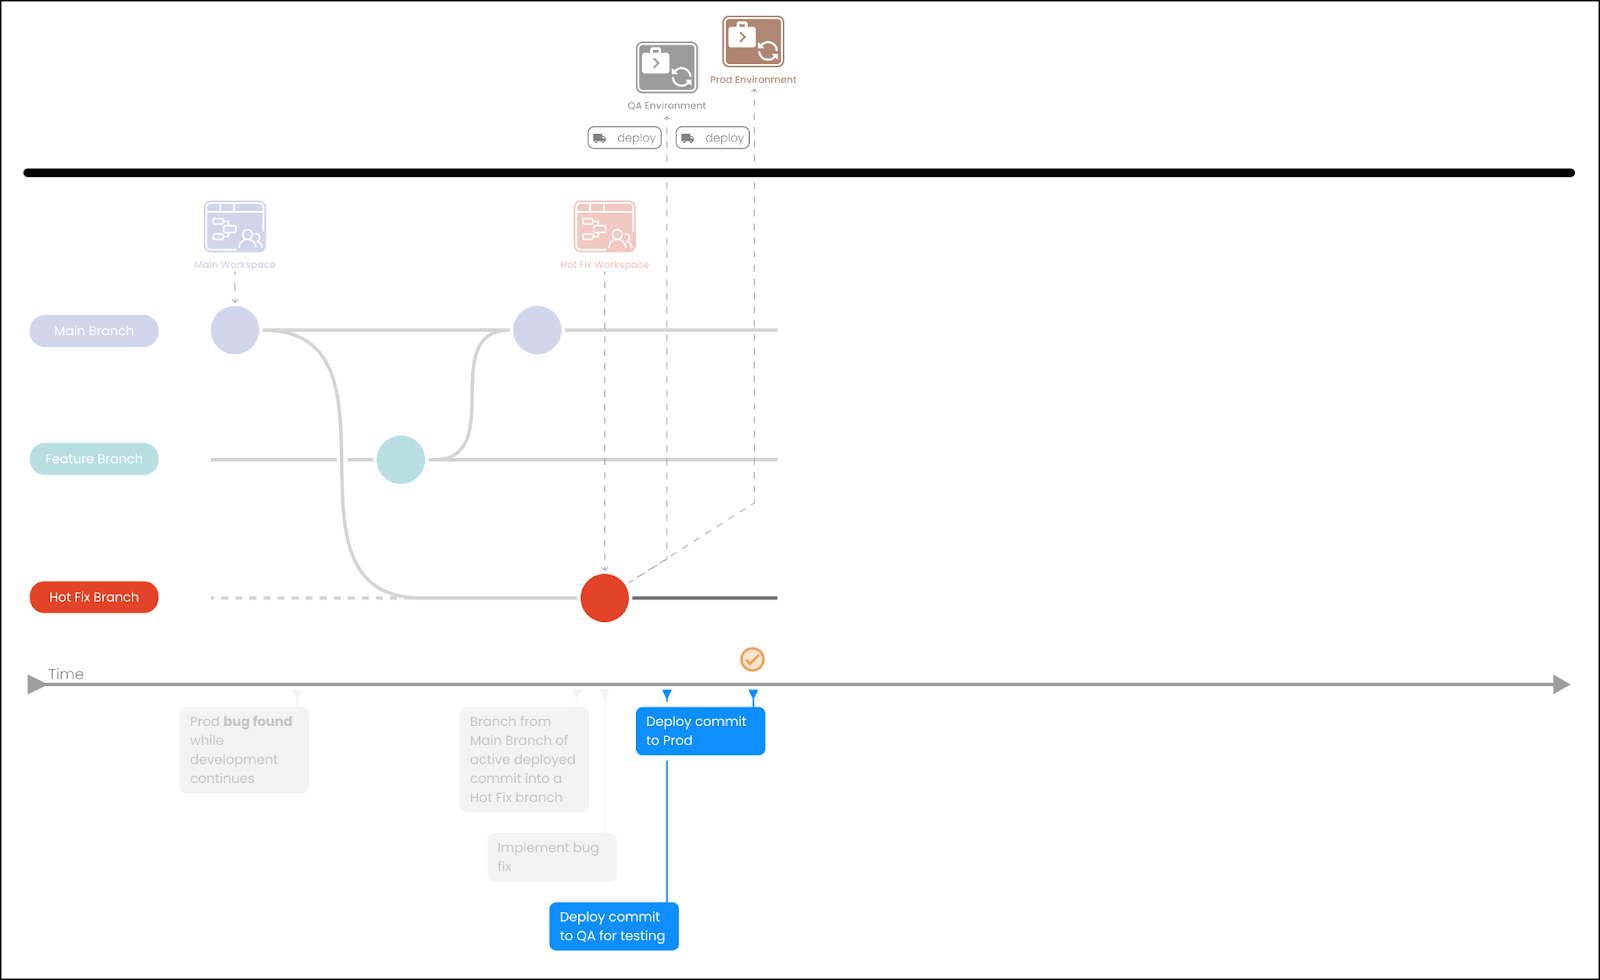
Deploy to QA for testing and if everything looks good, continue to deploy to Production.
-
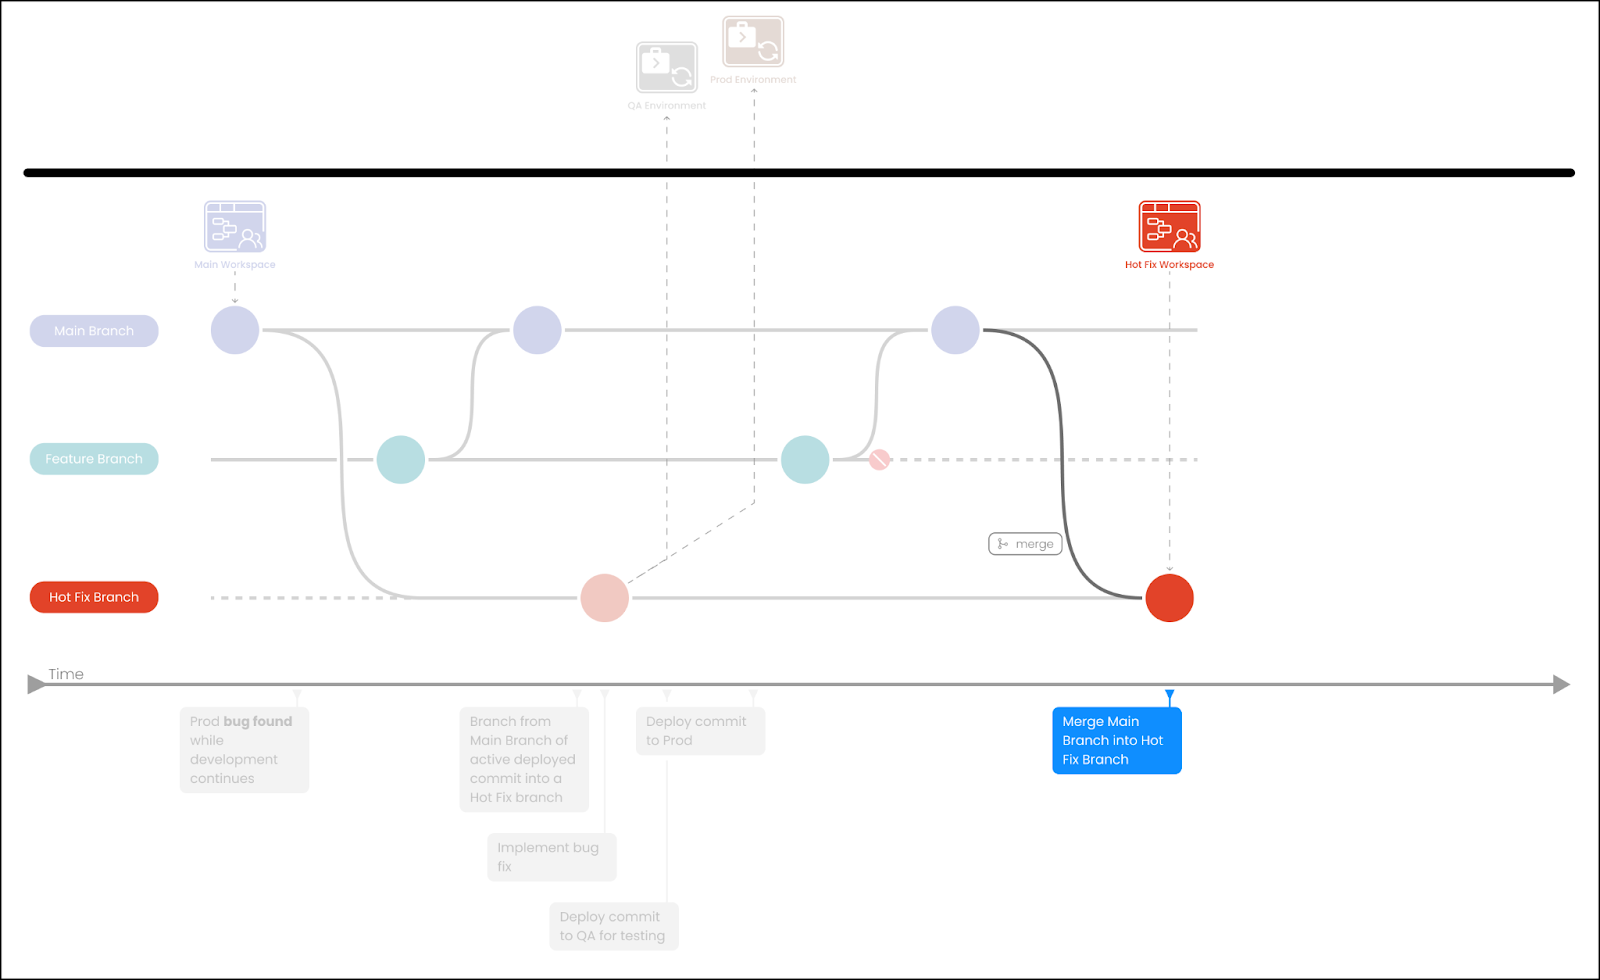
Merge main branch into the hotfix branch and verify everything is working properly.
-
Merge hotfix branch into the main branch and continue the release to QA and then to Production as usual.
Conflict Merging
Merging branches allows for the new development and changes in two feature branches to be combined into one branch. If no common objects have been changed, then the merge is straightforward and can be managed in Coalesce.
If the same object has been changed on two different branches that are being merged, then a merge conflict is identified. The developer responsible for the merge needs to decide which version of the change should be integrated and deployed, and resolve the merge conflict.
The merge conflict should be resolved in the Git host portal or in Git client such as VS Code. Merges are only allowed when there are no uncommitted changes in the target branch. A warning will be displayed if there have been changes, which will either need to be discarded or committed before a merge attempt can take place.
If there have been changes made by another developer while the Git modal is open, merging could reverse their changes without a warning. Often, merge types are dictated by the complexity of changes since the last merge.
These processes are applicable to any target Environments that have been created. Commits in the Git modal will be tagged with the Environments that reflect that particular version of code.
Step-by-Step: Resolving Merge Conflicts (Example Exercise)
In this example we will purposefully create a merge conflict and demonstrate how to resolve it in GitHub.
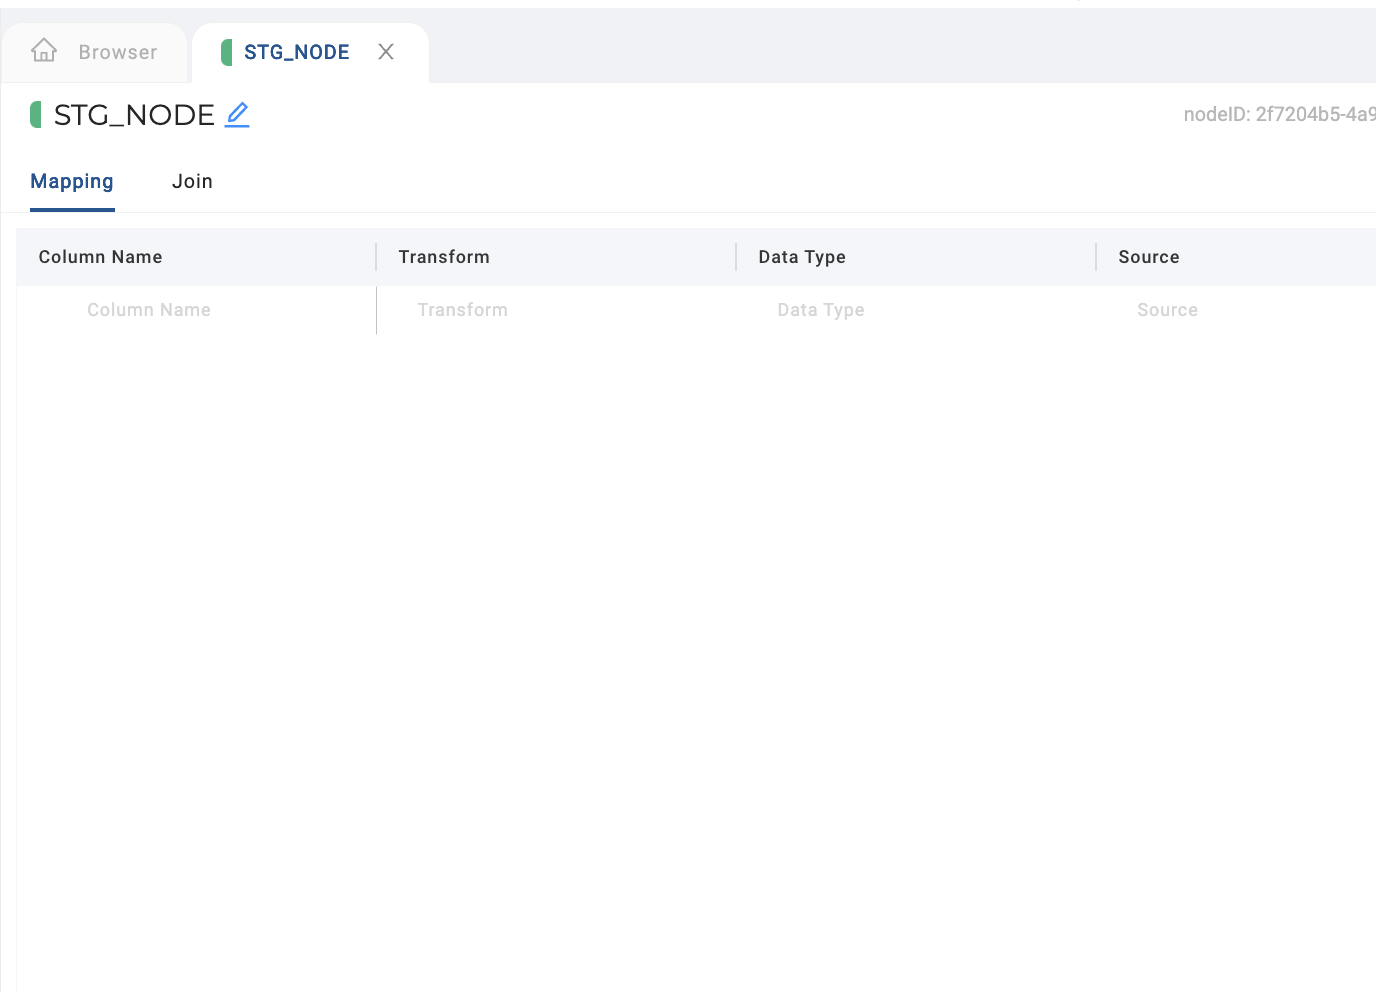
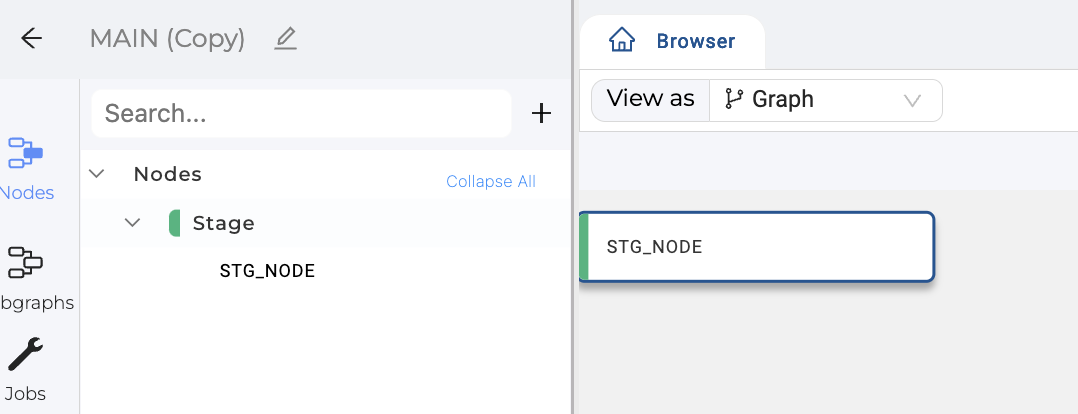
-
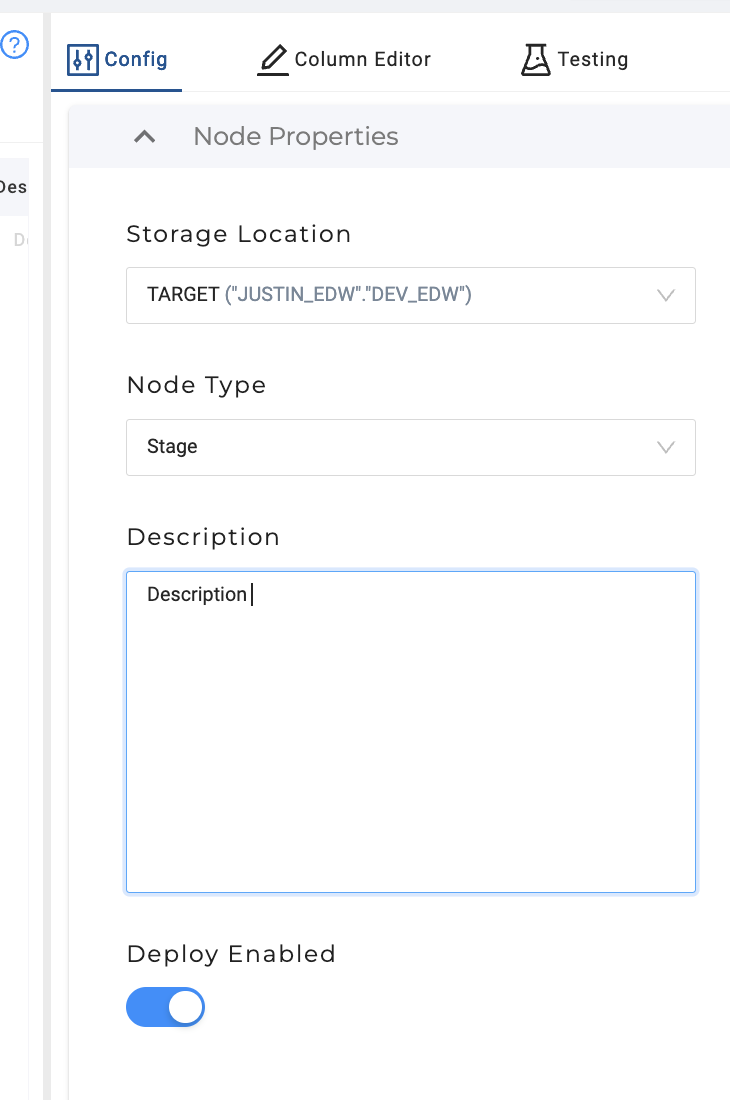
Begin in your primary Workspace and create a new Stage node.
-
Commit all changes in Git.
-
Now create a new Workspace and branch from the primary Workspace where changes were just committed.
-
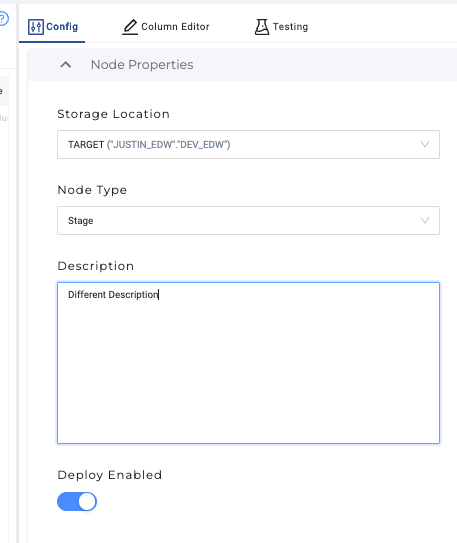
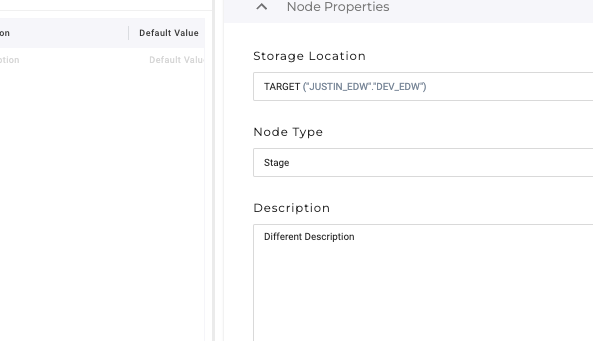
Make a change to your node's description and commit the change to Git.
-
Switch to the primary Workspace and add something different to the description field of your node. Commit the change. This step will create a merge conflict to resolve off platform.
-
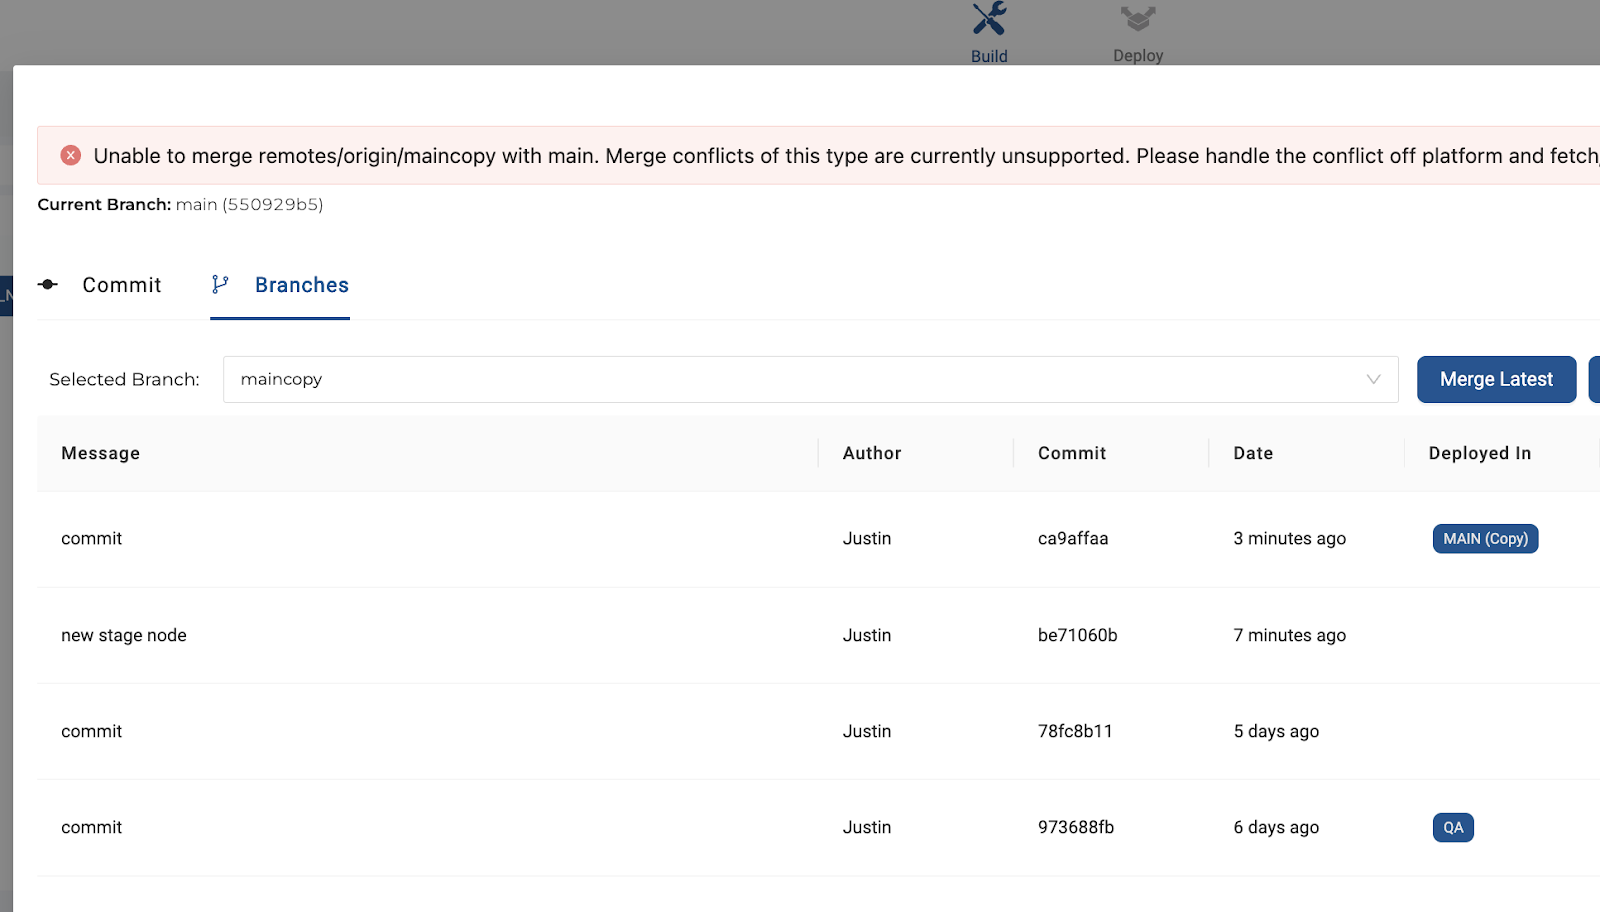
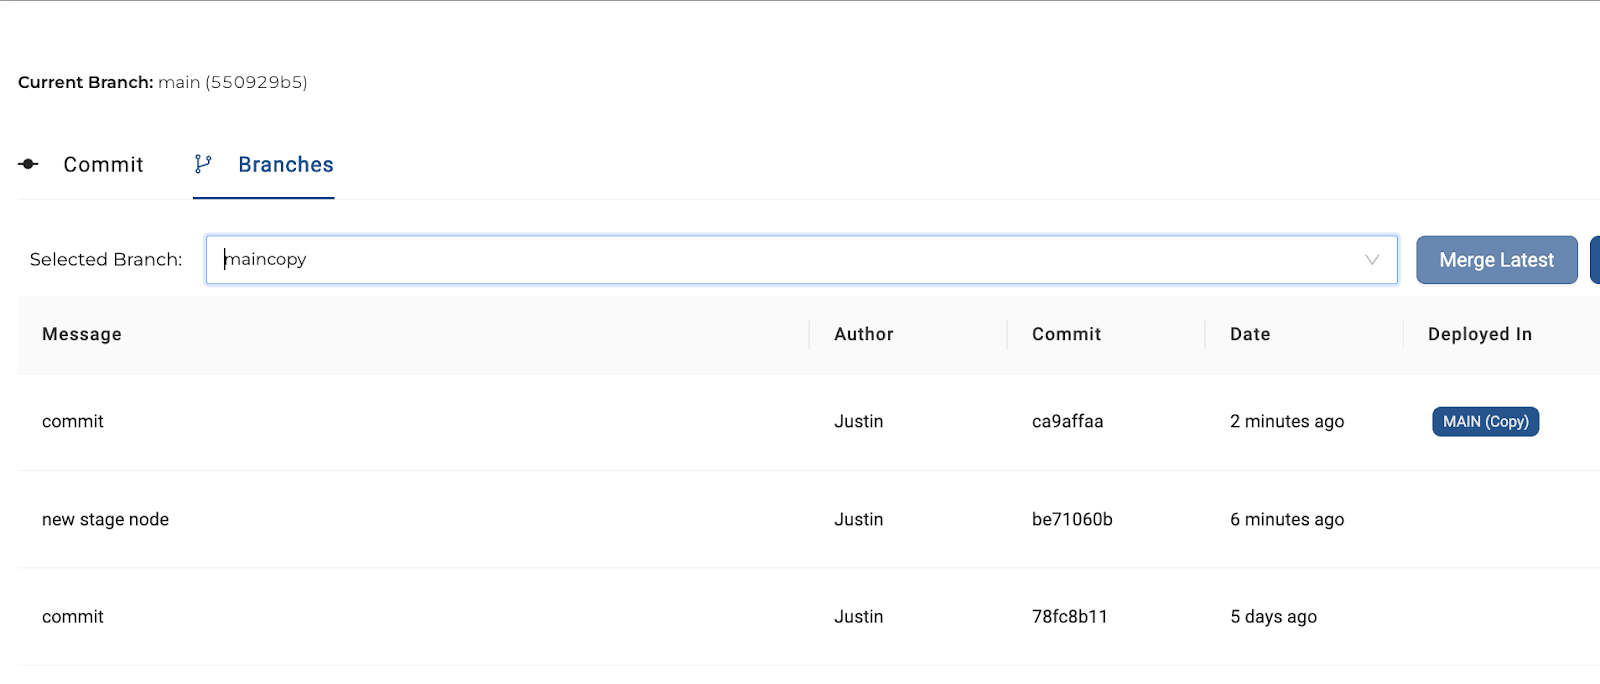
Now in the primary branch, try to merge the copied branch in. It should result in a merge conflict.
-
Instead of using the Coalesce merge conflict editor, close the pane and go to GitHub.
-
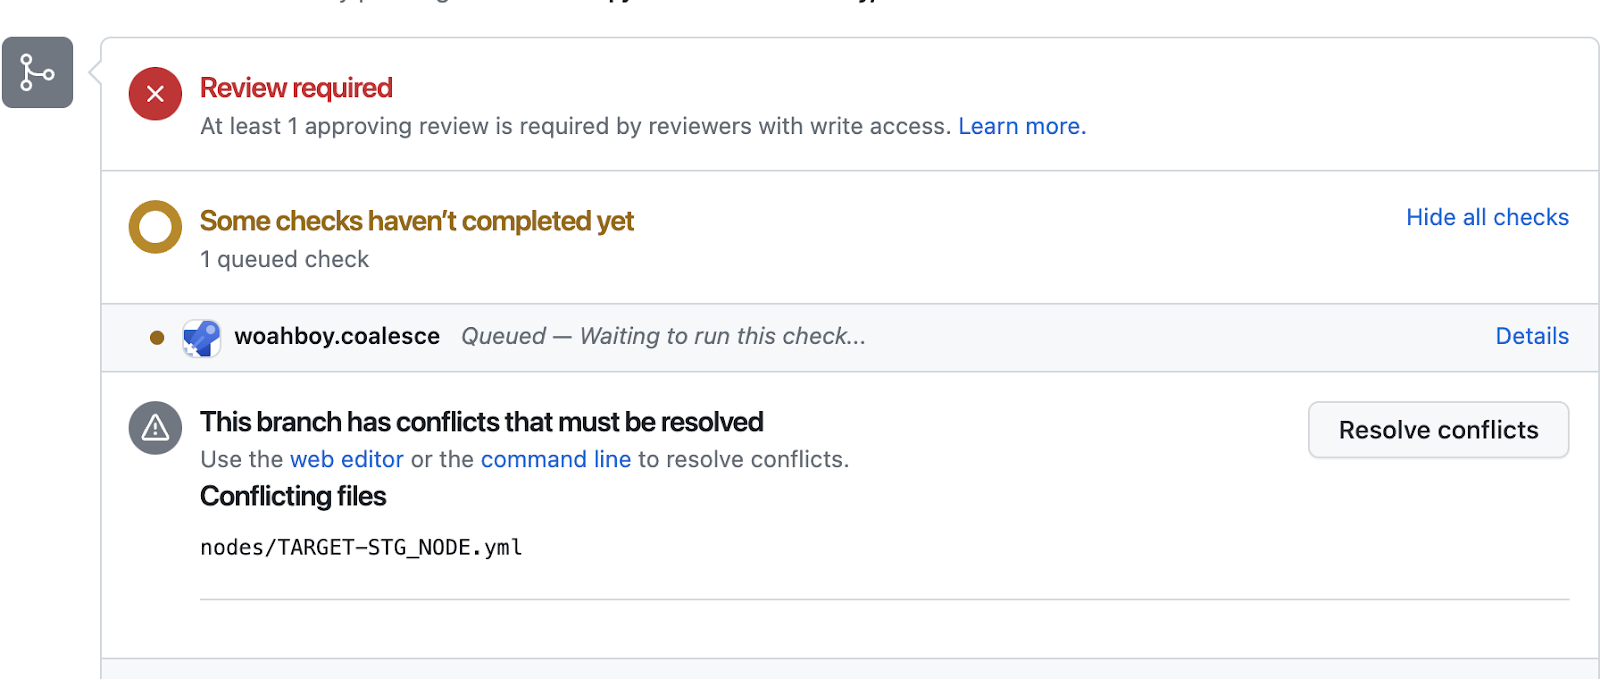
Once in GitHub you will see a prompt to create a pull request. Create the pull request.

-
After creating the pull request, a message will appear saying that the branches cannot be automatically merged due to conflicts. Click the "Resolve conflicts" button.
-
In the conflict editor, markers will indicate where the unresolvable differences were between the two files.
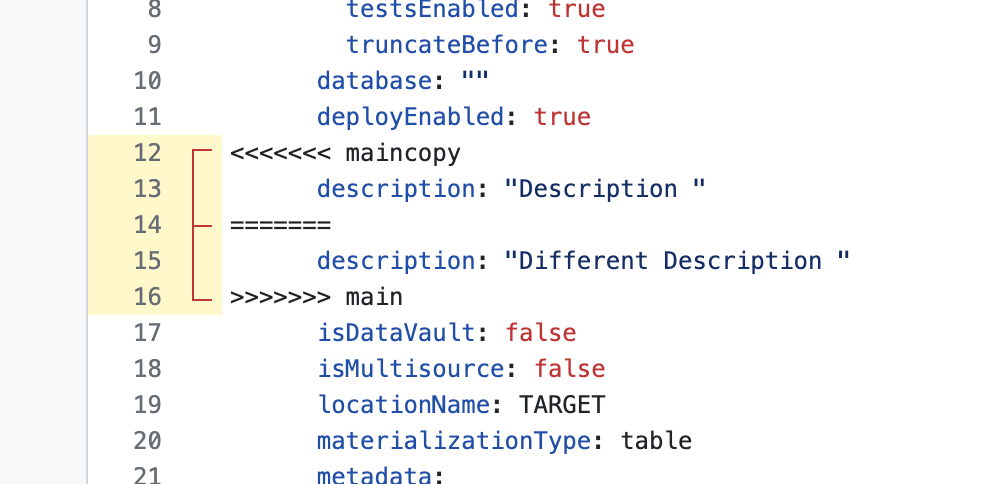
-
Delete the code you don't want to keep, as well as all of the Git generated conflict markers. After you do this, click the "Mark as Resolved" button in the upper right and then click "Commit Merge."
-
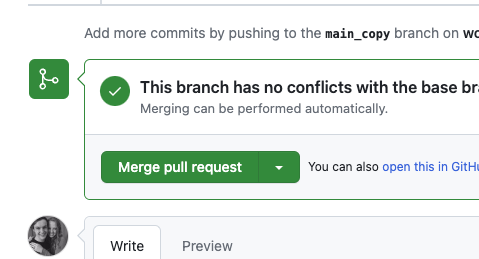
After you commit the merge, click the green button on the next screen that says "Merge Pull Request."
-
From here you will be able to see your changes reflected in Coalesce. To do this, go to the Git window and click "Resync Branch."
-
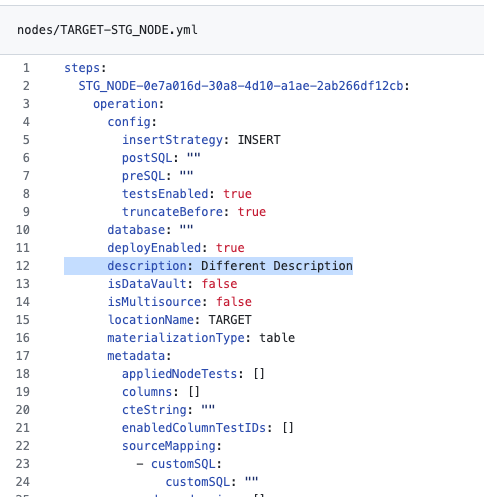
After the branch is re-synced, you can check in your node and verify that the change you selected in Git exists.
Congrats. You just resolved a merge conflict.