Setting Default Parameters
Setting Default Parameters for a Workspace/Environment
To set default Parameters for an environment:
- Open the Build Settings Tab, the gear icon located on the bottom left of the build tab interface.
- Choose a Workspace/Environment and Edit.
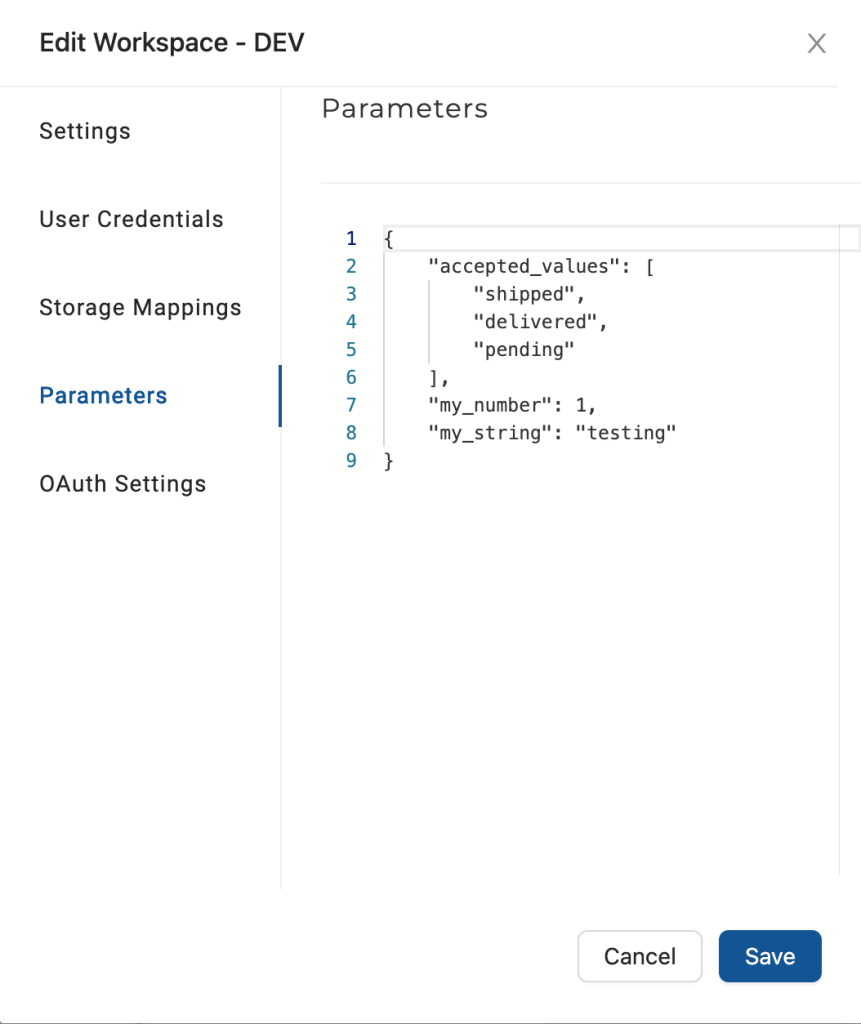
- Click on Parameters and add your Parameters in JSON format.
- Make sure to click Save to save your new parameters.
Example of Setting Parameters
Using the Snowflake sample data, you'll set a parameter, then use it in your JOIN tab.
-
Add the Snowflake sample data, CUSTOMER table as a Source node.
-
Create and Run Staging node from the CUSTOMER Source node.
-
Go to your Workspace by clicking Build Settings > Edit on your Development Workspace.
-
Go to Parameters and add the following:
 {
     "mkt_segment": "BUILDING"
} -
In the Staging node, go to the JOIN tab. It should already have a ref line. Add the line
WHERE C_MKTSEGMENT = '{{ parameters.mkt_segment }}'. Then Create and Run again.Final JOIN tab SQL
    FROM {{ ref('PROD', 'STG_CUSTOMER') }} "STG_CUSTOMER"

WHERE C_MKTSEGMENT = '{{ parameters.mkt_segment }}' -
In the results pane, the Data tab will show all records where
C_MKTSEGMENTis equal toBUILDING.
Using Parameters in Transforms
The values in Parameters can be used in transforms within Nodes using the following format:
{{ parameters.my_var }}
where your parameters follow JavaScript object dot notation syntax. Below are a few examples to illustrate this.
{{parameters.my_number}}

CONCAT( "CUSTOMER"."C_ADDRESS", '{{parameters.my_string}}' )

CONCAT( "CUSTOMER"."C_ADDRESS", '{{parameters.accepted_values[0]}}' )
{{parameters.my_number}} will not resolve to 1 (in the above example) until the node is actually rendered. In other words, the value in the transform field will remain {{parameters.my\_number}}.
Using Parameters in a Node Type Template
In the Node Type Editor, Parameters are appended to the metadata. Using Jinja logic, these parameters can be accessed and rendered in the Create and Run Templates if so desired.
They can be inserted into the Jinja Templates following the same format as in transforms and will run within Stages.
Parameters and Advanced Deploy Strategy
When using parameters as part of an Advanced Deployment Strategy, they need to be referenced with desiredState or currentState. For example, instead of {{parameters.my_number}}, instead use {{desiredState.parameters.my_number}}.