Scheduling Refresh Jobs with Azure Data Factory
Azure Data Factory is a cloud-based data integration service that allows creating and orchestrating data movement and transformation workflows at scale. Data analysts and engineers can visually construct pipelines extracting data from disparate siloed sources, applying data cleansing and enrichment flows leveraging services like Fivetran and publishing to centralized data warehouses and lakehouses.
Built-in triggers coupled with enterprise grade reliability, availability, and scalability has made Azure Data Factory a popular choice for realizing end-to-end orchestration of data pipelines. When working with a column-aware data transformation solution like Coalesce on Azure, Data Factory’s scheduling and automation capabilities help deploy existing data transformation pipelines amongst a feature rich logging and orchestration UI to ensure a trustworthy data ecosystem.
In this article we will explore setting up a basic Coalesce pipeline Refresh Trigger using the Azure Data Factory web UI.
Set up a Coalesce Environment
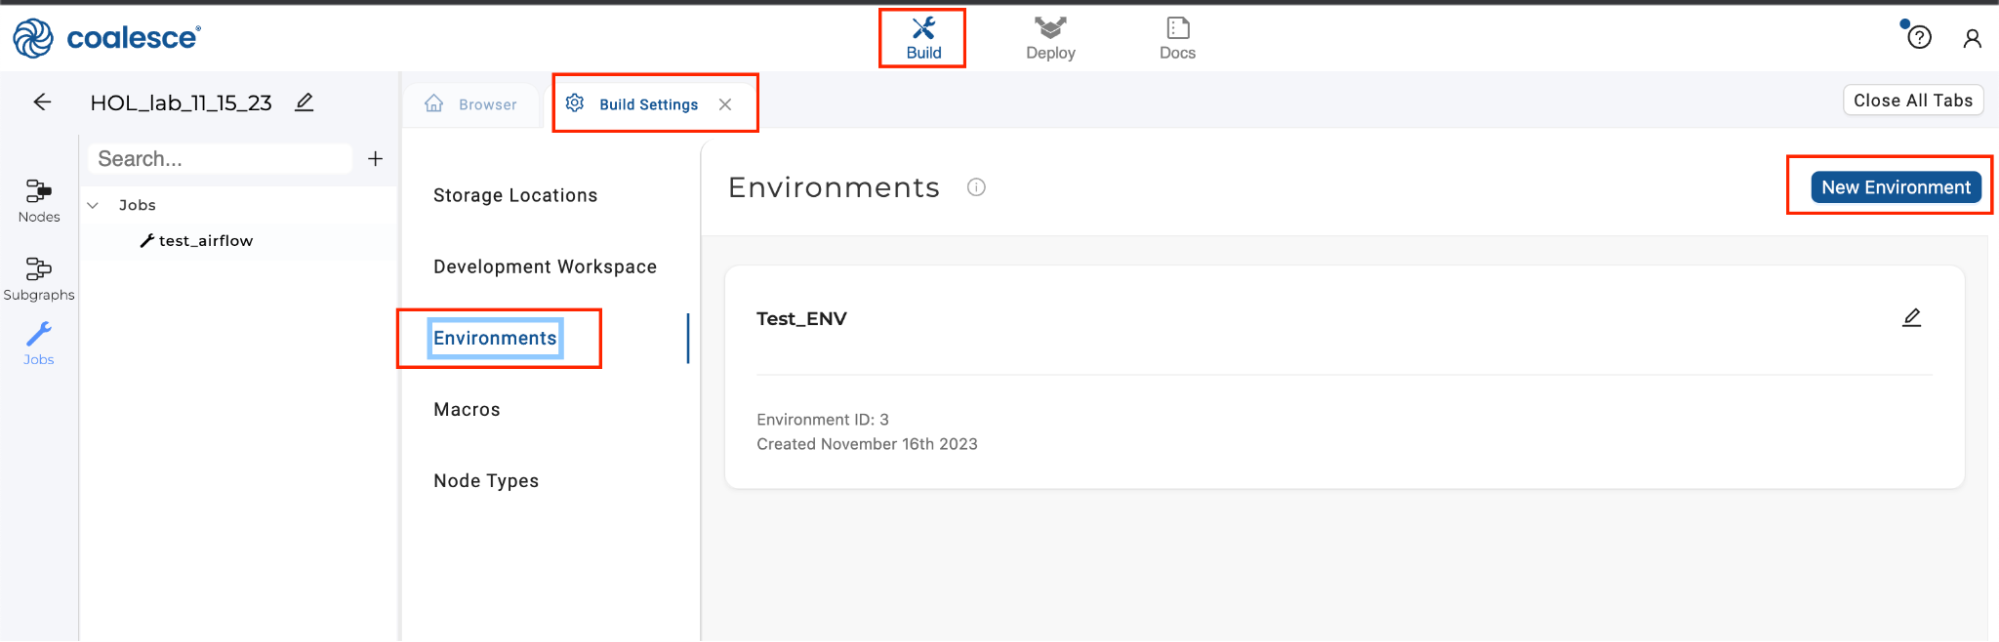
In order to execute jobs within Coalesce, we will have to create an Environment where our job will be deployed to, separate from our development Workspace. To do this, follow these steps.
-
Go to Build > Build Settings > Environments >New Environment.
-
Specify the necessary information in each of the tabs to create your Environment. Review Environments to learn more.
-
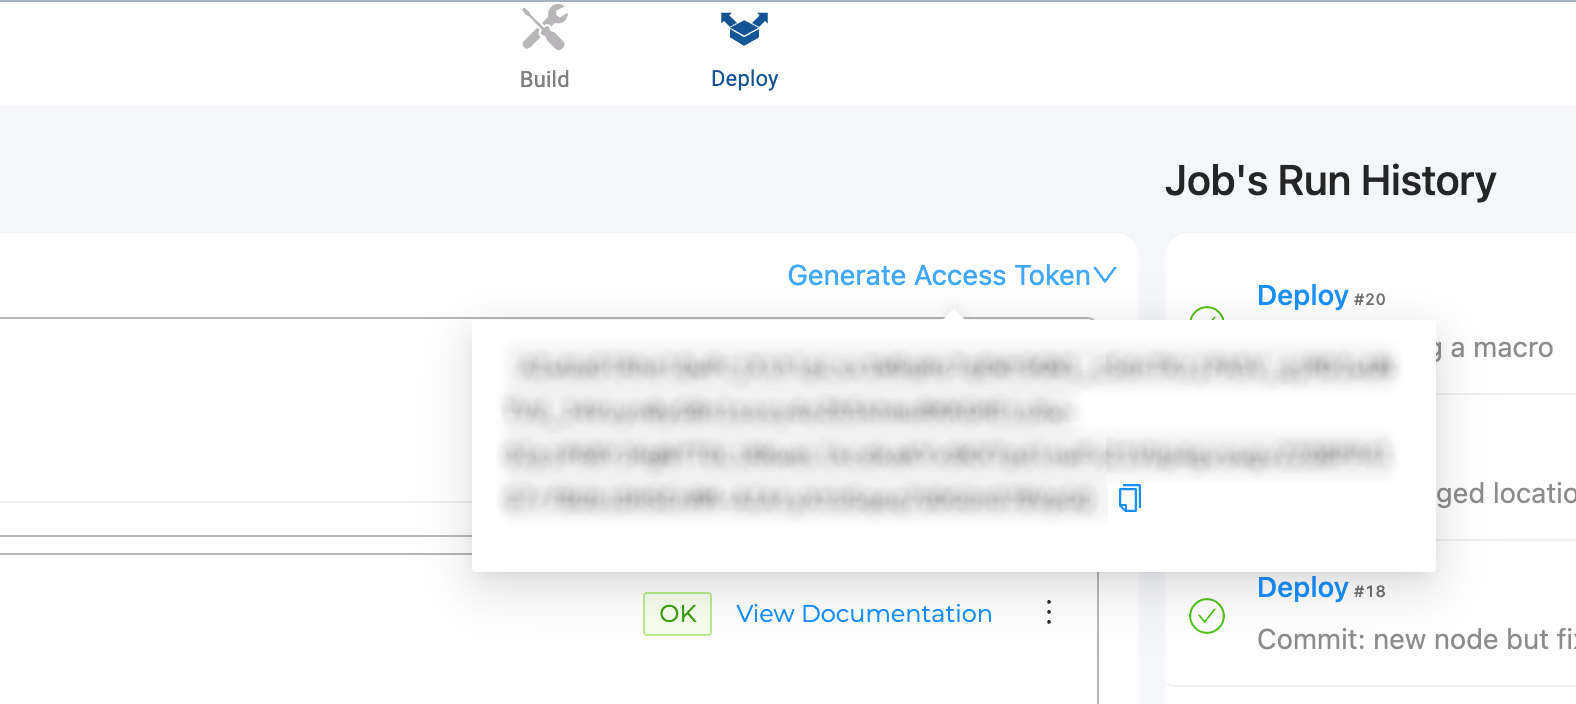
Once your environment is set up, navigate to the Deploy tab in the top menu.
-
Select Deploy next to the Environment that you created,
-
Select the branch from the Workspace or job that you wish to deploy into your new Environment. We recommend deploying the latest commit of your main branch into the production Workspace but you can choose any branch or job that you wish to deploy.
-
Once you’ve deployed into your selected Environment, click Generate access token and save it somewhere; you will need it to authenticate the API call made from Azure Data Factory.
Set up KeyPair Auth in Snowflake
Although the Coalesce API supports Snowflake Username/Password authentication, you should not use it for automated pipeline scheduling in order to conform to security best practices. Instead, we will configure KeyPair Authentication in Snowflake and format the key so it can be used as a secret in ADF. Save the private key generated from this process somewhere safe, as it be need in subsequent sections.
Configure the Azure Key Vault
In order to store and use the credentials that we need in order to authorize requests from ADF to Coalesce/Snowflake, you need to store the credentials (access tokens, keys, etc.) securely within the Azure Key Vault, and then link the Azure Key Vault to our Data Factory.
Even though you can store secrets less securely at the ADF pipeline level, this is not recommended as compared to the secure flow that is detailed below.
For the next set of steps, you will have to be an Azure Administrator to have the necessary permissions to create key vaults, secrets, and edit permissions.
-
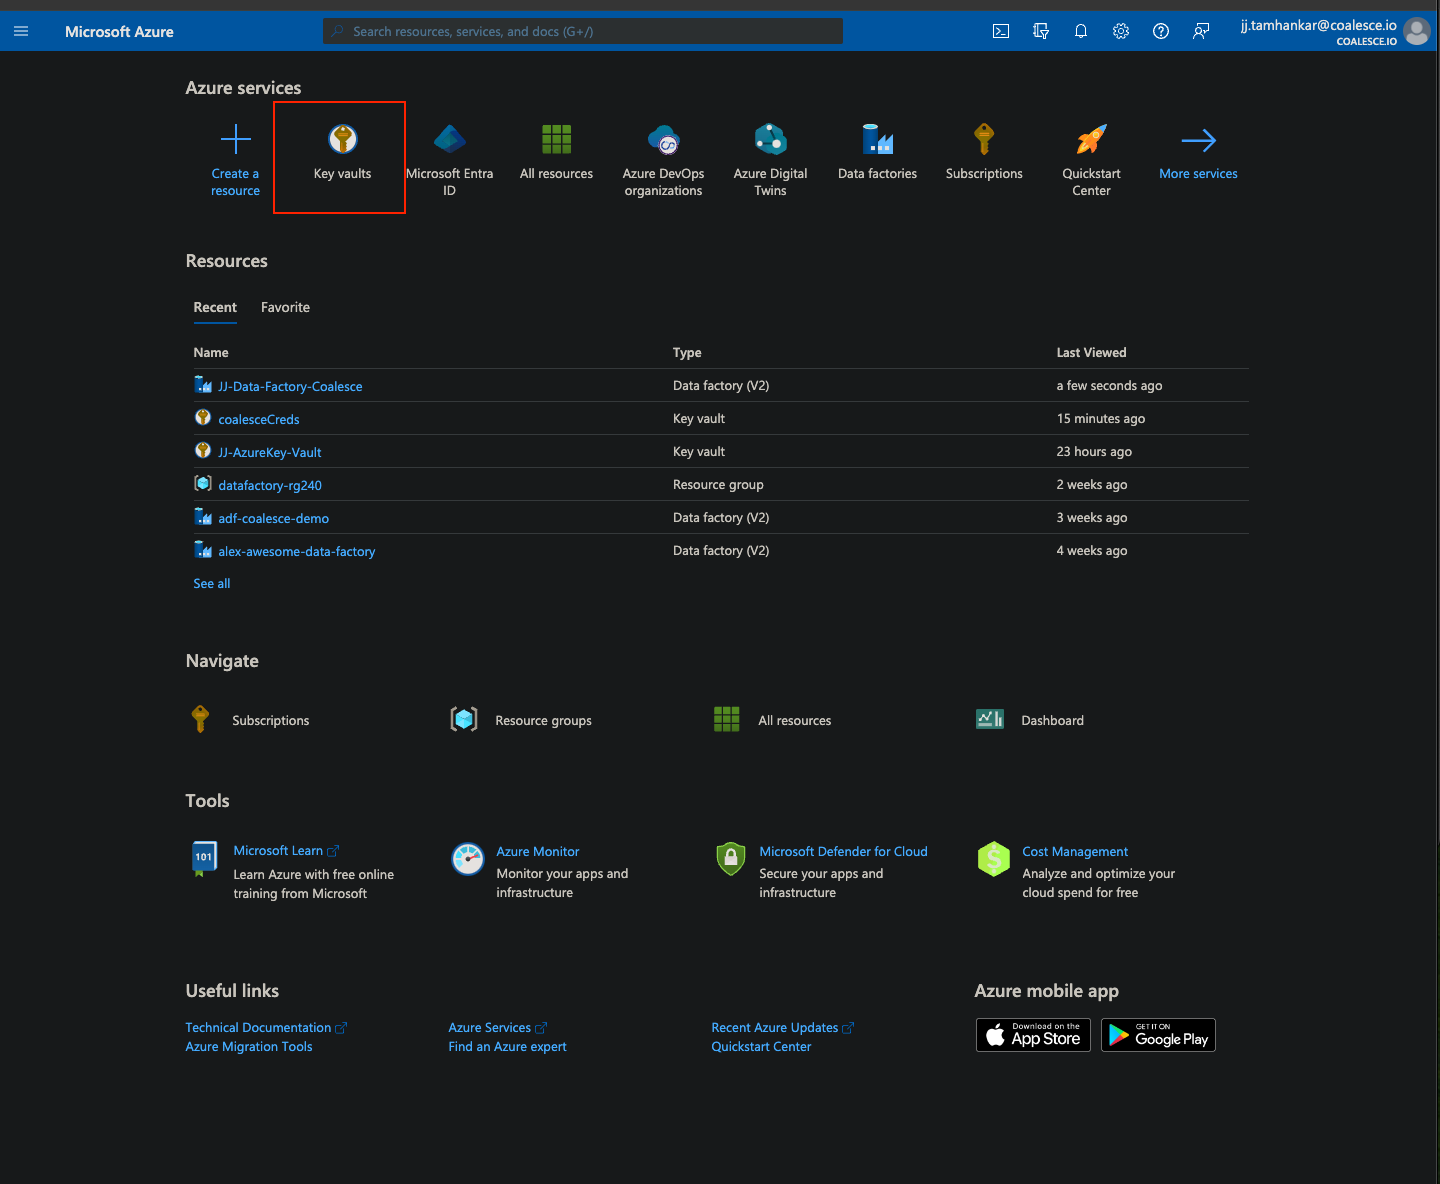
Create a key vault by logging into the Azure portal and selecting Key vaults from the Azure services.
-
Create the Key vault by selecting your subscription and proceeding through the menus. In this example, our Key vault is called
coalesceCreds.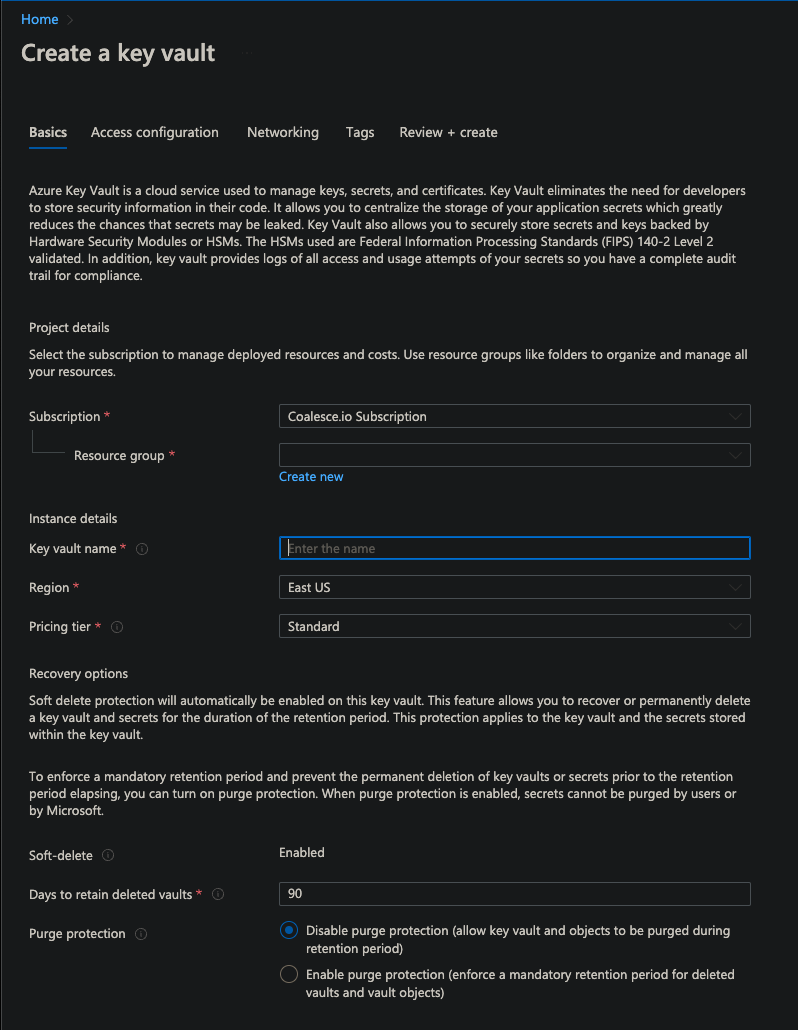
-
Go to the new Key vault and go to Object >Secrets.
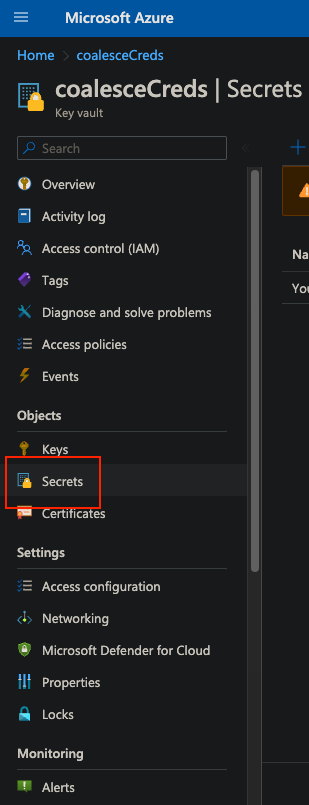
-
Select Generate/Import.

-
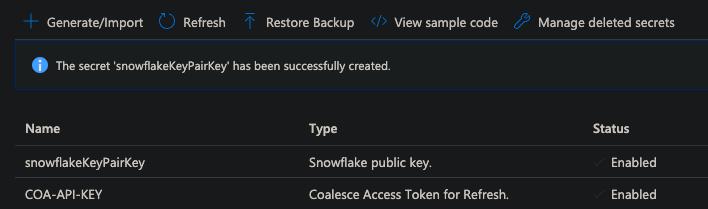
Add two secrets:
COA-API-KEY, which will be the access token that we generated in the section Set up Coalesce Environment.snowflakeKeyPairKey, which is the Snowflake key that we generated in the section Set up KeyPair Auth in Snowflake.
 Formatting the KeyPairKey
The KeyPairKey MUST be inputted in a very specific format, all newlines must be explicitly stated, and all whitespaces removed.
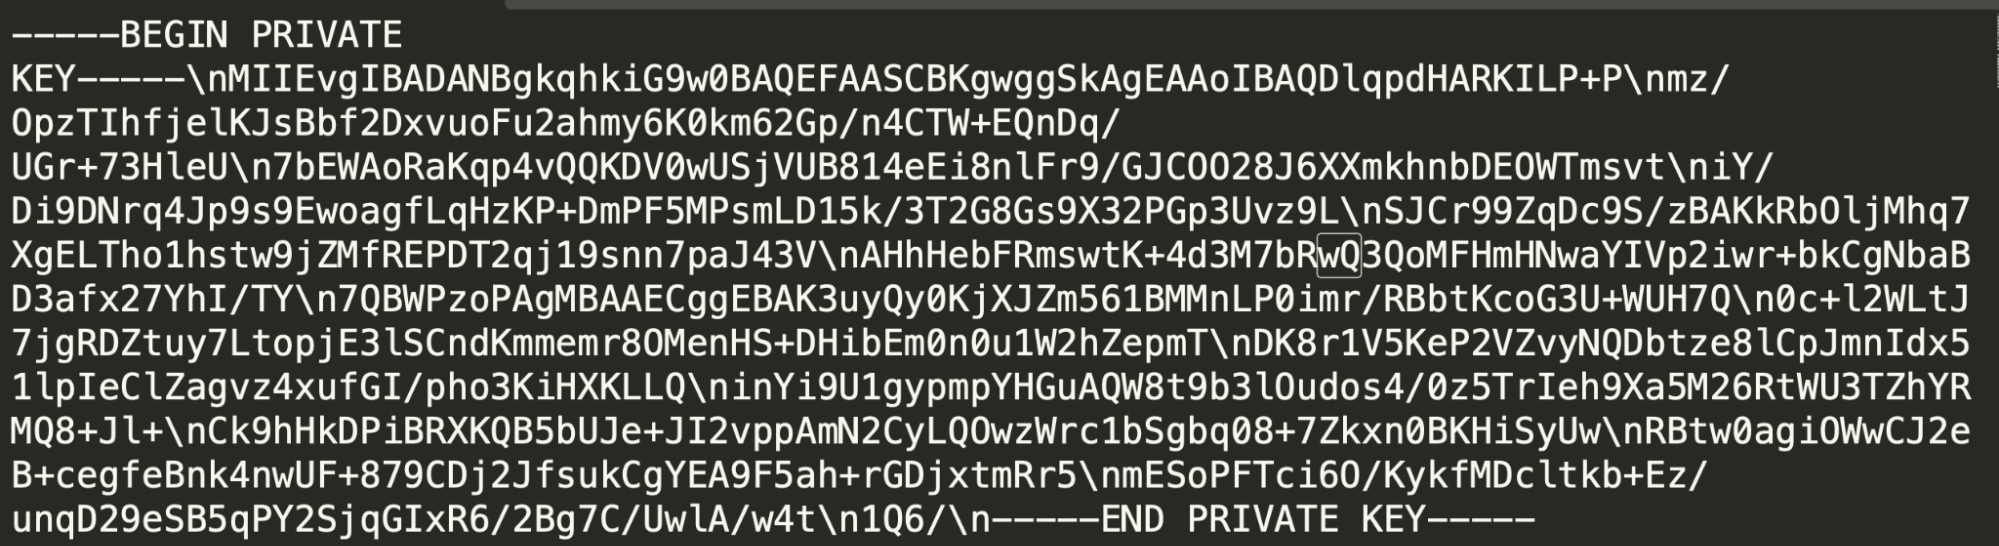
For example, if your key looks like this:
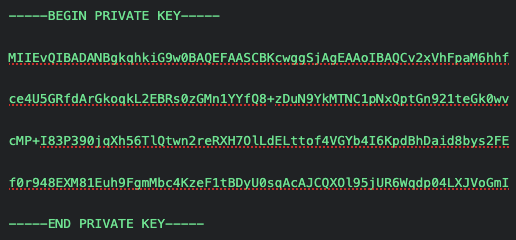
It must be inputted like this:
-
Go to Access Control (IAM) to configure the access policy for the Key Vault, and click Add Role Assignment.
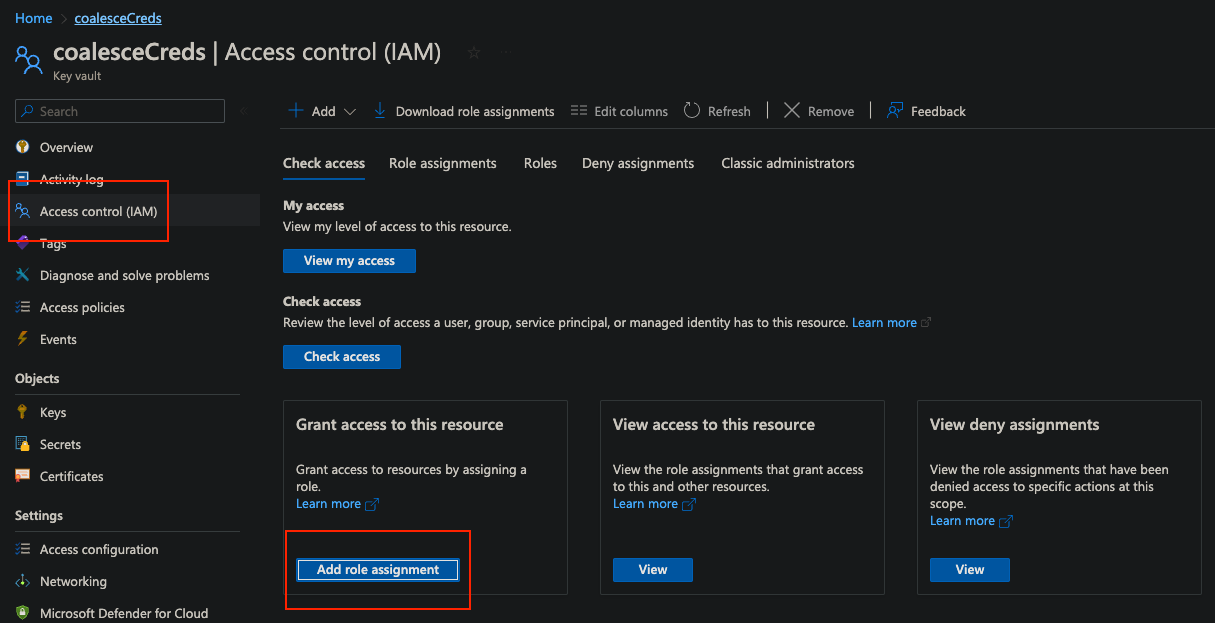
-
Select the Key Vault Secrets User role.
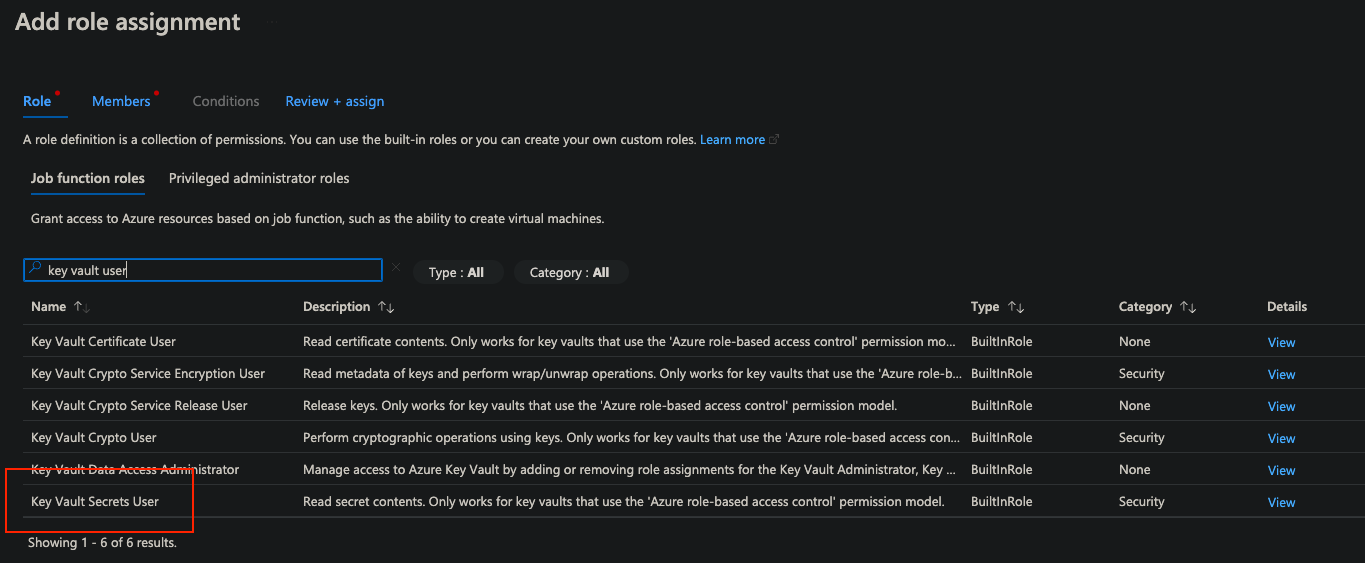
-
Click Next, then Select Managed Identity” on the next screen and select the name of the Data Factory, in this case, our data factory is called “JJ-Data-Factory-Coalesce”.

-
Click Review + assign.
-
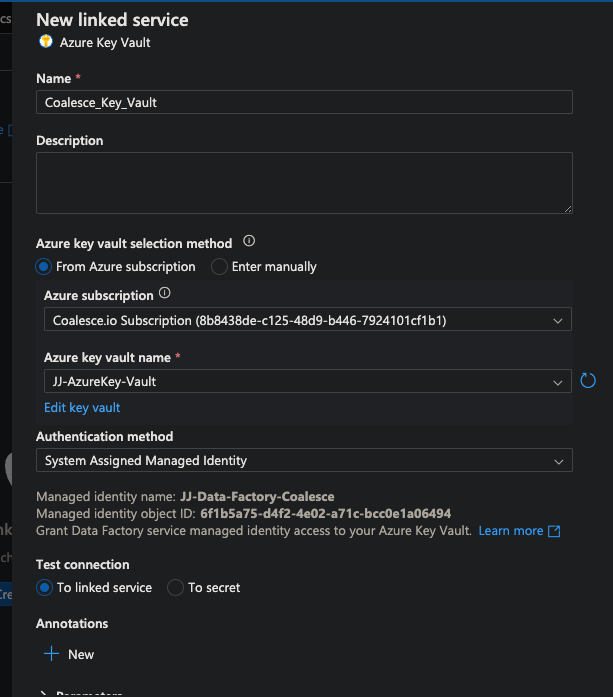
Navigate to the Azure Data Factory and link the key vault to the data factory by going to Linked Services > New.

-
Create the Linked Service.
Using Azure Key Vault Secrets in Pipeline Activities
Follow the steps outlined in Microsoft's Use Azure Key Vault secrets in pipeline activities guide to add the secrets to our ADF access policy and import in our secrets and use them in our pipeline.
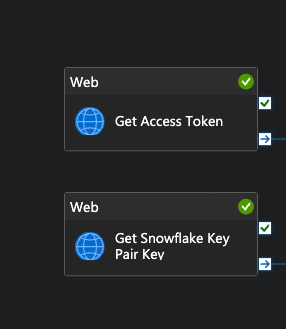
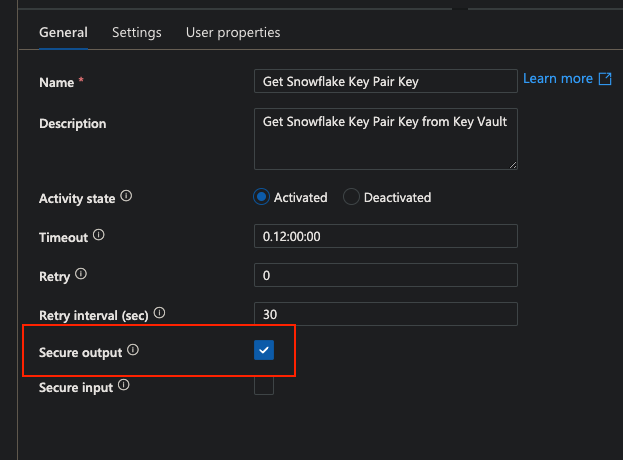
- Create a Web Activity type to extract the Access token from the Key vault.
- Repeat the steps to add a web Activity type that retrieves the Snowflake Key Pair credential. Both activities must have the Secure output box checked.
Create the Coalesce Refresh Activity
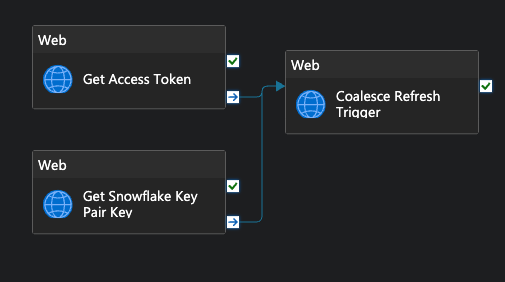
You can now begin assembling the Web Activity that will trigger a refresh of the Coalesce environment of our choosing. For this, you'll use the Coalesce API to issue a startRun call to trigger the pipeline. See Step 4 for what it should look like at the end.
-
Create a new Web Activity, name it Coalesce Refresh Trigger, and drag lines from the other Web Activity modules to it.
-
To input the Key Pair Key into the Coalesce Refresh Action Trigger and API body, click on Body to bring up the Pipeline Expression Builder for that input. Input the body of the Coalesce
startRunendpoint that you configured in the API documentation.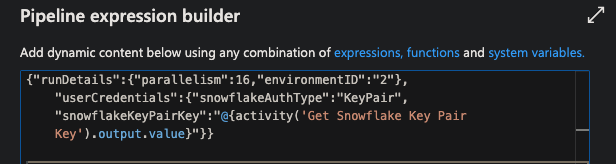 API Body
"runDetails": {"parallelism":16, "environmentID": "2"},
"userCredentials": {"snowflakeAuthType": "KeyPair",
"snowflakeKeyPairKey":"@{activity( 'Get Snowflake Key Pair
Key'). output. value}"}}
//Remember to update the body text for your use. -
To input the Coalesce Access Token, navigate to the Authorization header and click the Value input to bring up the Pipeline Expression Builder and input the following expression.
 Authorization
Bearer @activity( 'Get Access Token'). output.value} -
Your final configuration should match the following image. Enter your apps URL, the method (POST), and the Headers.

-
Click OK to save the changes.
-
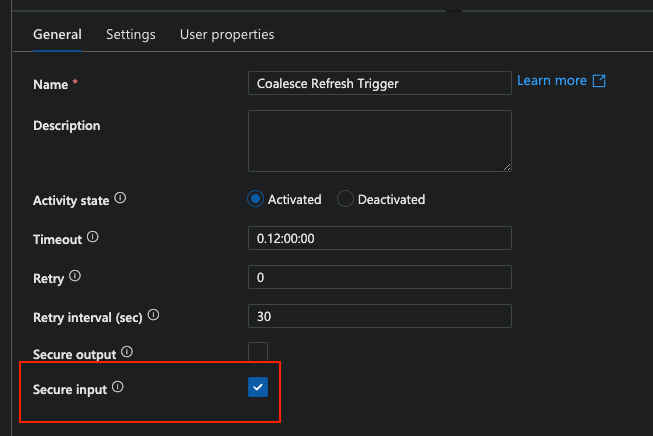
Check the Secure input box under General to ensure that none of the secure credentials are exposed.
Scheduling Your Coalesce Trigger Pipeline
You're going to schedule your ADF pipeline.
-
Go to the Edit tab in Azure Data Factory. Click Add Trigger > New/Edit.

-
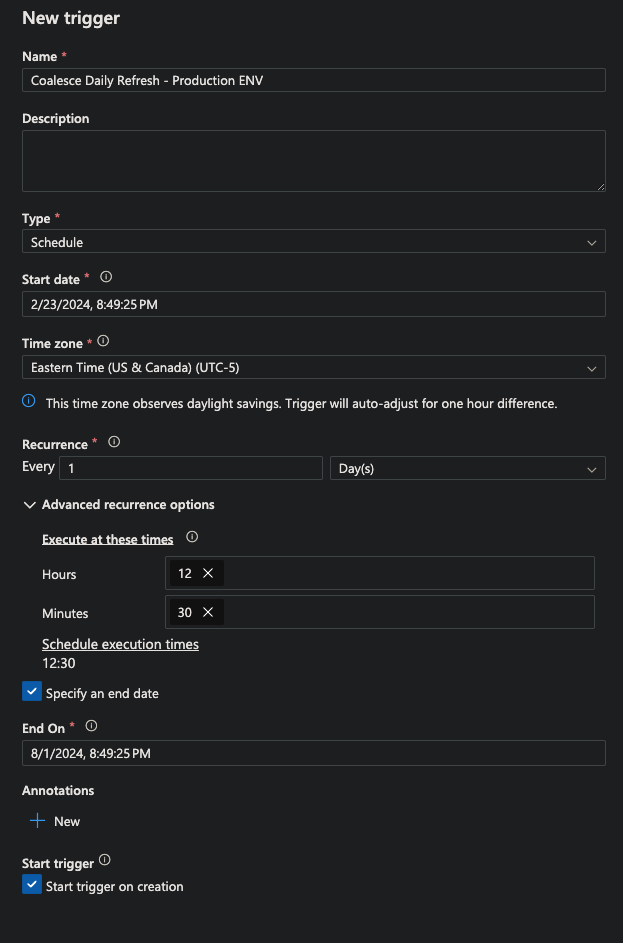
Input the desired cadence and times that you want to trigger the refresh for, or select from any previously selected cadences. See the example below.
-
Click Ok.
You have now successfully created and scheduled a Coalesce Environment Refresh with Azure Data Factory.