Refreshing Your Data Pipeline Jobs
What Is Refresh?
Refresh is responsible for running the data transformations defined in your data warehouse metadata. This typically involves DML (Data Manipulation Language) SQL statements such as MERGE, INSERT, UPDATE, and TRUNCATE which will perform transformations on the actual data. Use refresh when you want to update your pipeline with any new changes from your data warehouse. To only refresh a subset of data, use Jobs.
What Are Jobs?
Jobs are a subset of nodes, created by the selector query, that are run during a refresh.
Before You Begin
You'll need to get an authentication token to run refreshes. They can run using the Trigger Job to Run API or using refresh with the CLI. Review the steps in Connecting to the API.
You can only refresh if you've deployed your pipeline.
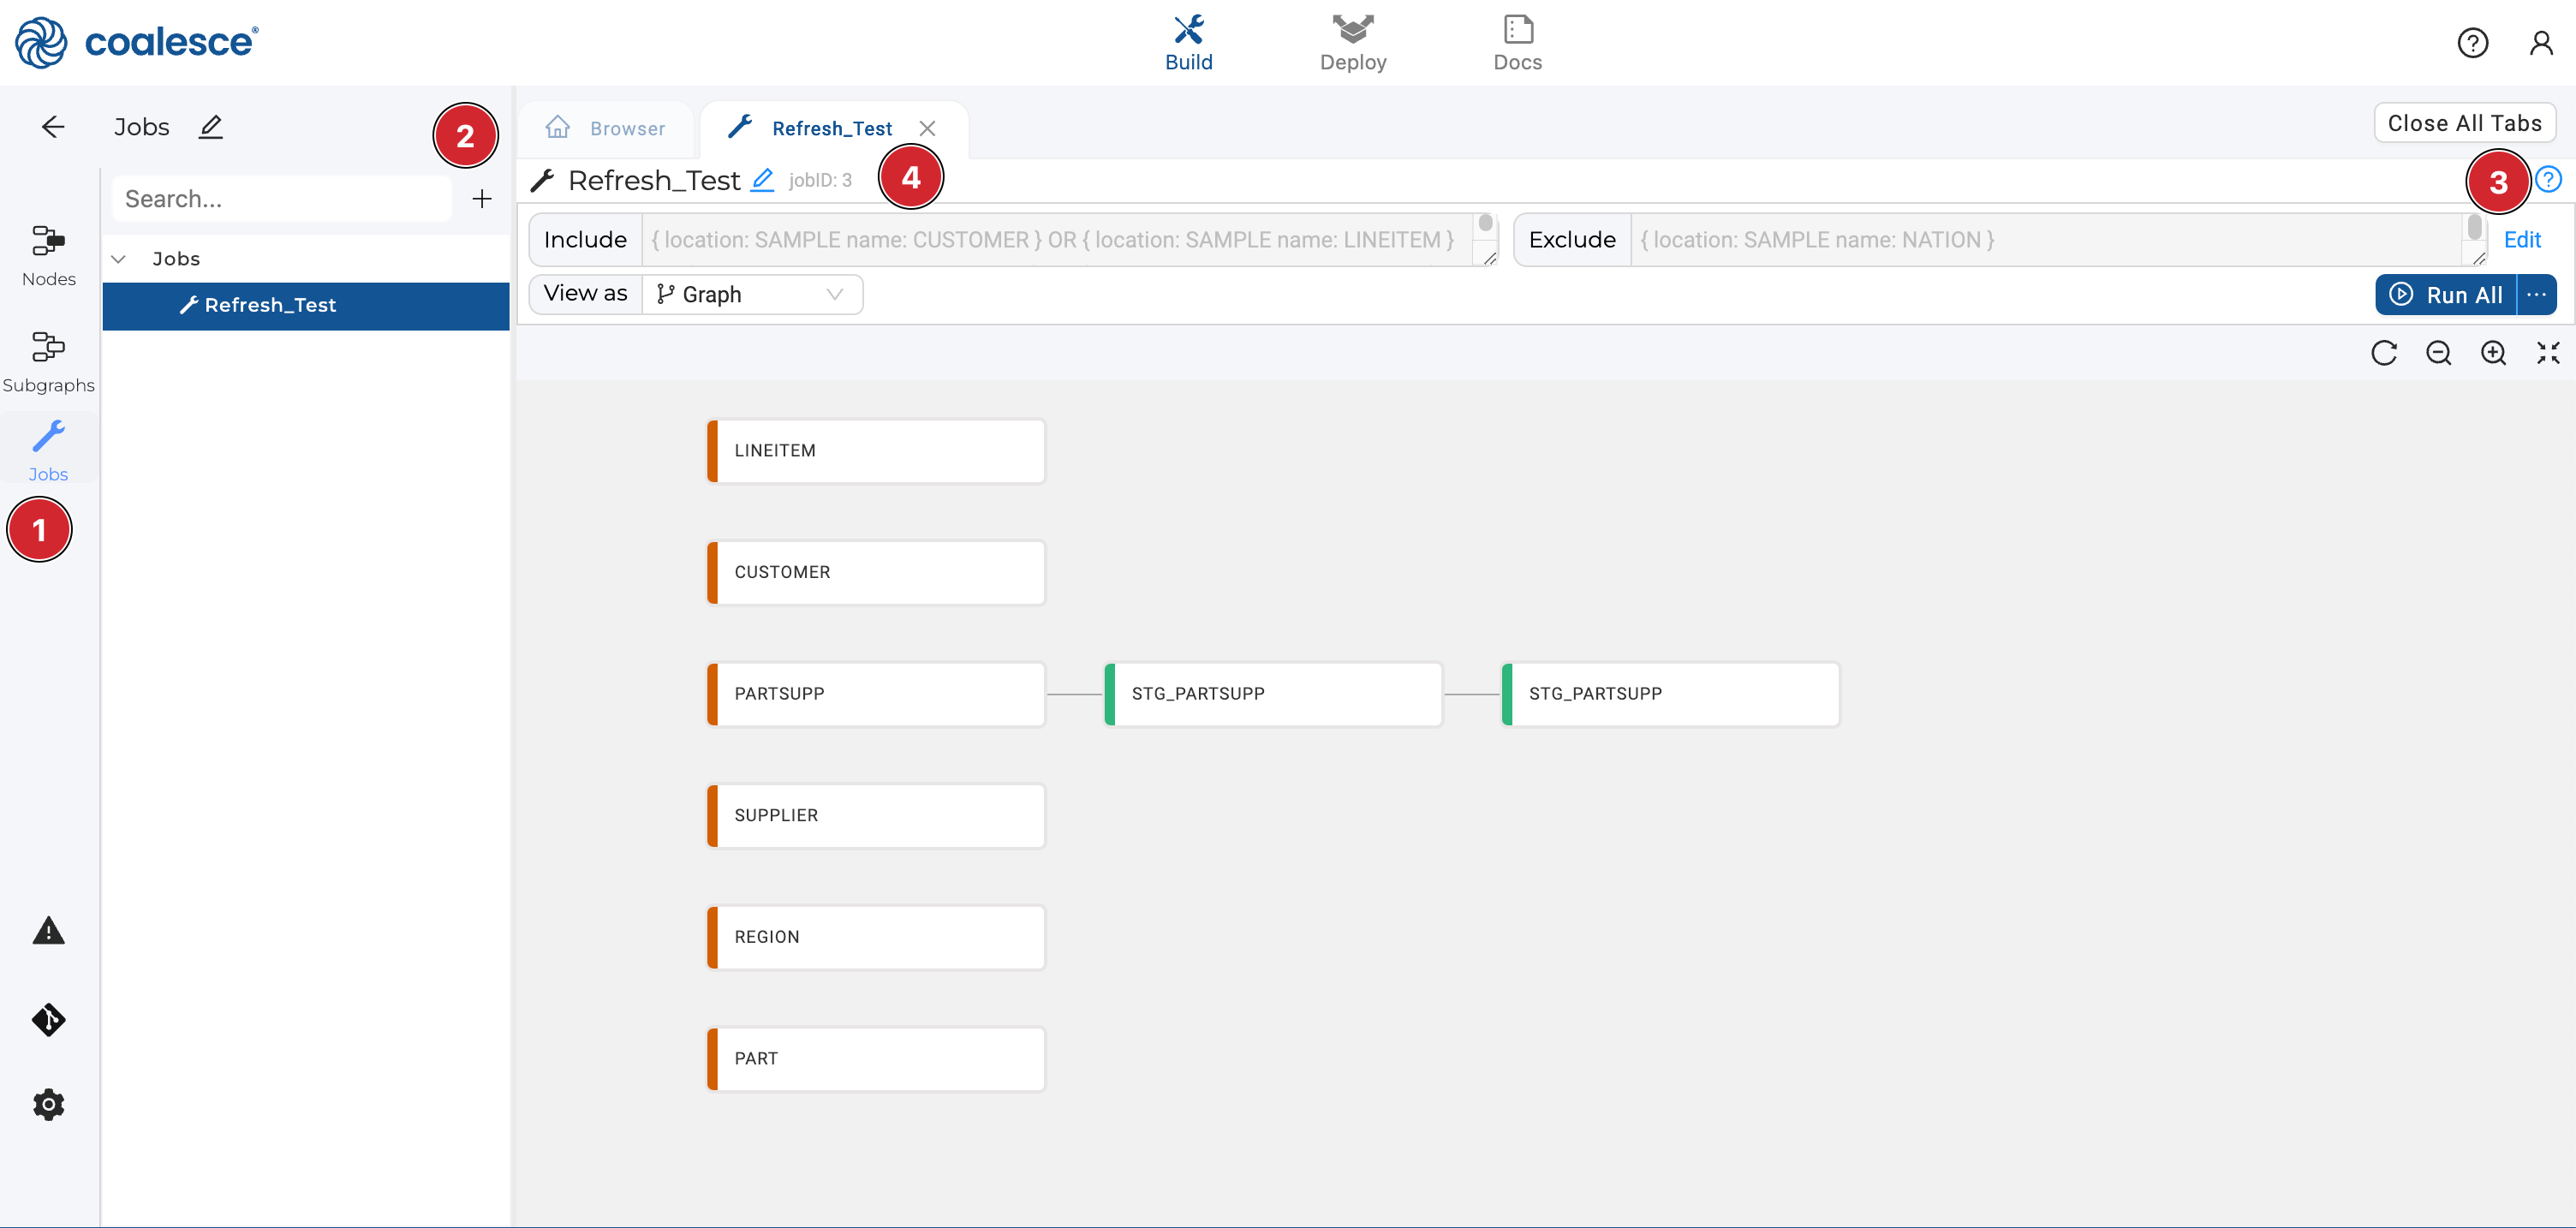
Step 1: Create a Job
- Go to Jobs in the Build sidebar.
- Select the + sign to create a new Job.
- Select Edit to add selector queries. Selector queries allow you to select a subset of Nodes to be refreshed.
- Take note of your Job ID. In this example it's
jobID: 3. You'll need the Job ID to run it as part of the refresh.
Step 2: Commit Your Job
Jobs need to be committed into git and deployed to an environment before they can be used. You can read more about making commits in our Git Integration article.

Step 3: Configure Your Environment
Go to Build Settings > Environments and check that the environment you want to refresh is configured. It should have:
Step 4: Deploy Your Pipeline
Jobs can only be run if they have been deployed first. Review our Deployment Overview to learn different ways to deploy your pipeline.
Step 5: Run Your Jobs
Use the API or CLI to run a Job.
API
Jobs can be triggered with the Start Job endpoint. Trigger Job to Run. By only passing the environmentID and leaving the jobID out, you can refresh the entire environment. You can also use the excludeNodesSelector and includeNodesSelector to override the Jobs created. To avoid setting the selectors manually each run, we recommend using Jobs to save and manage nodes.
- Run a Job
- Run a one-time Job
- Refresh an entire environment
curl --request POST \
     --url https://app.coalescesoftware.io/scheduler/startRun \
     --header 'Authorization: Bearer YOUR-API-TOKEN' \
     --header 'accept: application/json' \
     --header 'content-type: application/json' \
     --data '
{
  "runDetails": {
    "parallelism": 16,
    "jobID": "4",
    "environmentID": "10"
  },
  "userCredentials": {
    "snowflakeAuthType": "Basic",
    "snowflakeRole": "ACCOUNTADMIN",
    "snowflakeWarehouse": "COMPUTE_WH",
    "snowflakeUsername": "SOMEUSER",
    "snowflakePassword": "SOMEPASS"
  }
}
'
You can also the excludeNodesSelector and includeNodesSelector to run a one-time Job. Leave out the jobID.
curl --request POST \
     --url https://app.coalescesoftware.io/scheduler/startRun \
     --header 'Authorization: Bearer YOUR-API-TOKEN' \
     --header 'accept: application/json' \
     --header 'content-type: application/json' \
     --data '
{
  "runDetails": {
    "parallelism": 16,
    "includeNodesSelector": "{ location: SAMPLE name: CUSTOMER } OR { location: SAMPLE name: LINEITEM } OR { location: SAMPLE name: NATION } OR { location: SAMPLE name: ORDERS } OR { location: SAMPLE name: PART } OR { location: SAMPLE name: PARTSUPP } OR { location: SAMPLE name: REGION } OR { location: SAMPLE name: SUPPLIER } OR { location: QA name: STG_PARTSUPP } OR { location: PROD name: STG_PARTSUPP }",
    "environmentID": "10"
  },
  "userCredentials": {
    "snowflakeAuthType": "Basic",
    "snowflakeRole": "ACCOUNTADMIN",
    "snowflakeWarehouse": "COMPUTE_WH",
    "snowflakeUsername": "SOMEUSER",
    "snowflakePassword": "SOMEPASS"
  }
}
Leave out the jobID and selectors to refresh an entire environment.
curl --request POST \
     --url https://app.coalescesoftware.io/scheduler/startRun \
     --header 'Authorization: Bearer YOUR-API-TOKEN' \
     --header 'accept: application/json' \
     --header 'content-type: application/json' \
     --data '
{
  "runDetails": {
    "parallelism": 16,
    "environmentID": "10"
  },
  "userCredentials": {
    "snowflakeAuthType": "Basic",
    "snowflakeRole": "ACCOUNTADMIN",
    "snowflakeWarehouse": "COMPUTE_WH",
    "snowflakeUsername": "SOMEUSER",
    "snowflakePassword": "SOMEPASS"
  }
}
'
CLI
Refresh jobs can be triggered using our CLI tool coa using coa refresh. Learn more in our CLI Commands documentation. By only passing the environmentID and leaving the jobID out, you can refresh the entire environment. You can also use the excludeNodesSelector and includeNodesSelector to override the Jobs created. To avoid setting the selectors manually each run, we recommend using Jobs to save and manage nodes.
Make sure to setup your CLI. Review CLI set up.
- Run a Job
- Run a one-time Job
- Refresh an entire environment
This example assumes you are using a coa config file.
coa refresh --environmentID 1 --jobID 4
You can also the excludeNodesSelector and includeNodesSelector to run a one-time Job. Leave out the jobID.
coa refresh --environmentID 1 --include '{ location: SAMPLE name: CUSTOMER } OR { location: SAMPLE name: LINEITEM } OR { location: SAMPLE name: NATION } OR { location: SAMPLE name: ORDERS } OR { location: SAMPLE name: PART } OR { location: SAMPLE name: PARTSUPP } OR { location: SAMPLE name: REGION } OR { location: SAMPLE name: SUPPLIER } OR { location: QA name: STG_PARTSUPP } OR { location: PROD name: STG_PARTSUPP }'
Leave out the jobID and selectors to refresh an entire environment.
coa refresh --environmentID 1
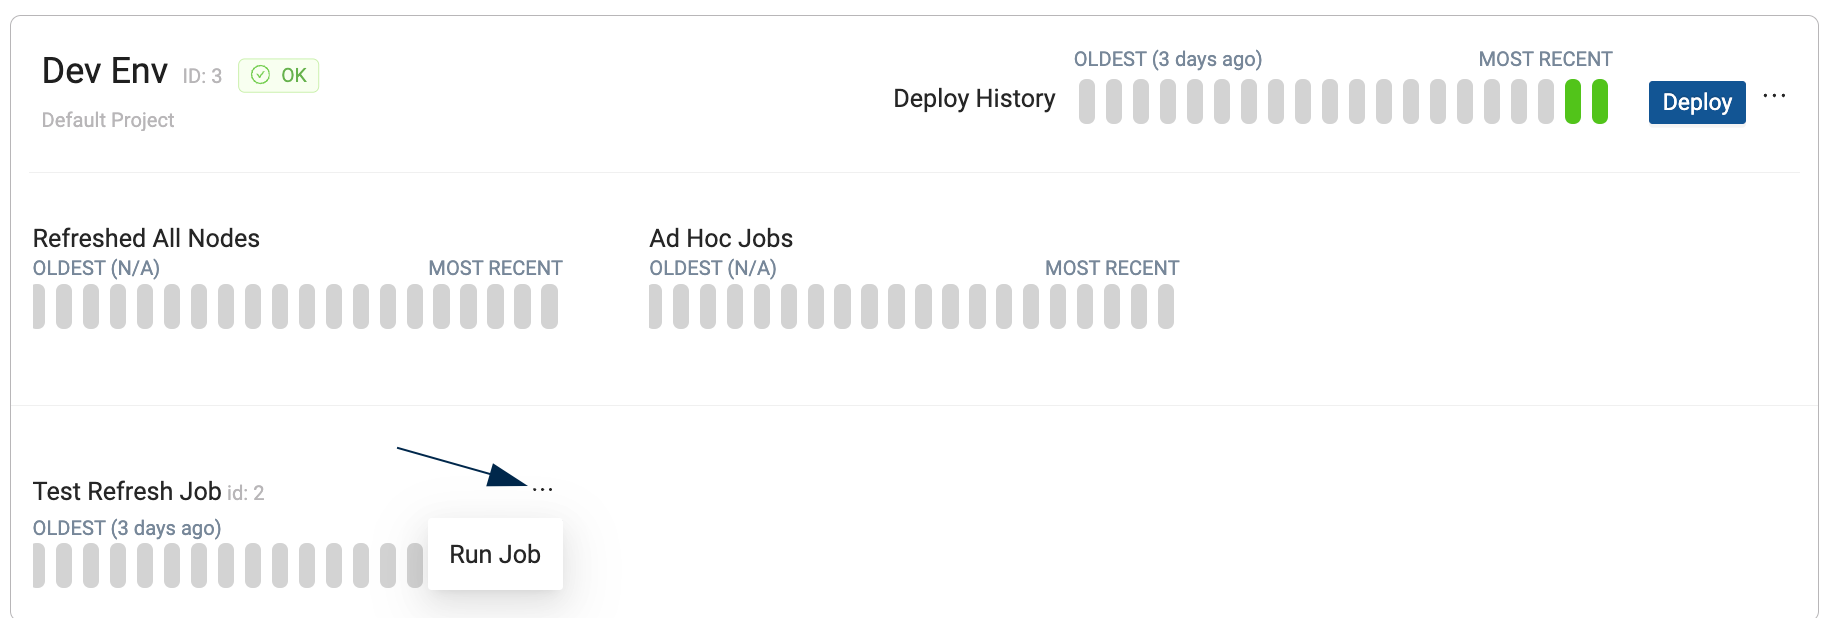
Coalesce App
Only existing, deployed Jobs can be run from the Coalesce App.
Go to the Deploy page, and next to each deploy, click on the menu, and select Run Job.
Edit Jobs
- Jobs can also be modified by dragging and dropping Nodes or Subgraphs into the include/exclude text boxes, while on the Graph, Node Grid, or Column Grid of a Job.
- Nodes can only be removed from the Job by modifying the include/exclude query.
- Right click each Job for more options.
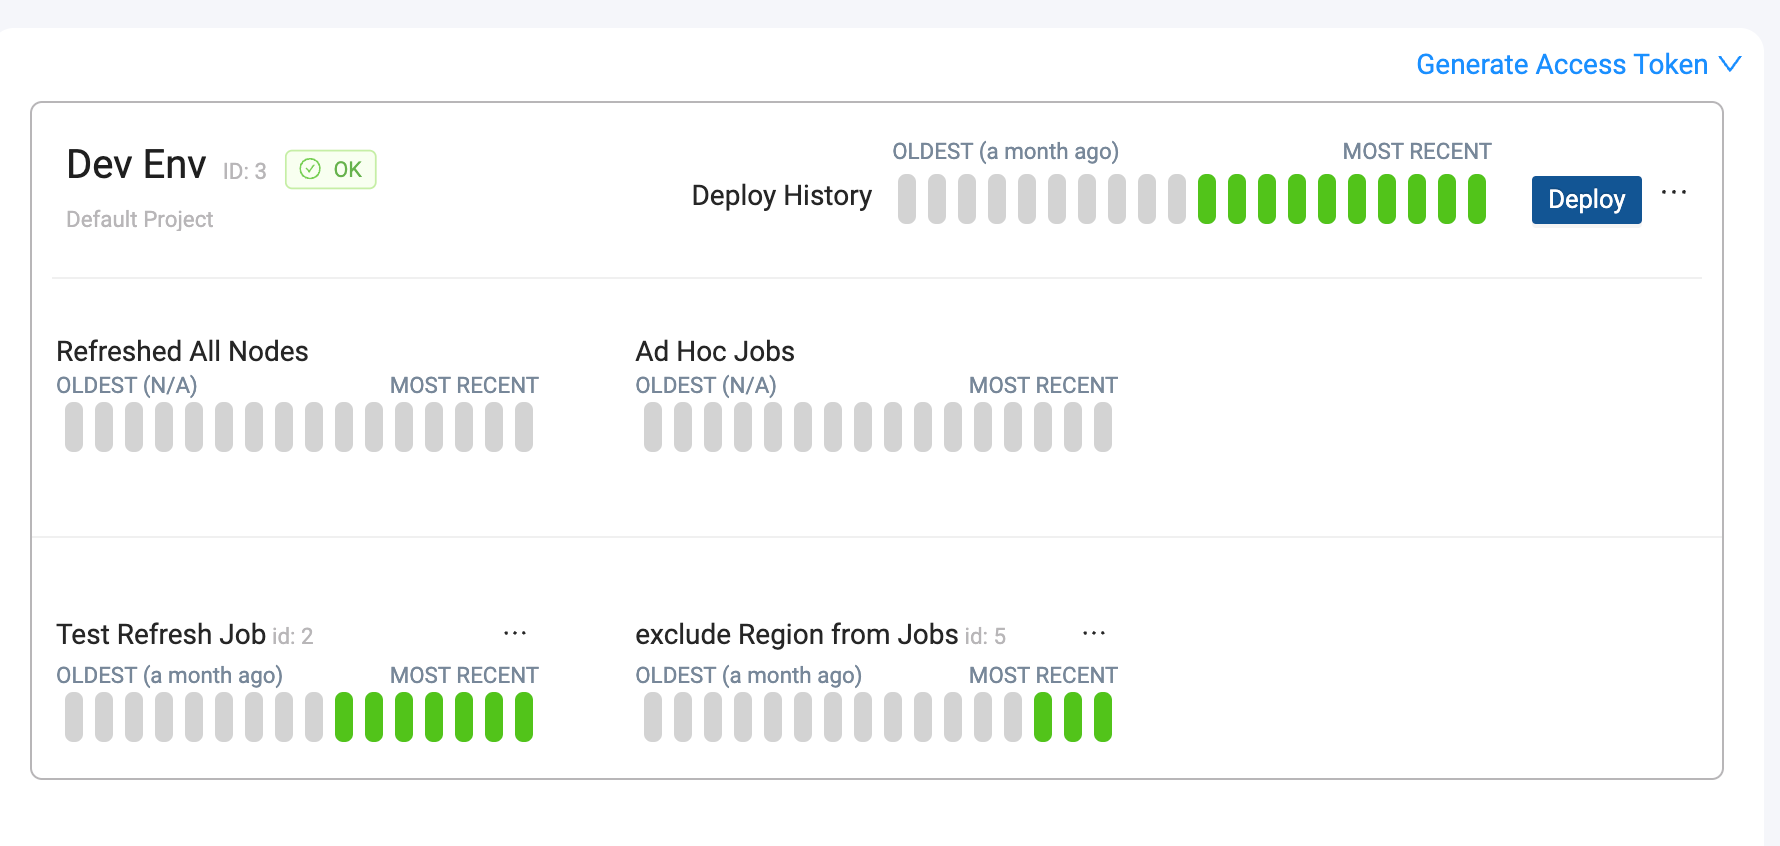
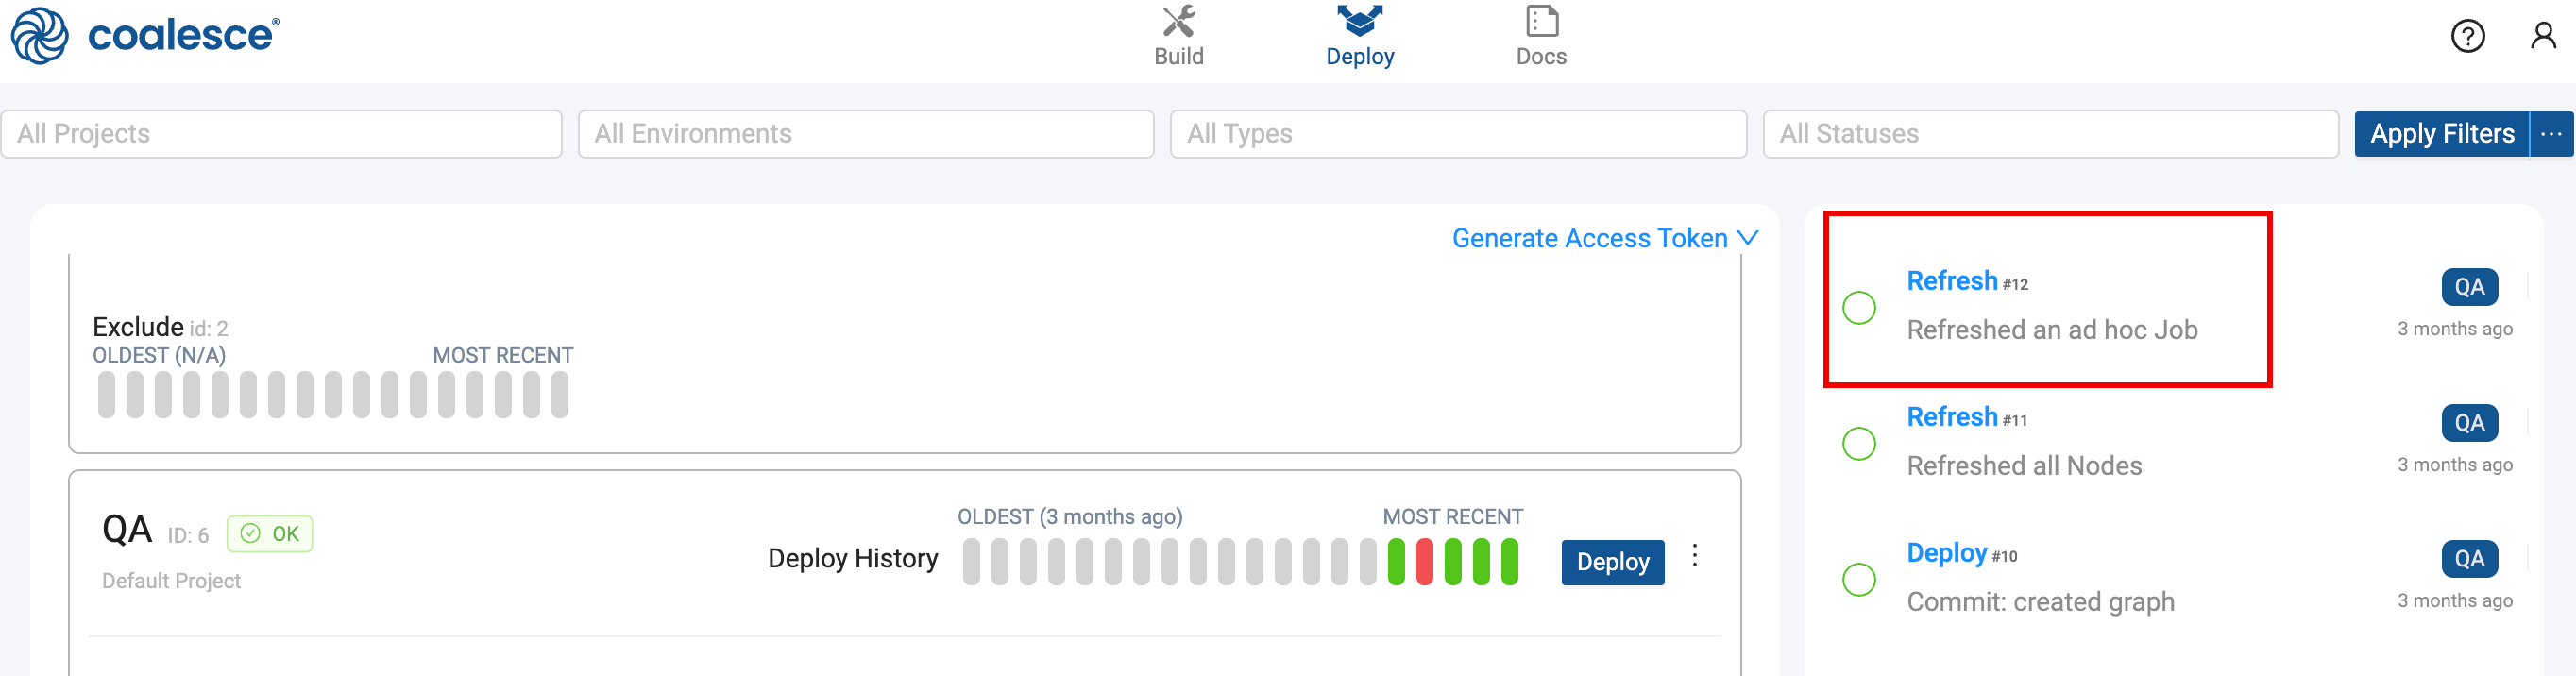
Refresh Status
You can review the refresh or job status by:
-
Going to the run in Coalesce App and clicking on the Refresh.
-
If you're using the CLI, adding the
--outflag to print the results in JSON format. -
Using the API, use Get Job Status, with the runID. The runID is returned when the job is run.
- runStatus - Status of the run.
- runType - If the run was a deploy or refresh.
- runLink - Link to the run documentation.
Job Scheduling
Jobs can be run at set time intervals using a scheduler. See our article on Scheduling for details and examples.
Re-run a Job
You can a rerun an existing Job using the API or CLI.
- CLI - Can re-run Nodes, starting at the point of failure. Use the
refreshcommands.coa rerun <runID>. - API - Can re-run Nodes, starting at the point of failure. Use the Rerun a Job endpoint.
- Coalesce App - Starts a new run each time. Doesn't run previously failed job.
Refreshed All Nodes and Ad Hoc Jobs
| Name | Job ID | Method | Description |
|---|---|---|---|
| Jobs | Yes | API, CLI, Coalesce Scheduler, Coalesce App | Any Jobs you created in the Coalesce app on the Build page. They have a Job ID and are started using the Coalesce Scheduler, API, Coalesce App, or CLI. |
| Ad-Hoc | None | API or CLI | Jobs that run manually using the API or CLI. They use include and exclude syntax. They aren't created in the app and can be run in addition to existing Jobs. These are standard within Coalesce and can't be removed from the Deploy page. |
| Refreshed All Jobs | None | API or CLI | Refresh all the nodes in your pipeline. They don't use include or exclude syntax. They aren't created in the app and can be run in addition to existing Jobs. These are standard within Coalesce and can't be removed from the Deploy page. |