Git Branches
This guide will go over creating branches and reading the branches tab in the Git Modal.
Branches
When you first open the branch tab, it will show the branch you are currently working on at the top. The Selected Branch will default to the branch you are working in. The drop down will list all available branches. You can only have one branch per Workspace.

The image shows a branch called understanding_commits with commits listed.
- Message - The commit message
- Author - The username of the person who made the commit
- Commit - The commit hash. A unique commit ID to identify the commit.
- Date - When the commit was done
- Used by Workspace - The Workspace the commit is used in.
- Deployed In Environment - The environment the commit was deployed in.
Branch Actions
- Merge Latest - Merge the latest changes from one branch to another. The modal will show which direction the changes are happening.
- Check Out Latest - Create a copy of the branch for you to work on in Coalesce. To make the changes available for everyone you’ll need to commit and push to either the remote main branch or to the remote branch you’re working on.
- Force Checkout - A force checkout means it will checkout any changes made on the remote to your local branch without checking to see if they are compatible. For example, if you made changes to your branch, but run force checkout, it will overwrite the local changes if they differ making it match the remote branch. You could lose local changes, so only use this if you are sure you want to overwrite changes.
- Fetch - Get any changes from the remote. It doesn’t overwrite the changes you’re working on. It’s a good way to get other branches and see what others have been working on or to get the most recent changes to the main branch.
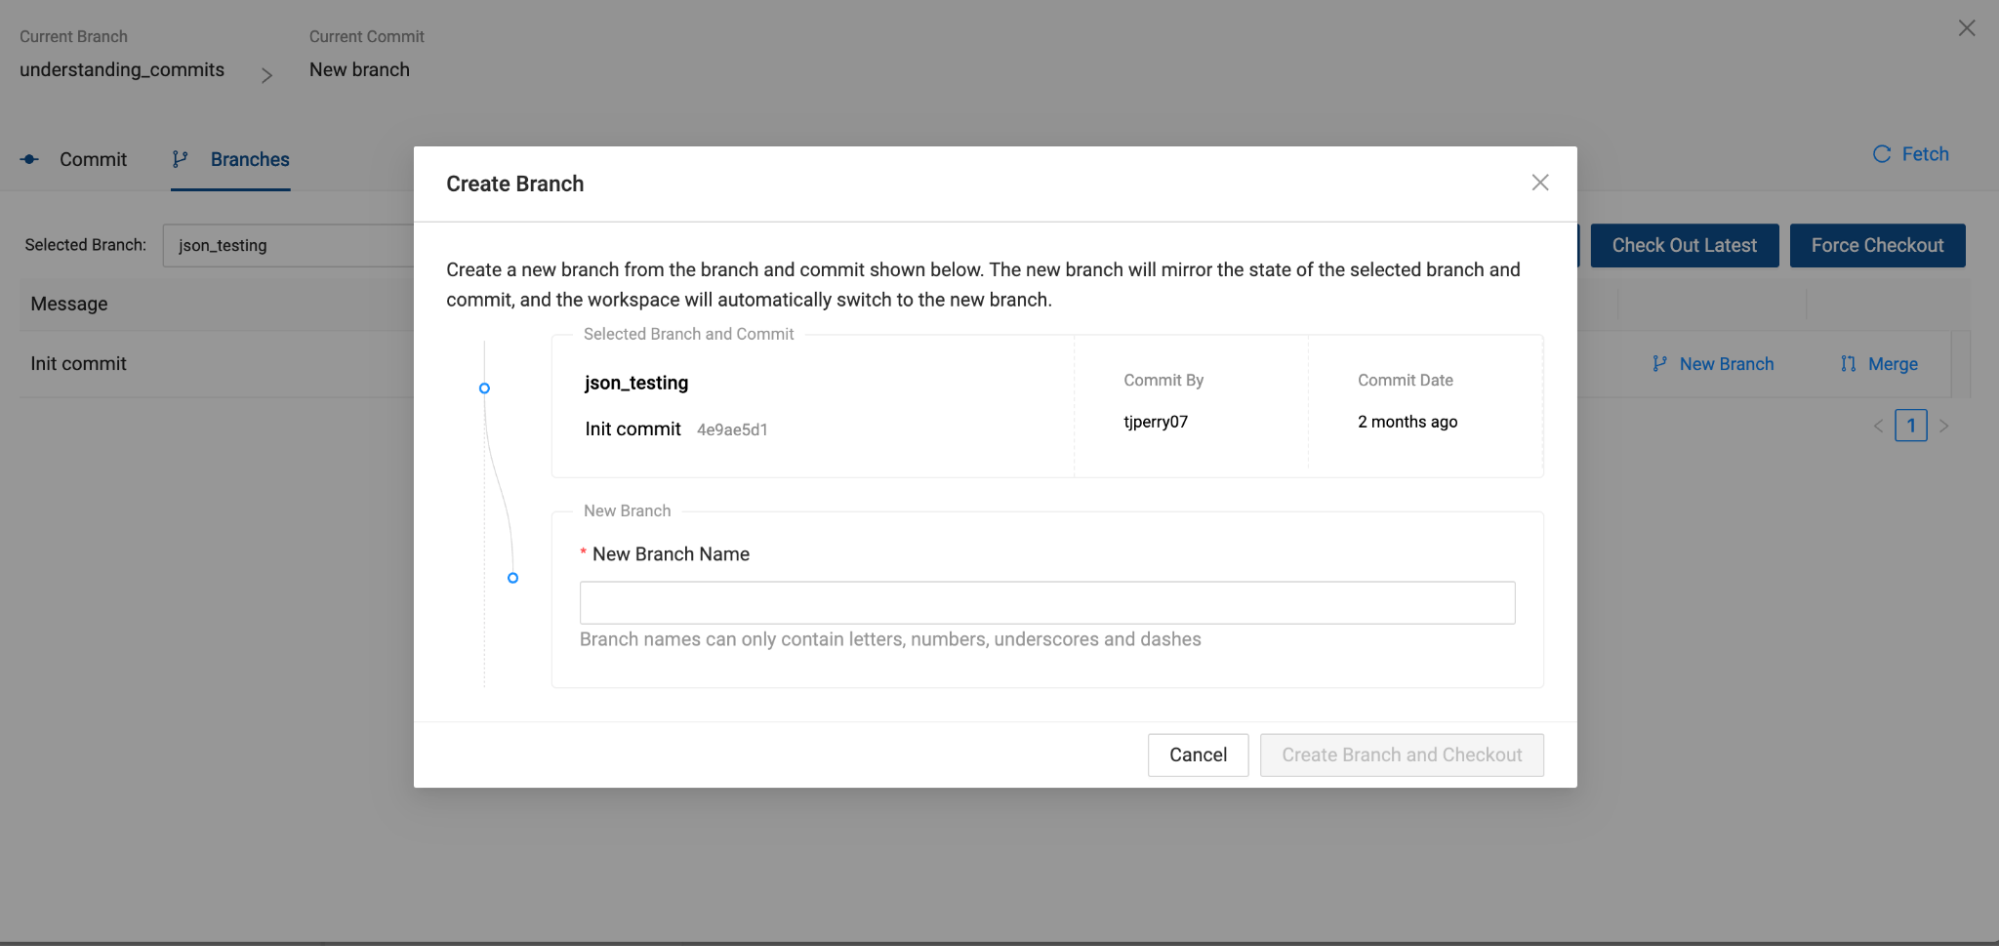
- New Branch - Each commit will have the New Branch option next to it. You can create a new branch from that commit. For example, in our current branch, there are three commits. A commit is a snapshot of the branch at that point in time. If you decide to create a new branch from the Coalesce Automatic Upgrade commit, then that means anything in the New branch won’t be available.
Create a New Branch
To make a new branch, click on the New Branch link on an existing commit, type in a name for it, and a new branch will be created from the current one.

Checkout a Branch
When you create a new branch, you will automatically check it out, but if you'd like to return to another branch, you can do so by selecting the branch from the dropdown and clicking Check Out Latest.
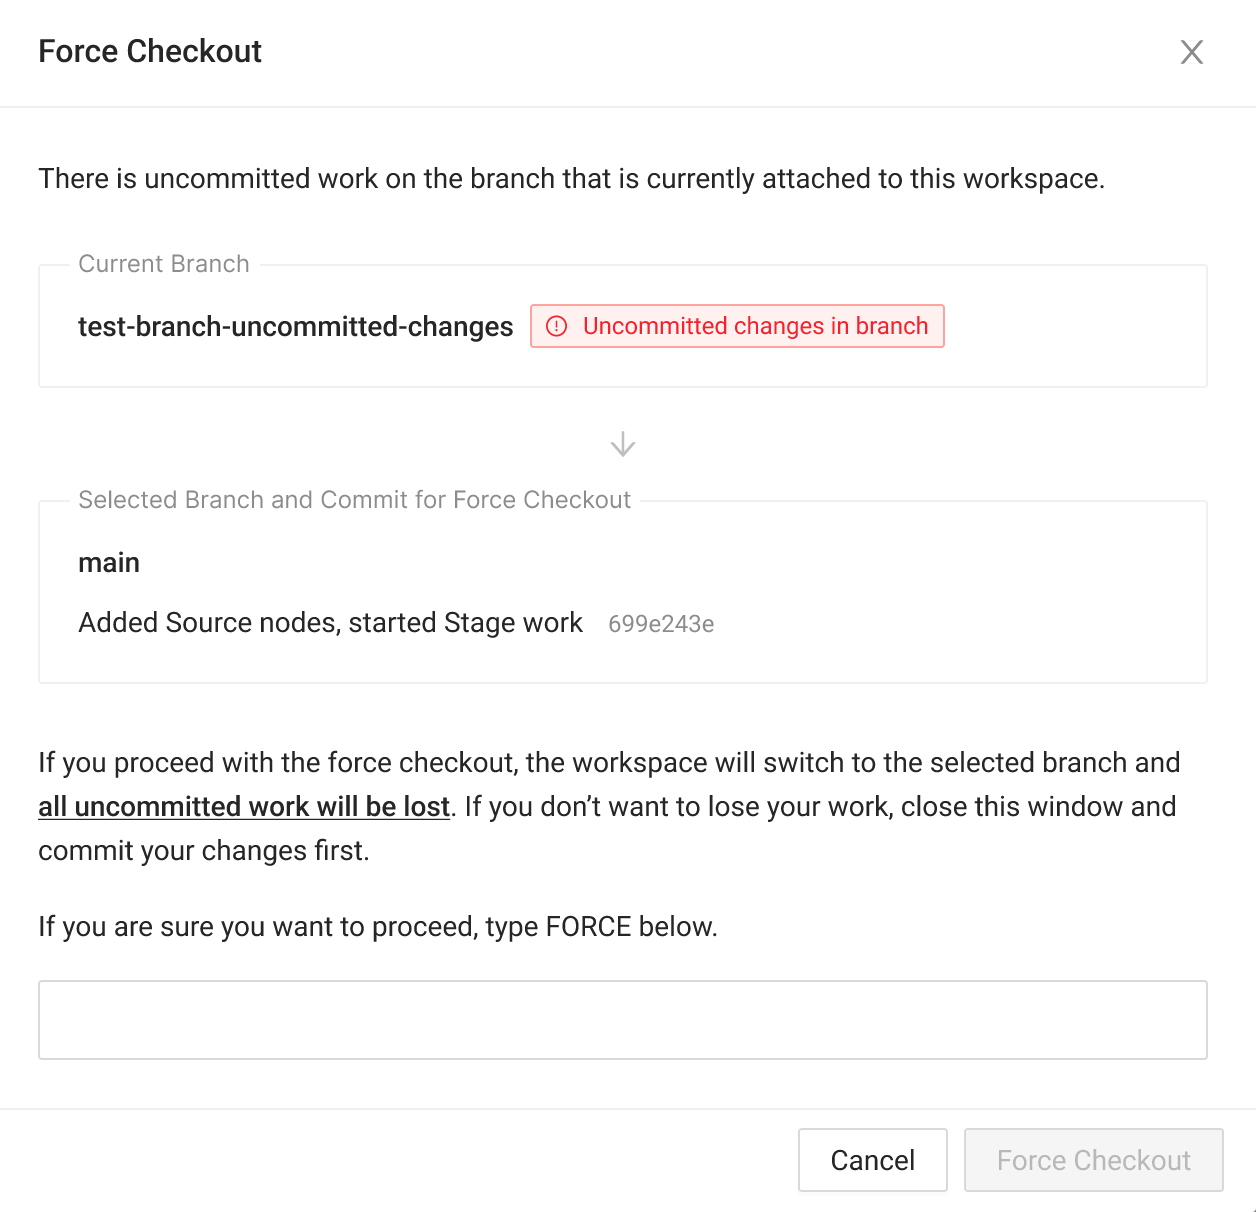
If you haven't committed your latest changes on your current branch, you will receive a warning message uncommitted changes will be moved to the new branch. If you'd like to force the checkout, click Force Checkout. Forcing a checkout to a new branch means you’ll lose any changes you haven’t committed.

Force Checkout
Force checkout lets you switch branches. Only do a force checkout when you want to discard local changes in your current branch and revert to the last committed state of the branch you are checking out. This can be helpful if your current changes are causing issues or if you want to start fresh from the last known good state.
If you have uncommitted changes, you’ll need to confirm you want to proceed. If you have committed your changes, you won’t need to confirm.
Force checkout will permanently delete your uncommitted changes and they can’t be recovered. Commit your changes before proceeding.

Merge Branches
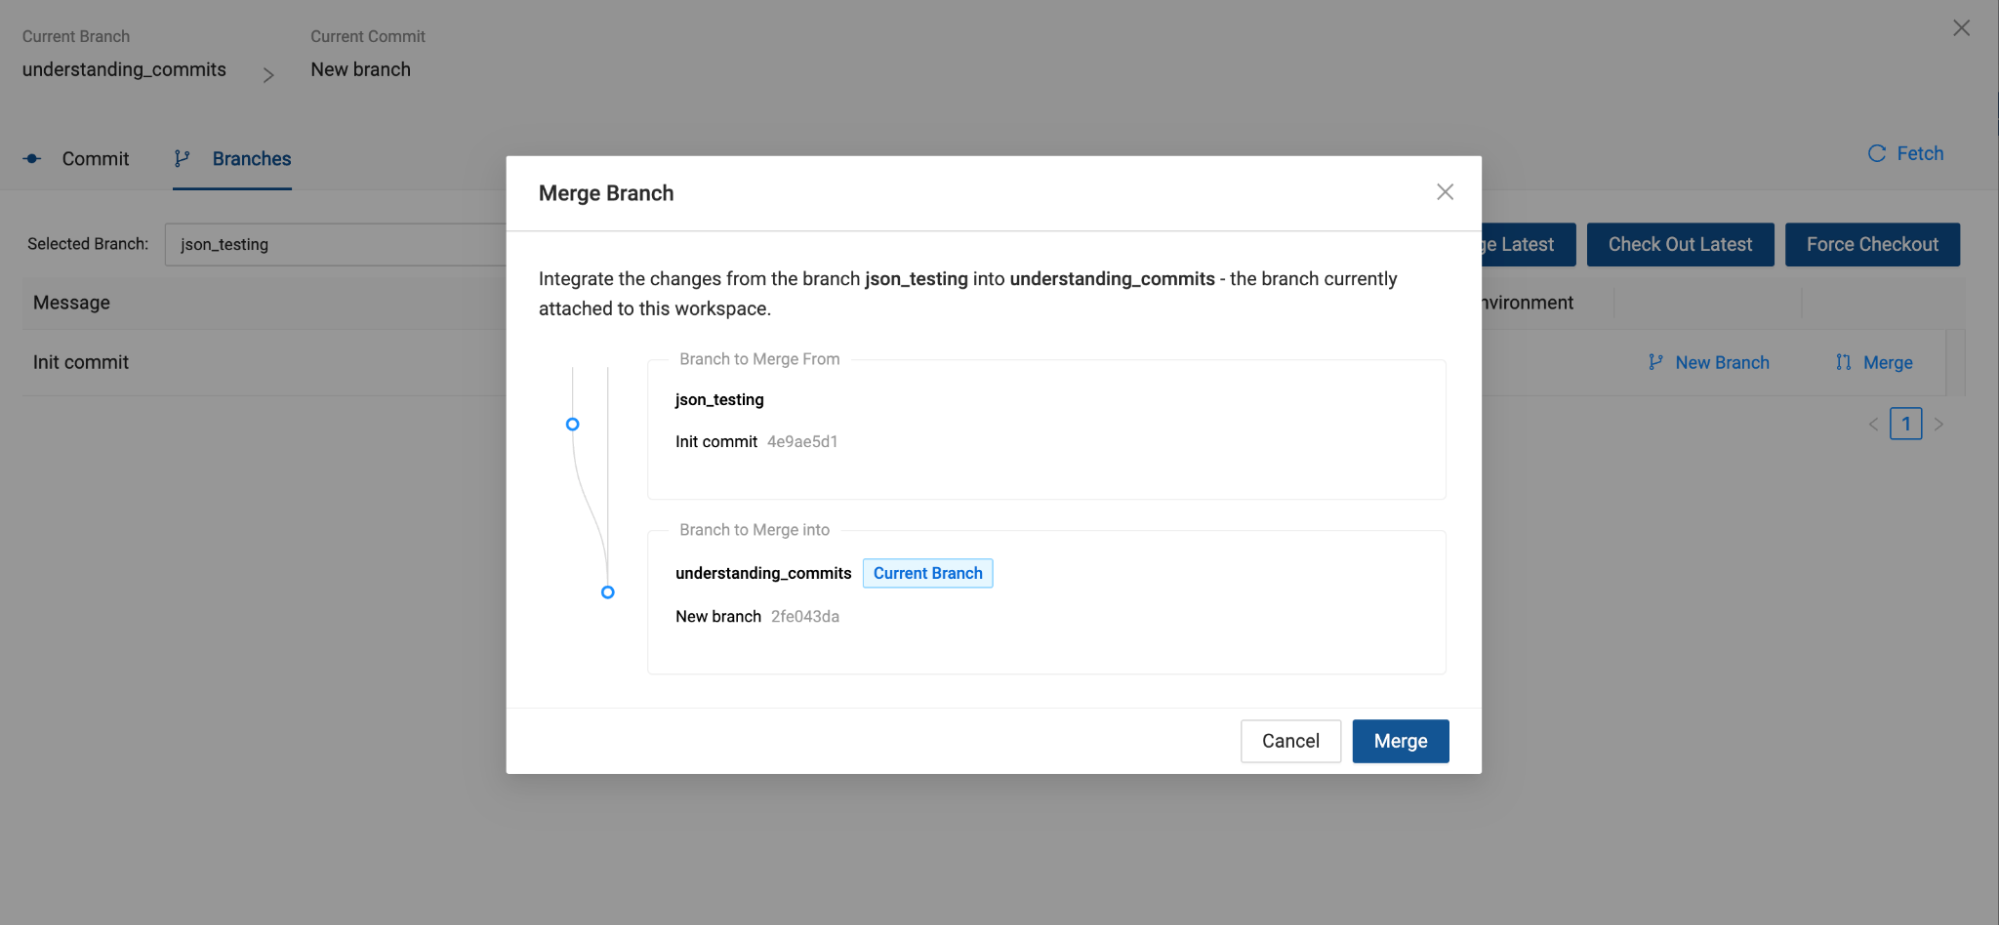
After making changes and making a commit to a branch, you can merge the changes back to another branch.
- Check out your destination branch to make it your Current Branch.
- Select the source branch with the incoming changes from the Selected Branch dropdown.
- Click on Merge Latest or Merge next to the desired commit you would like to merge into the current branch.
All the changes from the Selected Branch will be merged into your Current Branch. If you get an error while trying to merge, review Merge Conflicts.

- Merges are only allowed when there are no uncommitted changes in the target branch. The Merge button is disabled until the changes are either discarded or committed.

Merge and Merge Latest
- Merge will merge all changes and commit history into the branch.
- Merge Latest will only merge the most recent commit into the branch.
Delete Branches
Before deleting a branch, make sure it's no longer needed. This action is irreversible.
Branches can't be deleted within Coalesce, but they can be deleted in your version control provider.
In your Coalesce app, fetch the latest changes after deleting the branch.