Projects
In Coalesce, your work is organized into Projects. It's similar to a folder on your computer that helps organize your work. Projects can be organized by purpose, department, or business area.
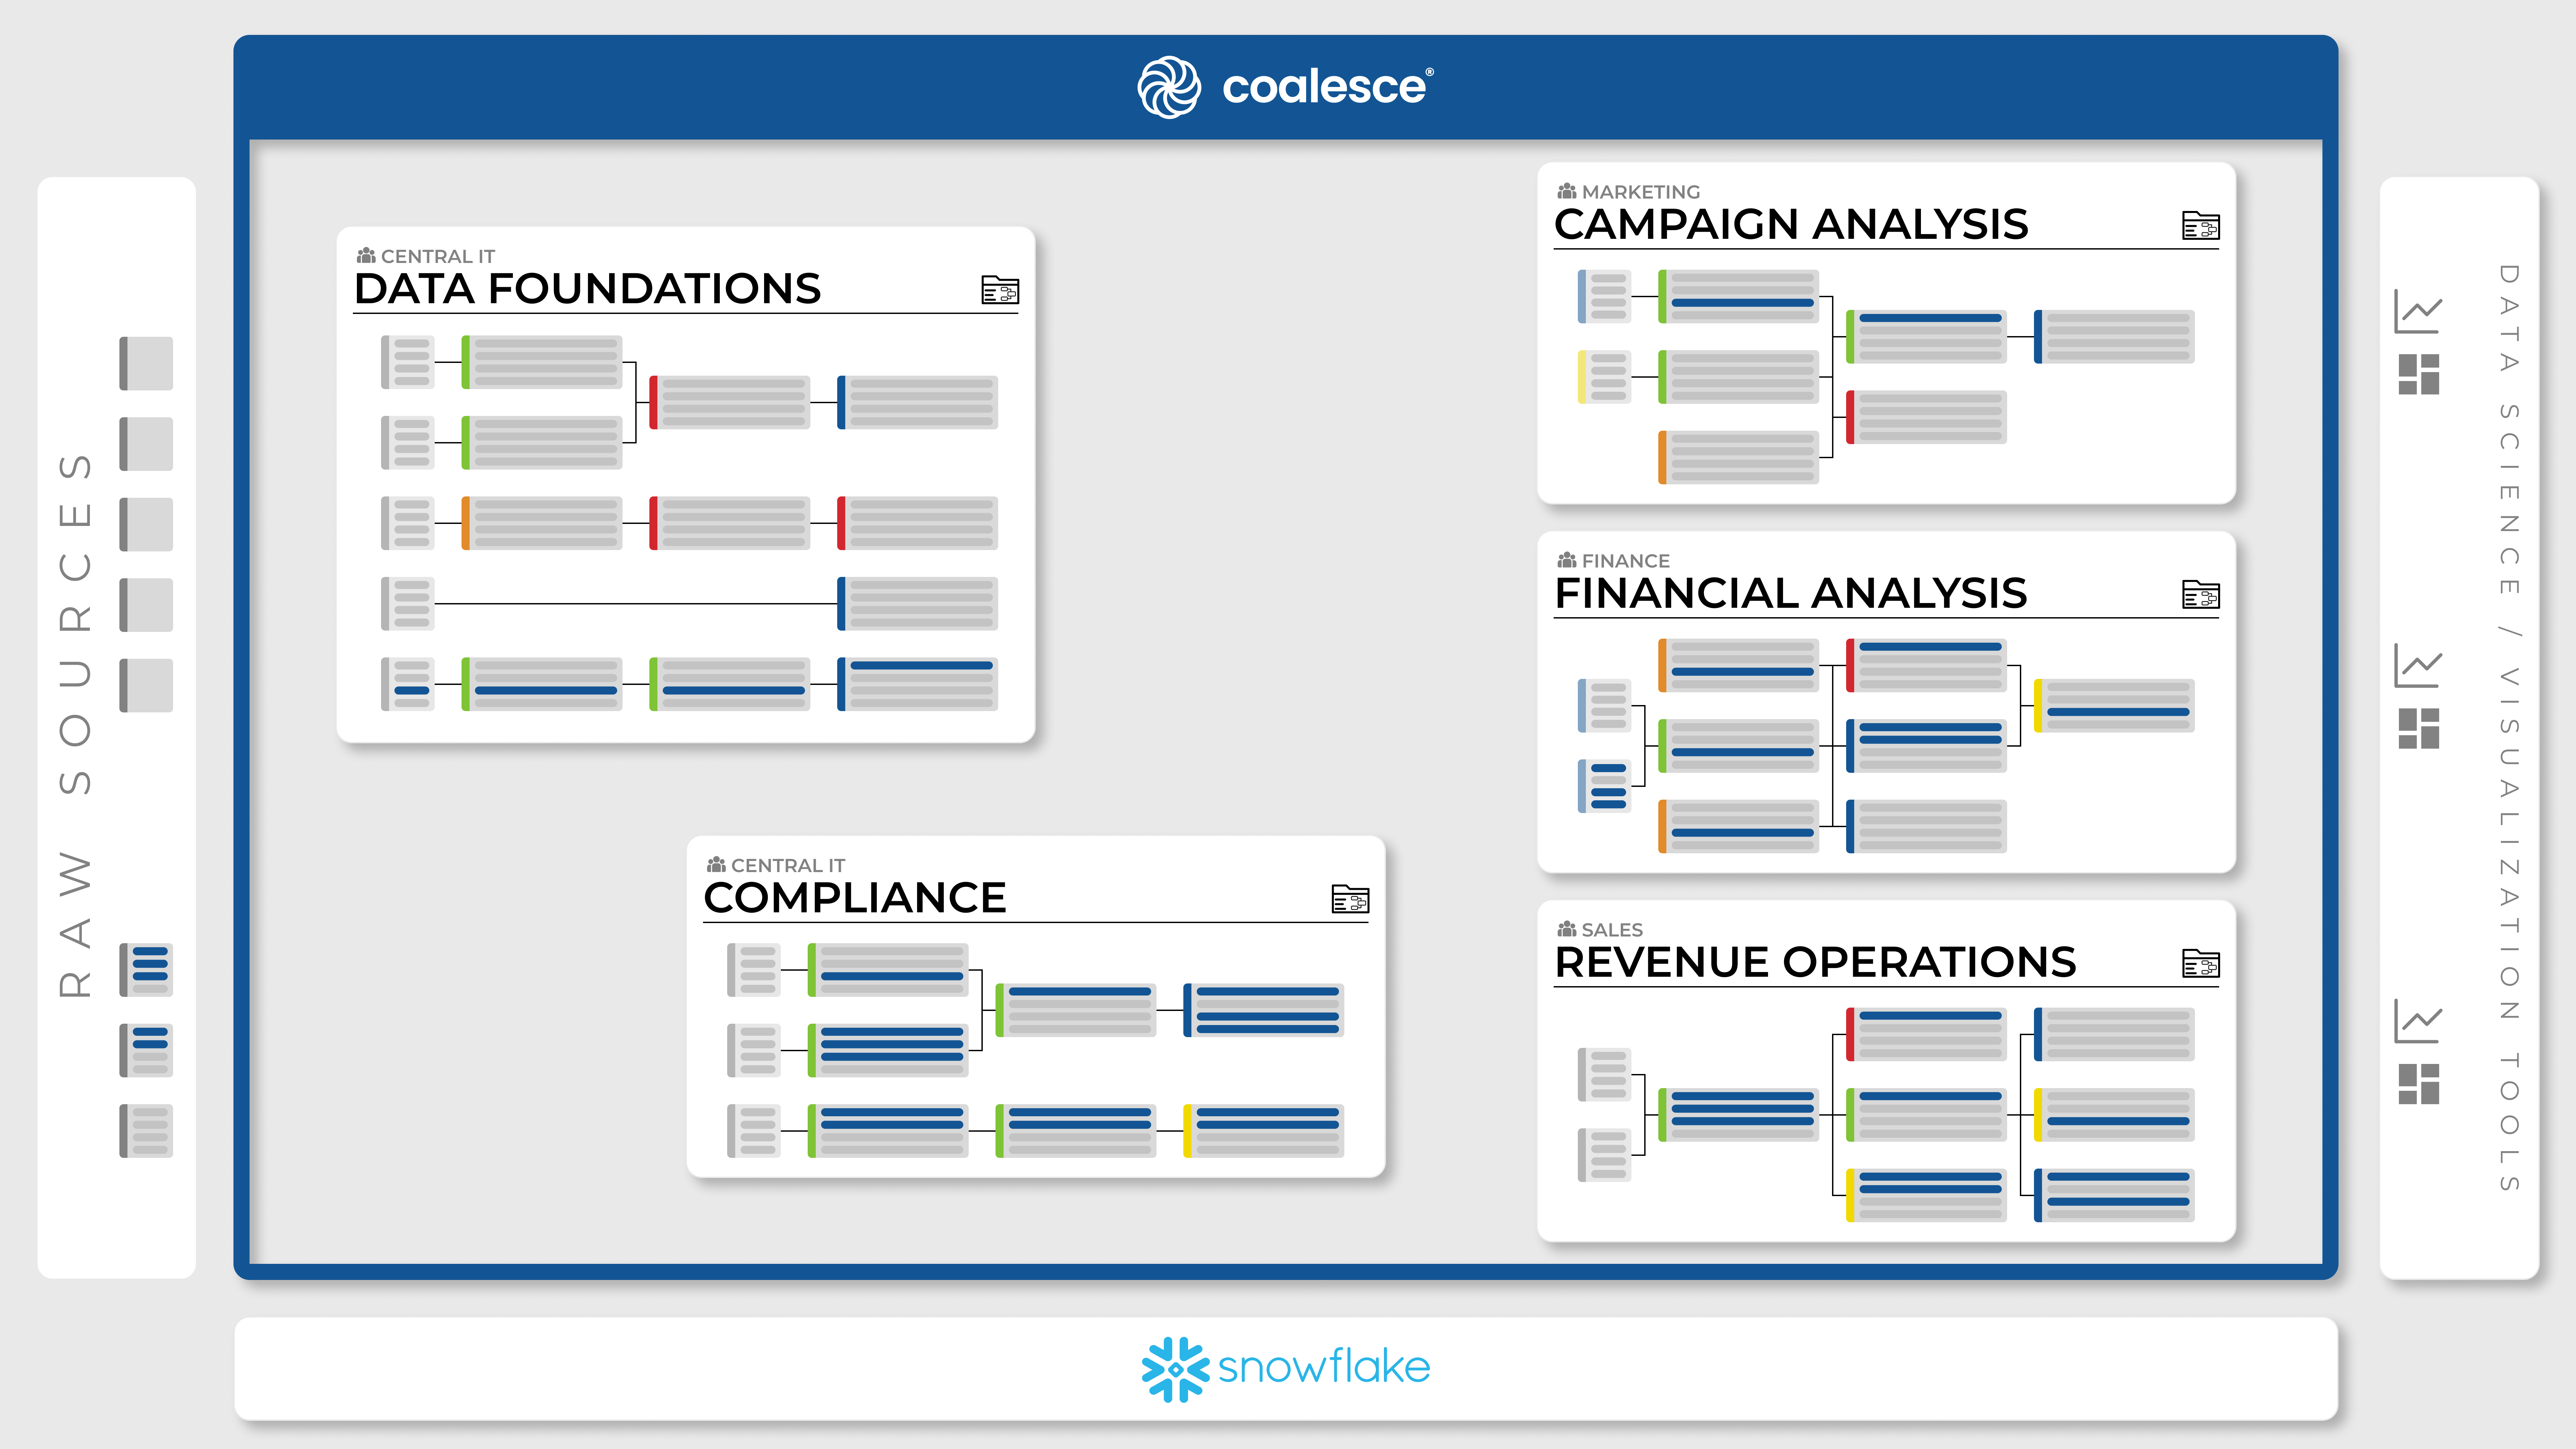
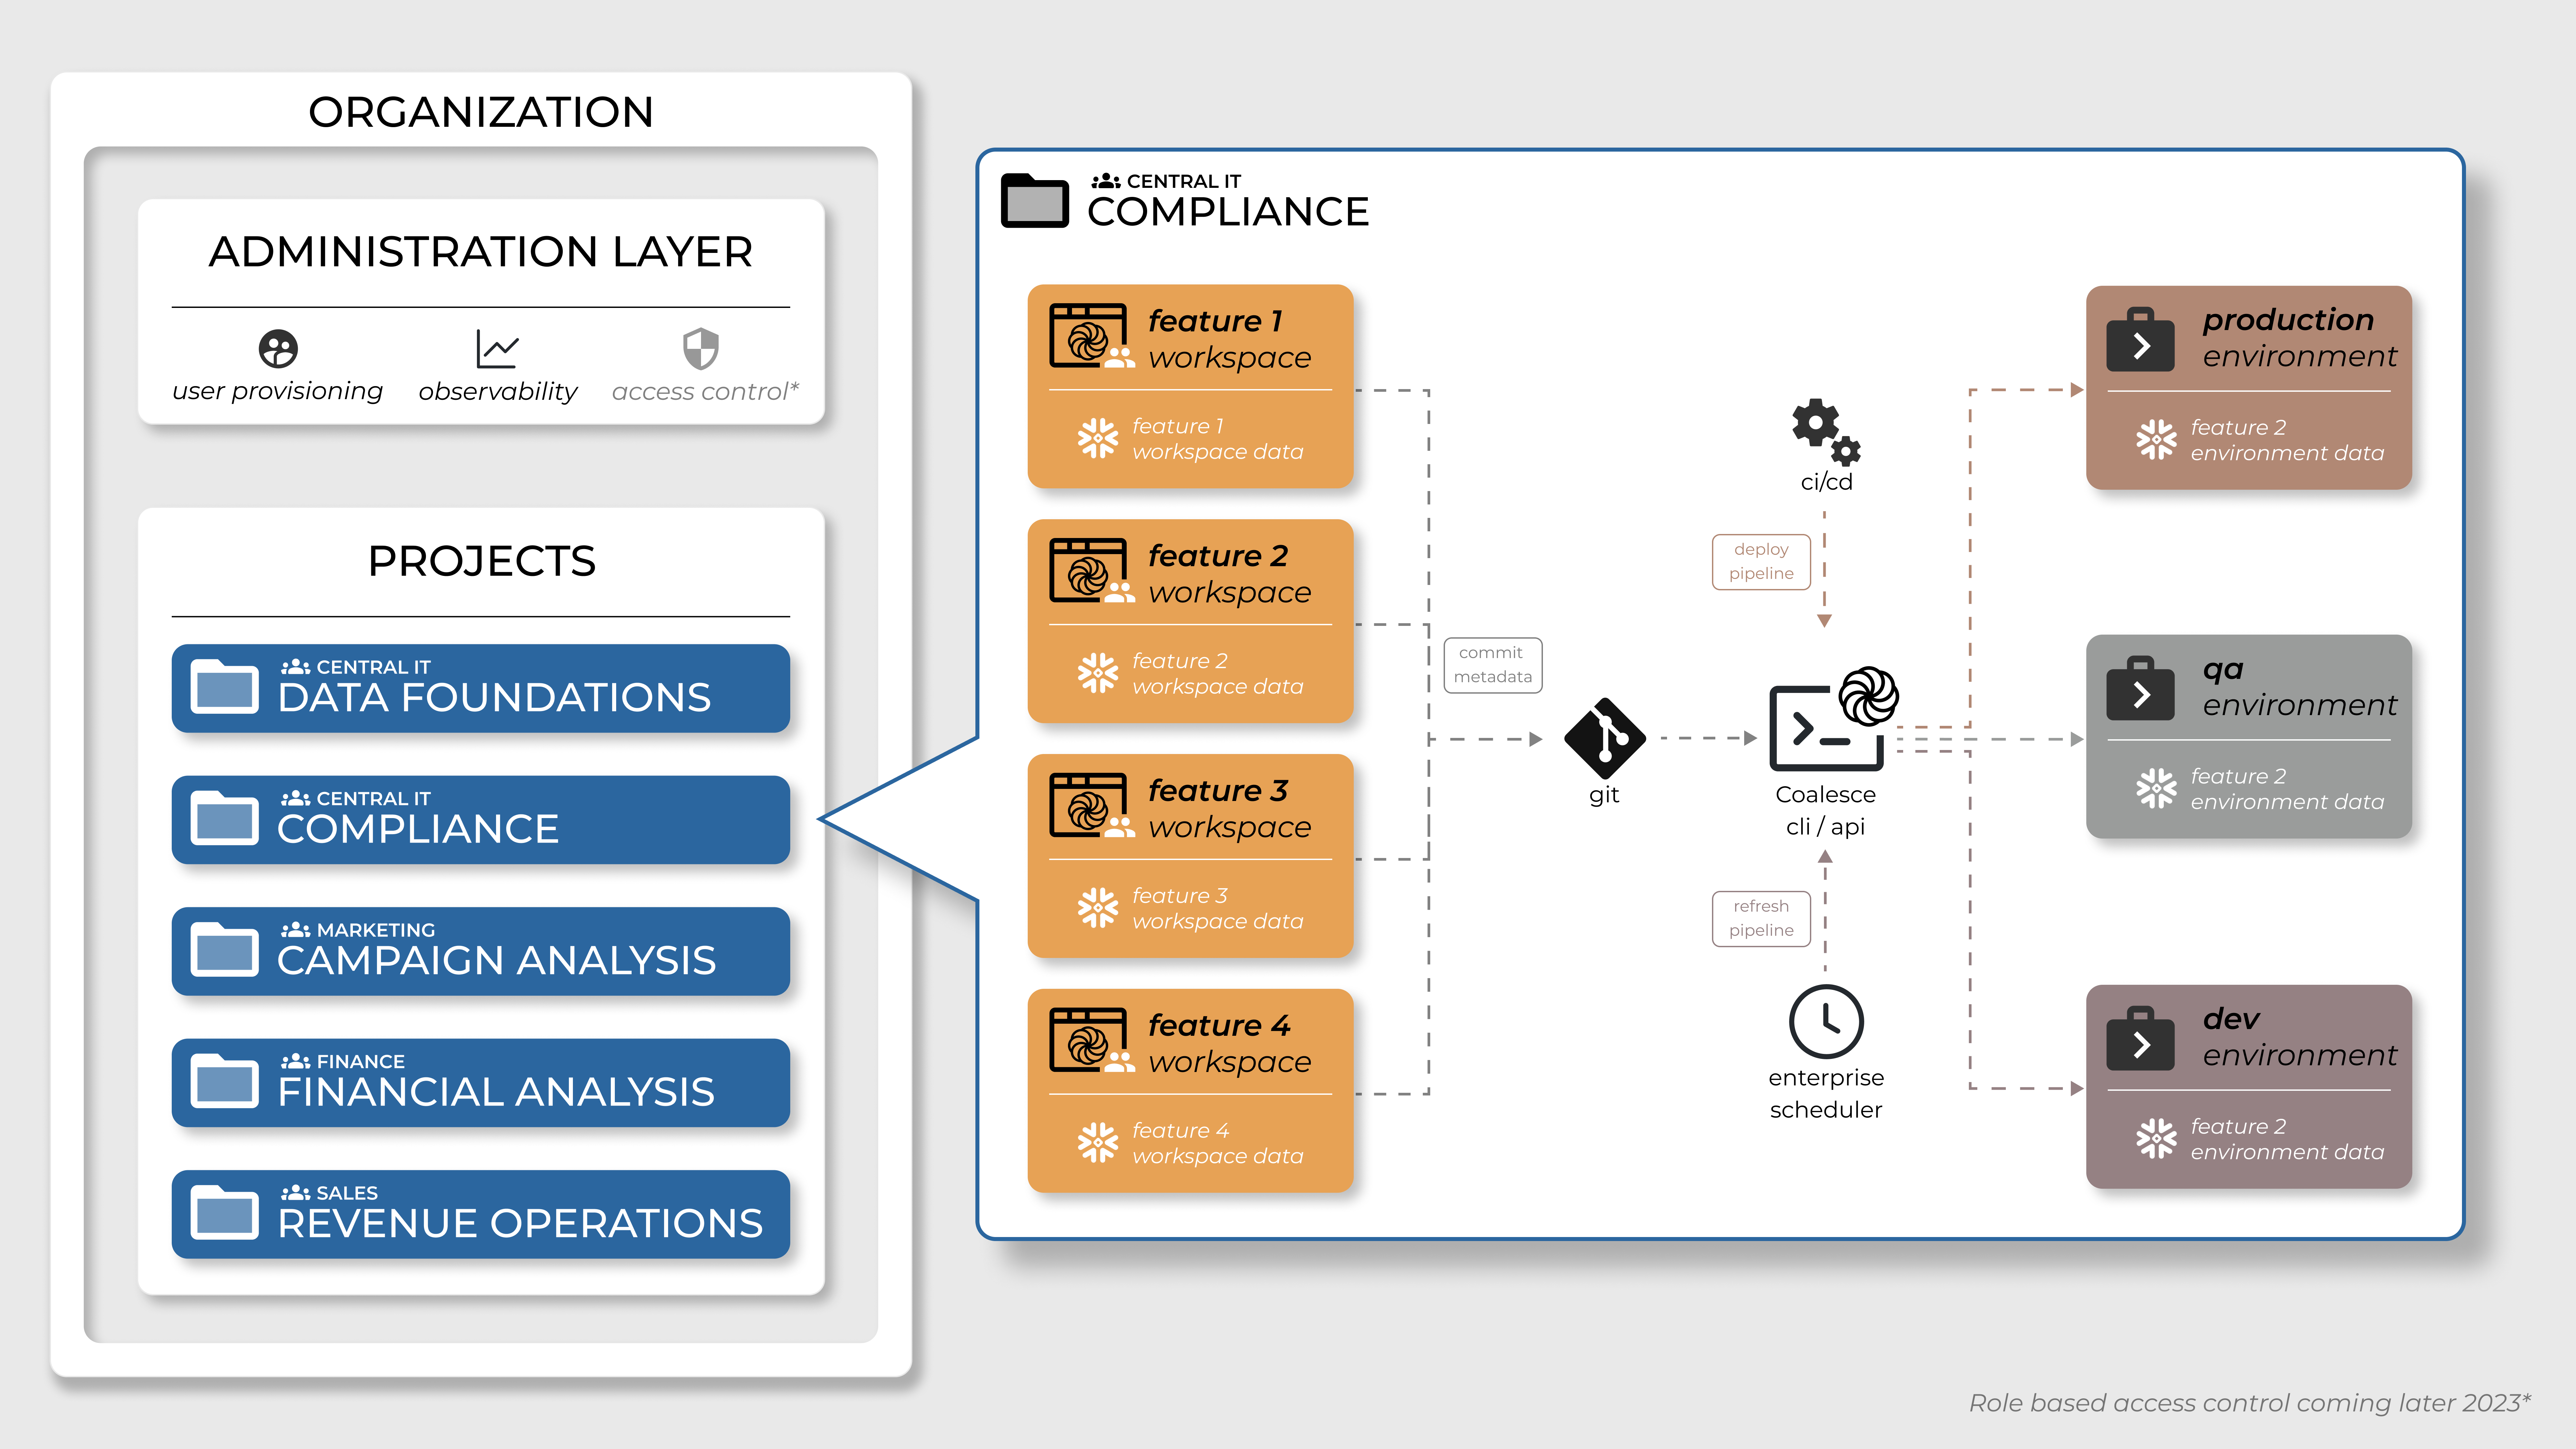
In the following example of a Coalesce Organization that has 5 Projects, Data Foundations, Compliance, Campaign Analysis, Financial Analysis, and Revenue Operations.
Each Project in Coalesce is tied to a single git repository, which allows for easy version control and collaboration. Within a project, you can create one or multiple Development Workspaces, each with its own set of code and configurations.
Each project has its own set of deployable Environments, which can be used to test and deploy code changes to production.
It's a good idea to use one Git repository per project.
Create a New Project
-
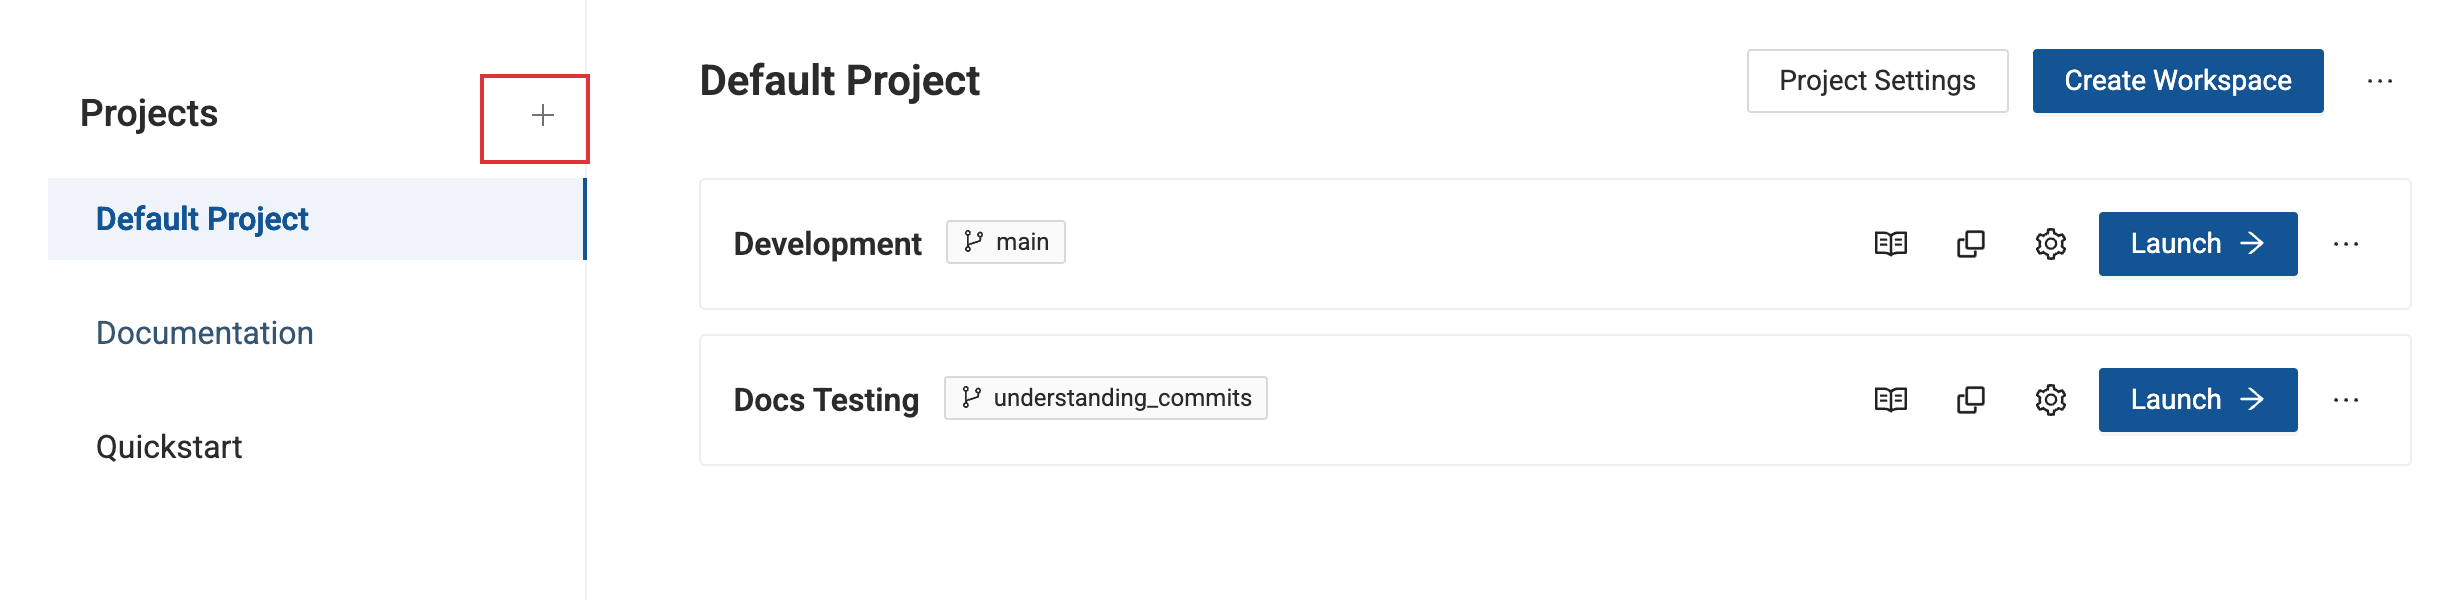
Go to the Project page. If you are on the Build page , click the back arrow.
-
Click the plus sign(+) next to Projects.
-
Enter the Project name and description. Click Next.

-
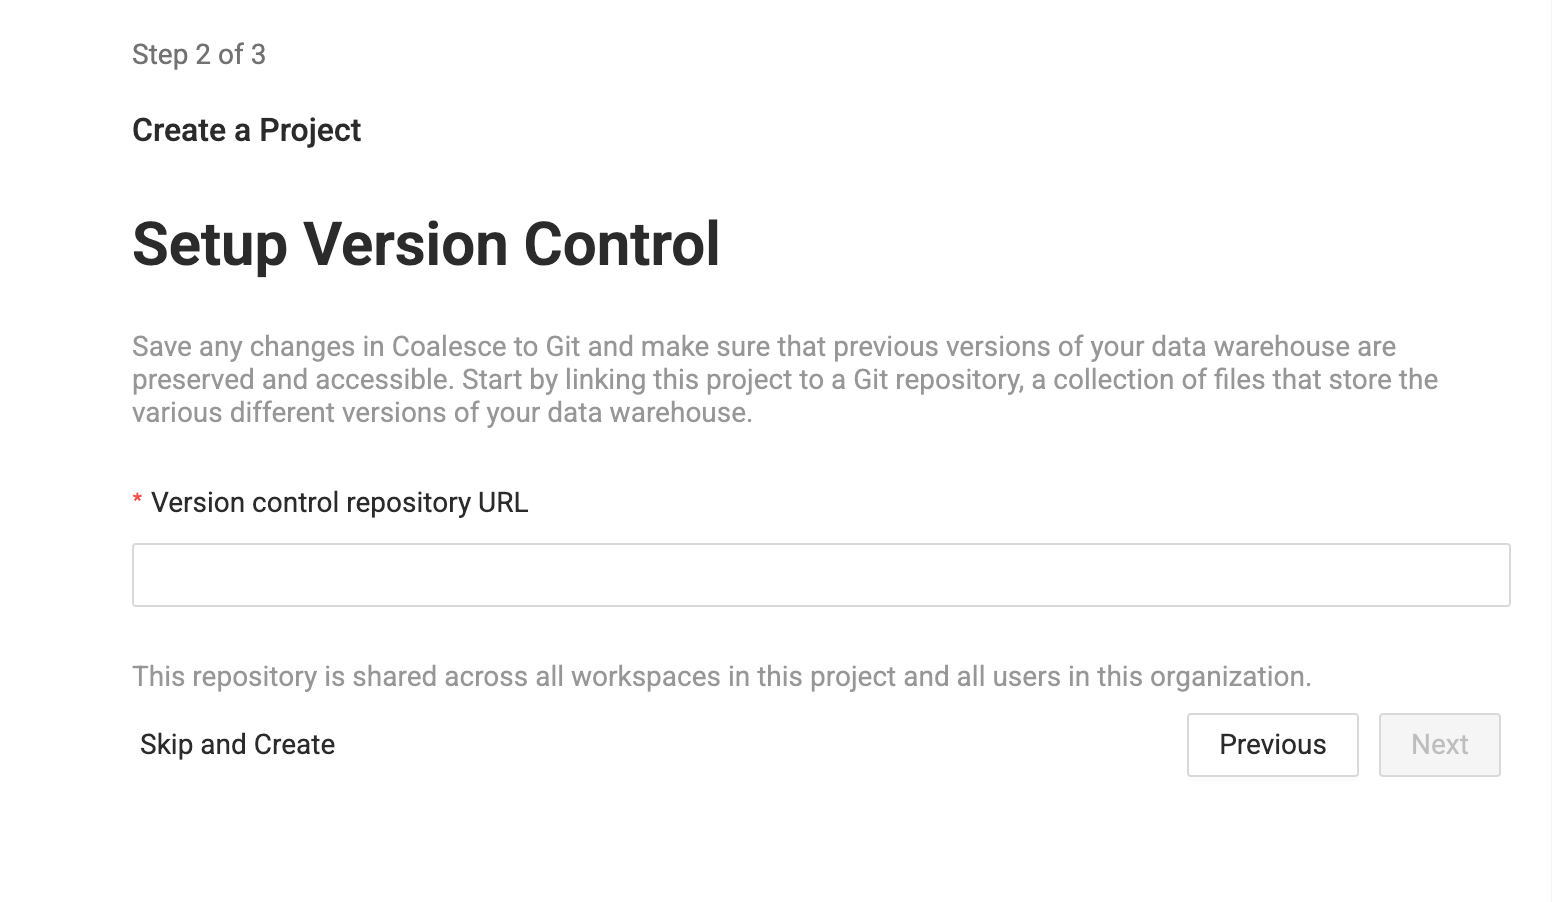
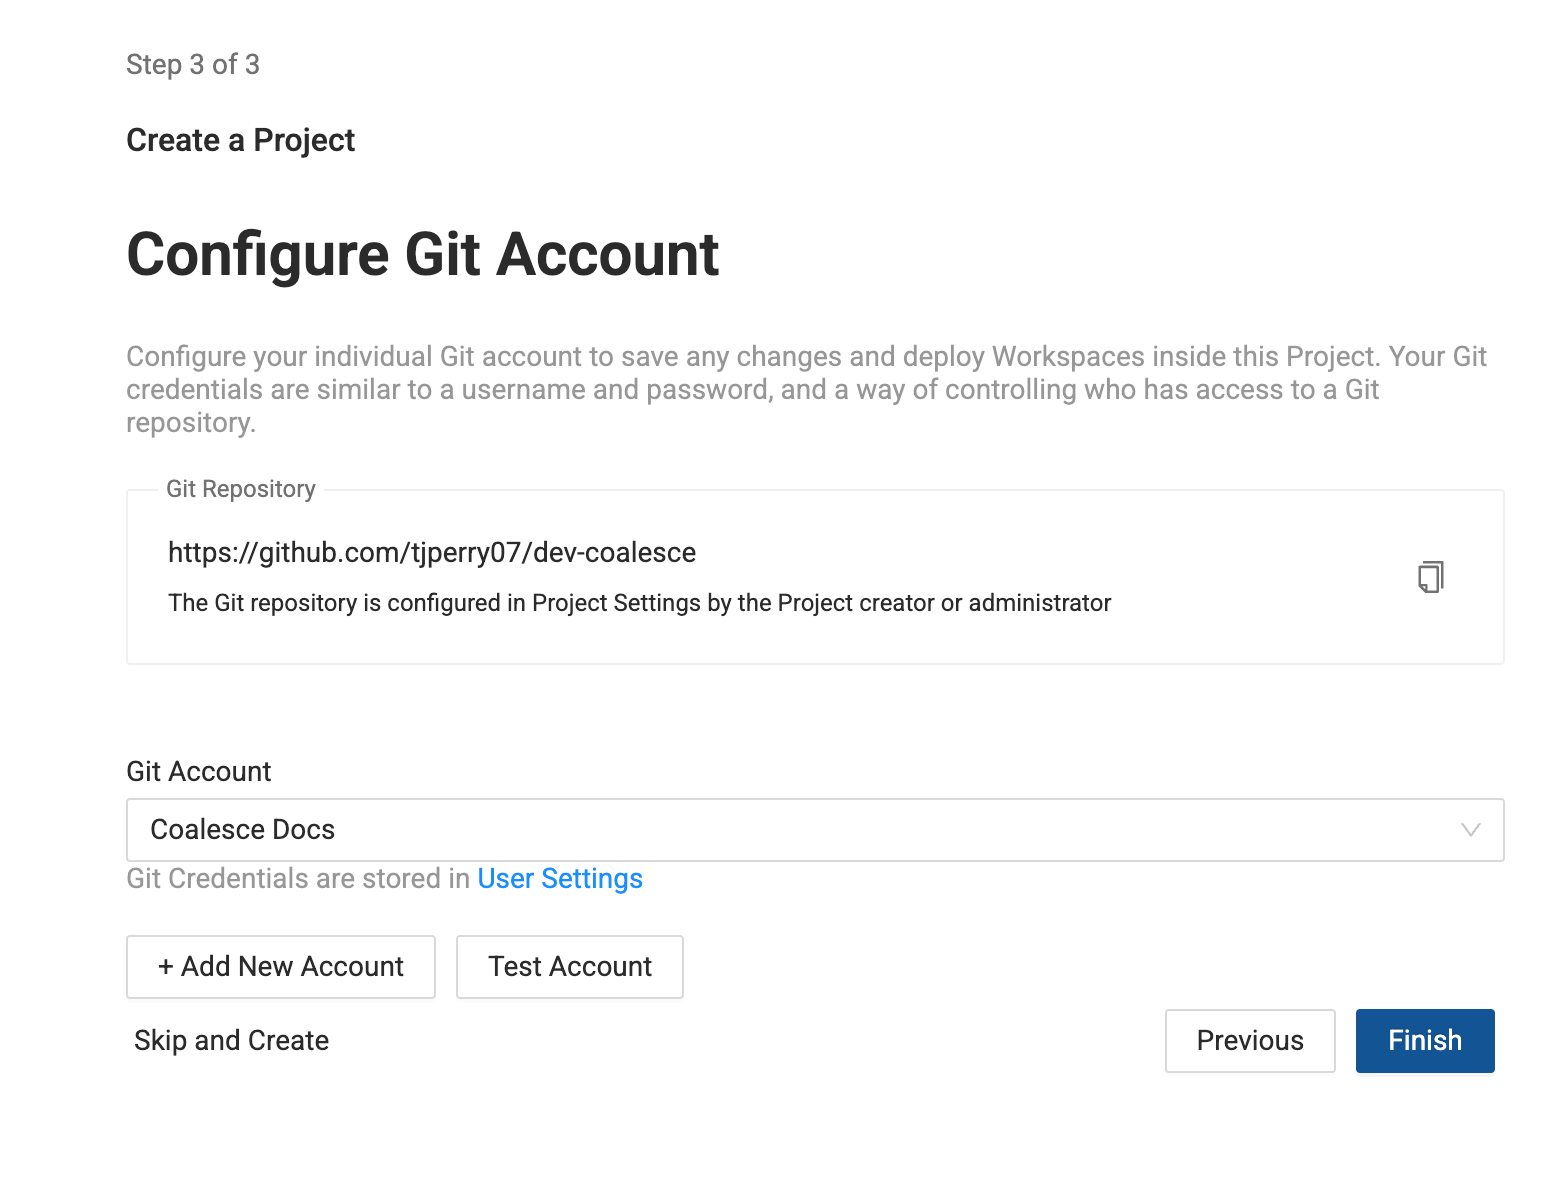
Enter you version control repository URL. You can Skip and Create to start using the project, but you won't be able to deploy.
- Coalesce supports many providers.
-
Then select an account to use. It should be able to view and make requests to the Git repo in the previous step.
-
If you don't a repo configured, then click Add New Account.
- Enter an account nickname. This will displayed in the interface.
- Enter the Git username and token. This will be either the GitLab, Git, Azure, or Bitbucket App Password.
- Enter the Author Name, which identifies the committer.
- Enter the Author Email, which identifies the committer email.
- Click Add.
- Select the Git account you just created in the drop down, then click Test Account.
-
Once successful, click Finish.
-
Now that you've added a Project, you need to add a Workspace.
Copying Objects
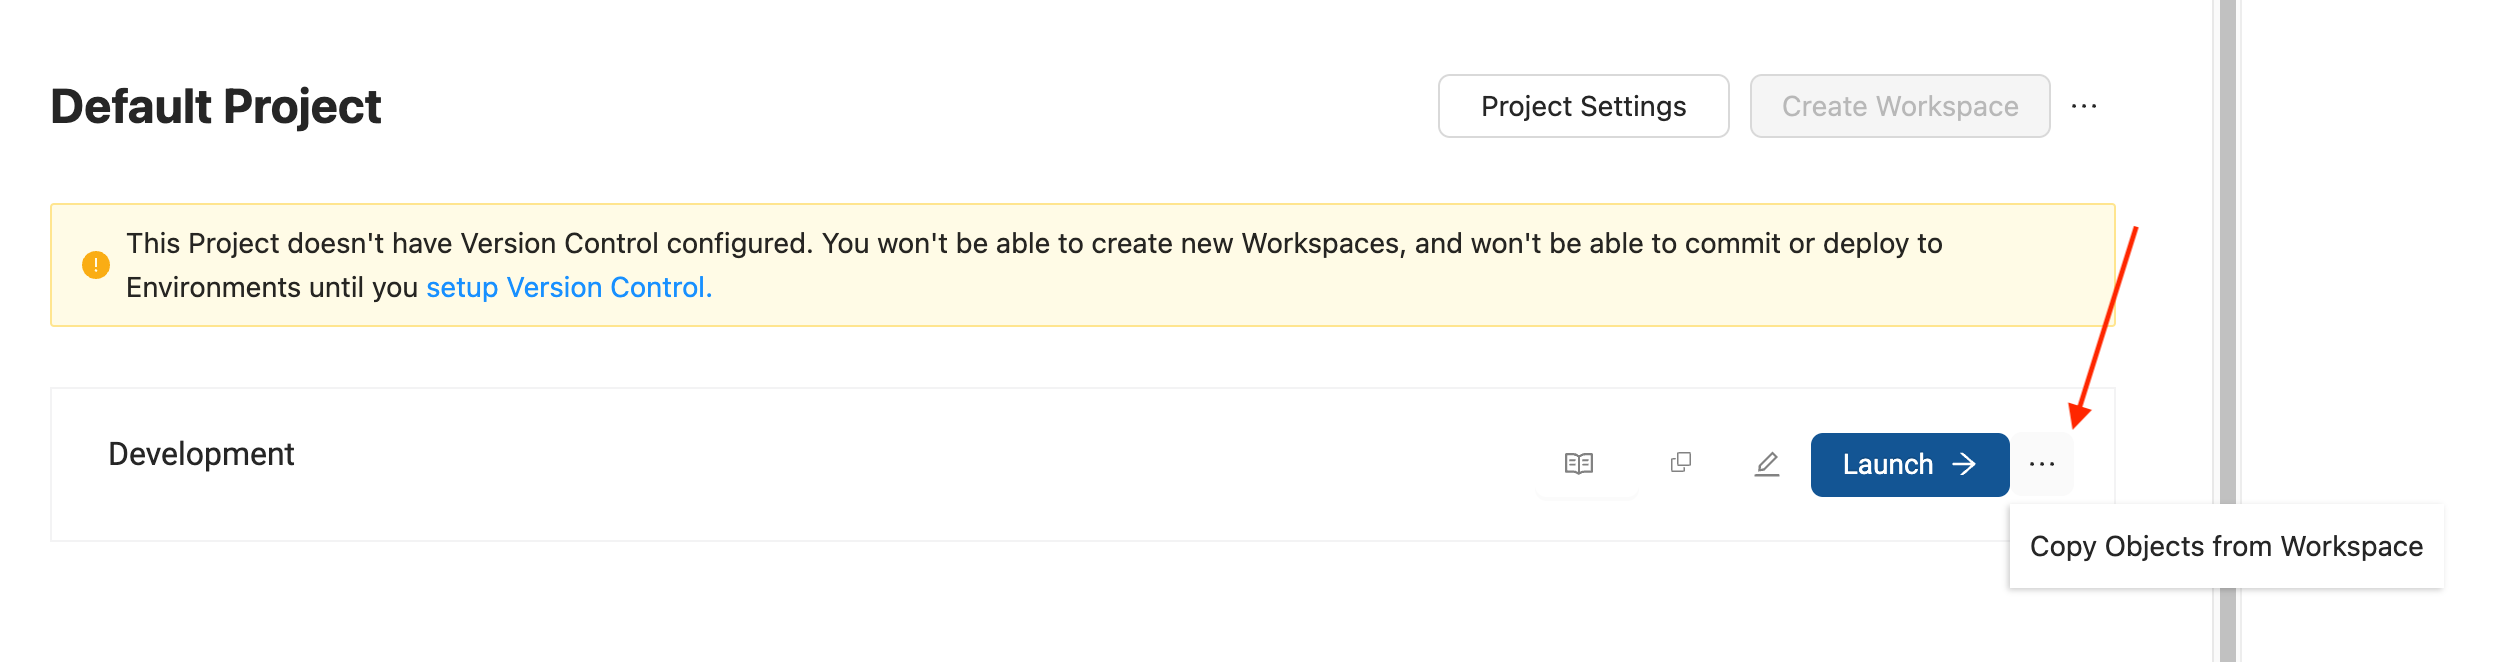
As part of Projects, there is copy functionality than can make copying Nodes, Macros, Jobs, Subgraphs, and Storage Locations (excluding mappings) from one Workspace to another. Jobs and Subgraphs have their definition copied over, but the Nodes themselves will not be copied over. You can access it by clicking on the ellipsis next to an individual Workspace and follow the interface prompts from there. Learn more in When To Use Copy Objects, Duplicate, or Create New Project.
Deleting a Project
To delete an existing Project, you can click the ellipsis next to the relevant one and select Delete Project. A confirmation window will appear, and once you confirm, the Project will be deleted.
