Workspaces
A Workspace is a sandbox environment where you can complete the development of your data, refine, and perform preliminary validation before merging them into the codebase. Each workspace has its own graph, storage locations, macros, node types, connection configuration, and Git branch. You can create multiple workspaces to work on different tasks and merge them into the codebase using Environments. For example, a data engineer may be tasked with creating a new data mart. They could create a new workspace with its own git branch, separate from the main workspace. Once the feature is done, its code can be merged back into the main branch.
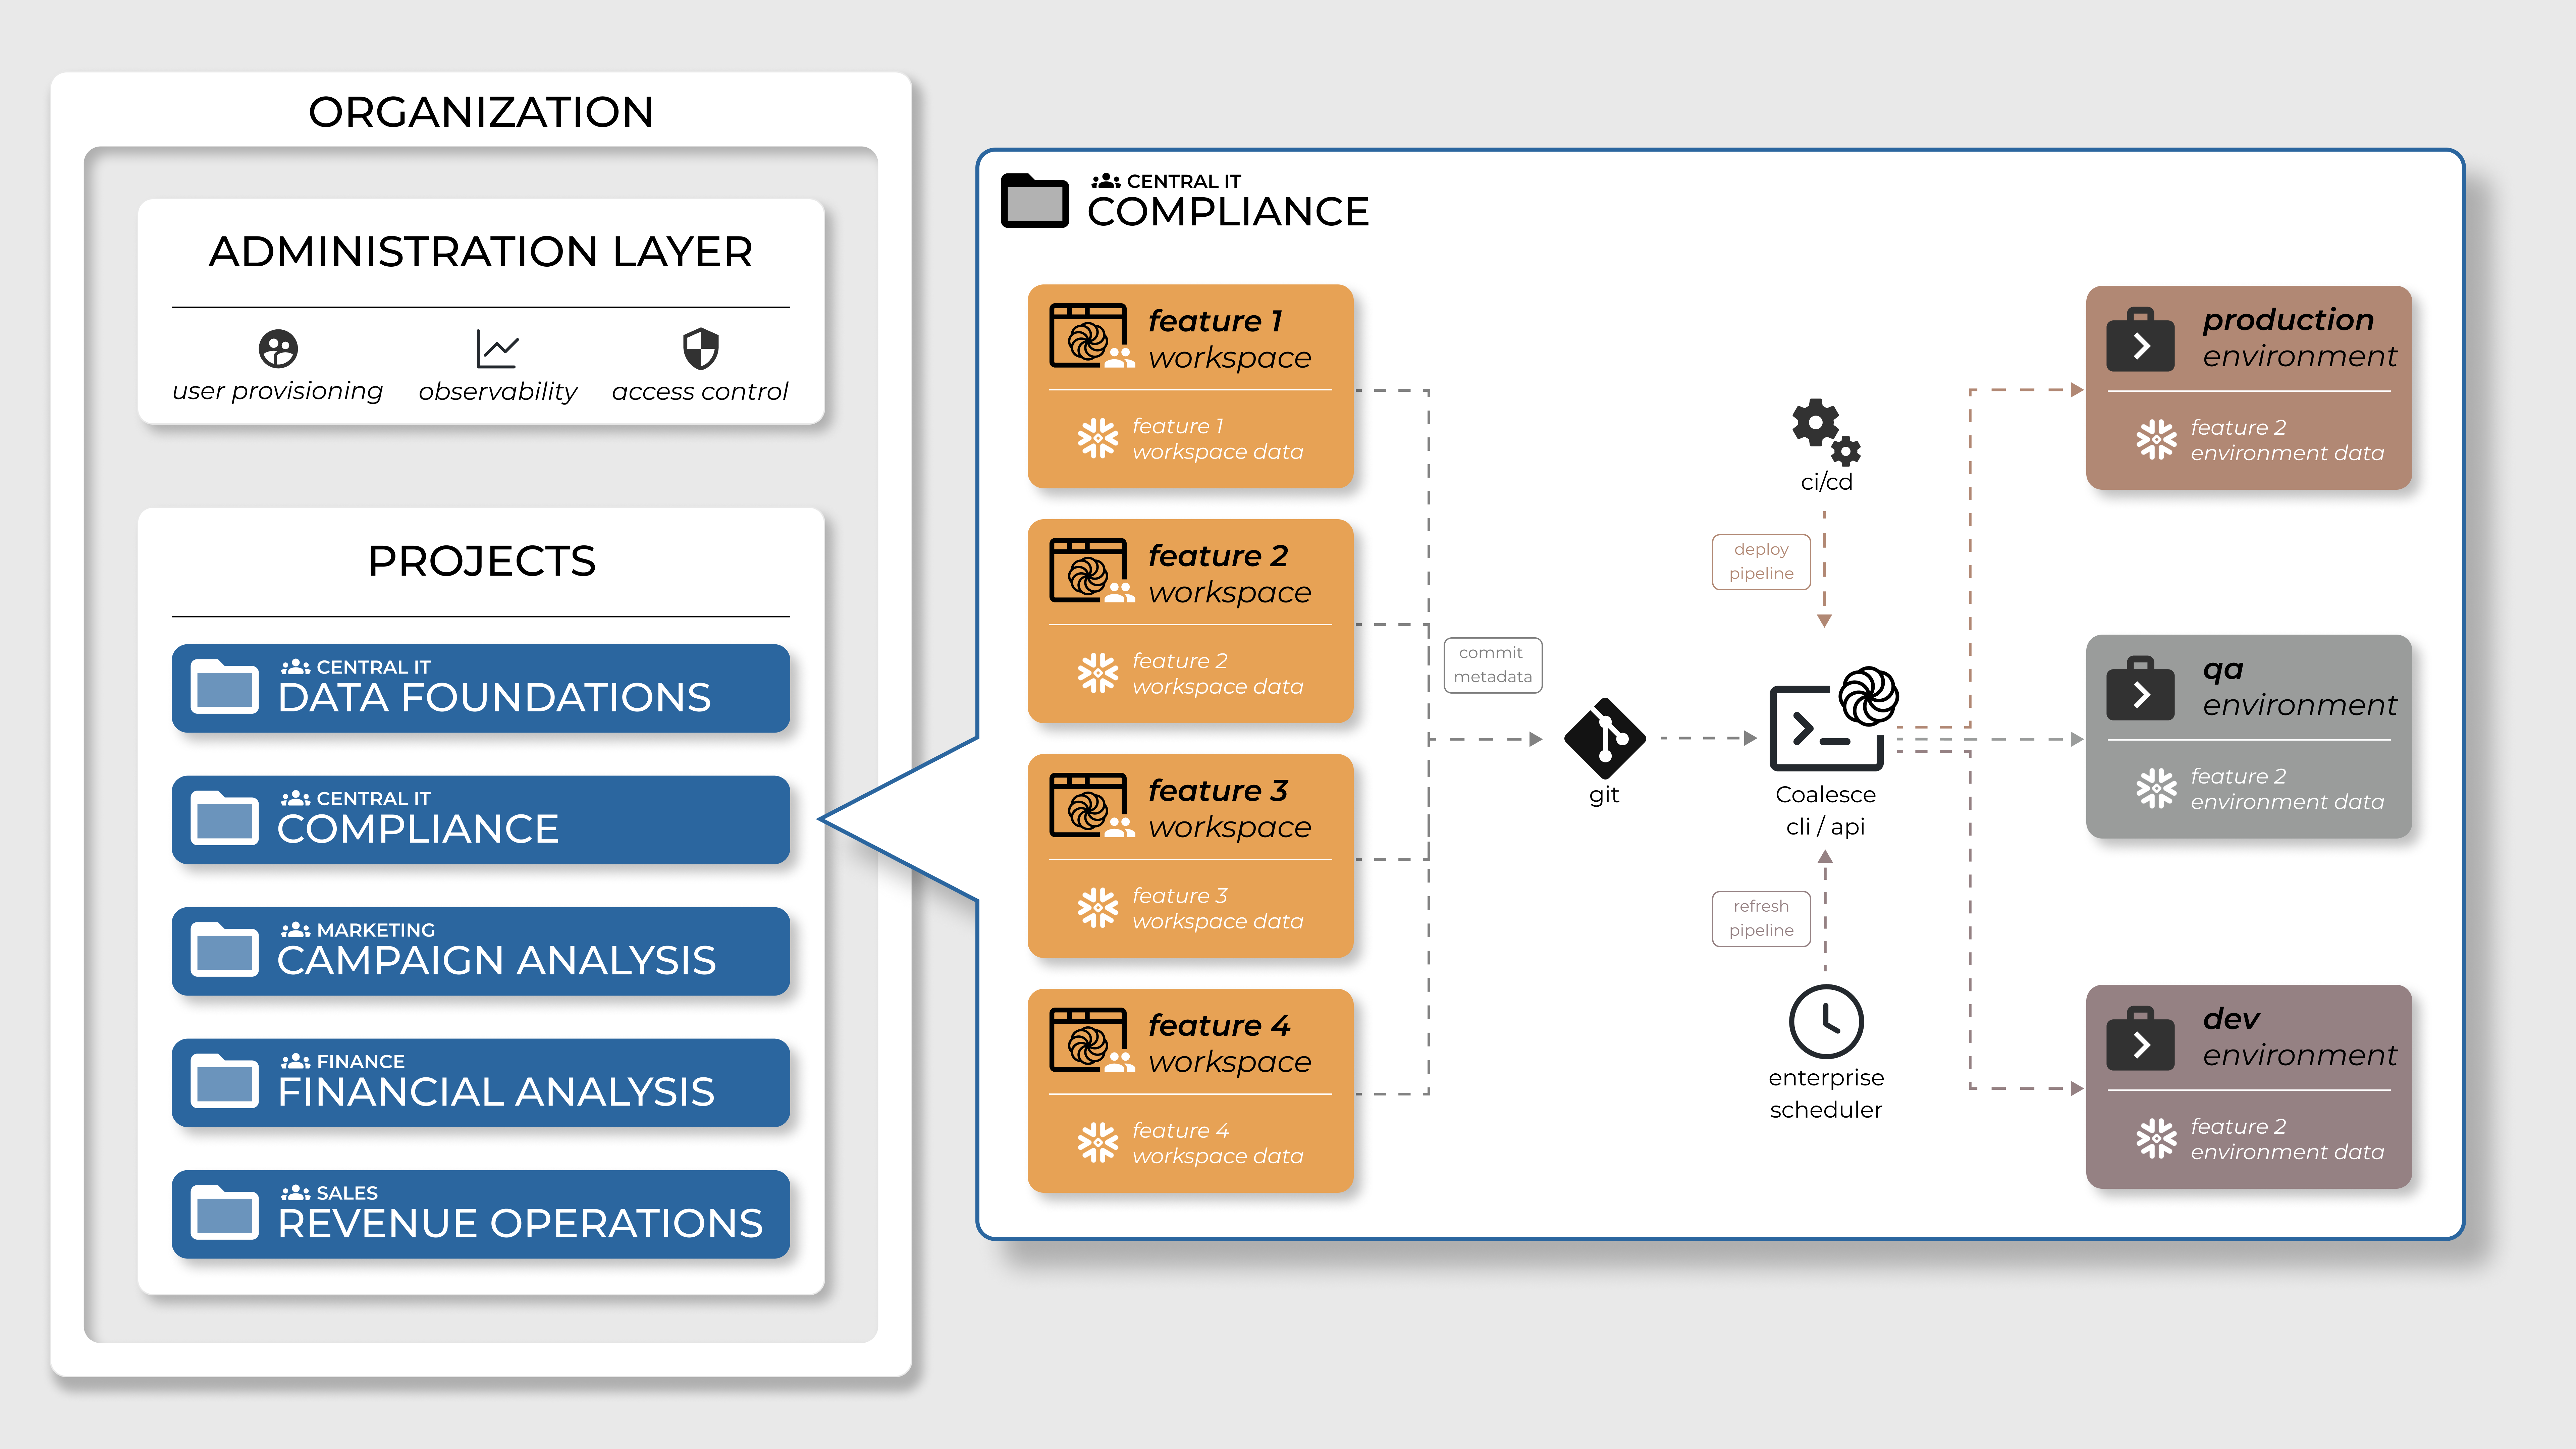
- All Coalesce development is completed in a Workspace.
- Objects are created and data is loaded and refreshed manually on-demand, either for individual objects or for subsets of or the full data pipeline.
- When a change is made to an object (for example, adding or dropping a column, renaming a column, etc.), the object is dropped and recreated vs. ALTERed.
- Deleted objects are not cleaned up (DROPPED) in the backend instance.
Create a Workspace
Before creating a Workspace, you should make sure you have a Project created with version control. You can choose from username and password or OAuth.
- Select the Project you want to create the Workspace in.
- Click Create Workspace.
- Give your Workspace a Name and Description(optional).
- Workspaces let you work in a branch in git. You will need to select a current branch to make a new branch from. For example, if you want to create a branch off main, select main and then in New Branch Name, enter the new branch name.
- Select Initial commit to start your first commit to your new branch.
- Then click Create.
- You're new Workspace will be created with the new branch.
- Next, add Storage Locations and Storage Mappings to your Workspace.
For a quick overview and setup instructions for your first Workspace, see the following video.
Edit a Workspace
There are two ways to edit a Workspace:
- Go to Build Settings > Workspace and click the cog.
- From the Project page, click the cog next to the Workspace.
You can update the following in a Workspace:
- Settings includes Workspace name, description, and tag color.
- User Credentials including OAuth
- Storage Mappings
- Parameters
Duplicate or Copy a Workspace
To duplicate an Workspace, go to the Projects page and click the Duplicate Settings button, . Then follow the on-screen prompts.
To copy a Workspace, click the three dots next to the Workspace and select Copy Objects from Workspace.
Review When To Use Copy Objects, Duplicate, or Create New Project to learn more about duplicating versus copying and what information will migrate to the Workspace.
Snowflake password aren't copied.
Delete a Workspace
To delete a Workspace, click the cog icon in Workspace Settings, then click Delete Workspace. If a user deletes all workspaces, a new blank workspace named DEV will be automatically created, as there must always be at least one development workspace.
There are two ways to delete a Workspace:
- Go to Build Settings > Workspace and click the cog.
- From the Project page, click the cog next to the Workspace.
Development Workspace
When you first start working in Coalesce, after you create a Project, a DEV Workspace is automatically created. You can create another Workspace from the Project page.