Version Control
Coalesce leverages Git style version control to manage changes to your project.
Supported Providers
Provider Not Listed
If you provider is not listed, you might still be able to connect if your repo is:
- Version control repository is available to Coalesce through the public internet.
- Authentication to your version control provider is available using a Personal Access Token.
We have not tested every available version control provider.
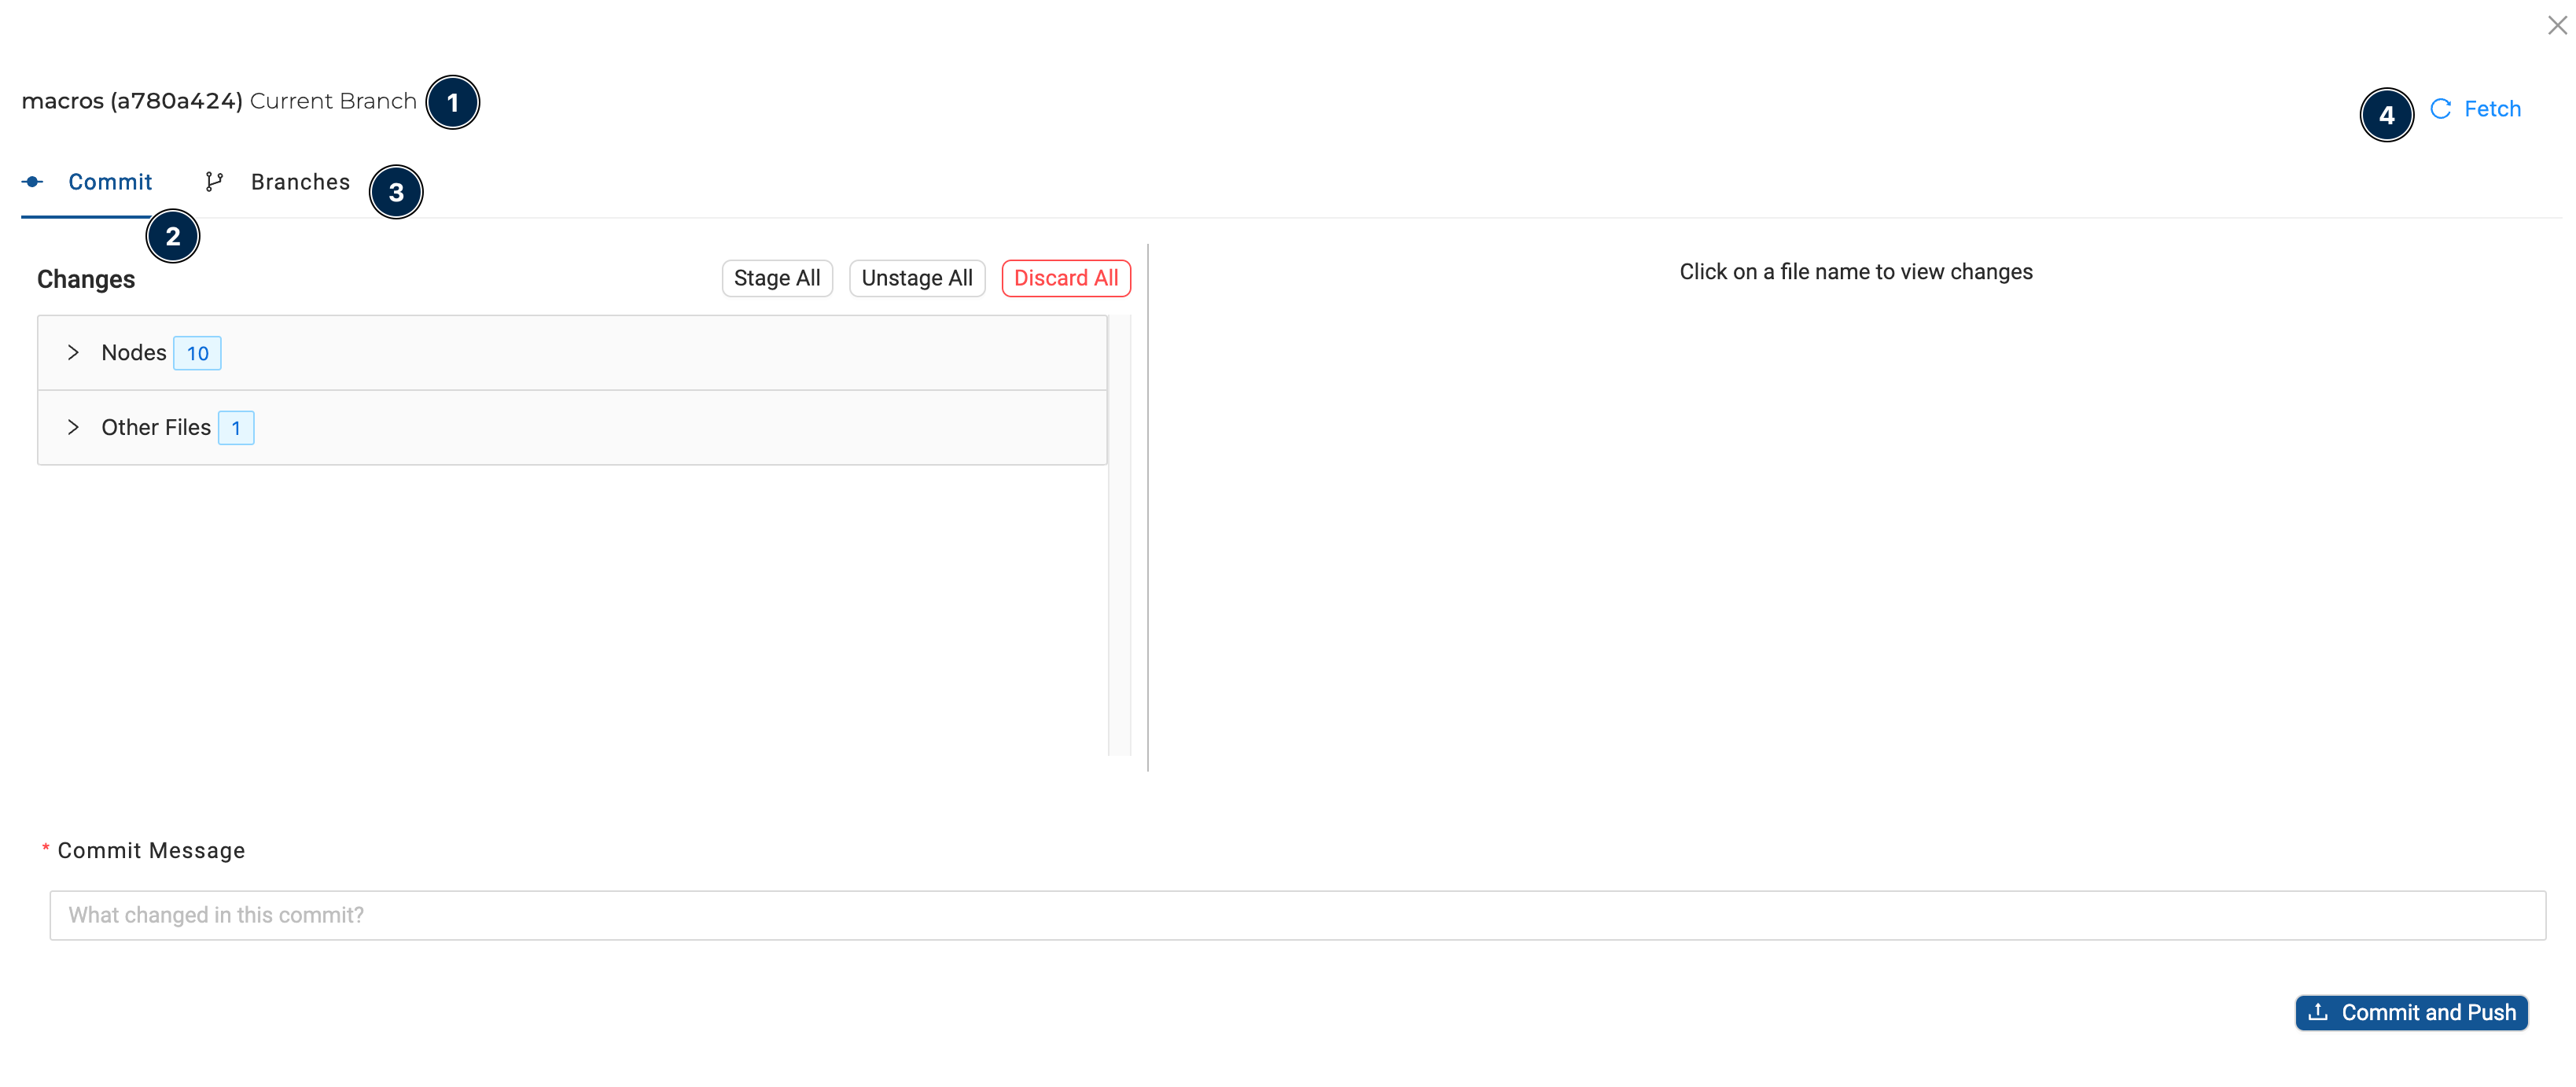
The Git Modal
- Current Branch - This is the branch you are working on or have checked out.
- Commit - This tab contains information about your commit. A commit is any changes you’ve made while working. Learn more in Commits.
- Branches - This tab will list any available branches. Learn more in Branches.
- Fetch - Fetch will check the repository for any recent changes.
Resources
- Go through our interactive Git tutorial. DataOps Best Practices with Git and Coalesce
- Learn the basics of version control. What is version control | Atlassian Git Tutorial
- Understand how Git branches work in this interactive walkthrough. Learn Git Branching
- Git Cheat Sheet. A handy reference from GitHub.
📄️ Git Basics
This guide will go over some basic Git concepts you’ll use in Coalesce.
📄️ Set Up Version Control
How to set up version control in Coalesce
📄️ Git Branches
This guide will go over creating branches and reading the branches tab in the Git Modal.
📄️ Git Commits
This guide goes over the commit tab of the Git Modal and making a commits to your repository.
📄️ What Gets Committed
Learn what is committed when using Git and Coalesce.
📄️ Changing A Repository in Coalesce
Learn how to change your repository
📄️ Reverting a Commit
How to revert a commit in Coalesce
🗃️ Solving Git Errors
4 items
📄️ DataOps Best Practices
These are some best practices that can make using Git go smoothly for your organization.