Documentation index: llms.txt. This page is also available as markdown: append .md to this URL or send Accept: text/markdown.
Okta SSO
In this guide, you’ll learn how to set up Okta SSO in Coalesce.
You must be a Okta Administrator to complete this process.
Before You Begin
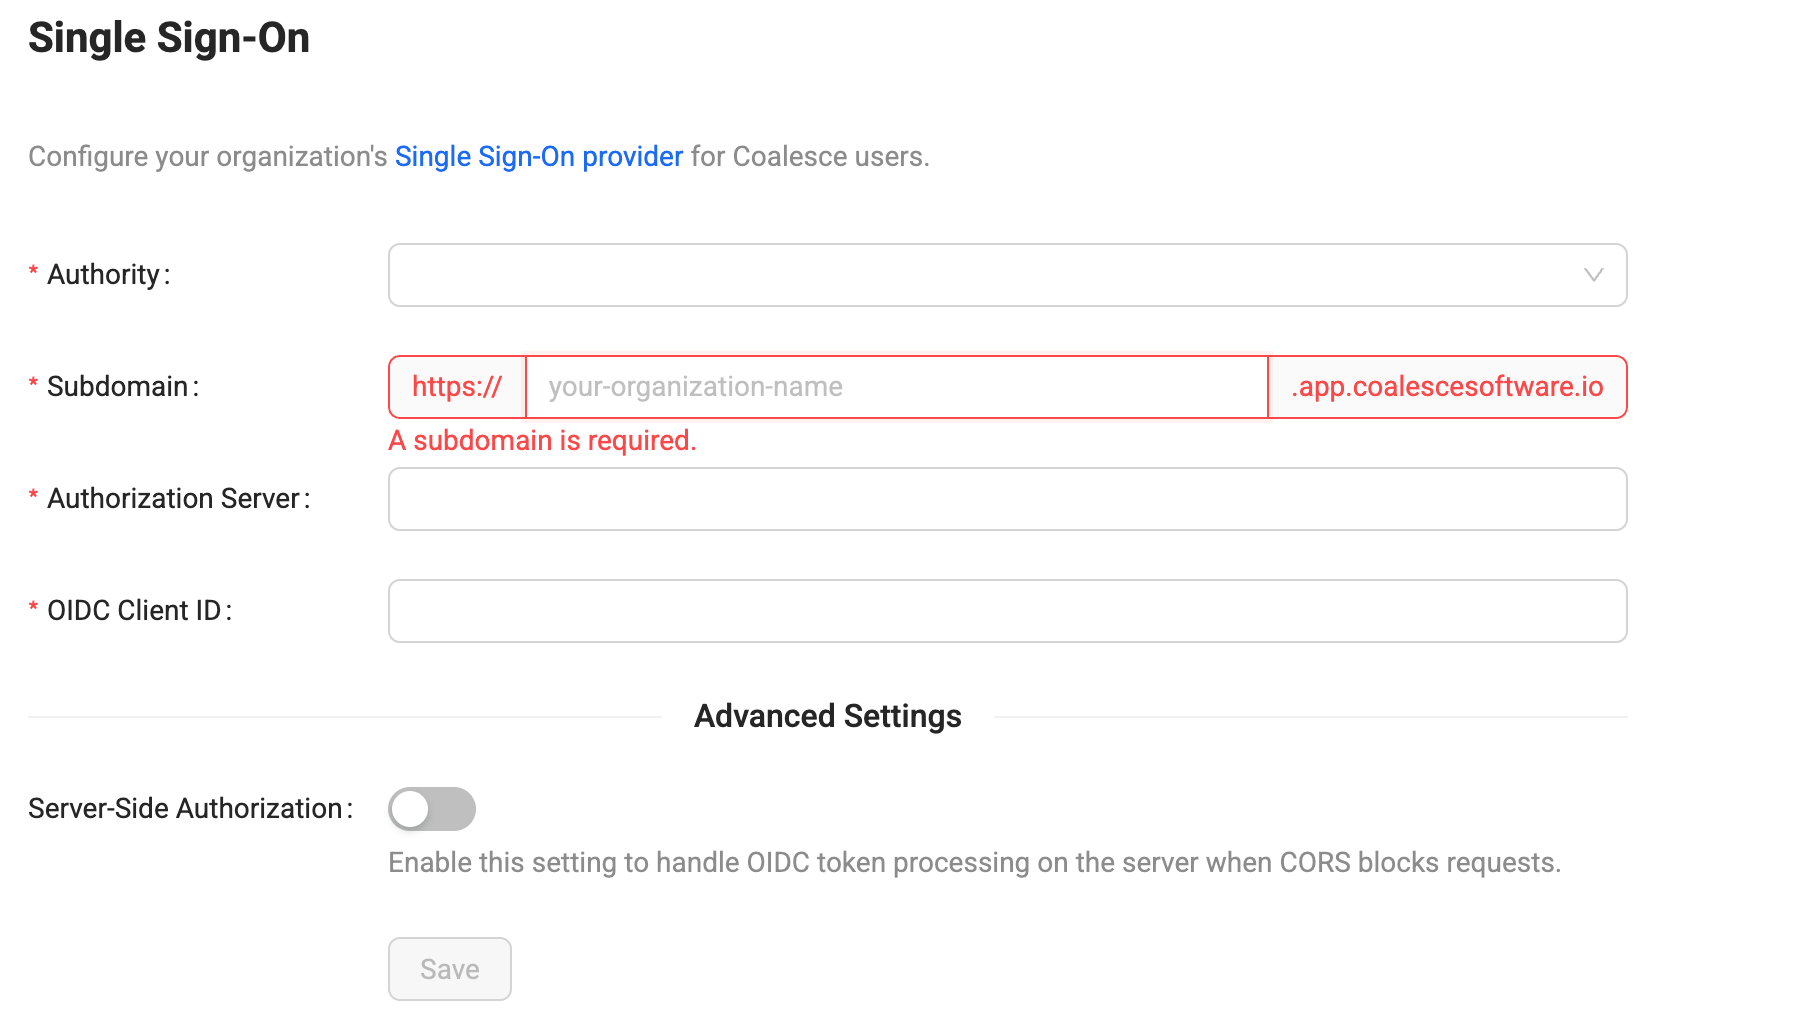
Check Your Subdomain
Your subdomain is the subdomain of your Coalesce instance. For example, if you login at https://testapp.app.coalescesoftware.io/. Your subdomain is testapp.
To check if already have a subdomain, go your organizations single sign-on settings.
If you don't have a subdomain, you can add one to the subdomain box. Coalesce will automatically configure your subdomain based on the name entered. Check with your IT team before adding it to your organizations settings.
Create Okta App Integration
To use Okta as your Single Sign-On provider, you'll want to create a new App Integration in Okta.
-
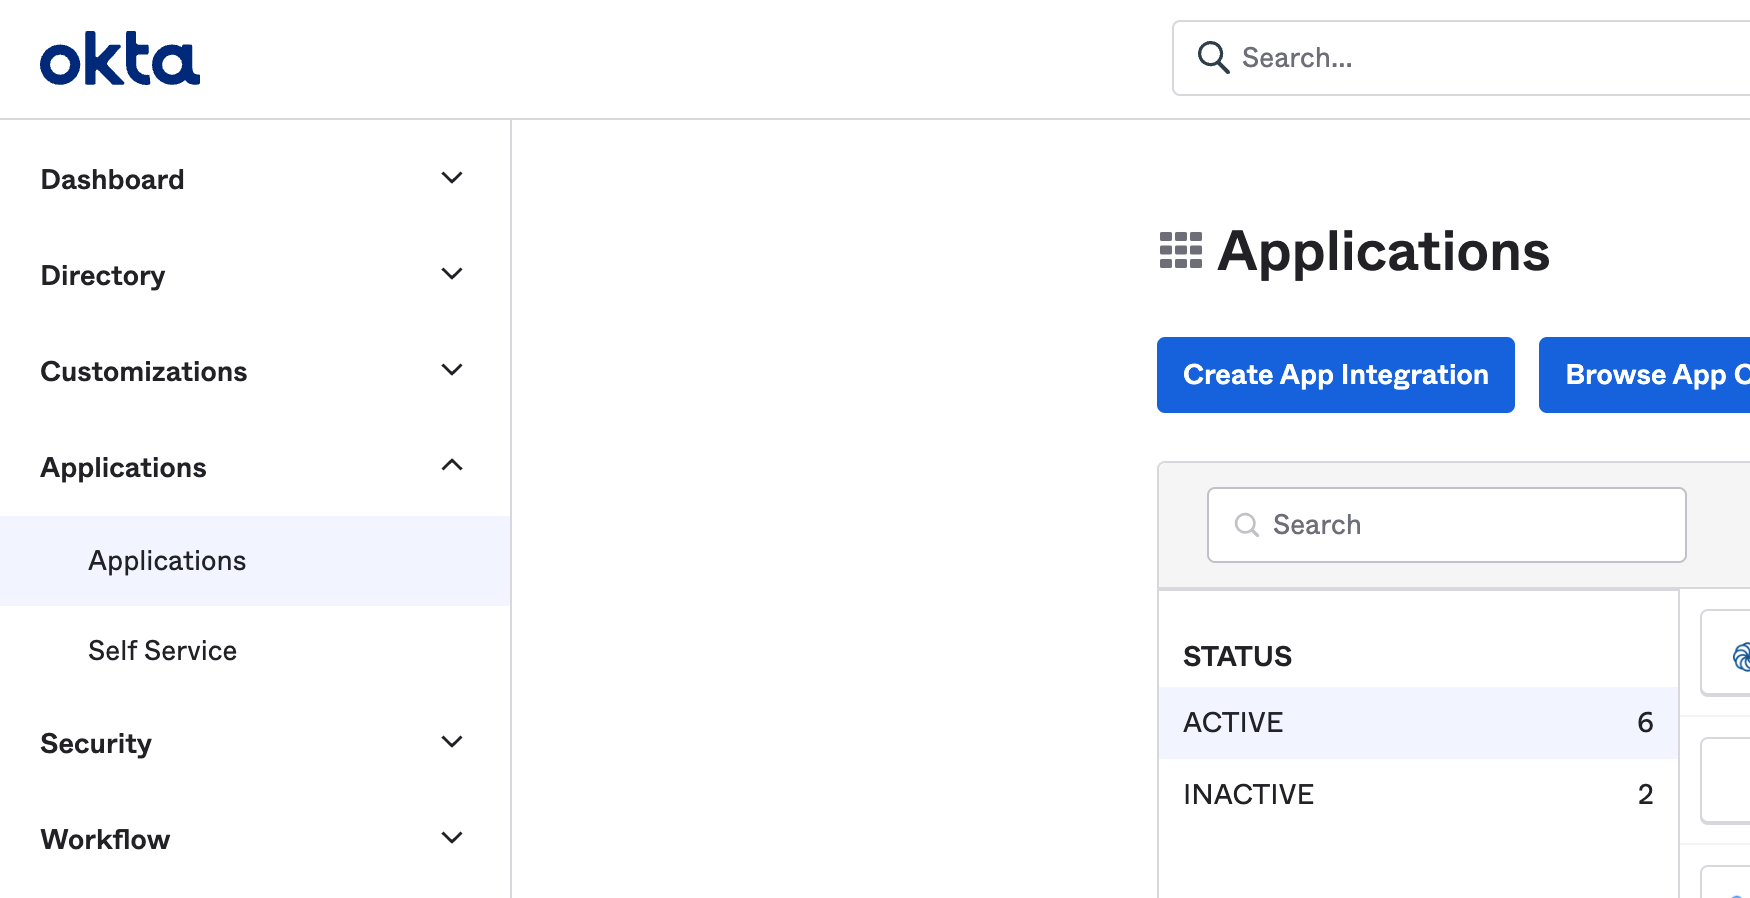
Open the admin panel for your Okta organization
-
Click on Applications.
-
Click on Create App Integration.
-
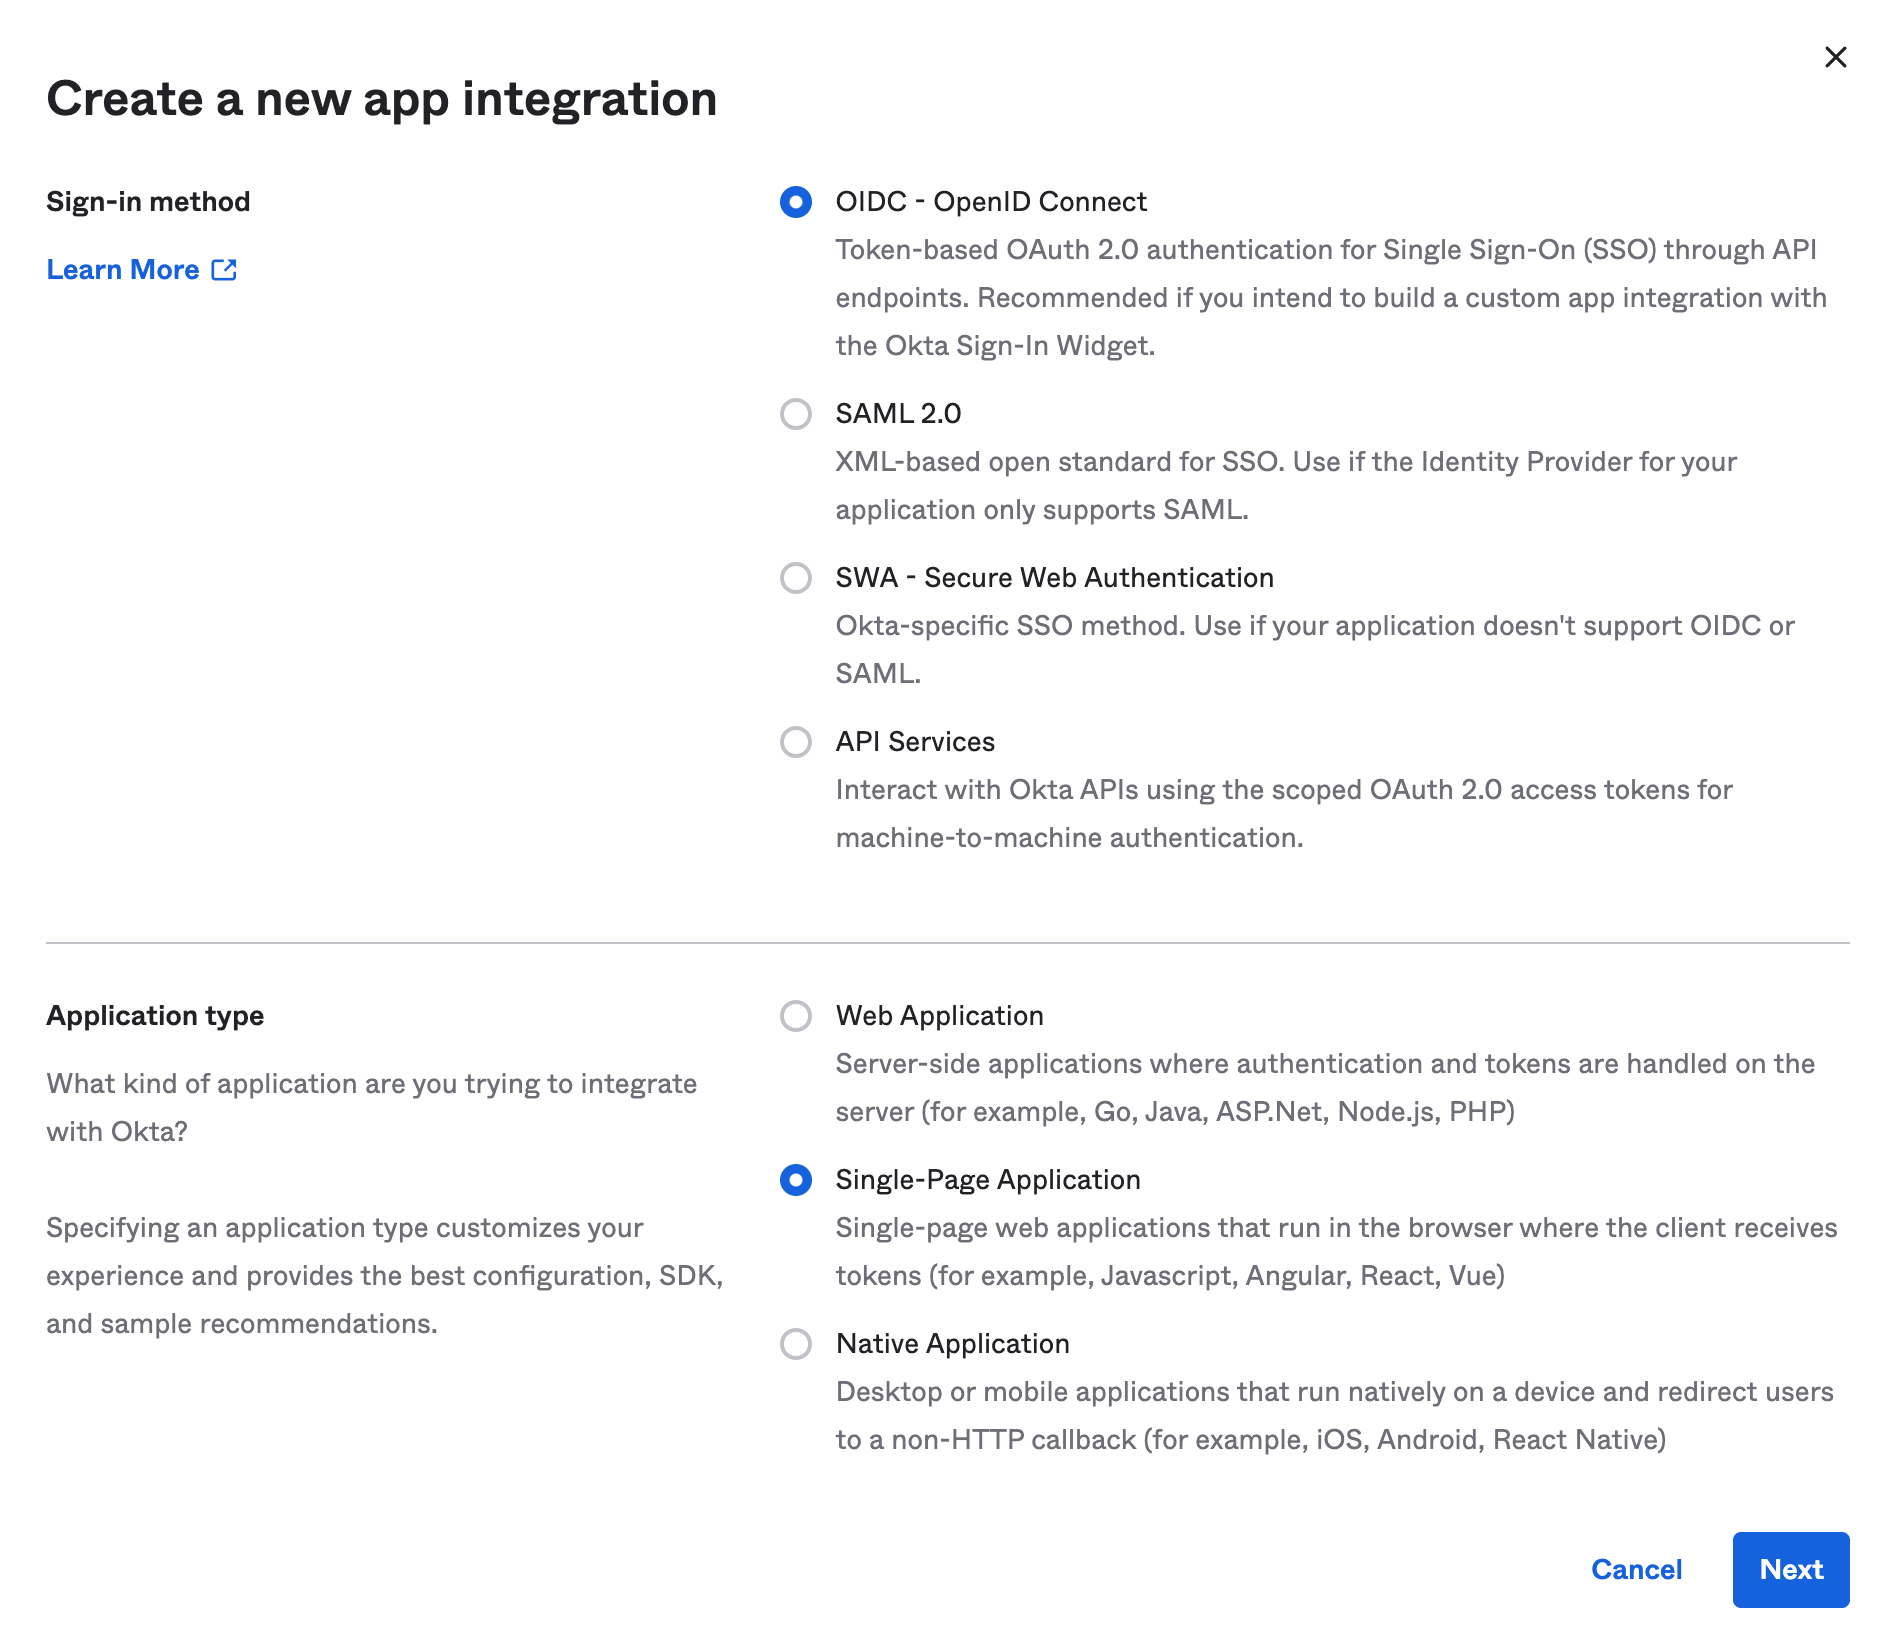
Select OIDC - OpenID Connect as the Sign-in method and Single-Page Application as the Application Type and then create the new app integration.
-
On the settings page for this newly created integration, enter the following:
- App Integration Name - this is typically going to be
Coalescebut any friendly name works - Sign-in redirect URI - by default this is
http://localhost:8080/login/callbackwhich you'll want to change tohttps://mySubdomain.<app_domain>/login/callback.mySubdomainis typically the name of your organization. - Controlled Access - select whichever setting is appropriate for your organization
- App Integration Name - this is typically going to be
-
Click Save. You'll now be at a window with all your App Integration settings. Keep this browser tab open as you'll need to enter some information from it into Coalesce.
Configure Coalesce Okta Settings
-
Open a new window.
-
Sign in to your Coalesce application using username and password.
-
Go to Organization Settings > Single Sign-On.
-
Enter in the following information:
Field Description Authority The system being used for Single Sign On. Choose Okta. Subdomain This will be the same as mySubdomain. Not the entire redirect URI.Authorization Server Refer to the URL you use for your Okta account. Your Authorization Server will be the base URL. For example: https://<yourcompany>.okta.comOIDC clientID This will be the same as the Client ID field in the settings of your Okta app integration. Server-Side Authorization (Optional) Toggle on to add an authorization URL. Use this when the authorization server blocks access to the OpenID configuration or token endpoints. Authorization Endpoint (Available with Server-Side Authorization ) The authorization URL to redirect to. 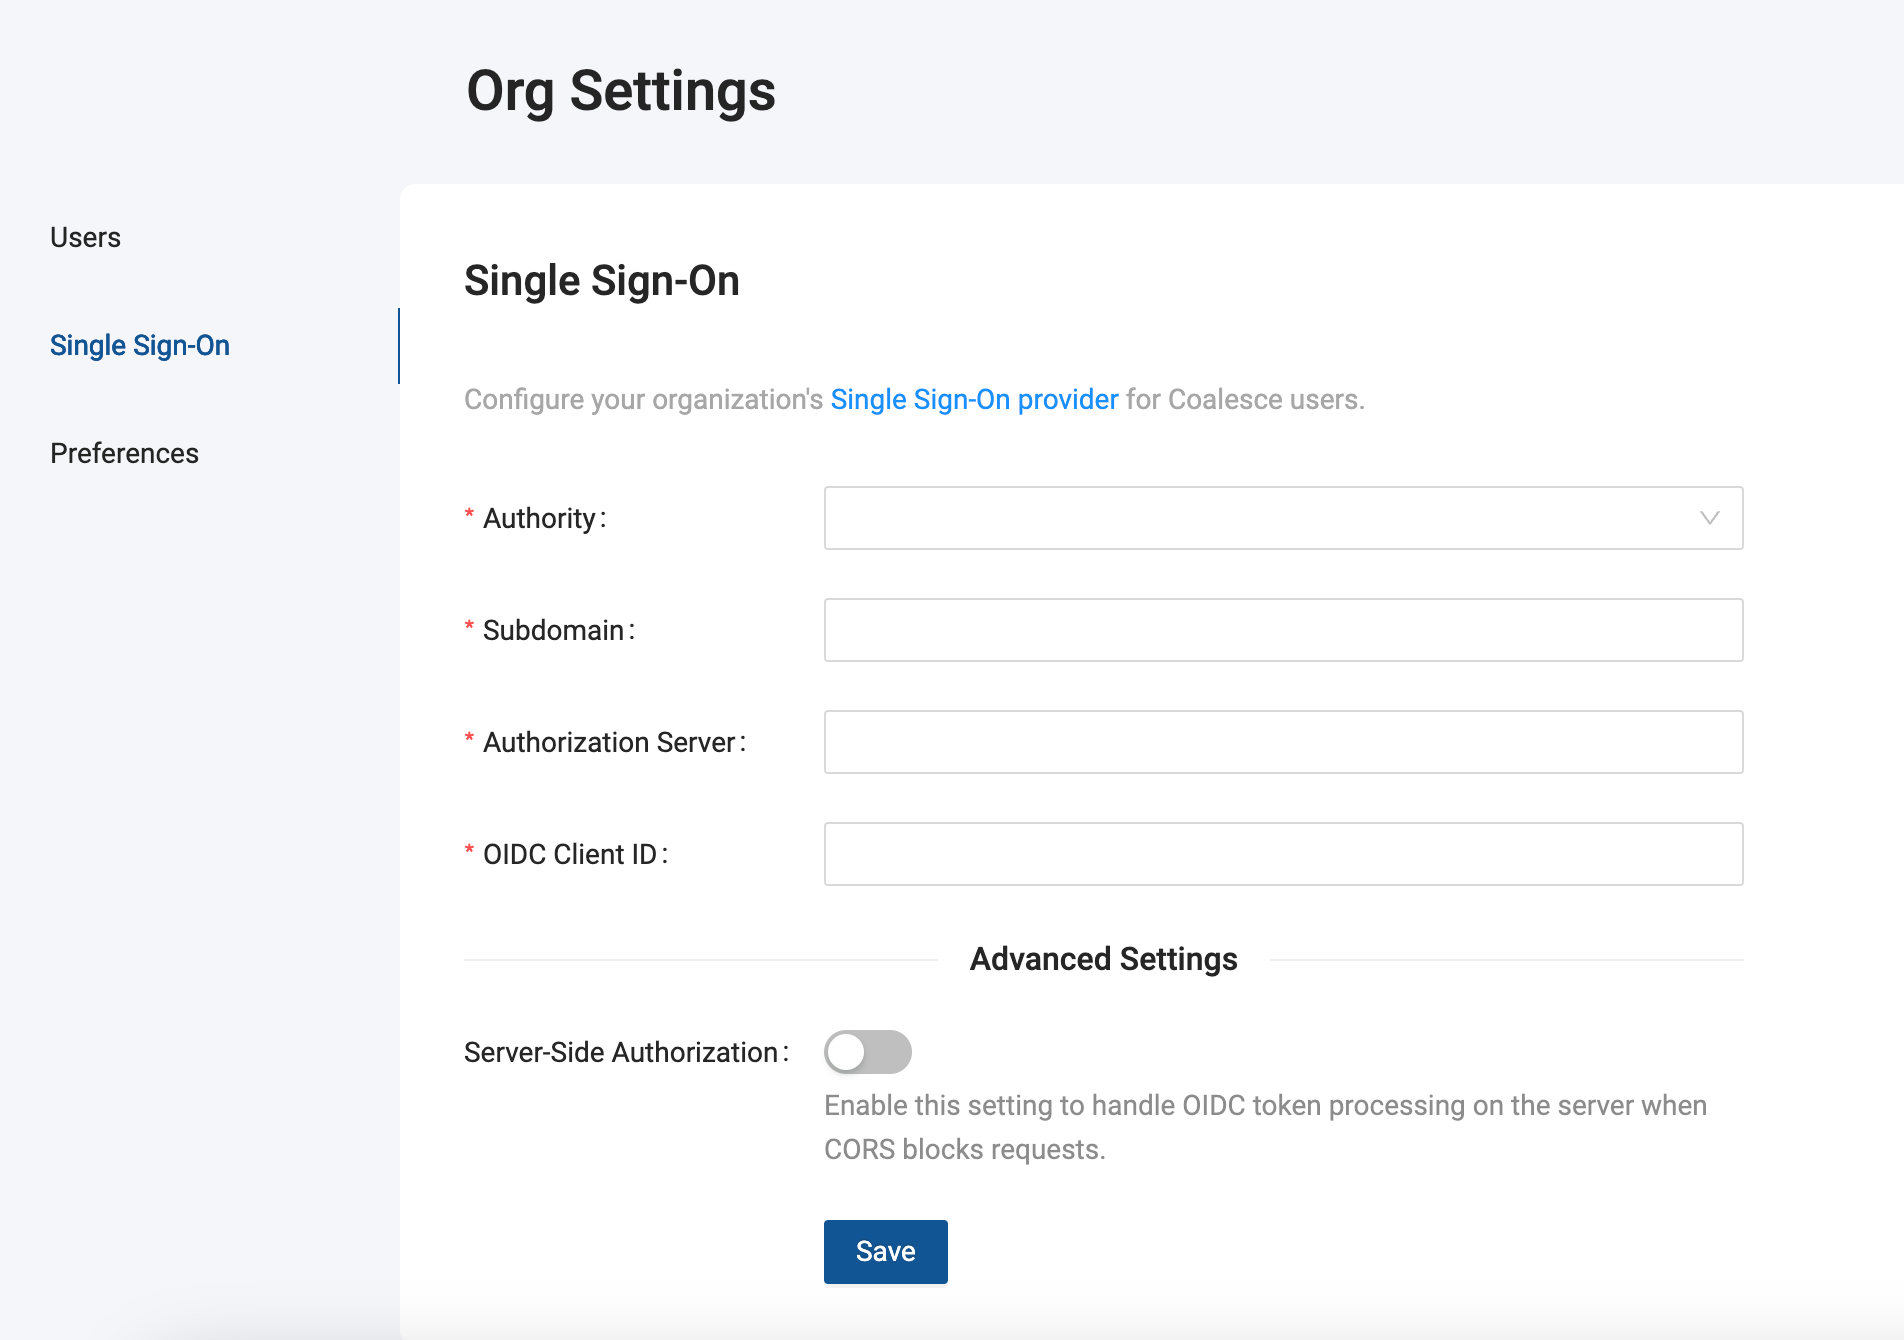
-
Once you've filled out the SSO settings in Coalesce, click Save.
-
Log out of Coalesce.
-
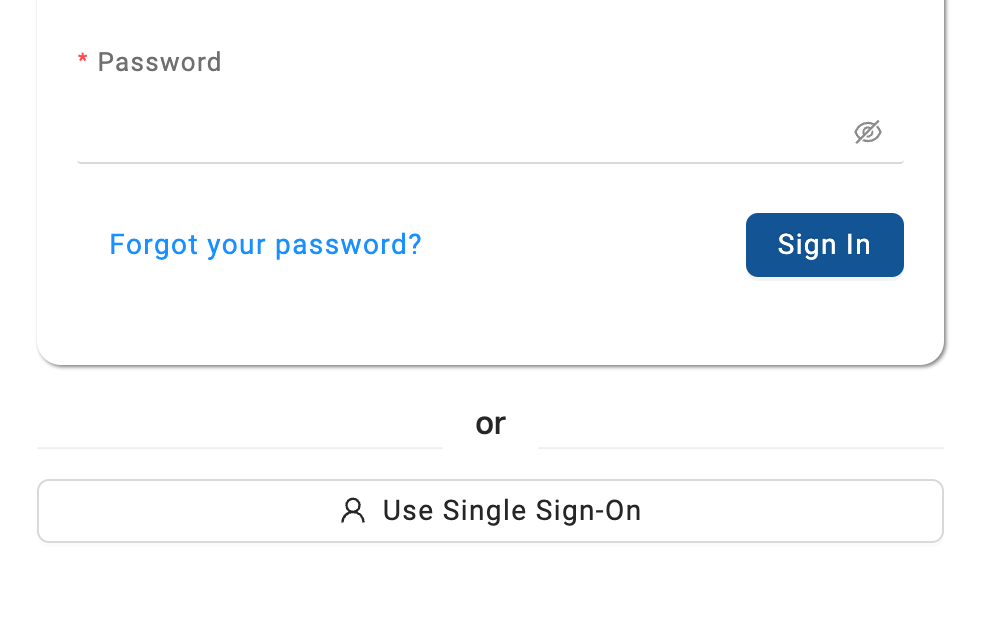
Go to your SSO URL, which will be formatted like -
https://mySubdomain.<app_domain>- and click on the Use Single Sign-On button to log in using SSO.
If instead of a button you see an error message, check to make sure you correctly entered all the fields in your Coalesce SSO settings. If the problem persists please reach out to our Support Team.
Duplicate Accounts After SSO Setup
The creation of a separate SSO account is expected behavior and does not affect your existing basic auth account's permissions.
When you first authenticate using SSO in Coalesce, the system creates a new SSO account separate from your existing basic authentication account. This new SSO account is automatically assigned Org Member permissions by default.
If you previously had admin permissions through your basic auth account, you'll need to update the permissions for your new SSO account. To do this:
- Log in using your basic authentication credentials.
- Update the permissions for your SSO account.
- If you don't have admin access, contact your organization's admin to update the permissions.
What's Next?
- If your SSO appears successful but Coalesce shows a blank or spinning screen, see Troubleshooting Browser Login Issues.
- Common SSO Errors