Documentation index: llms.txt. This page is also available as markdown: append .md to this URL or send Accept: text/markdown.
Microsoft Teams
The Microsoft Teams connector enables your users to interact with Coalesce Catalog directly within Teams.
Your users can:
- Ask questions directly to the Catalog Data assistant and get insights instantly.
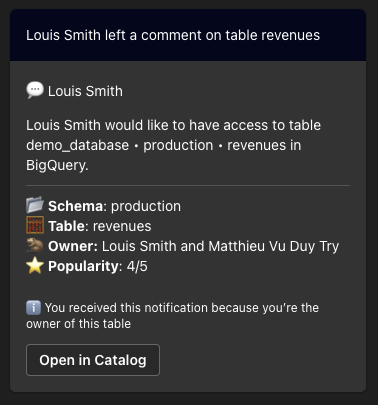
- Receive automated notifications about assets they own and stay updated on changes that affect them.
.gif)
This document walks you through the steps required to install, use, and remove the custom Microsoft Teams extension within your organization.
Prerequisites
Before you begin, ensure you have the following:
- Microsoft 365 Admin Privileges: You must have the appropriate permissions to manage apps within the Microsoft 365 admin center. For more information on admin roles, see About admin roles.
- Microsoft Teams Admin Center Access: You need access to the Microsoft Teams Admin Center to add custom apps and manage policies.
- Custom Extension Package (Manifest): You should have the custom extension files ready for upload. Refer to the Teams App manifest schema for details.
Download the appropriate package for your region:
-
US Region: For accounts using
app.us.castordoc.comappPackage.prod-us.zip -
EU Region: For accounts using
app.castordoc.comappPackage-1.0.2.prod-eu.zip -
Subscription or License for Microsoft Teams: Ensure your organization is licensed to use Microsoft Teams. You can learn more at Microsoft Teams licensing.
-
Access to the Integration Page: You need the ability to visit app.castordoc.com/settings/integrations as an Admin user to initiate the integration.
Microsoft Teams Integration
This section covers how to create the integration from the Coalesce Catalog Integrations Page.
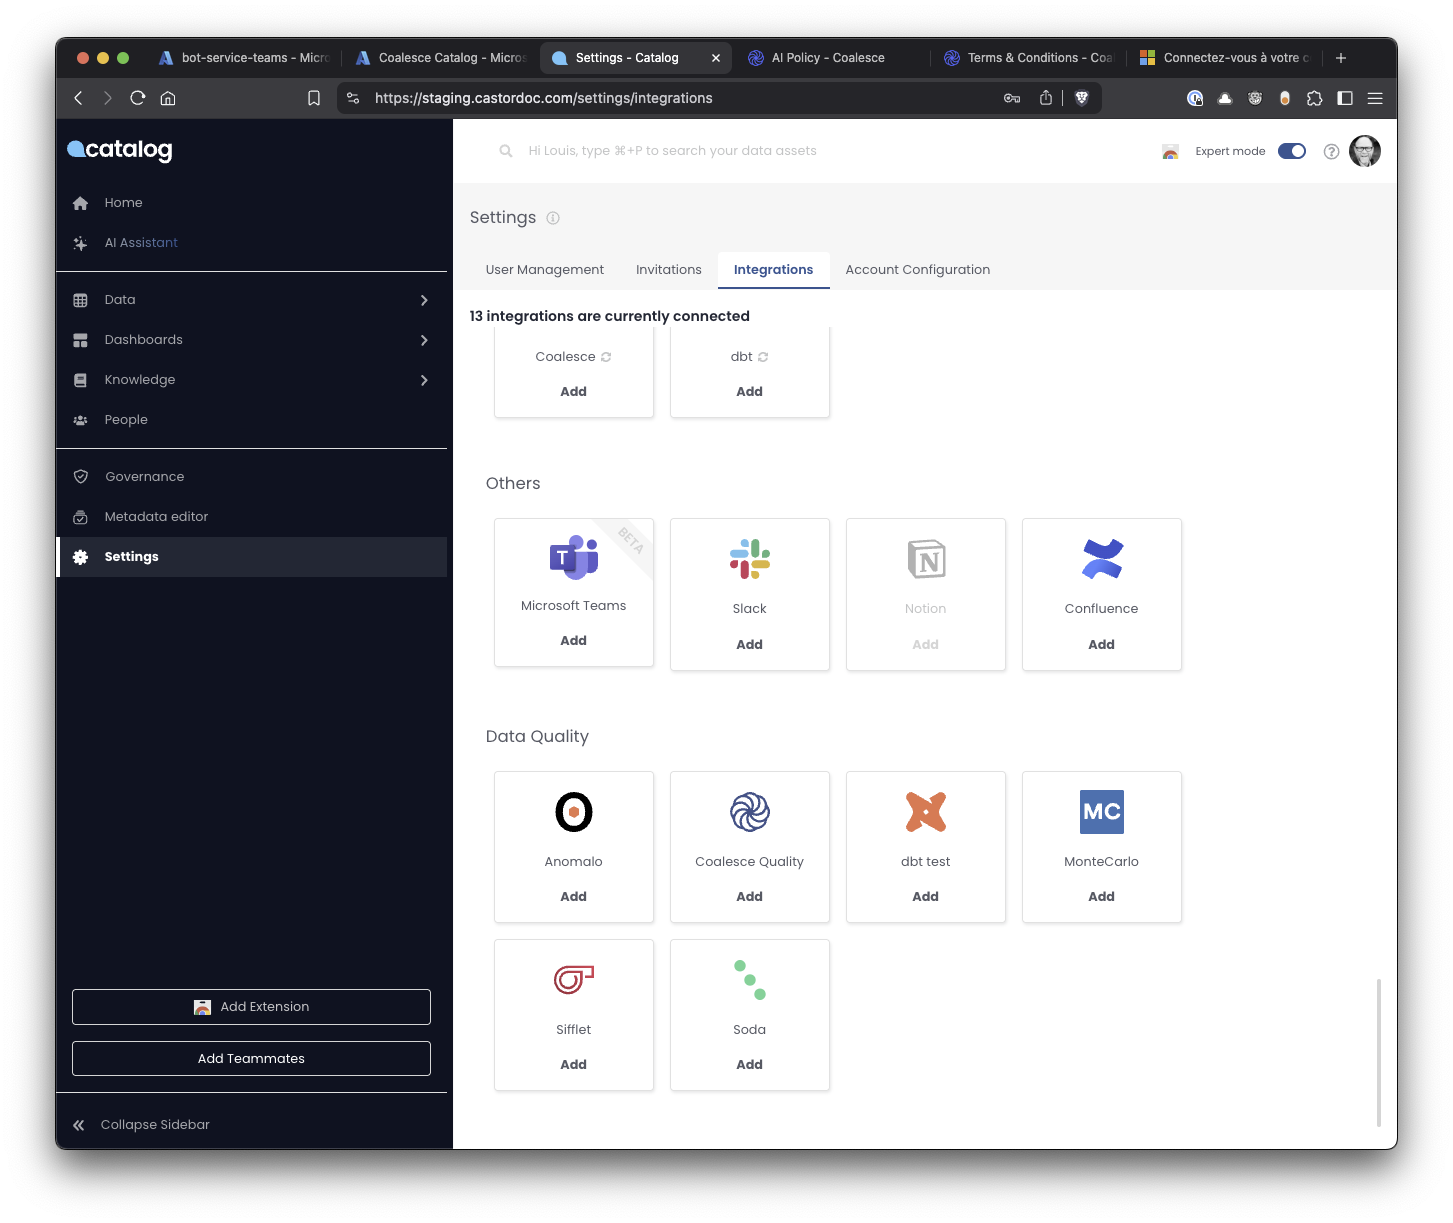
Step 1: Navigate to the Integration Page
Visit app.castordoc.com/settings/integrations.
Step 2: Select Microsoft Teams
Click the Teams card to start the installation process.
Step 3: Grant Required Permissions
You're redirected to your Microsoft Online sign-in page. During this stage, you may be prompted to grant the necessary permissions for the Azure Bot Service, including reading chat messages, user profiles, and other Microsoft Graph API capabilities. Only a Microsoft 365 admin can grant these permissions.
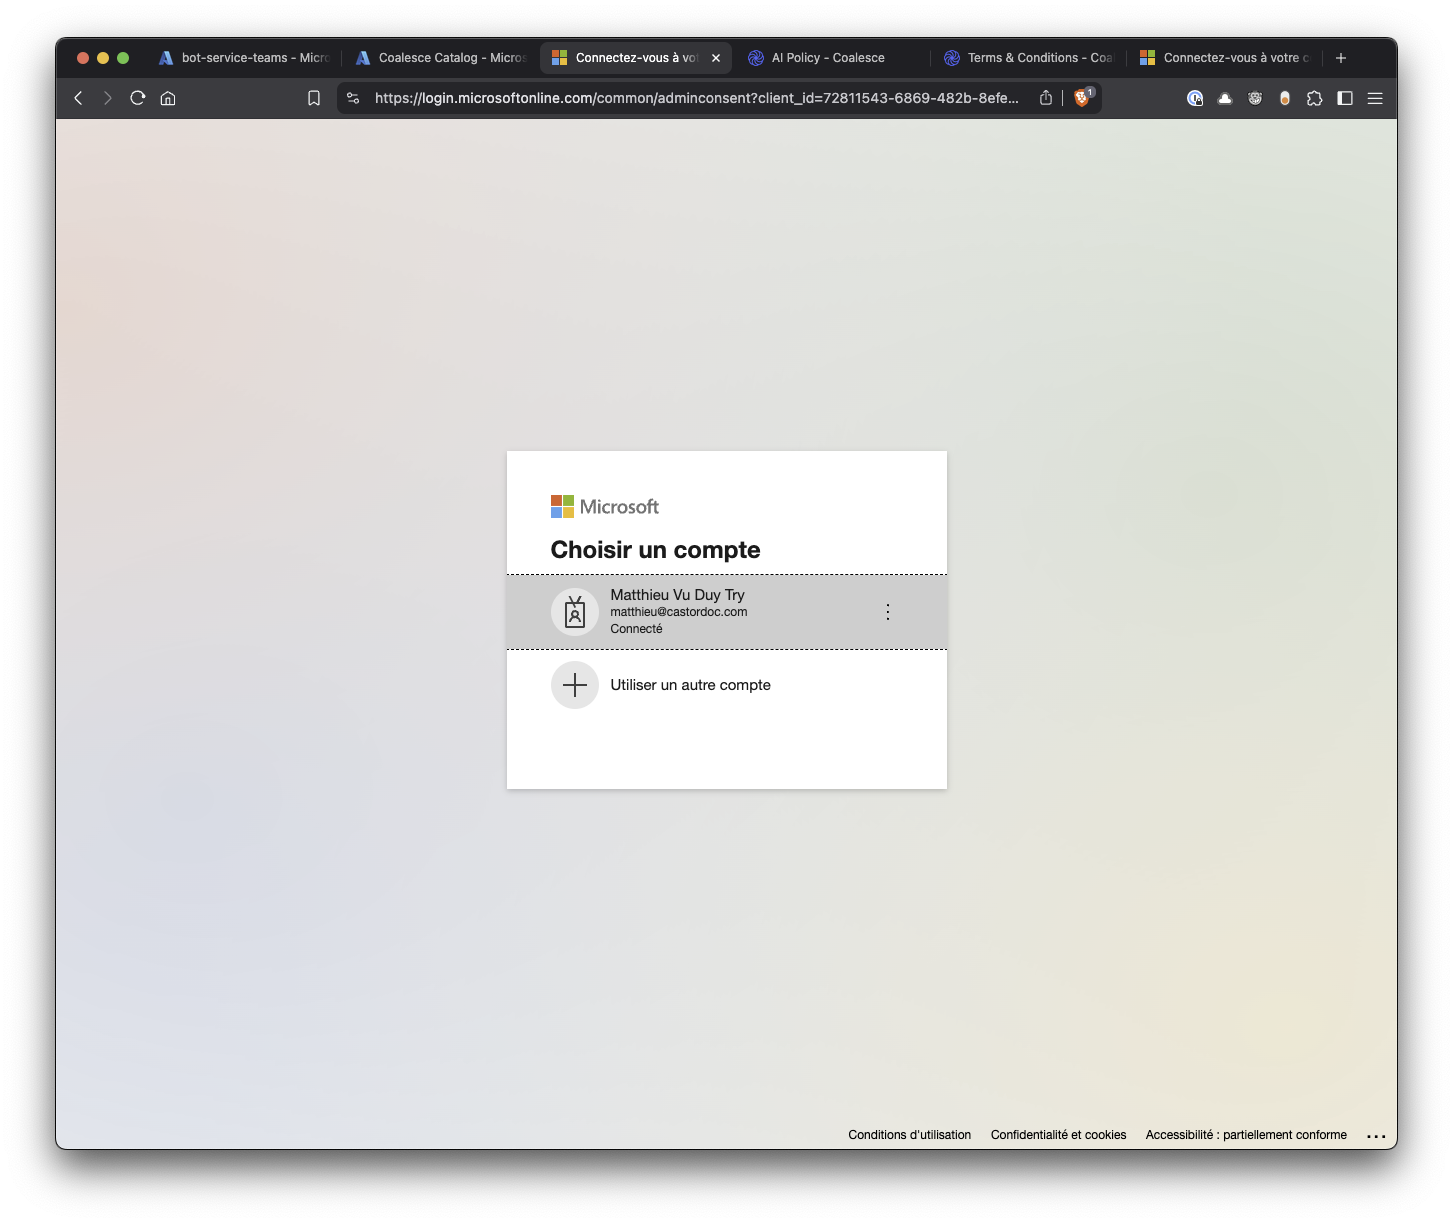
 (1).png)
Step 4: Complete Administrative Consent
Once the admin has consented, you're redirected back to app.castordoc.com/settings/integrations, where a confirmation toast appears indicating the installation was successful.

Once the integration is set up, a user synchronization from Azure Active Directory (Entra) to the Coalesce Catalog is initiated. This synchronization is automatically re-scheduled to run daily, ensuring user data remains up to date.
The AI Assistant in Microsoft Teams only responds to users with active accounts in the Coalesce Catalog. If a user doesn't have an active account, the AI Assistant ignores their messages.
Microsoft Teams Extension Installation
This section covers how to install the Teams extension in your organization.
Step 1: Enable Custom App Upload
If your organization has restricted the use of custom apps, you must enable the upload of custom apps before proceeding.
- Log into the Admin Center: Sign in at the Microsoft Teams Admin Center.
- Permission Policies: Navigate to Teams apps > Permission policies.
- Allow Custom Apps: Under Global (Org-wide default) or the relevant policy, ensure Custom Apps is set to Allowed.
- Save: Click Save.
Step 2: Prepare the Package for Upload
- Download the appropriate Teams package for your region:
- US Region: For accounts using
app.us.castordoc.comappPackage.prod-us.zip - EU Region: For accounts using
app.castordoc.comappPackage-1.0.2.prod-eu.zip
- US Region: For accounts using
- Locate the downloaded
.zipfile containing the custom extension manifest. - If you need to edit the manifest file to update icons, descriptions, or version, do so before proceeding. You can refer to the Teams App Studio for help.
- Confirm that your manifest file references the correct application endpoints.
Step 3: Install the Extension
Microsoft Teams offers 2 ways to install custom extensions: using the Teams Client or the Microsoft Teams Admin Center Panel.
Install Using the Teams Client
If your organization has Allow custom app uploads enabled for end users, you can install the extension directly from within the Microsoft Teams client.
-
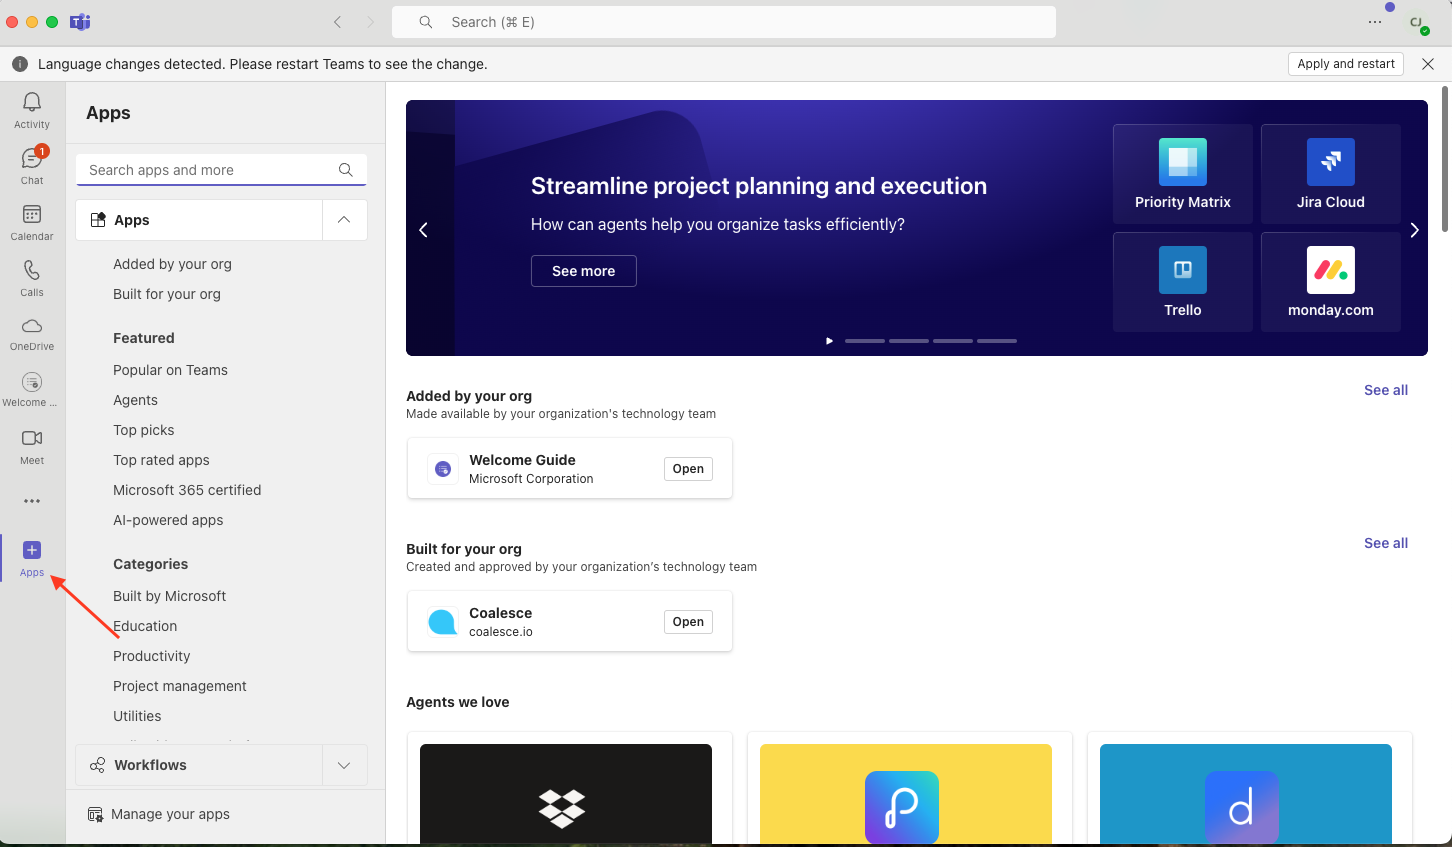
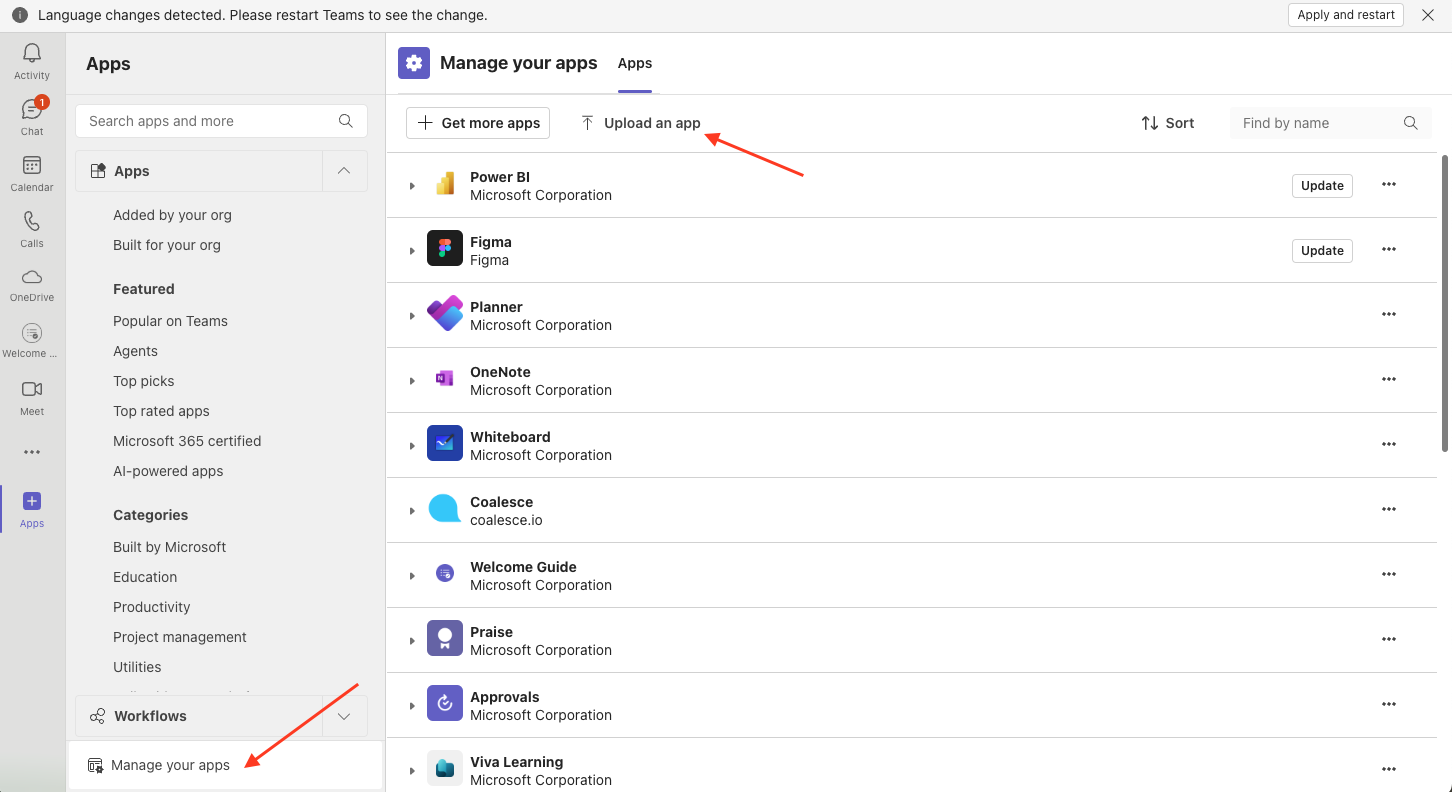
Open Teams: In the Microsoft Teams desktop or web client, select Apps on the left navigation.
-
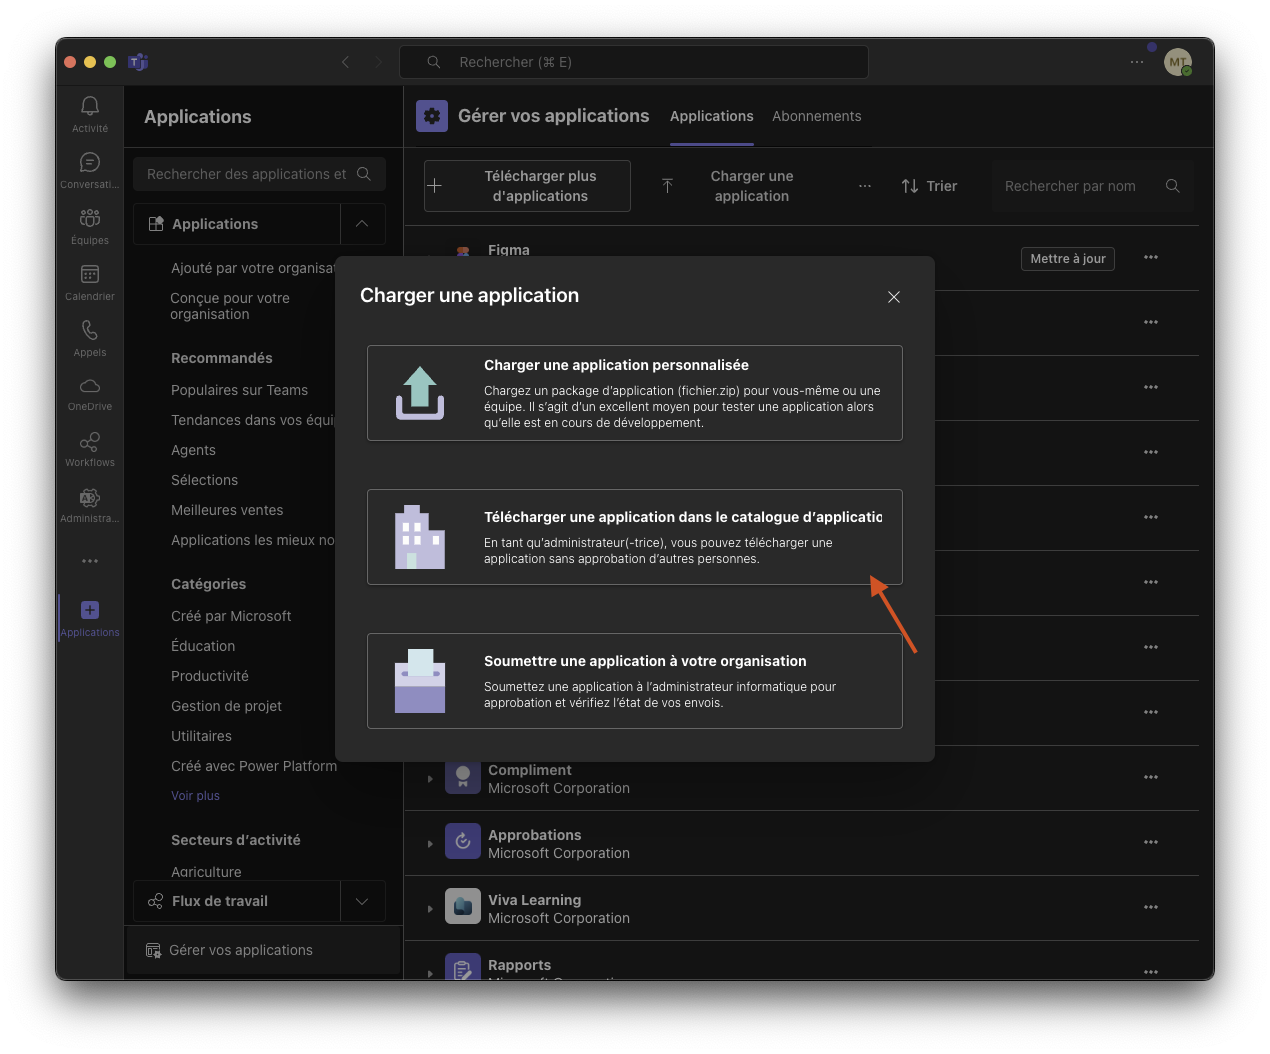
Upload a Custom App: At the bottom of the Apps pane, choose Upload a custom app.
-
Select File: Browse to the
.zipfile containing your custom extension.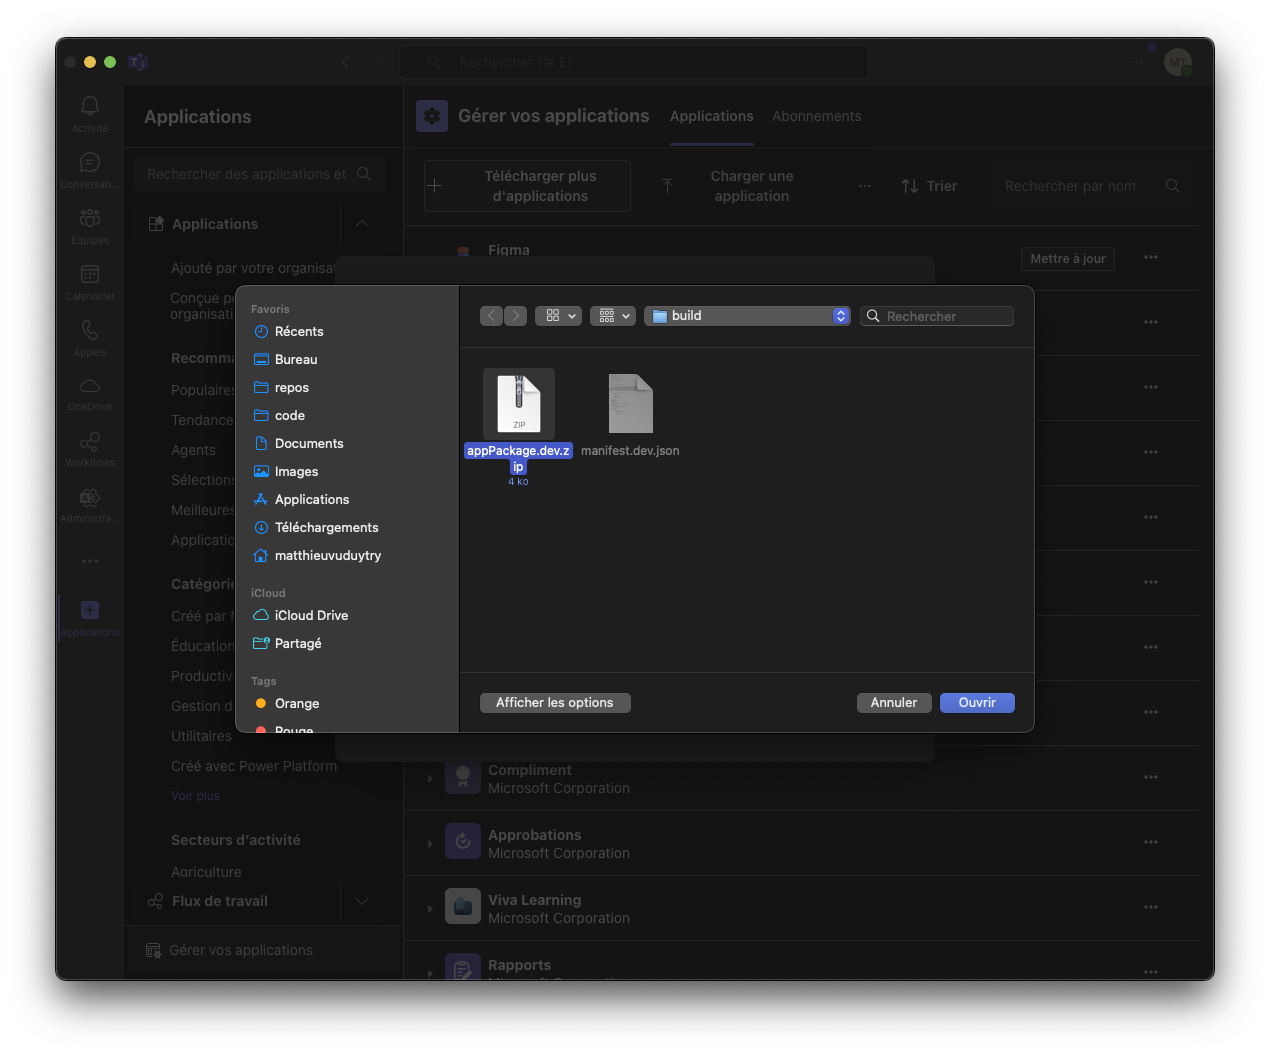
-
Consent (If Required): If prompted for app permissions, only a Microsoft 365 admin can grant these permissions organization-wide.
-
Complete Installation: Once uploaded, you should see a confirmation message, and your new extension appears on your app list.
Install Using the Admin Center
If you're an admin and want to upload the extension directly through the Microsoft Teams Admin Center, follow these steps.
-
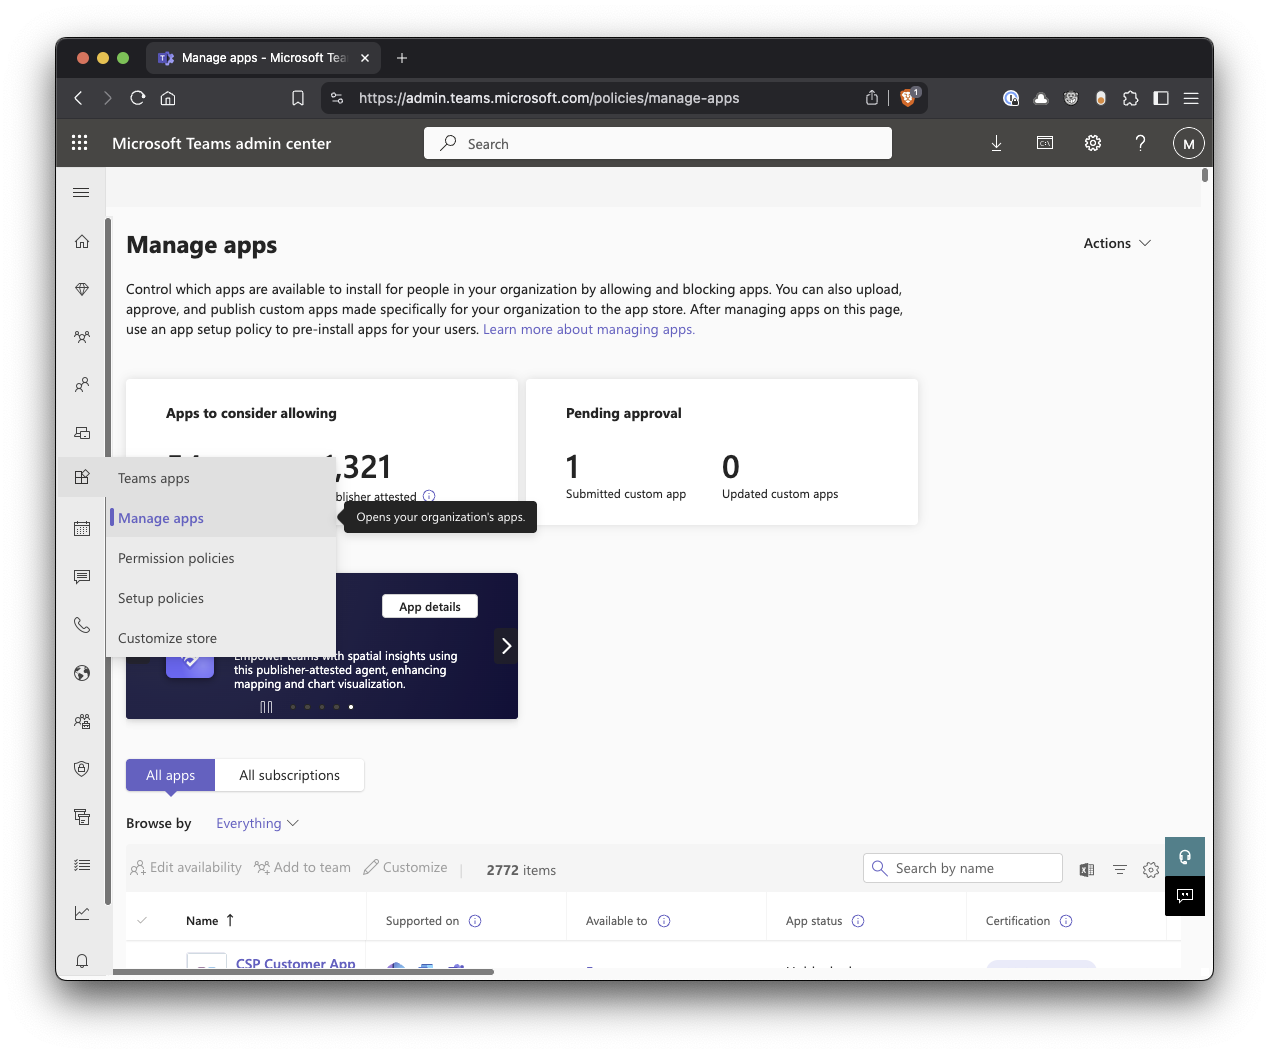
Manage Apps: In the Microsoft Teams Admin Center, go to Teams apps > Manage apps.
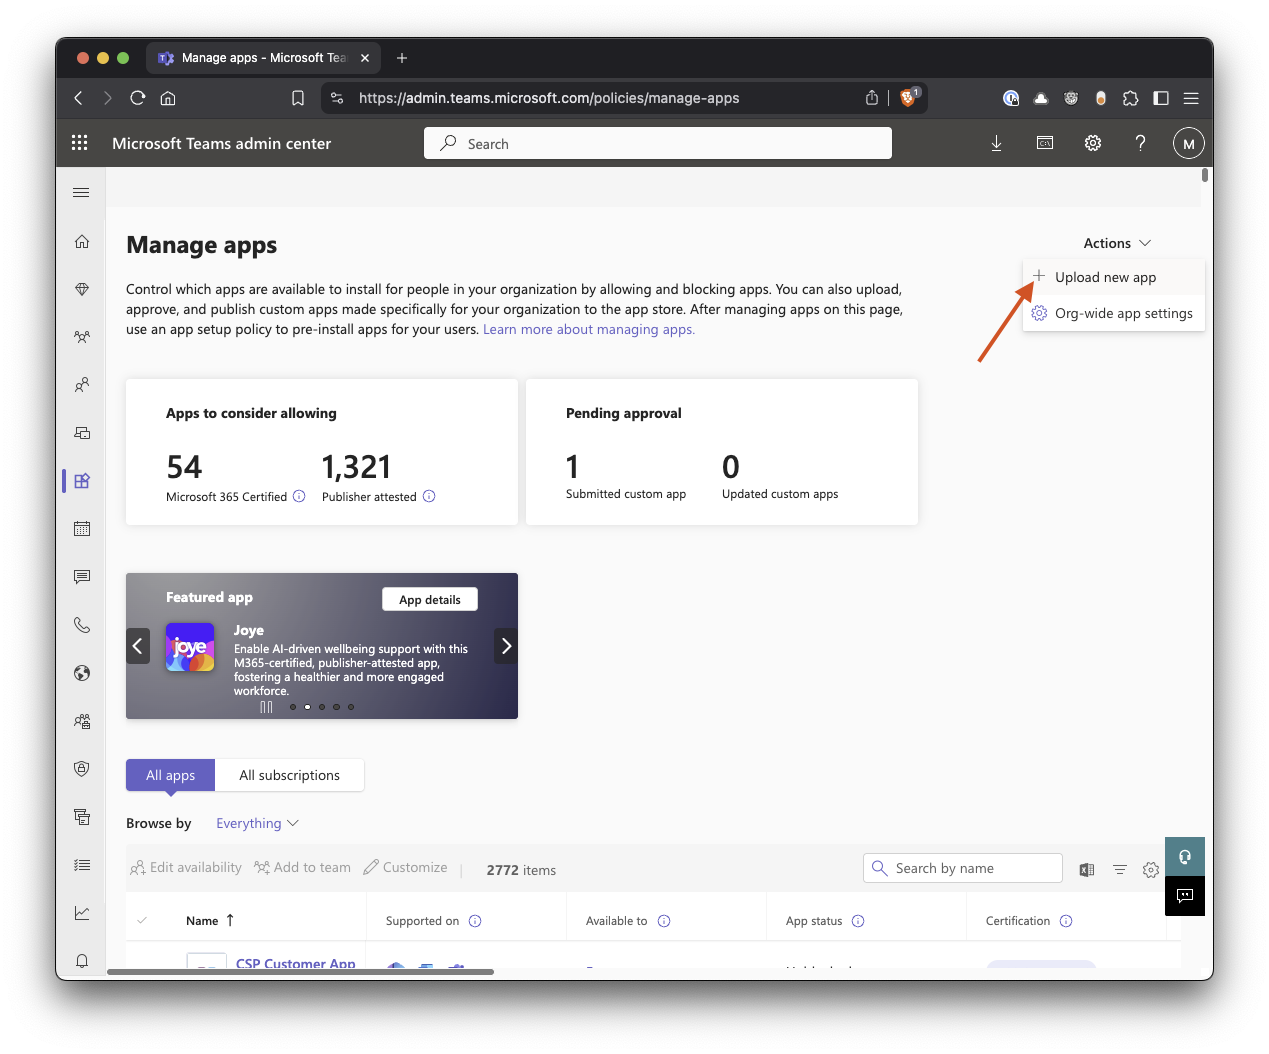
-
Upload: Click Upload.
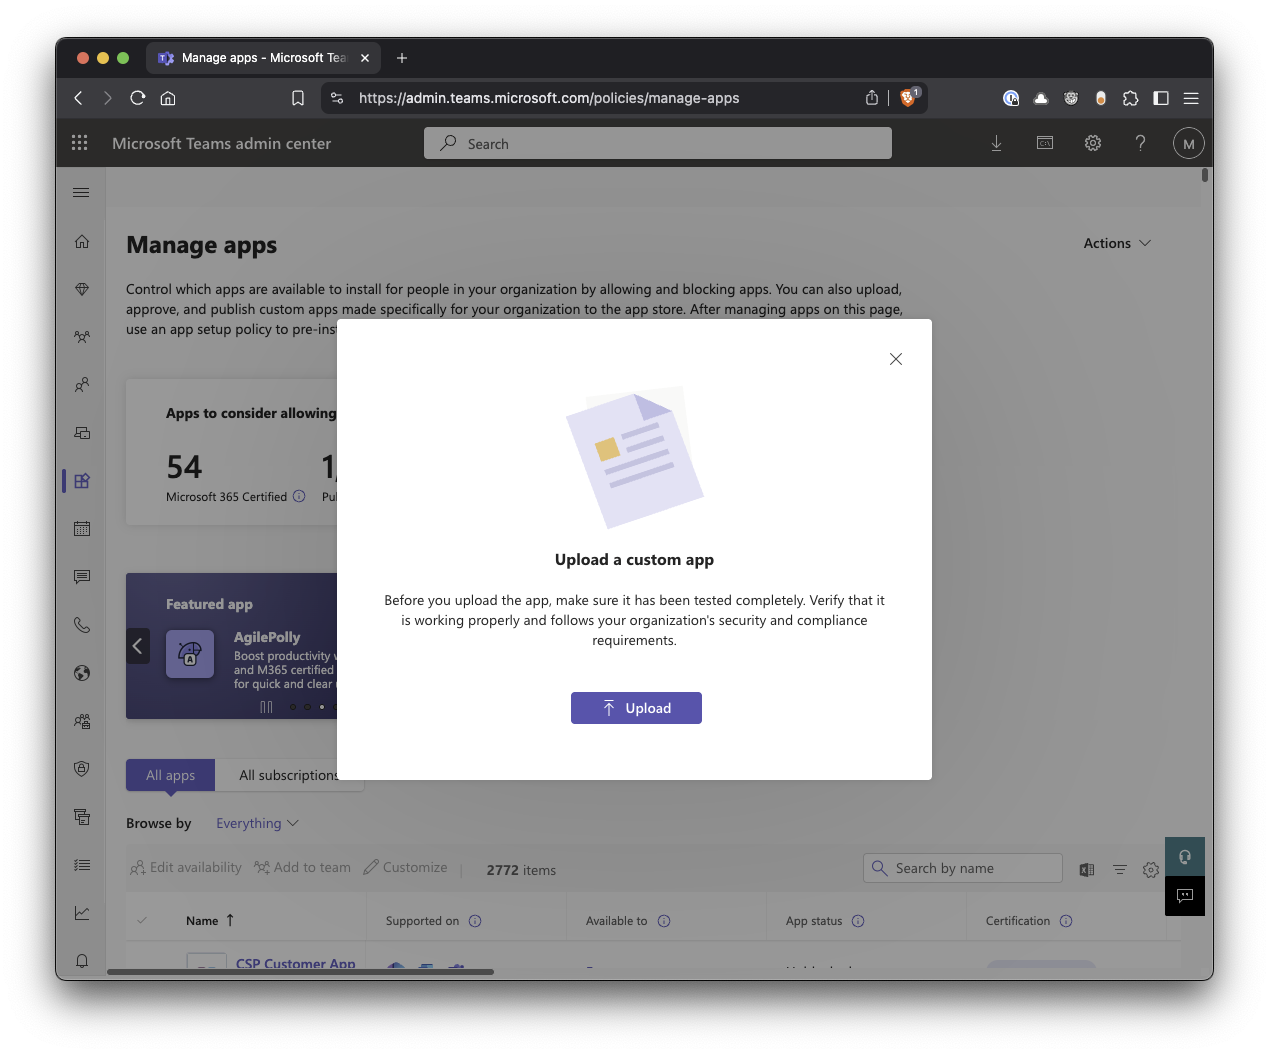
-
Select File: Browse to the
.zipfile for your custom extension and select it. -
Complete Upload: Wait for the upload process to complete.
Step 4: Assign the Extension to Users Using App Setup Policies
If you want specific users or groups to receive notifications from the Coalesce Catalog, the Teams Catalog app must be installed for those users. You can either have users install the extension through self-service, or you can deploy it to them using App setup policies.
-
Setup Policies: Under Teams apps in the Microsoft Teams Admin Center.
-
Select Coalesce Catalog, then select the Users and Groups tab.
-
Search and Add: Search for your newly uploaded custom extension and add it.
-
Save: Click Save.
Step 5: Create a Custom App Setup Policy
- In the left navigation of the Teams Admin Center, expand Teams apps and select Setup policies.
- Click + Add to create a new policy.
- Name it something recognizable (e.g., "Coalesce App Install Policy").
- Scroll down to the Installed apps section.
- Click Add apps.
- Search for Coalesce, click Add, and then click Add again at the bottom of the pane.
- (Optional but recommended) Under Pinned apps, you can also add Coalesce here if you want the app icon to be permanently pinned to their left-hand Teams navigation bar so they don't miss it.
- Click Save at the bottom of the policy page.
Step 6: Assign the Policy to Your Specific Groups
Now you need to apply this pushing policy to the groups you identified.
- Still on the Setup policies page, look for the Group policy assignment tab at the top (next to 'Manage policies').
- Click + Add group.
- Search for the group that you want the application pushed to.
- Select a rank (rank determines which policy wins if a user belongs to multiple groups; rank 1 is the highest).
- Under Select a policy, choose the "Coalesce App Install Policy" you just created.
- Click Apply.
- Repeat this process for the Toll Analytics - Data and BI group.
Step 7: Done
Once the extension is installed, the user has access to it, and they have a provisioned account in catalog, they can interact with the AI Assistant in 2 ways:
- In 1-to-1 chat.
- In a group chat, by mentioning @Coalesce Assistant, followed by your question.
Microsoft Teams Extension Uninstall
This section covers how to remove the Teams extension from your organization.
Uninstall Using the Teams Client
If you installed the extension directly through the Teams client, you can remove it at the user level.
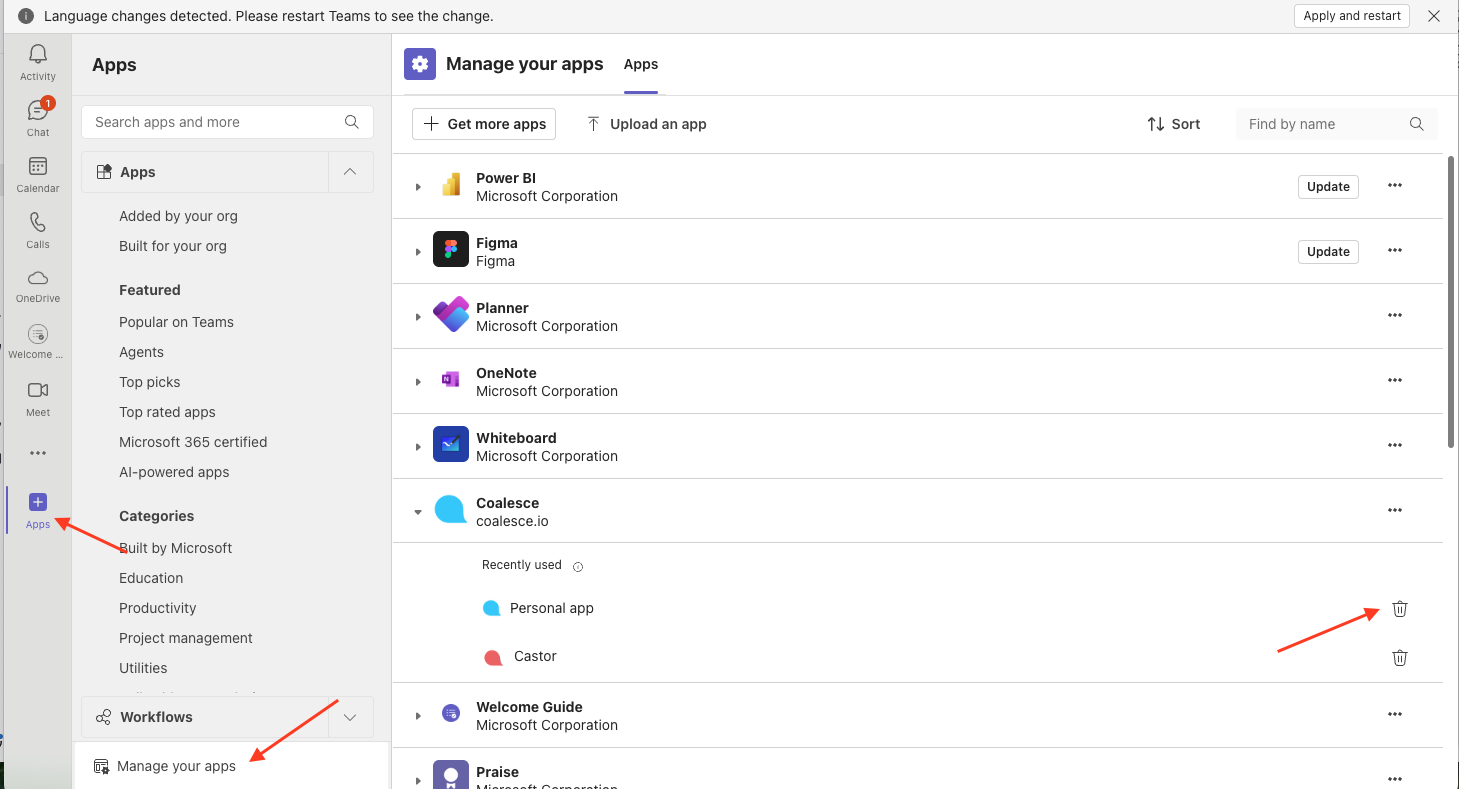
- Open Teams: In the Microsoft Teams desktop or web client, select Apps on the left navigation.
- Find Your Extension: Look for your custom extension under Built for your org or Uploaded.
- Open the Extension Menu: Click the extension's name or right-click.
- Uninstall: Select Uninstall or Remove and confirm if prompted.
Uninstall Using the Admin Center
If you want to remove or uninstall the custom extension from your organization, follow these steps.
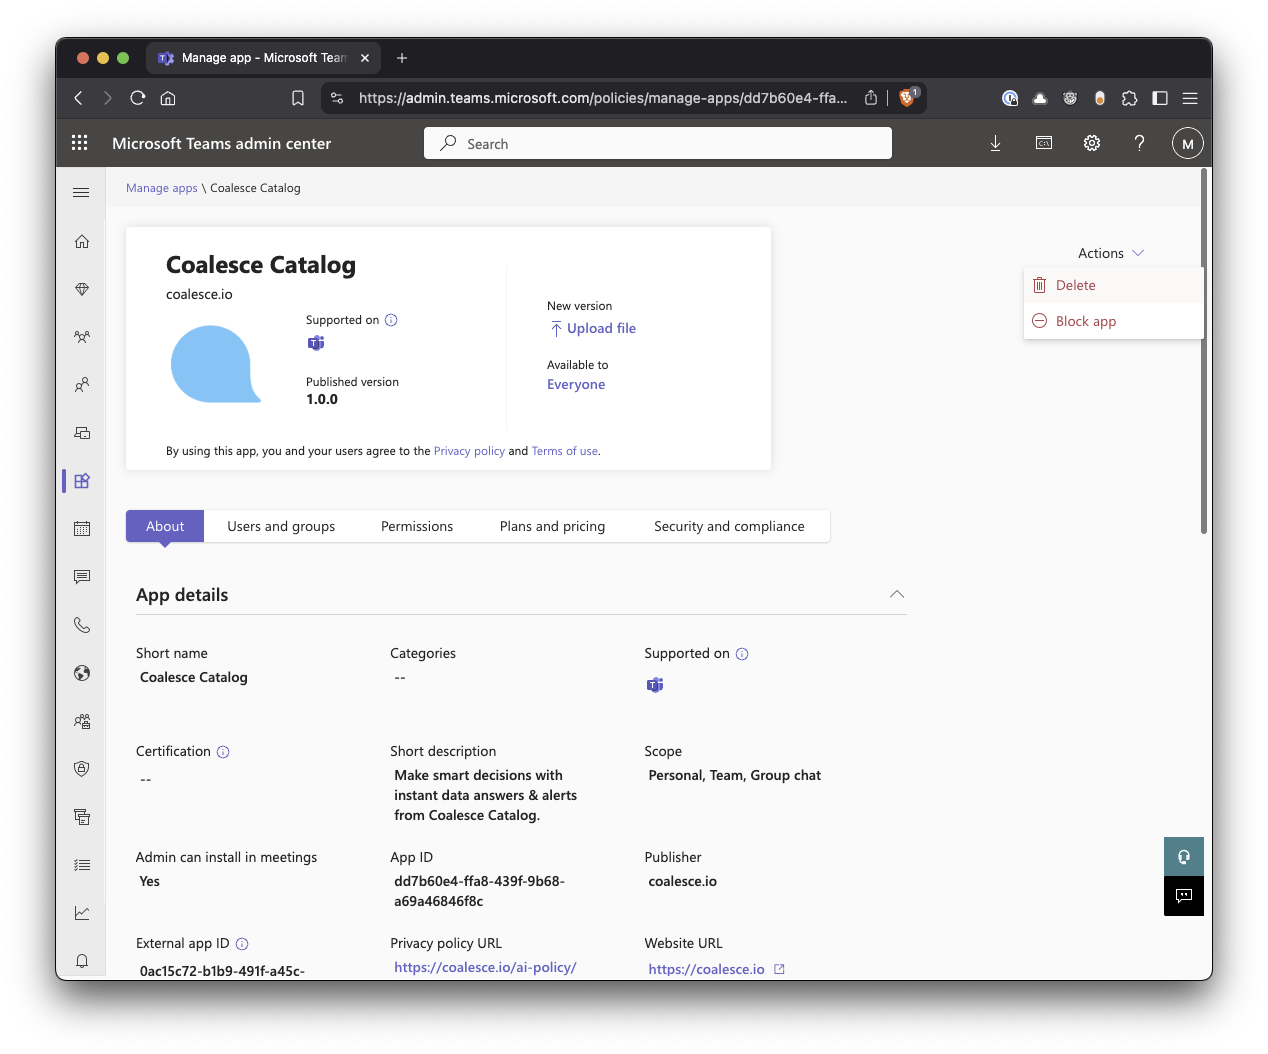
- Unpublish or Block the Extension:
- Navigate to Teams apps > Manage Apps in the Microsoft Teams Admin Center.
- Locate the custom extension.
- Select Block to disable it temporarily, or Delete to permanently remove it from your tenant.
- Confirm Removal:
- Wait a few minutes for the changes to propagate.
- Sign out and sign back in to Microsoft Teams to ensure the extension is no longer visible.
Troubleshooting
This section covers common issues and how to resolve them.
Extension Not Showing Up: Double-check the app permissions and setup policies in the Teams admin center.
Missing Permissions: Ensure your account has the necessary Microsoft 365 admin roles.
Provide Tenant ID: If you contact support, your Microsoft 365 tenant ID helps track activity in the logs, making diagnosing and resolving any issues more straightforward.
For further assistance or clarifications, reach out to the support team.