Snowflake Username and Password
Basic Auth is the fastest way to connect your target database platform to Coalesce, and the credential can be stored either in your local browser's storage (not recommended) or in Coalesce's cloud secrets vault.
-
Navigate to Build Settings > Environments or Workspaces.
-
Select Edit on the environment or workspace that you wish to connect to Snowflake using Basic Auth.
-
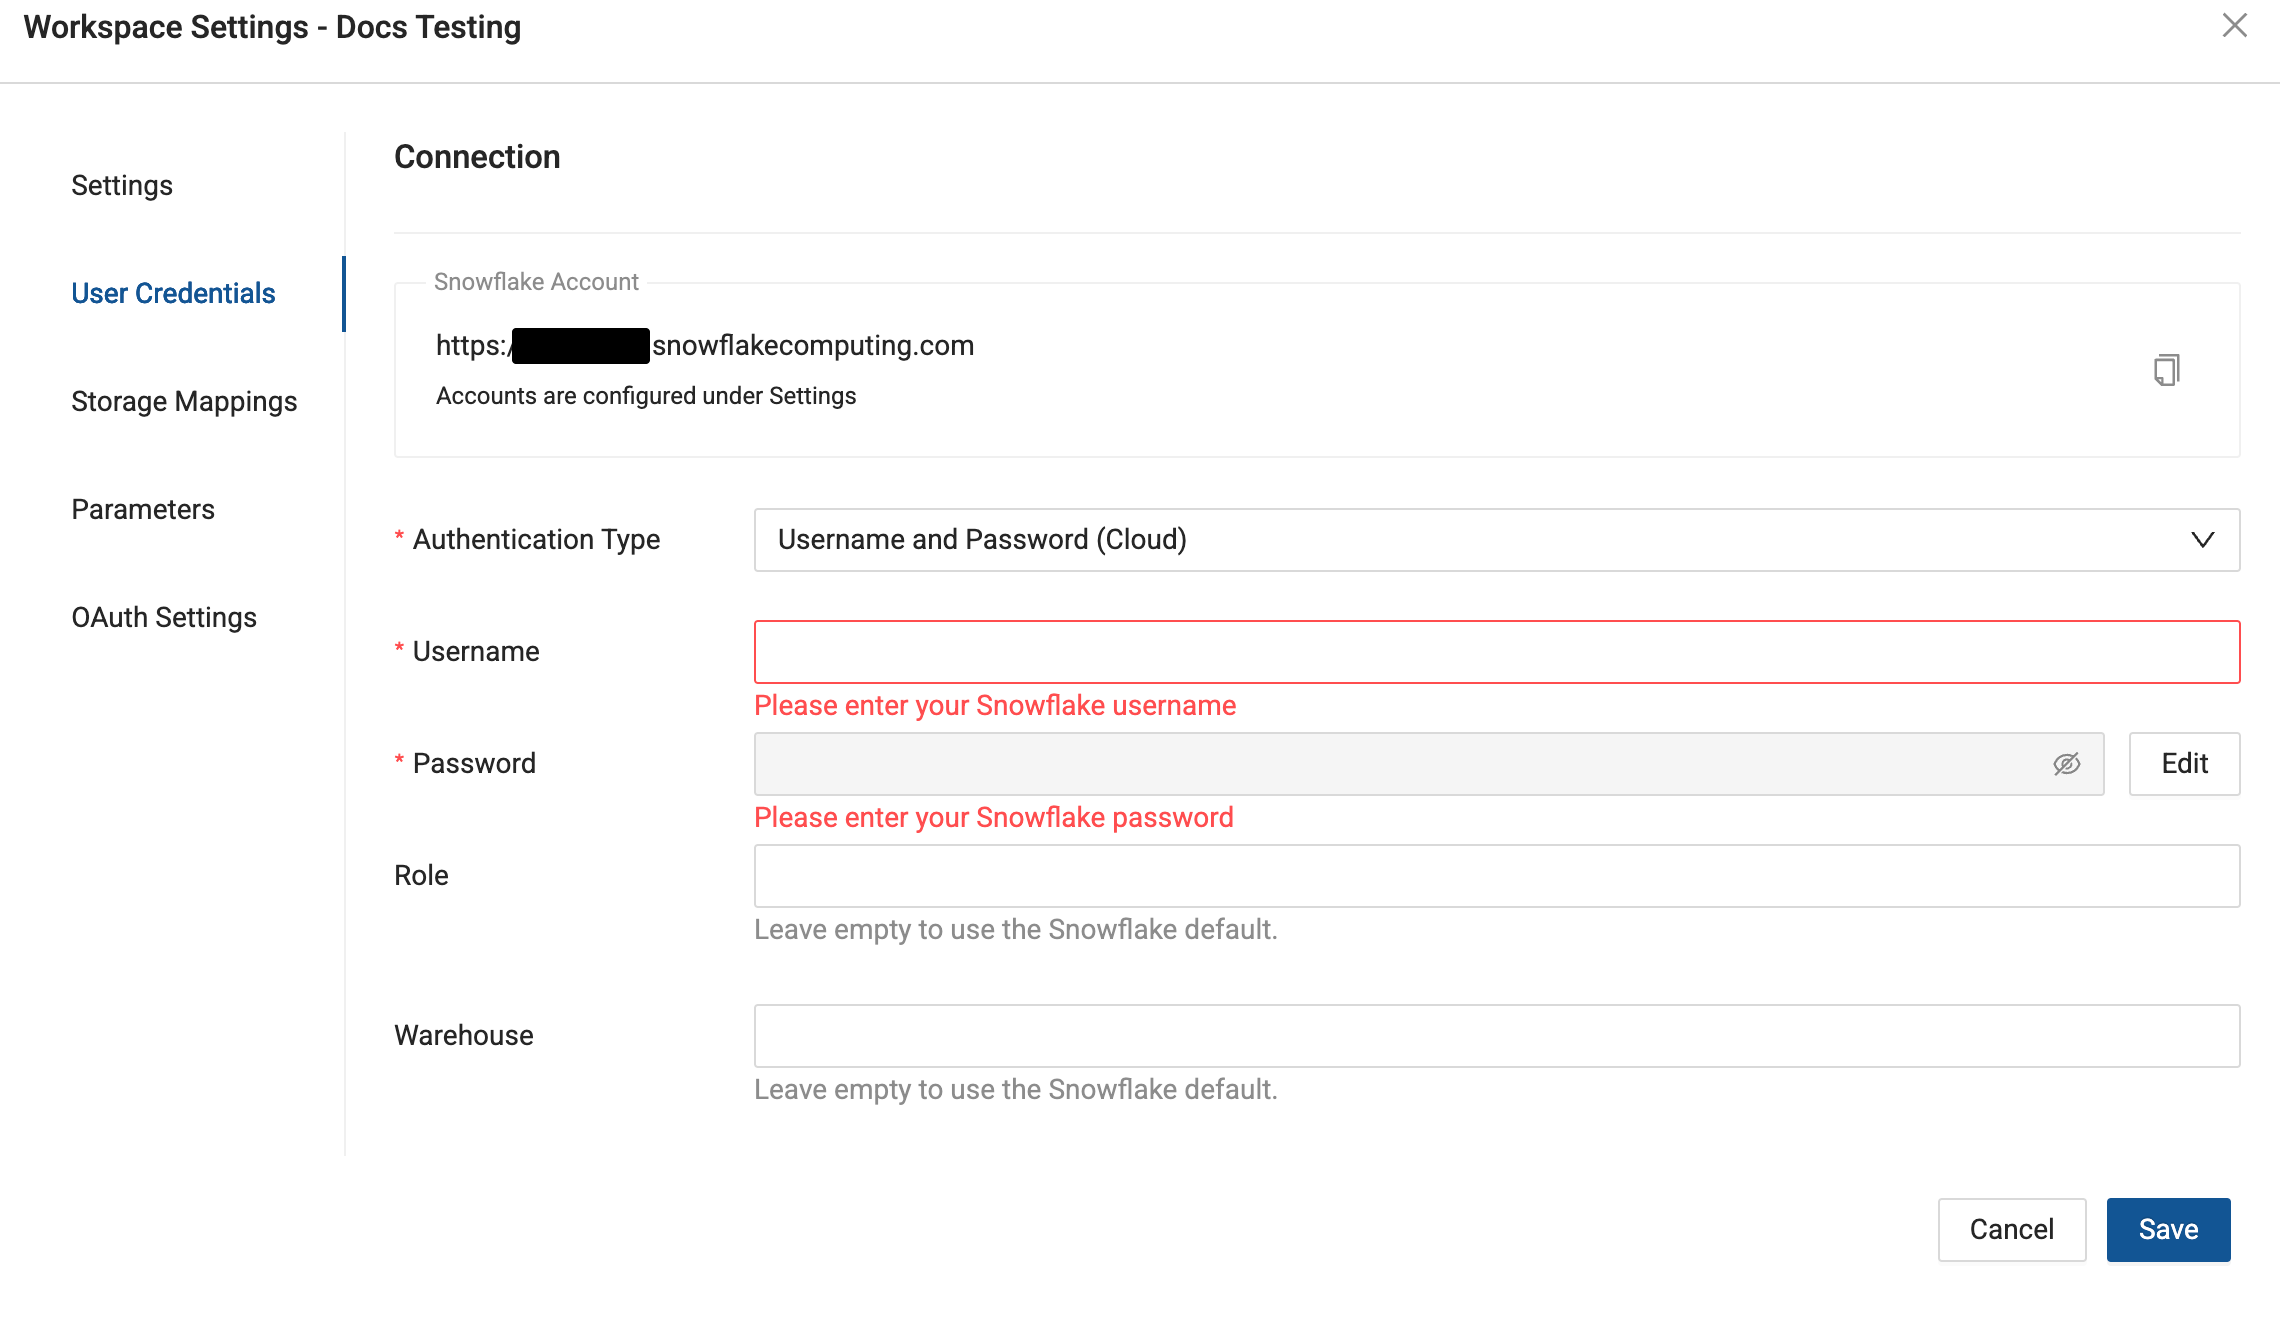
On the Settings Page, enter your Snowflake Account URL.
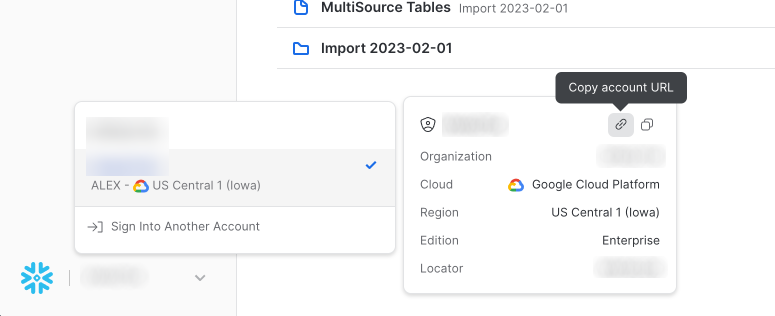
- Obtain your Snowflake URL, by opening the account selector in Snowflake.
-
In Edit Environment or Workspace > User Credentials, select Authentication Type as Username and Password (Cloud) or Username and Password (Browser Storage).
-
Enter Username and Password into their respective fields and Save.