Documentation index: llms.txt. This page is also available as markdown: append .md to this URL or send Accept: text/markdown.
Azure AD Authentication Using SAML
Configure Azure AD authentication for Catalog using SAML. In this guide you'll create an Azure AD app, configure claims, and add the certificate to Catalog.
Before You Begin
You'll need to be an Entra admin.
Create the Entra ID App for Catalog
You'll register an enterprise application that acts as the SAML identity provider for Catalog.
-
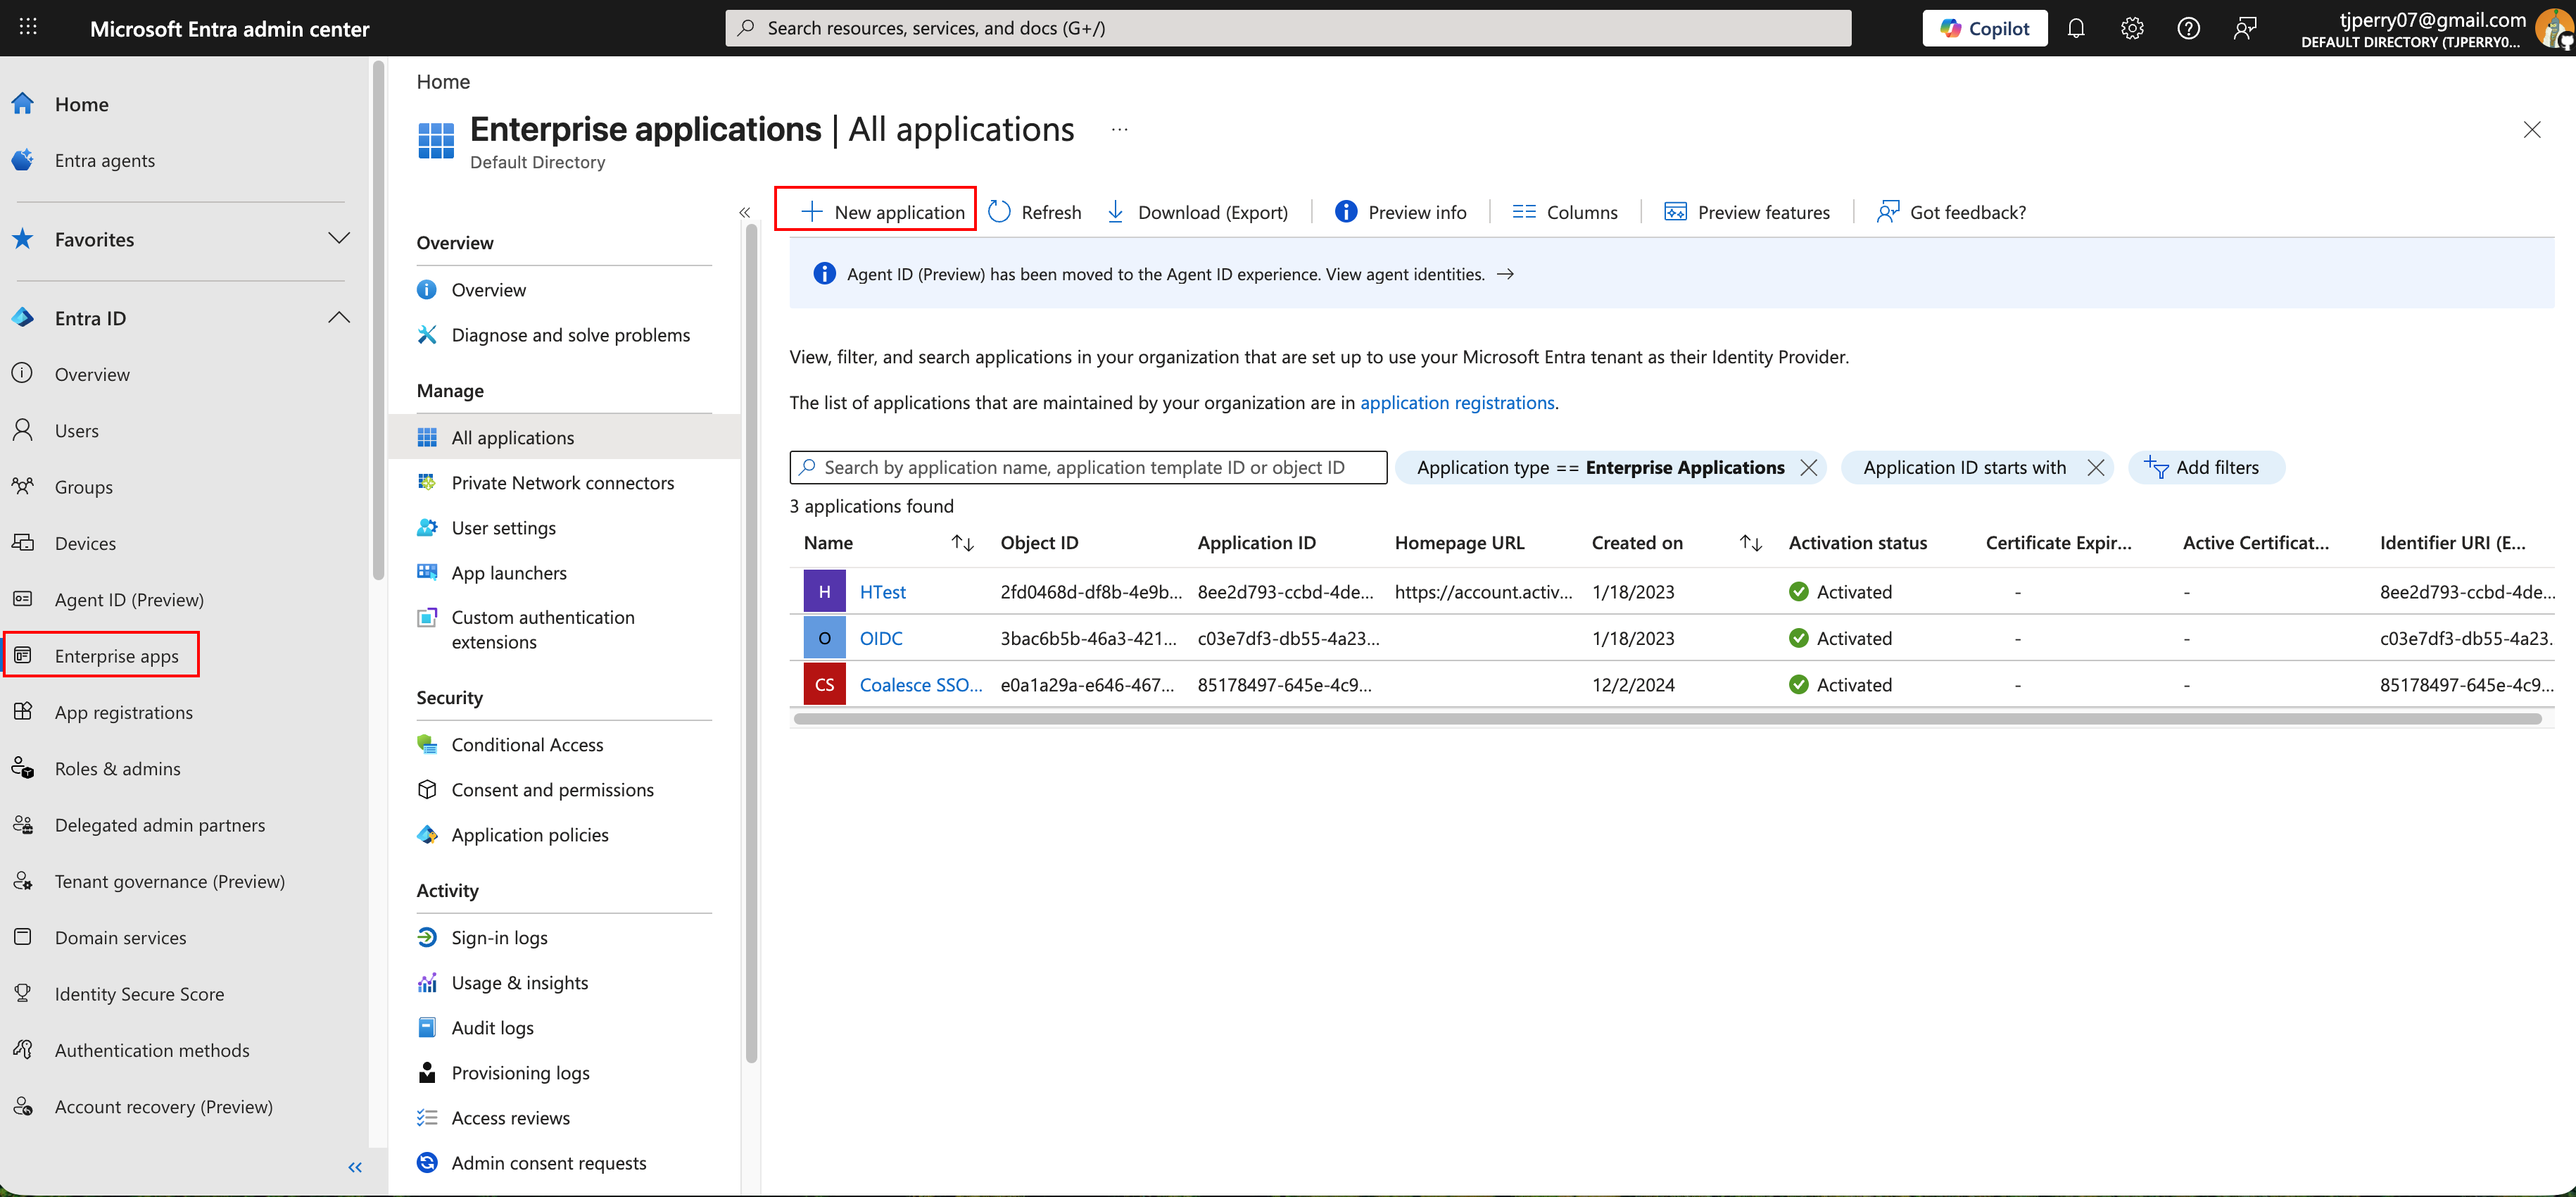
Go to the Microsoft Entra admin portal.
-
Go to Enterprise applications > All applications.
-
Click New Application.
-
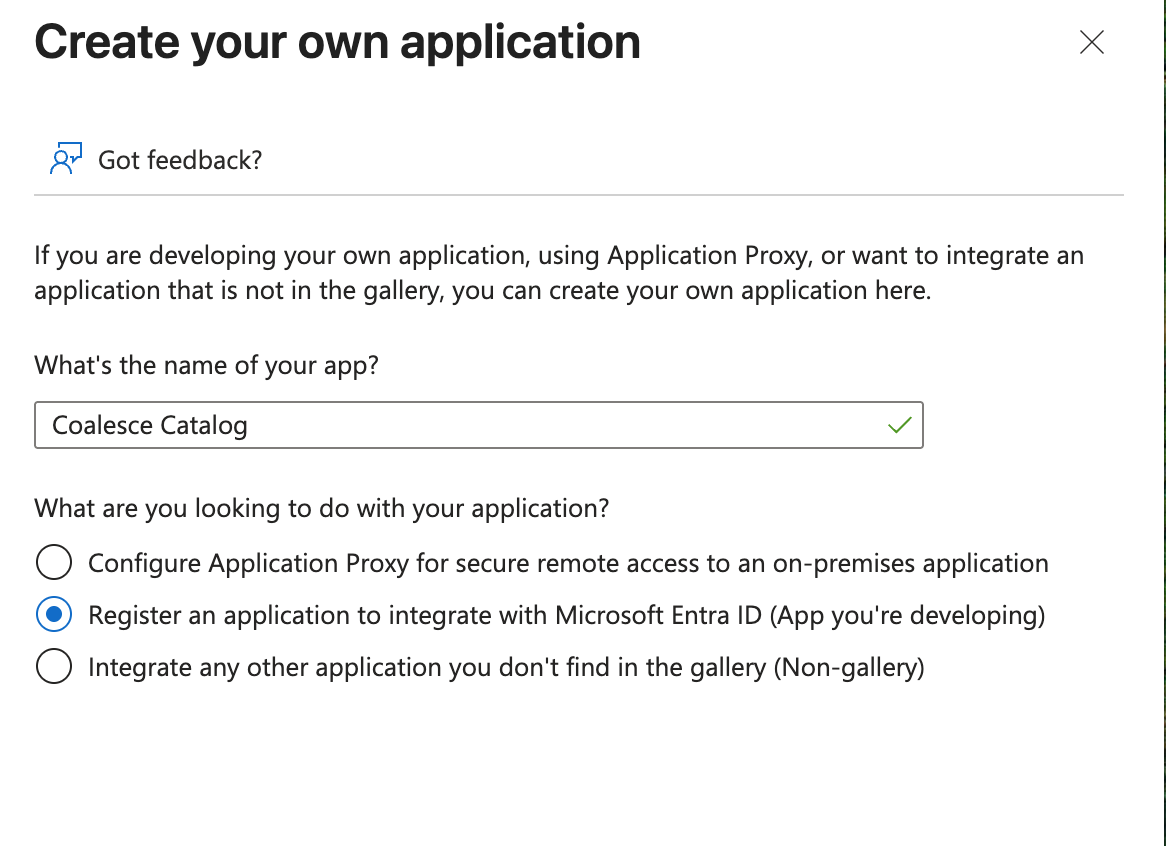
Click Create your own application.
-
Choose Integrate any other application you don't find in the gallery.
-
Name your app.
-
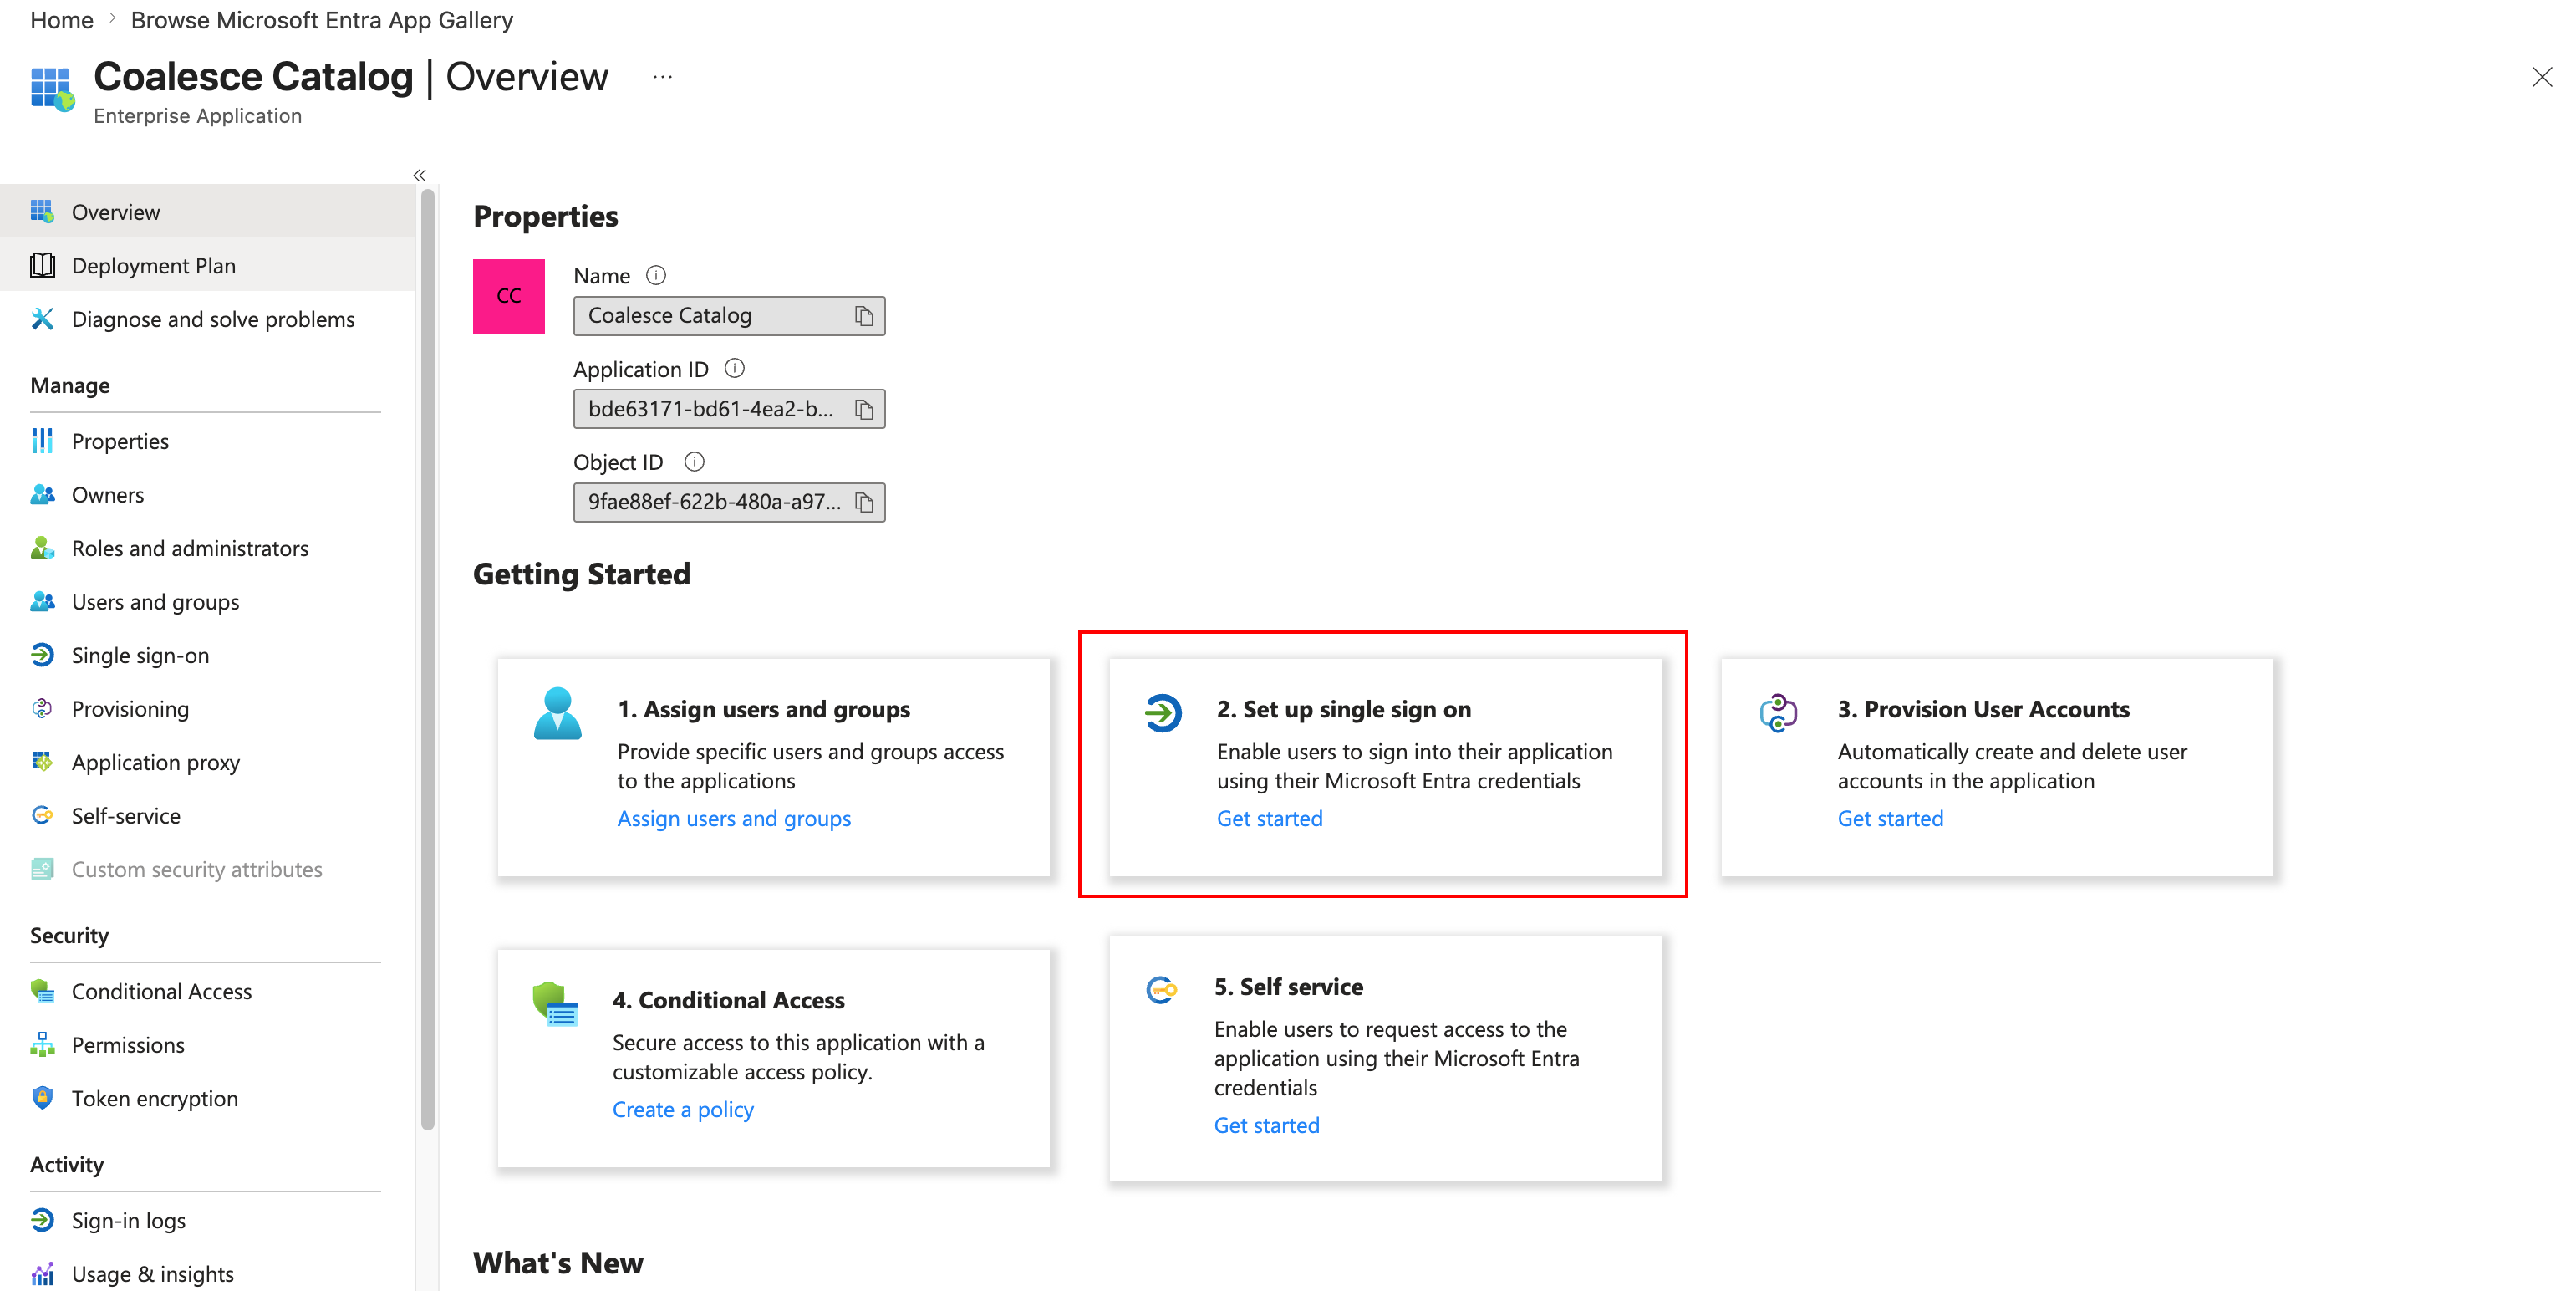
On the Overview page, select 2. Set up single sign on.
-
Then select SAML.
-
On the Set up Single Sign-On with SAML page, open Basic SAML Configuration. Set Identifier to
production-castorSAML. This value is the SAML entity ID. -
Set Reply URL based on your account region:
- For accounts using
app.castordoc.com, usehttps://api.castordoc.com/auth/saml/callback. - For accounts using
app.us.castordoc.com, usehttps://api.us.castordoc.com/auth/saml/callback.
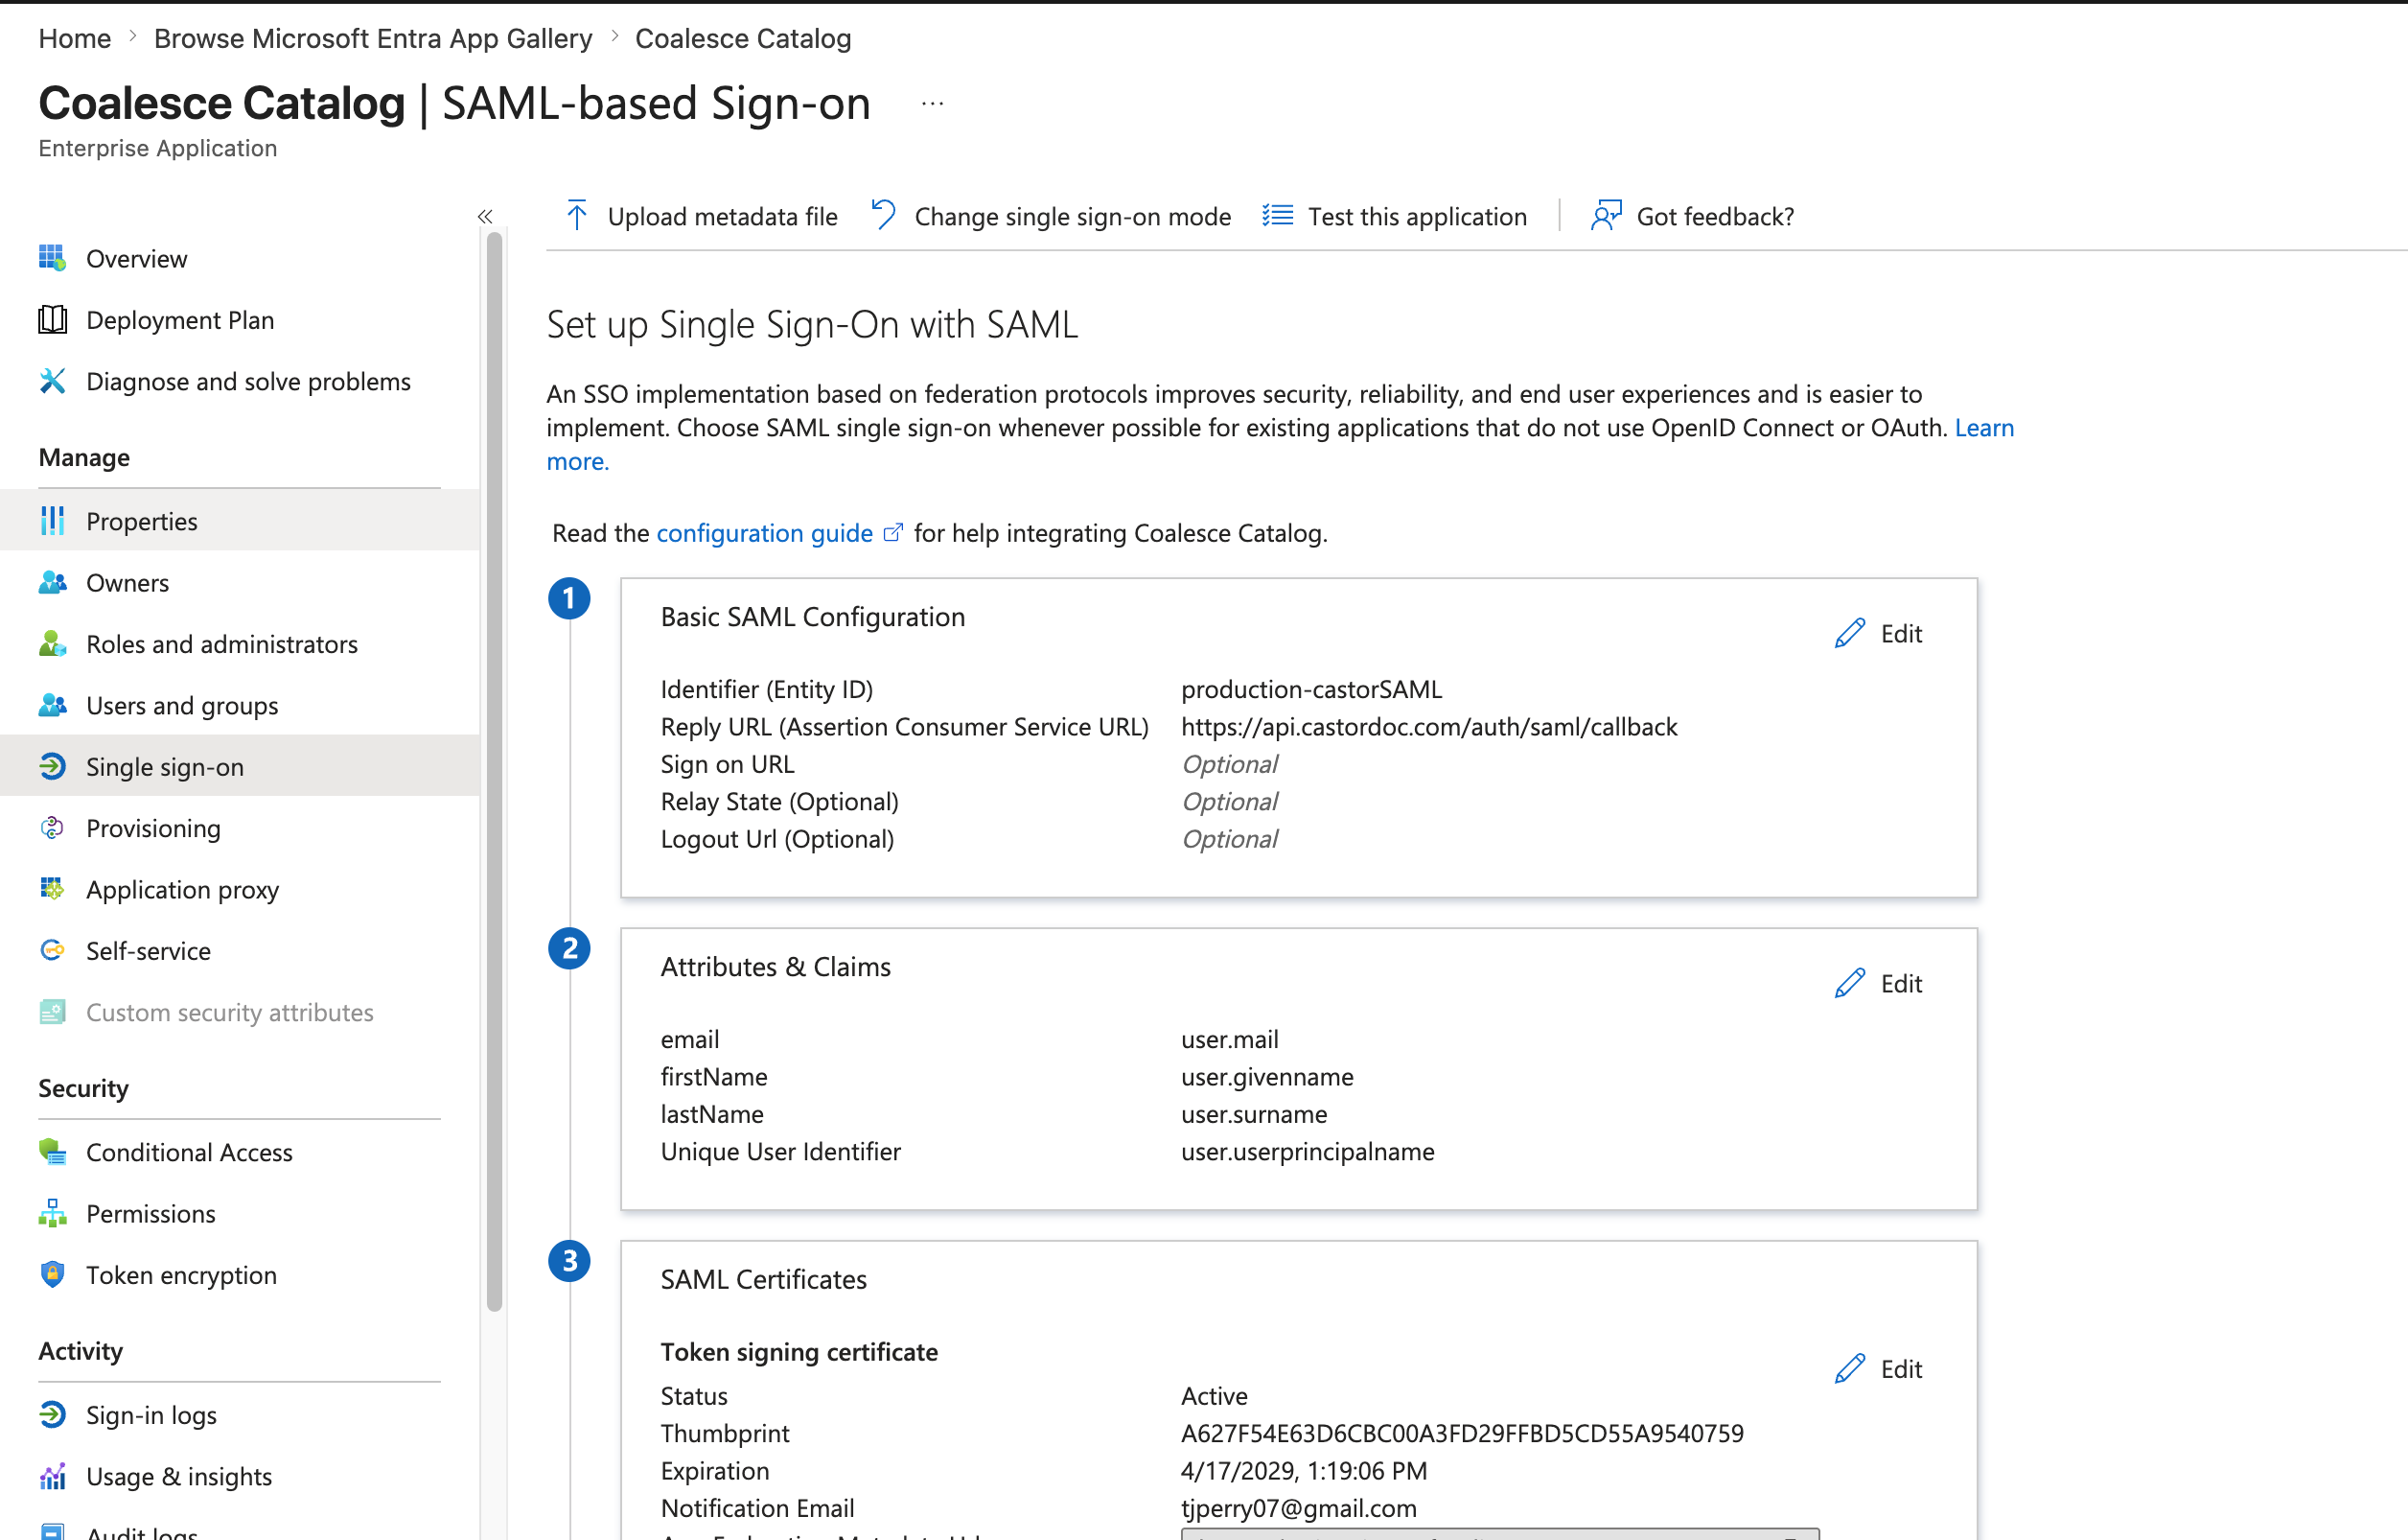
- For accounts using
-
Open Attributes & Claims and map the following optional claims:
user.givennamemaps tofirstNameuser.surnamemaps tolastNameuser.mailmaps toemail- You can delete
user.userprincipalname. - Make sure to delete the Namespace.
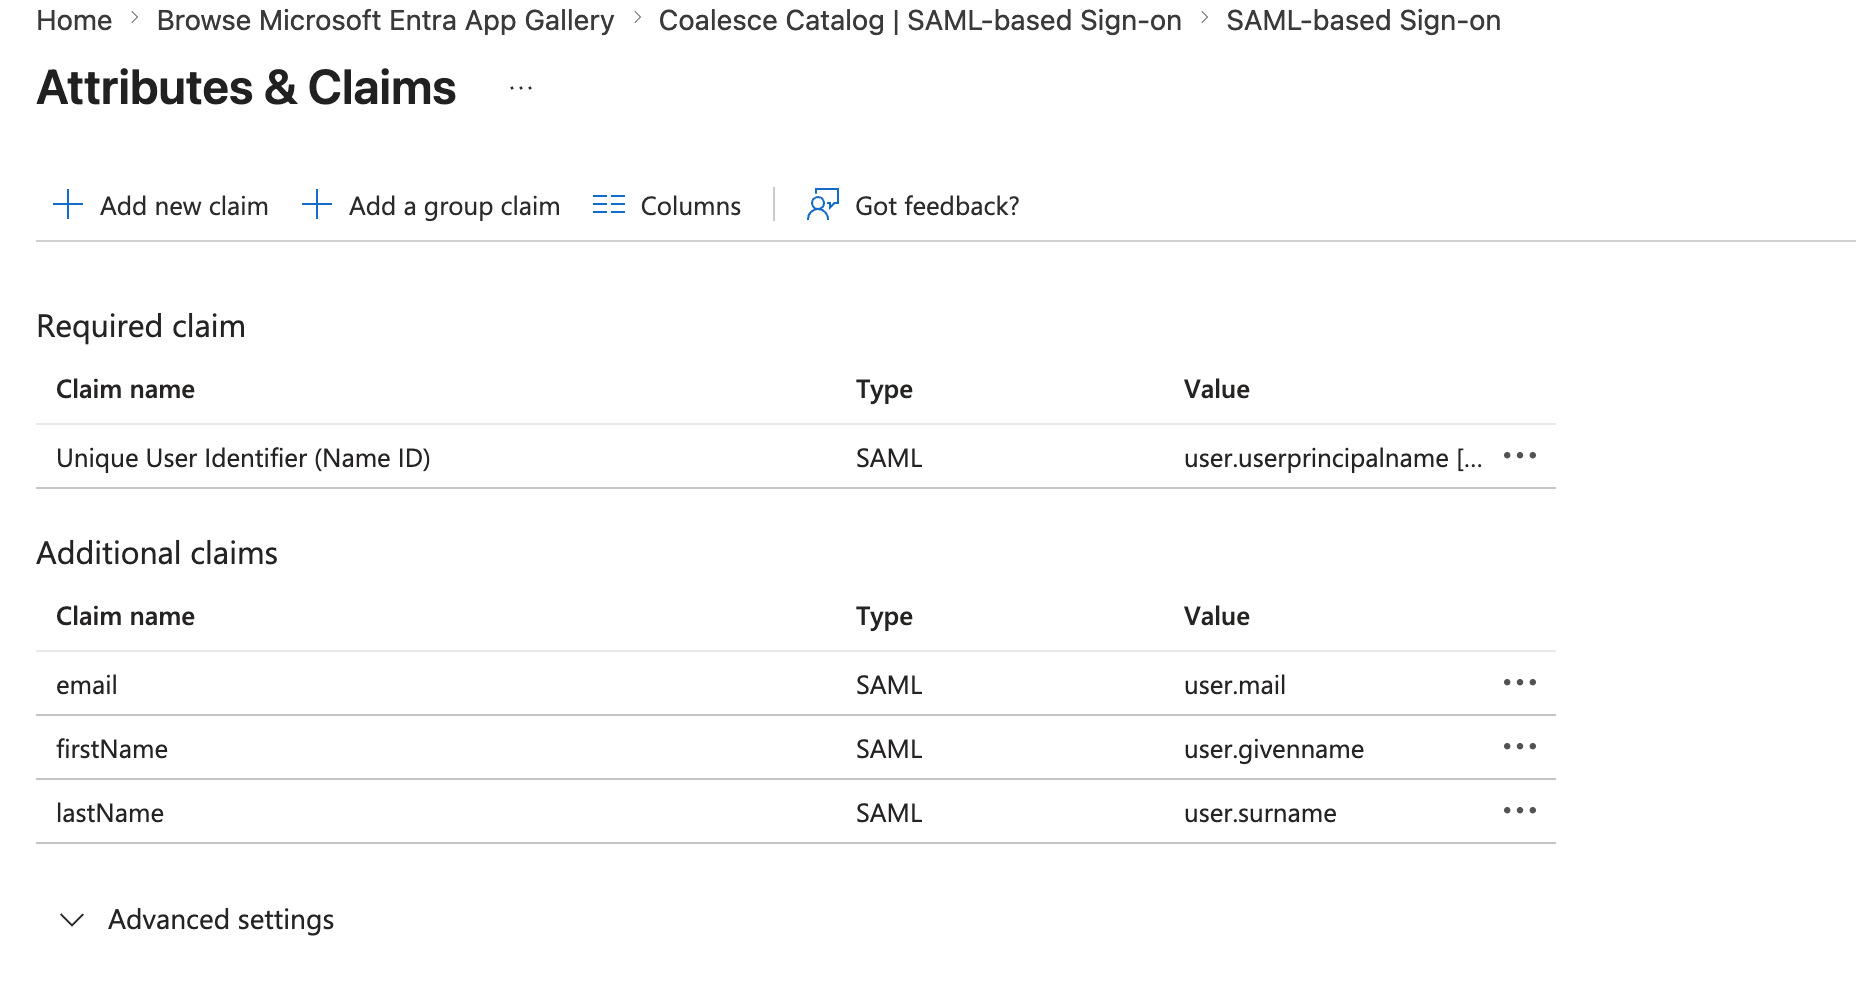 Claim configuration
- Keep the Namespace empty for each claim.
- Claim names are case sensitive.
-
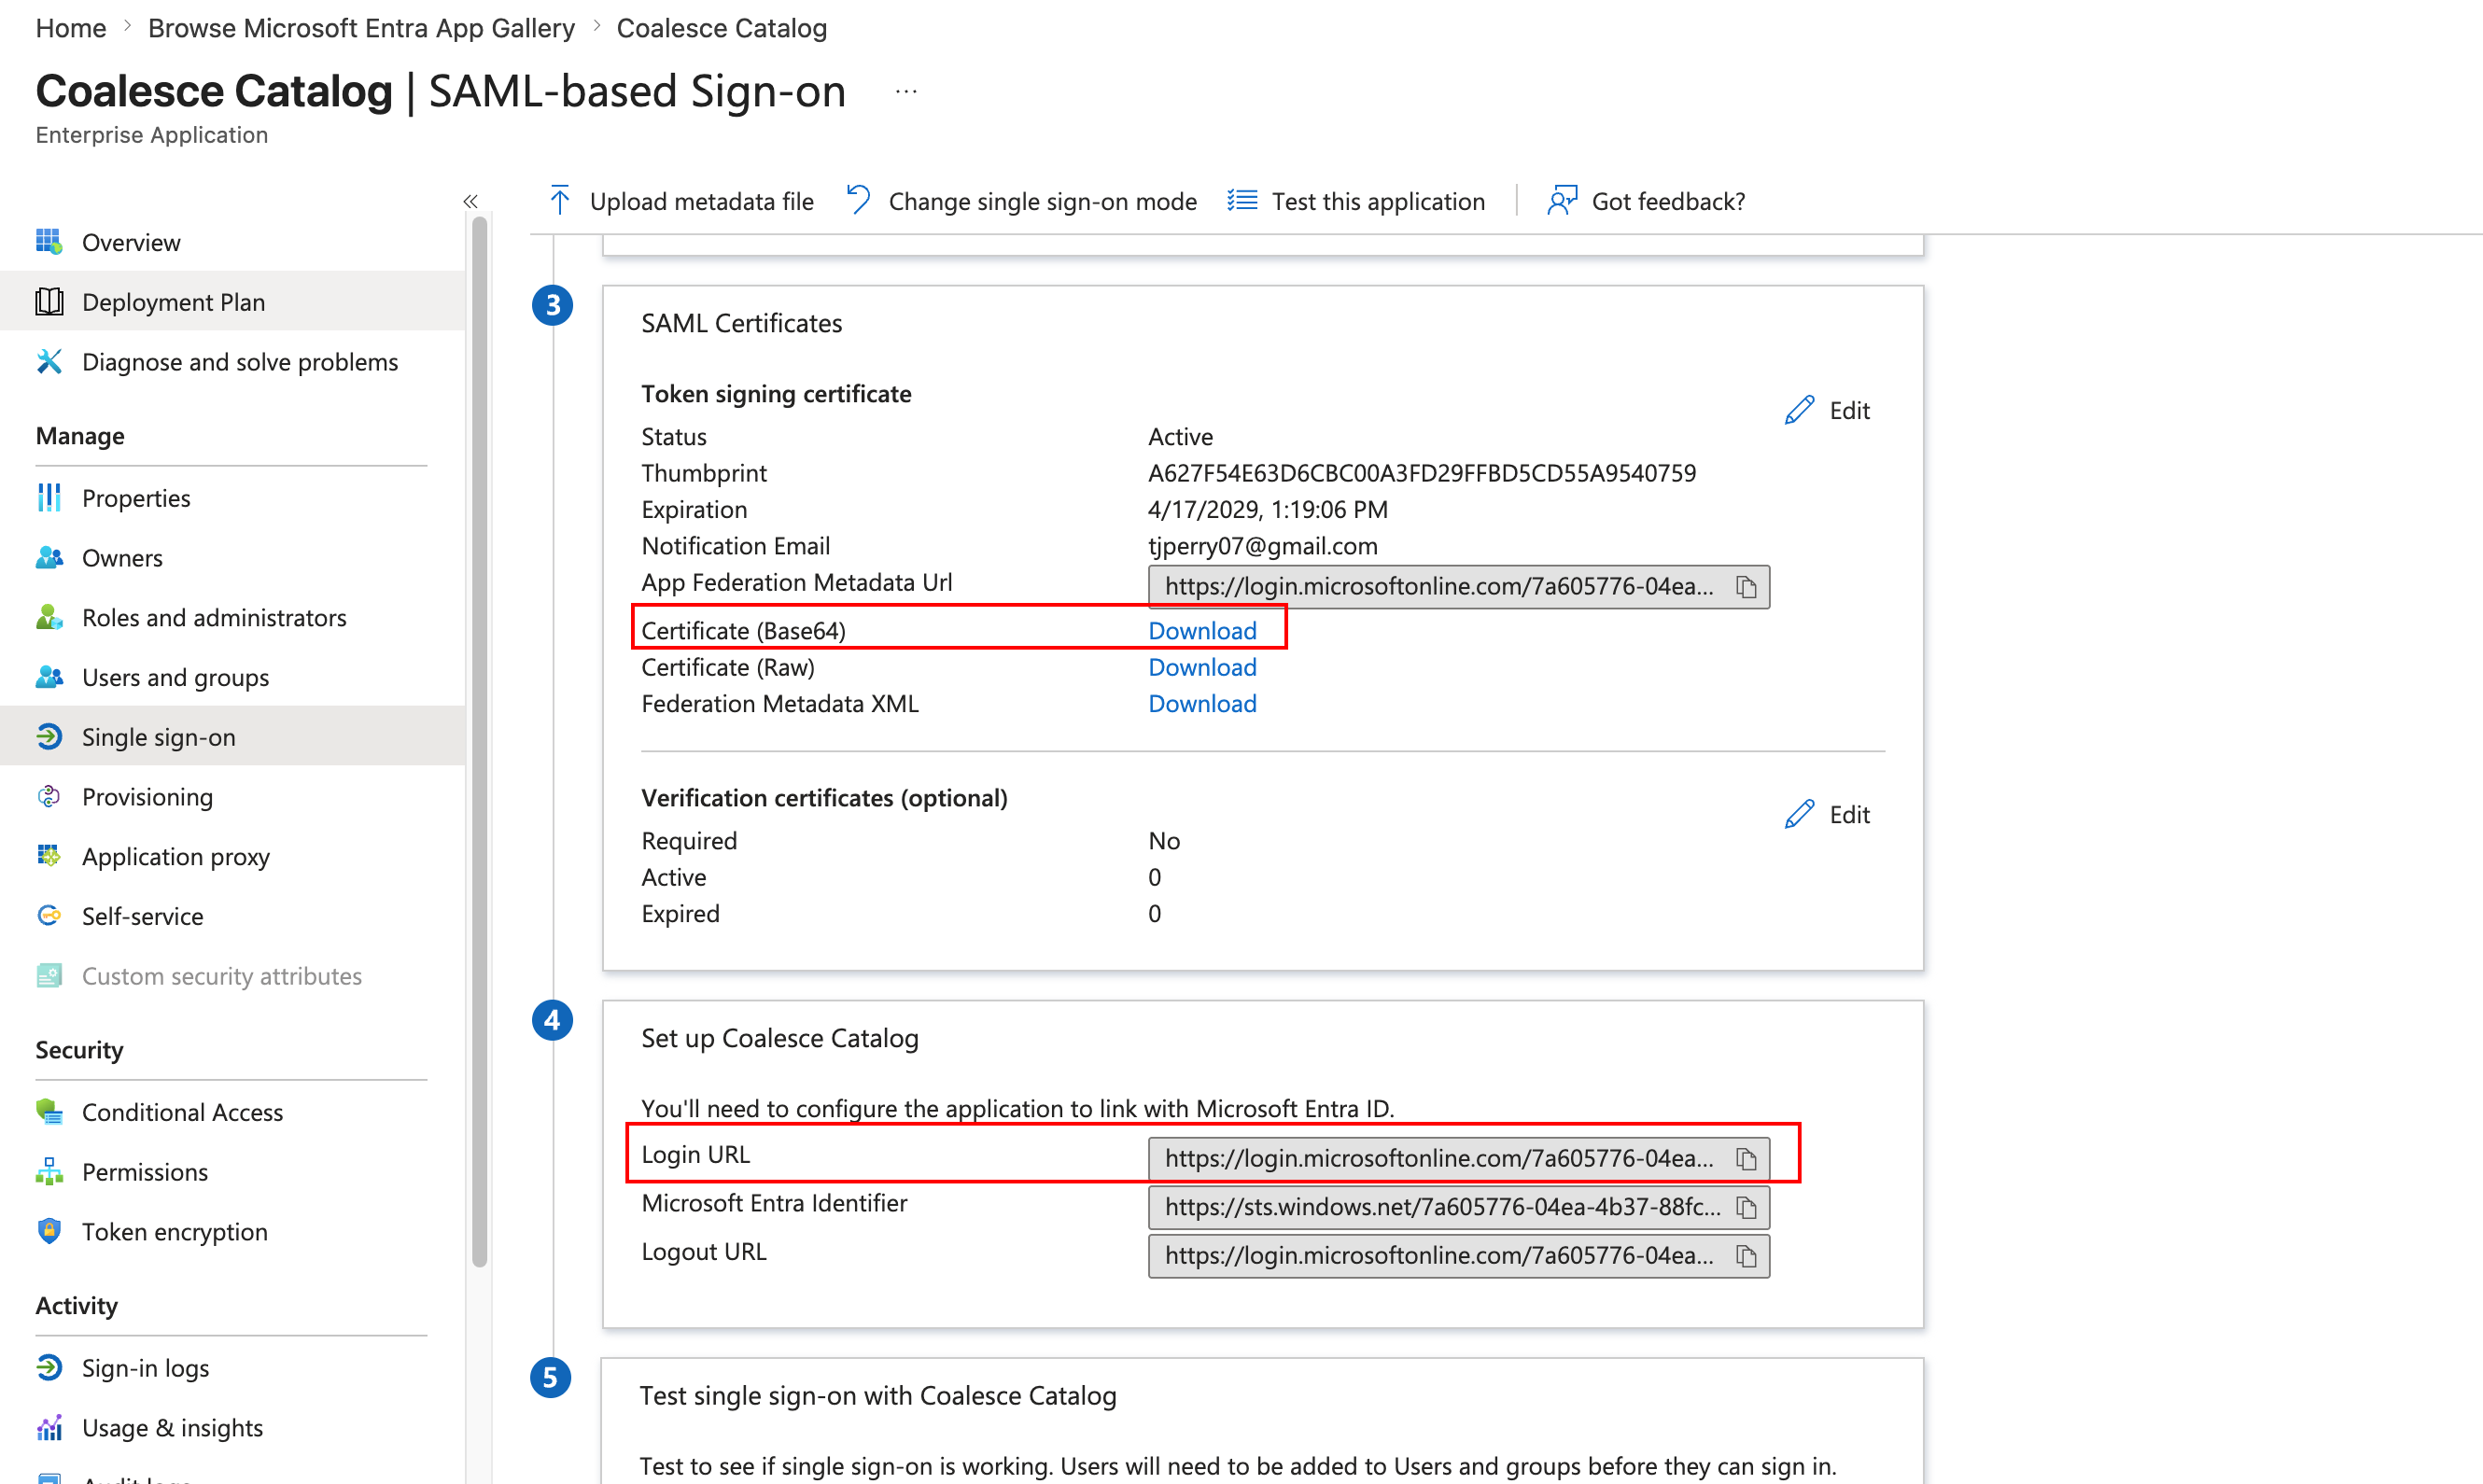
Download the Certificate (Base64).
-
Make note of the Login URL.
Allow Users To Connect To The Catalog App
Make sure to add the users and groups in Microsoft Entra admin center who need to connect to Catalog.
Catalog can keep both SAML and email with password strategies active.
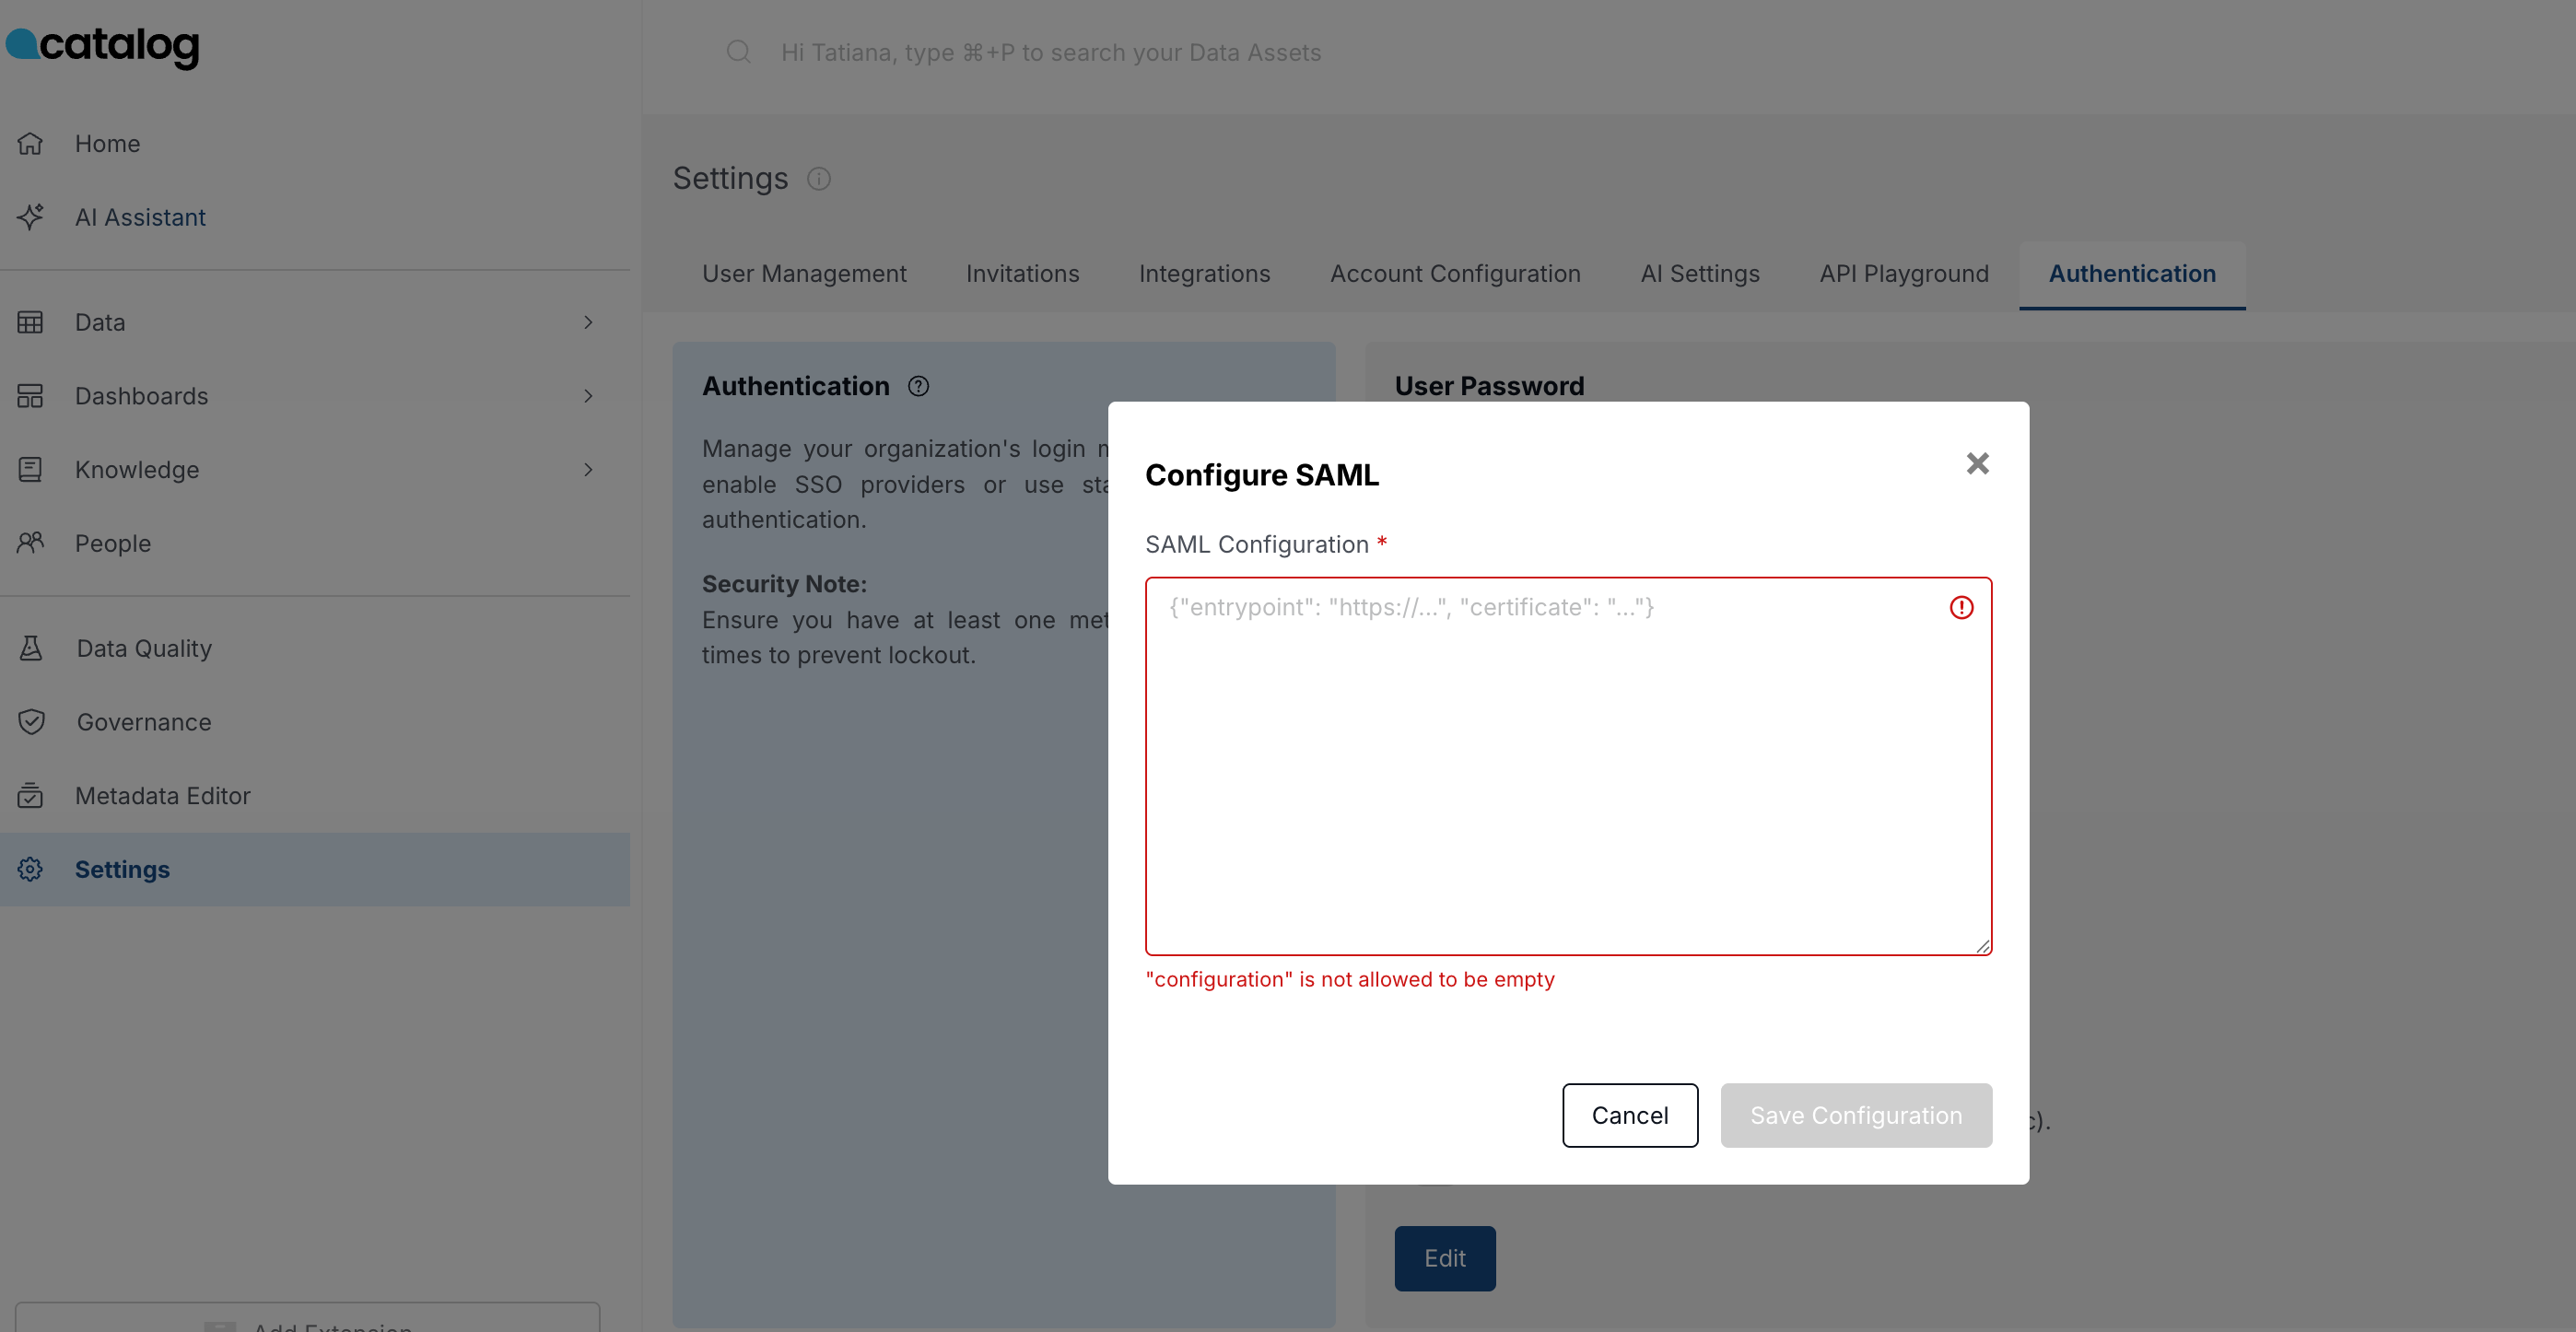
Add URL and Certificate to Catalog
Paste the signing certificate and login URL from Microsoft Entra into Catalog so SAML sign-in can complete.
- In Catalog, go to Settings > Authentication.
- Copy and paste the certificate and URL, making sure to format them correctly.
{
  "entrypoint": "https://...",
  "certificate": "..."
}