Documentation index: llms.txt. This page is also available as markdown: append .md to this URL or send Accept: text/markdown.
Salesforce
You'll create an External app in this guide. Connected apps can no longer be created as of Spring 2026. See New Connected Apps Can No Longer Be Created in Spring ‘26 for Salesforce.
This guide will take you through the steps to connecting Salesforce to Catalog. You can either choose to manage connections using Catalog for automatic updates(recommended) or managed by you.
Prerequisites
- A Salesforce System Administrator must complete these steps.
Follow these instructions for automatic data updates.
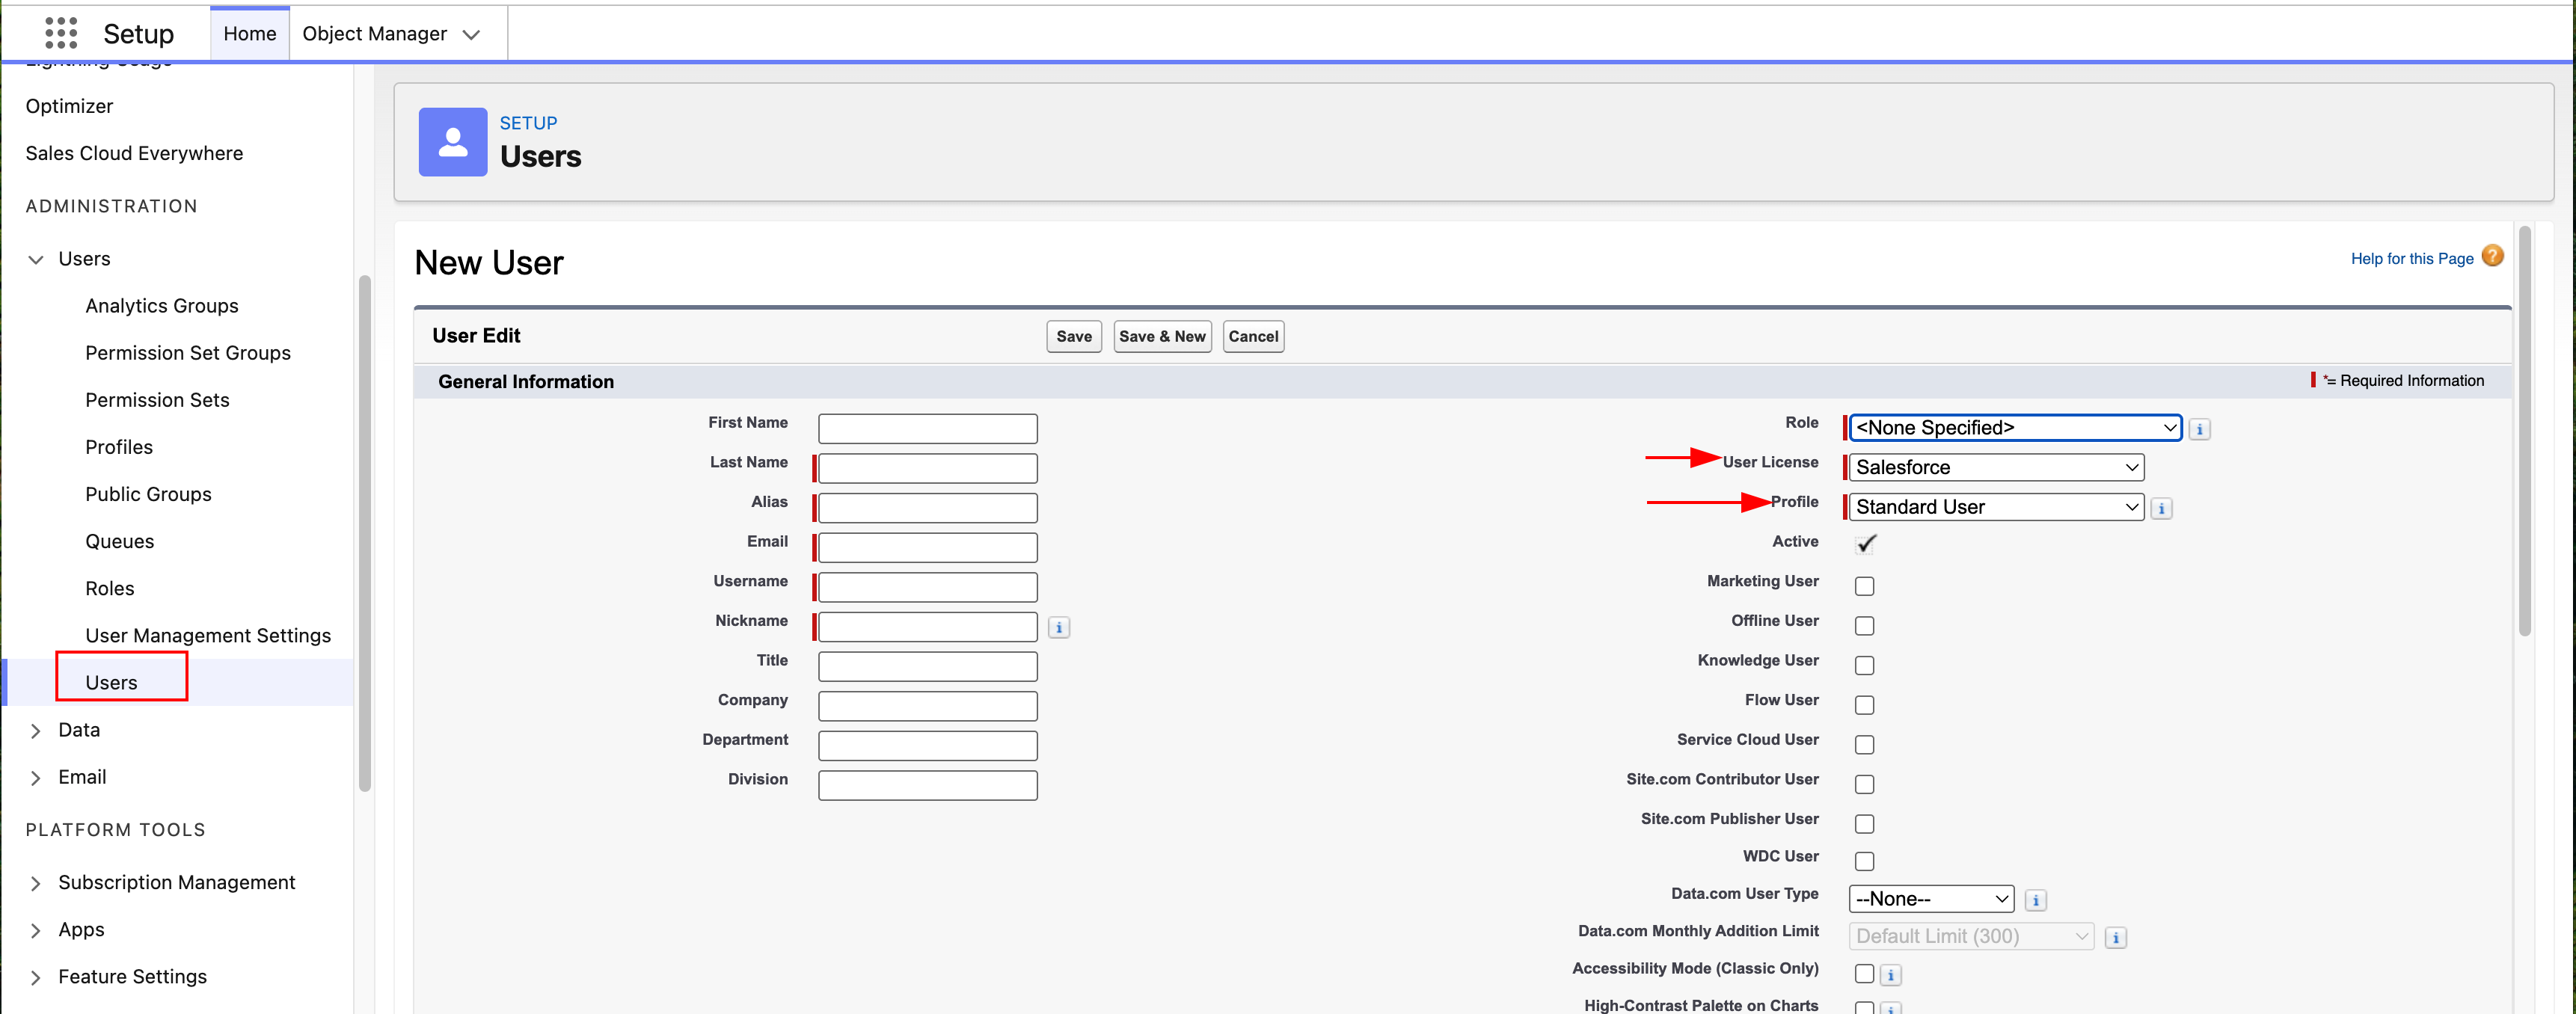
Create a Catalog User (Optional)
We recommend creating a user and assigning them to Catalog app in order to keep a clear audit trail in Salesforce.
- From Setup, in Quick Find, search for Users > Users.
- Click New User.
- Set the User License based on your subscription.
- Set the profile to Standard User.
- Fill in the rest of the information based on your company's administration rules.
Set App Permissions
This is the user who will have access to the Salesforce app. For these next steps, you’ll need to clone a Permission Set.
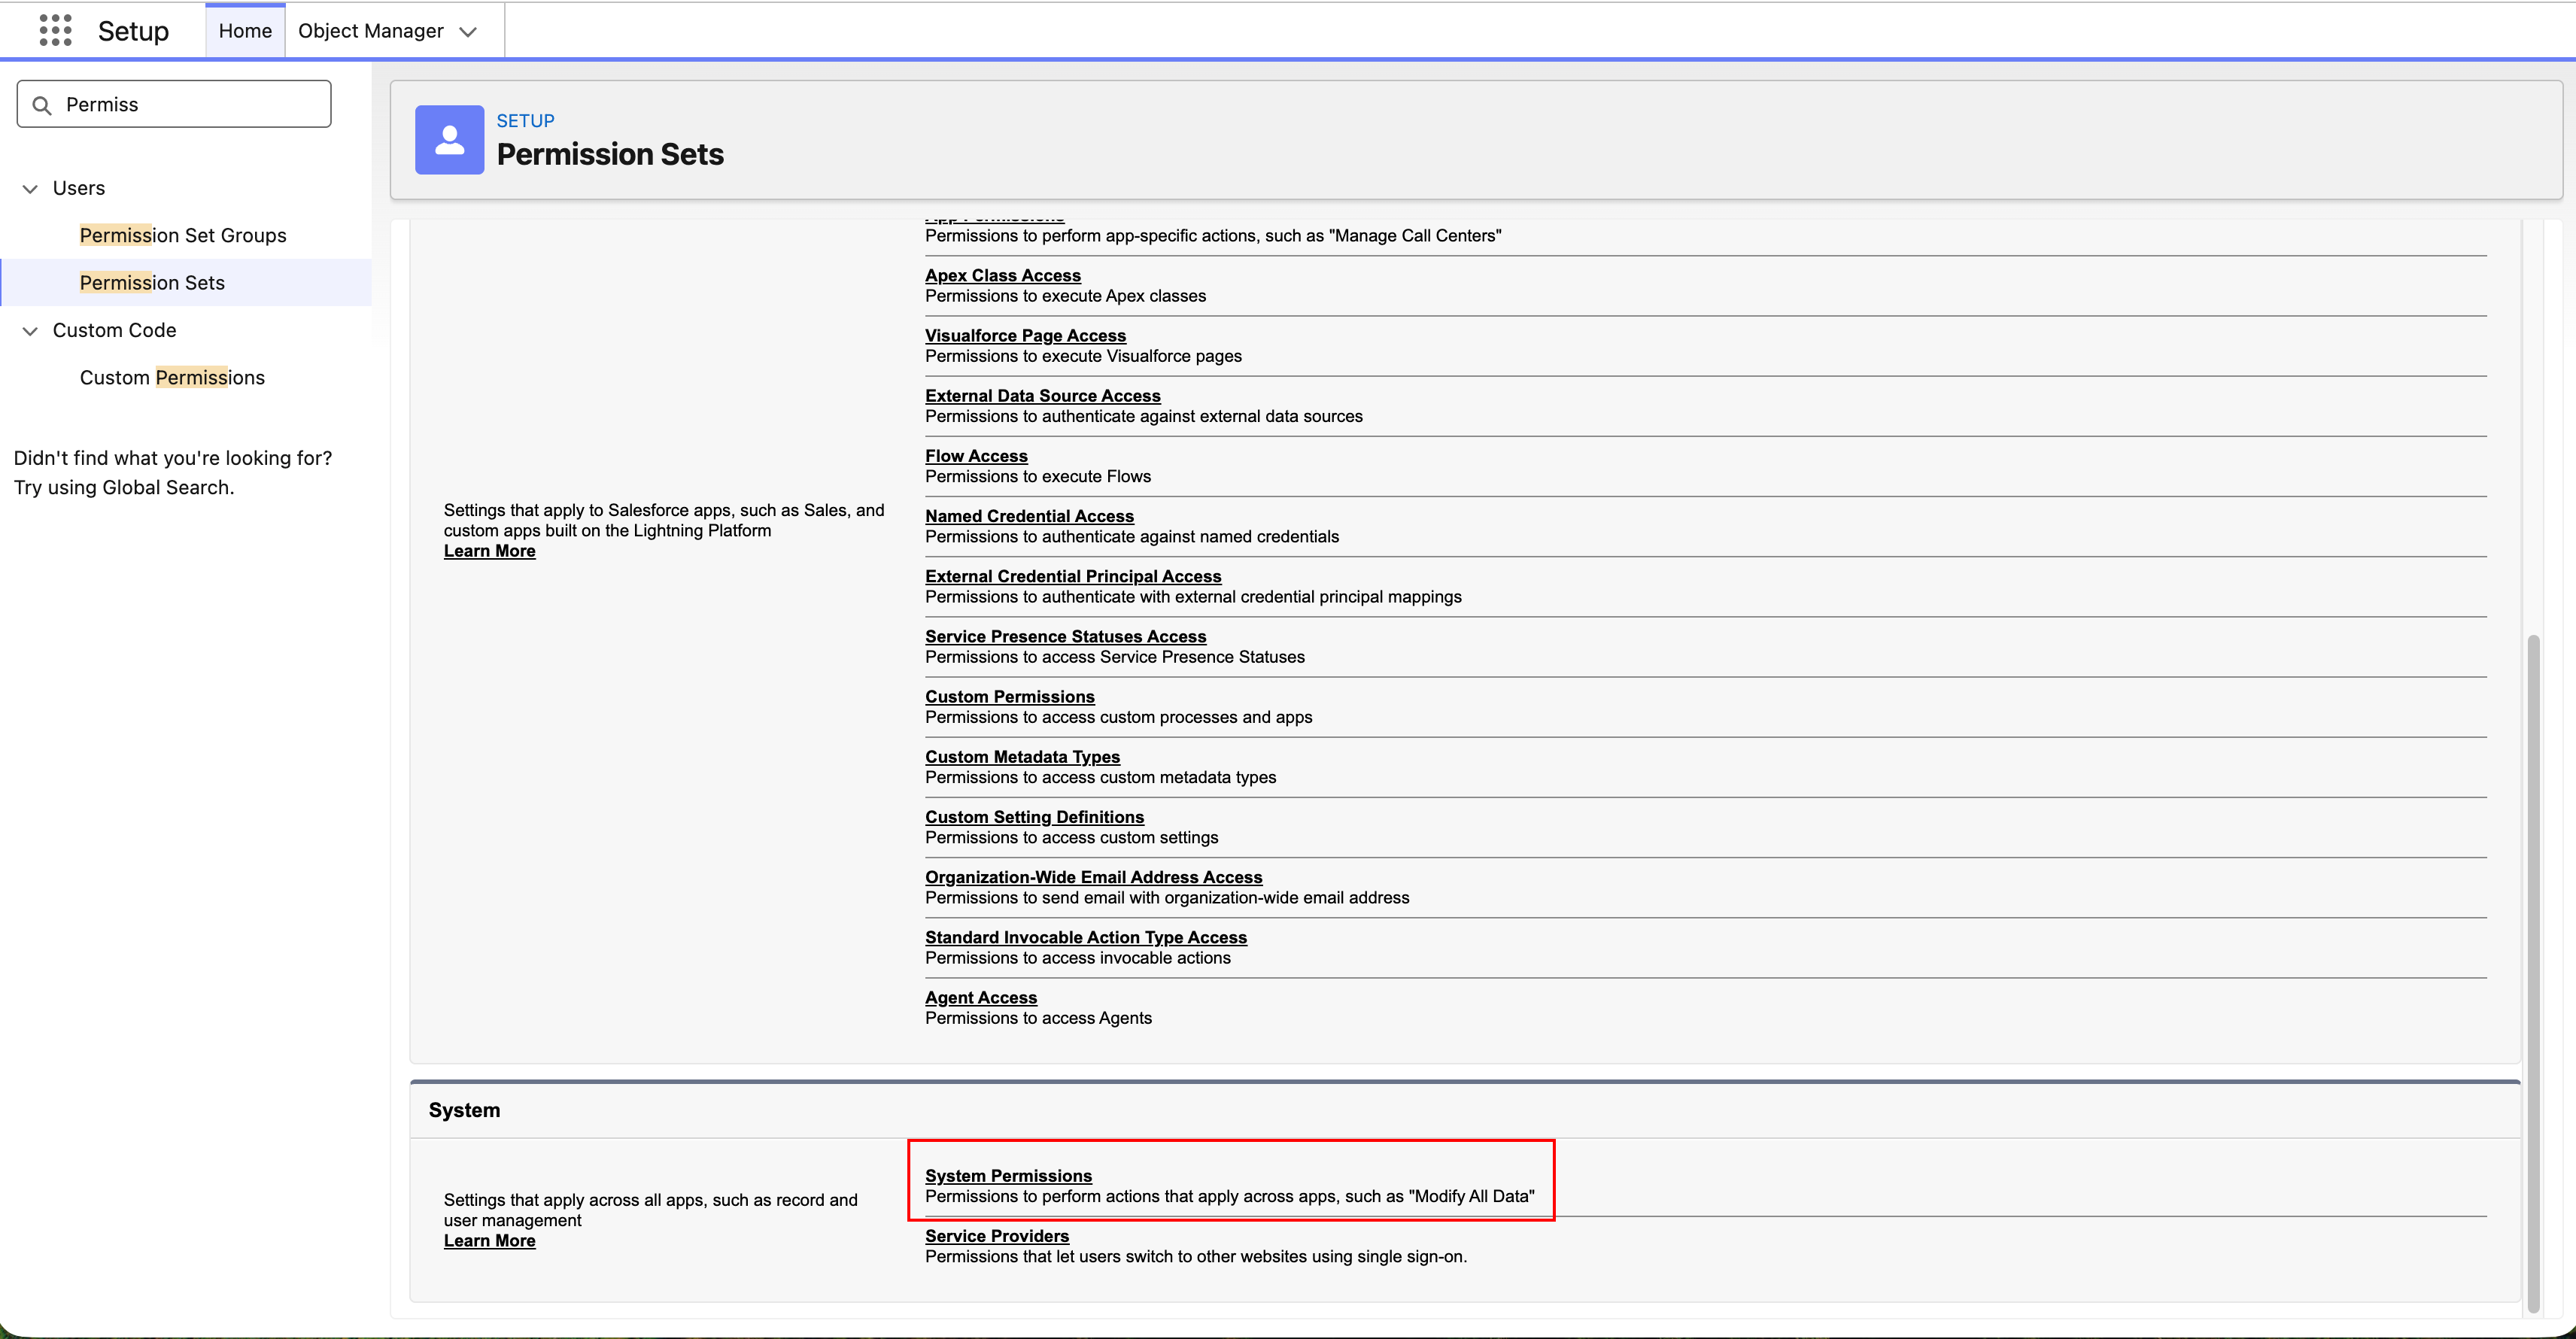
- From Setup, in Quick Find, search for Users > Permissions Sets.
- Clone any permission set with the license, Salesforce. If the license doesn’t match the user assigned to the app, the connection will fail. In this example, Event Monitoring User was cloned.
- Give your permission set a name and description.
- Under System, click System Permissions. Then click Edit.
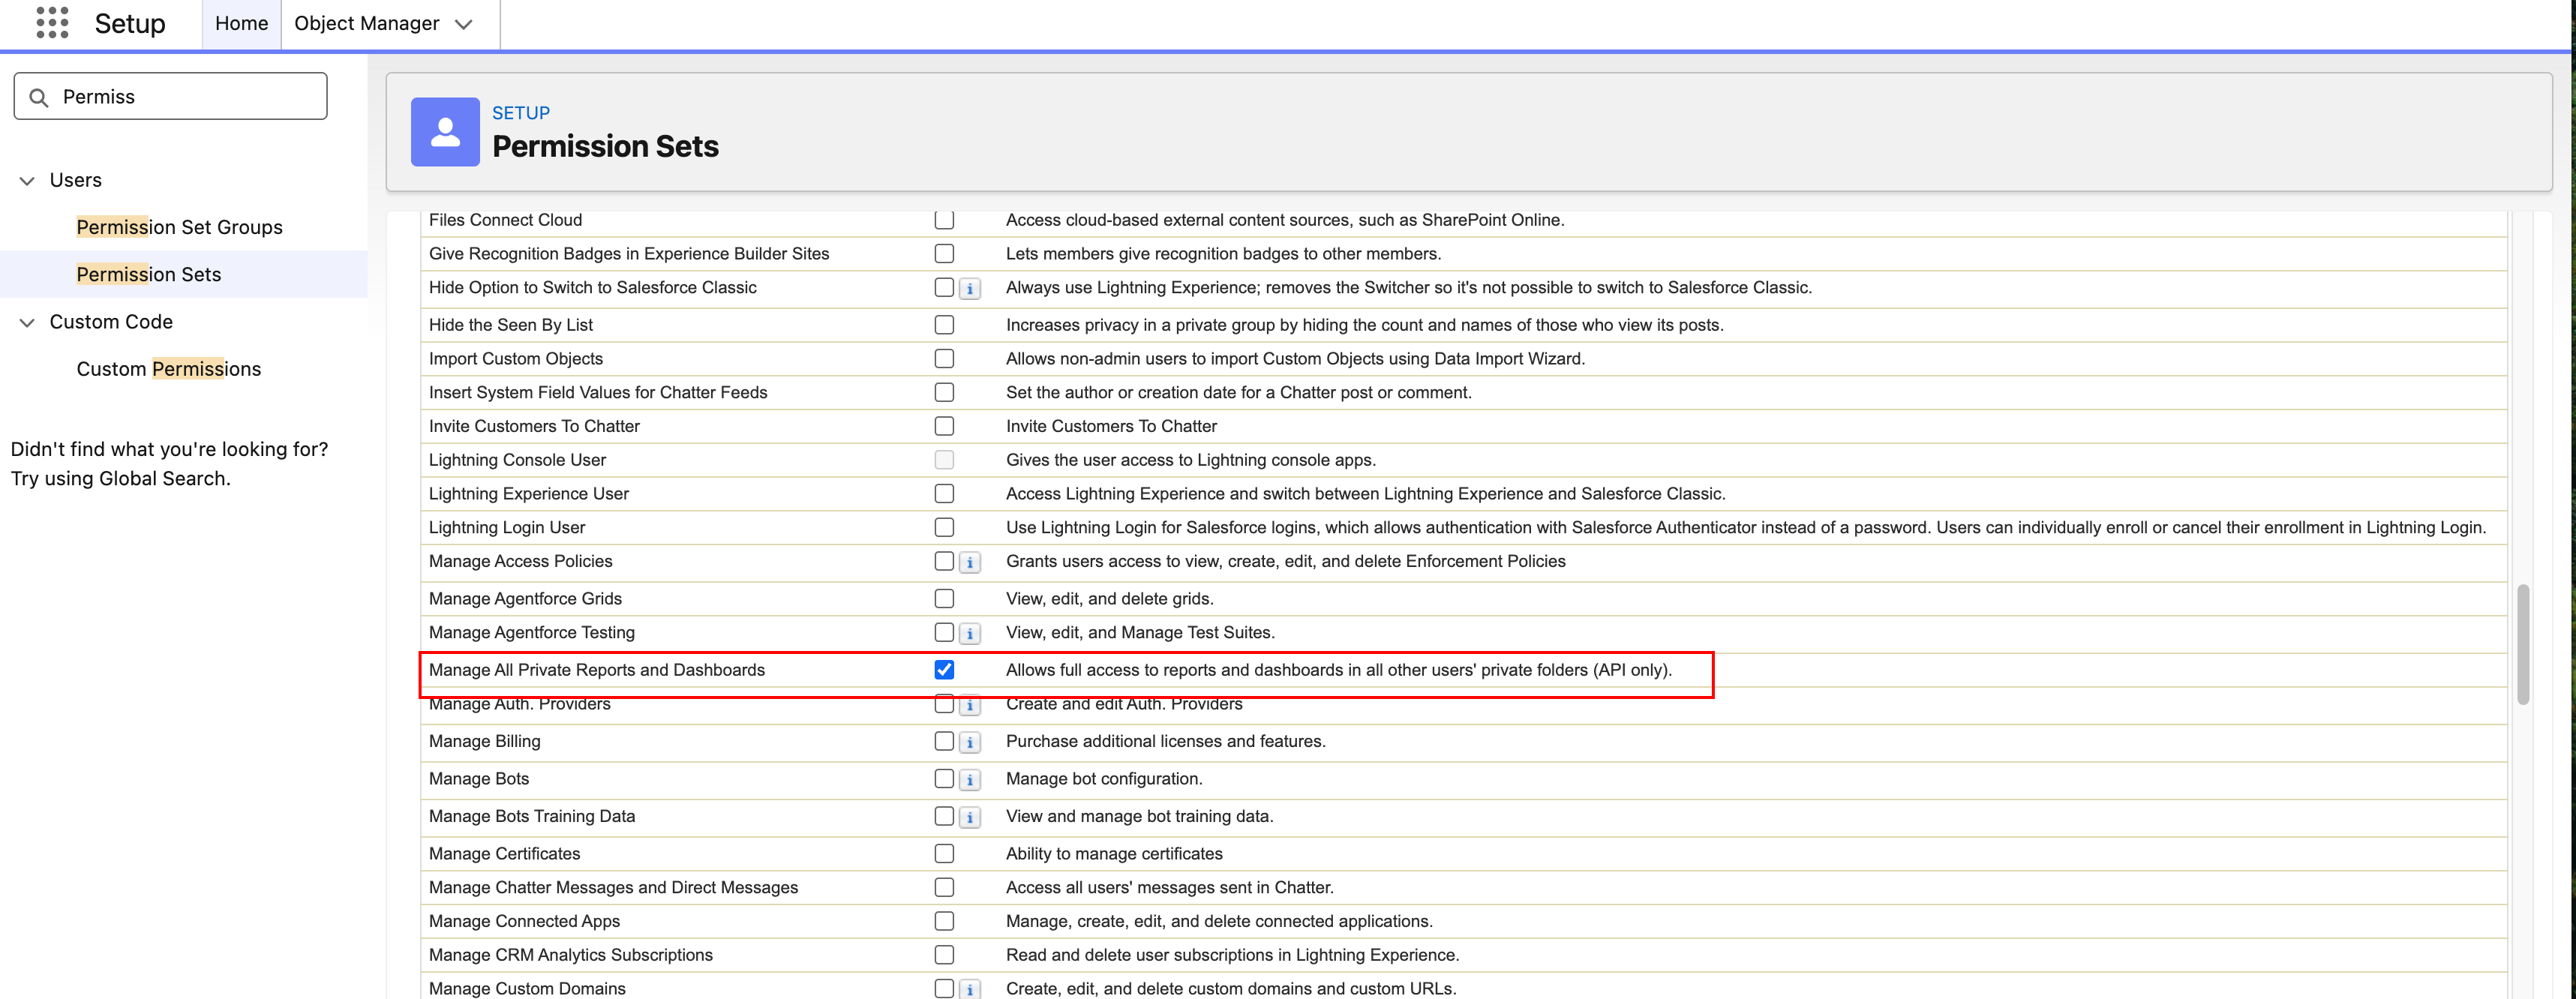
- Assign the following permissions:
- Run Reports
- View Dashboards in Public Folders
- View Reports in Public Folders
- Manage All Private Reports and Dashboards
- View Roles and Role Hierarchy
- View Setup and Configuration
- Save.
- On the same Permission Sets page, click Manage Assignments near the top.
- Click Add Assignment.
- Assign the user who should have the permissions to use the Catalog app.
Create External Client App
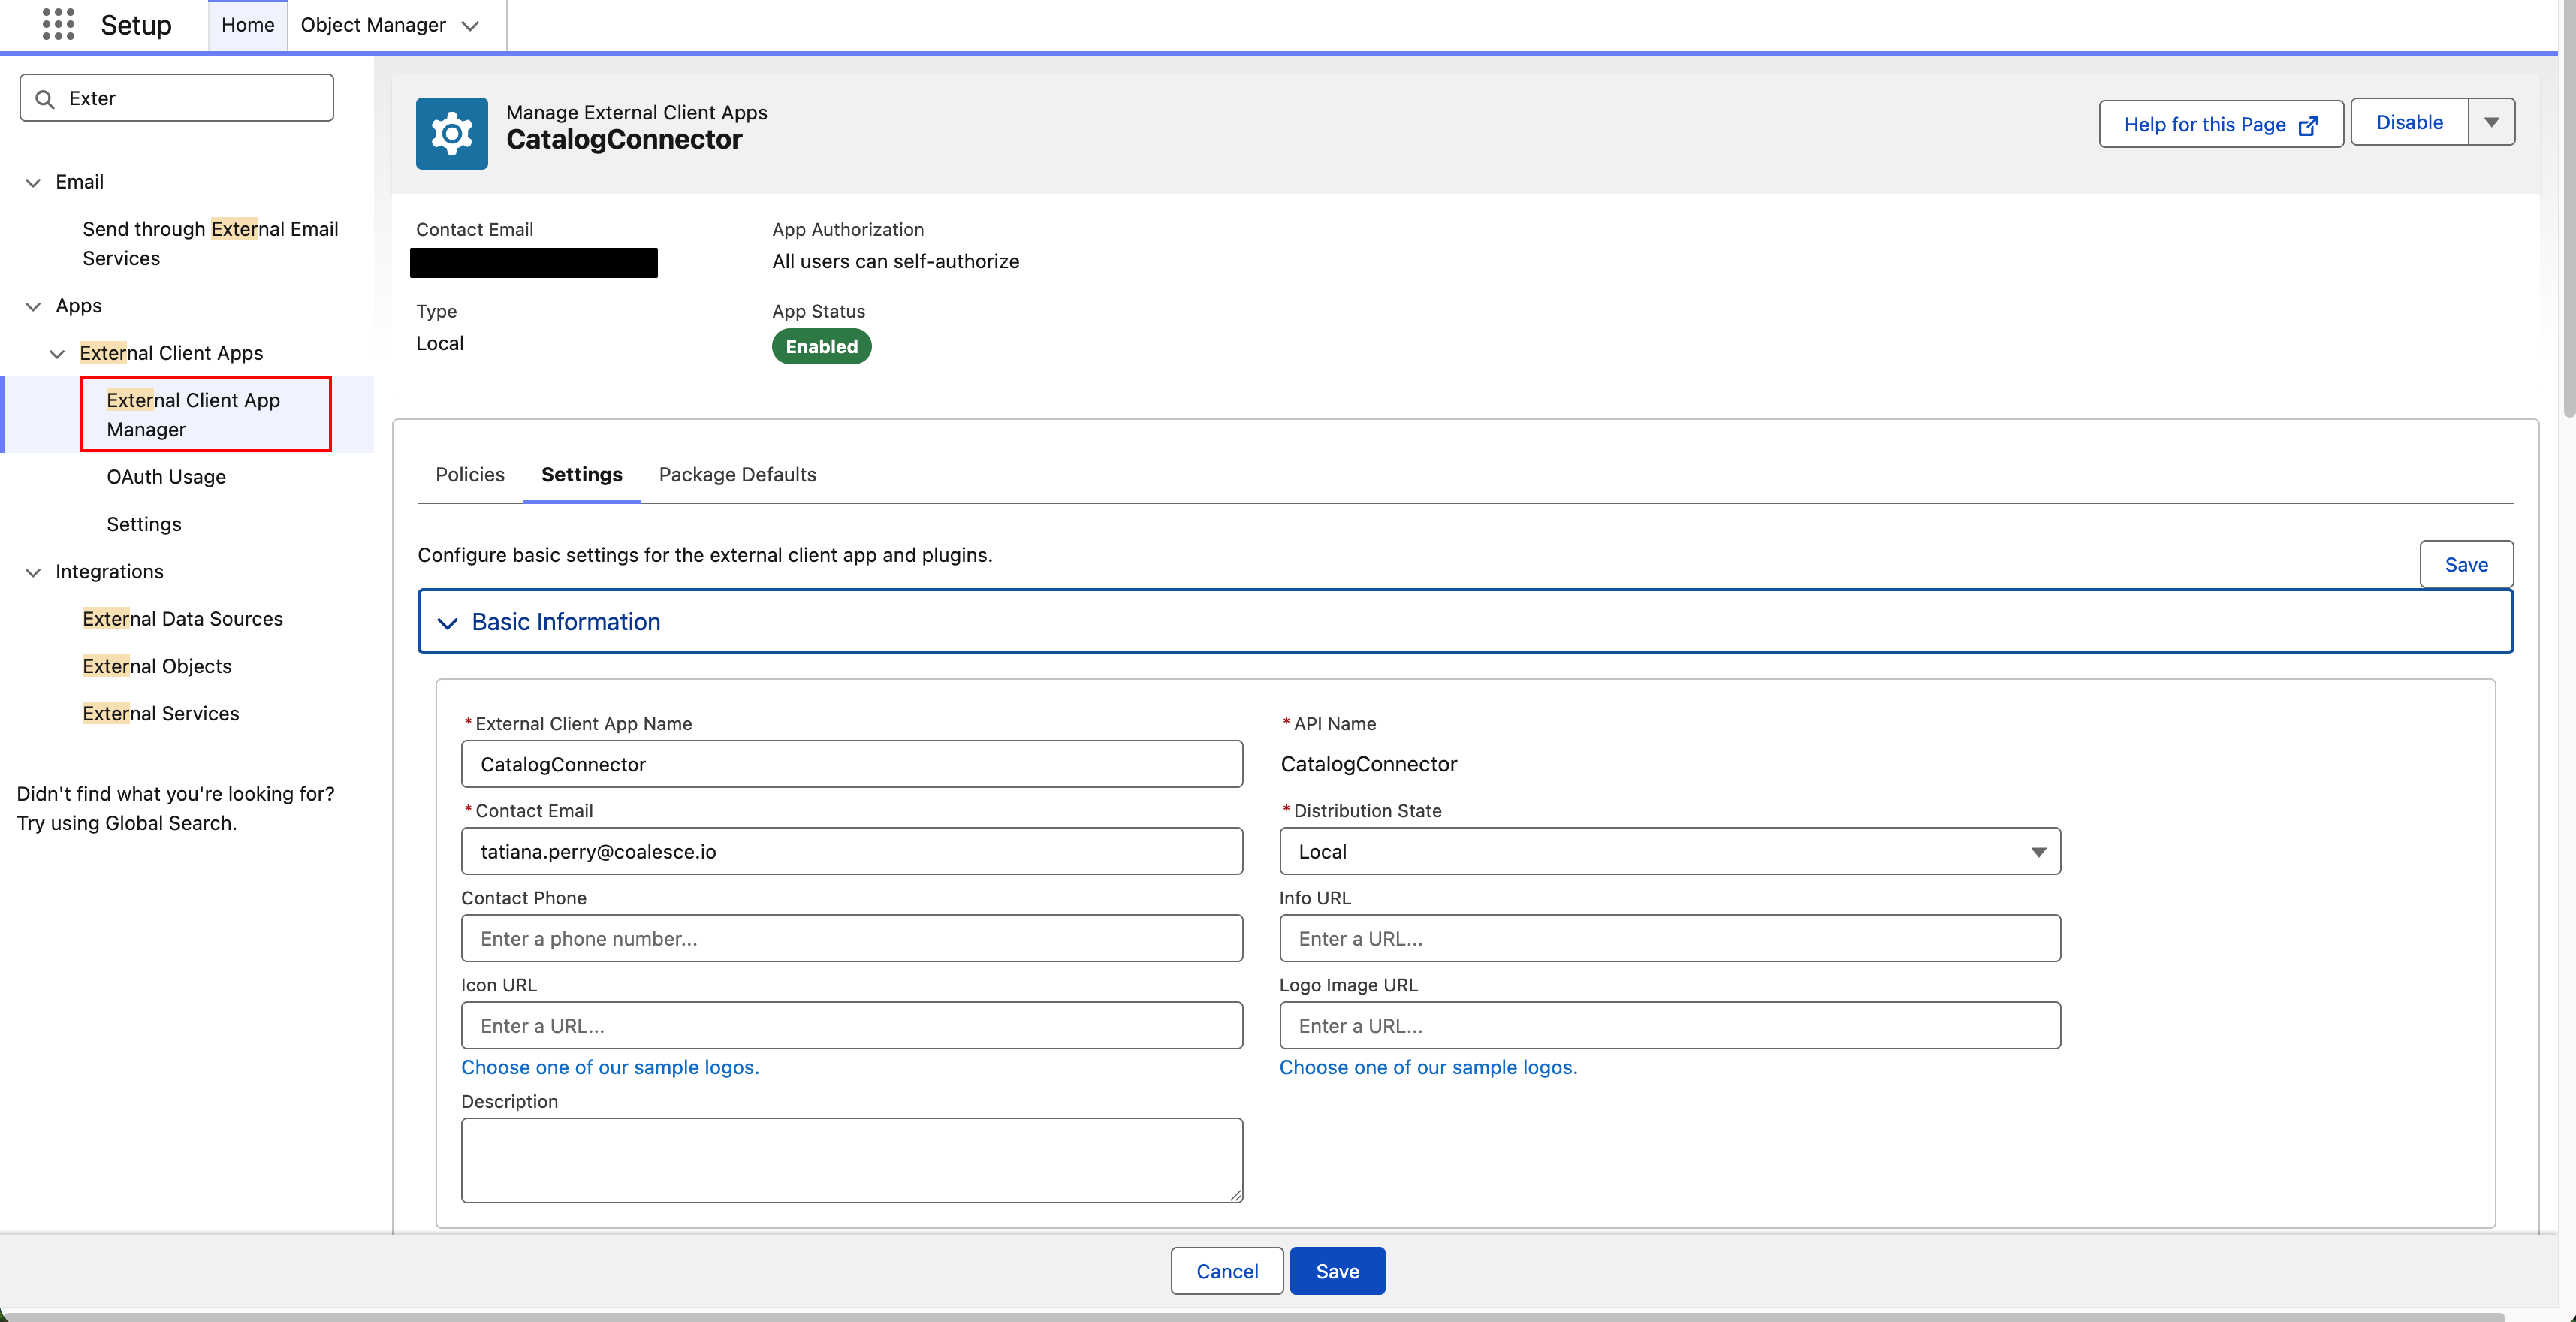
- From Setup, in Quick Find, search for External Client Apps > External Client App Manager.
- Click New External Client App.
- In Basic Information, enter the required information. Name the app
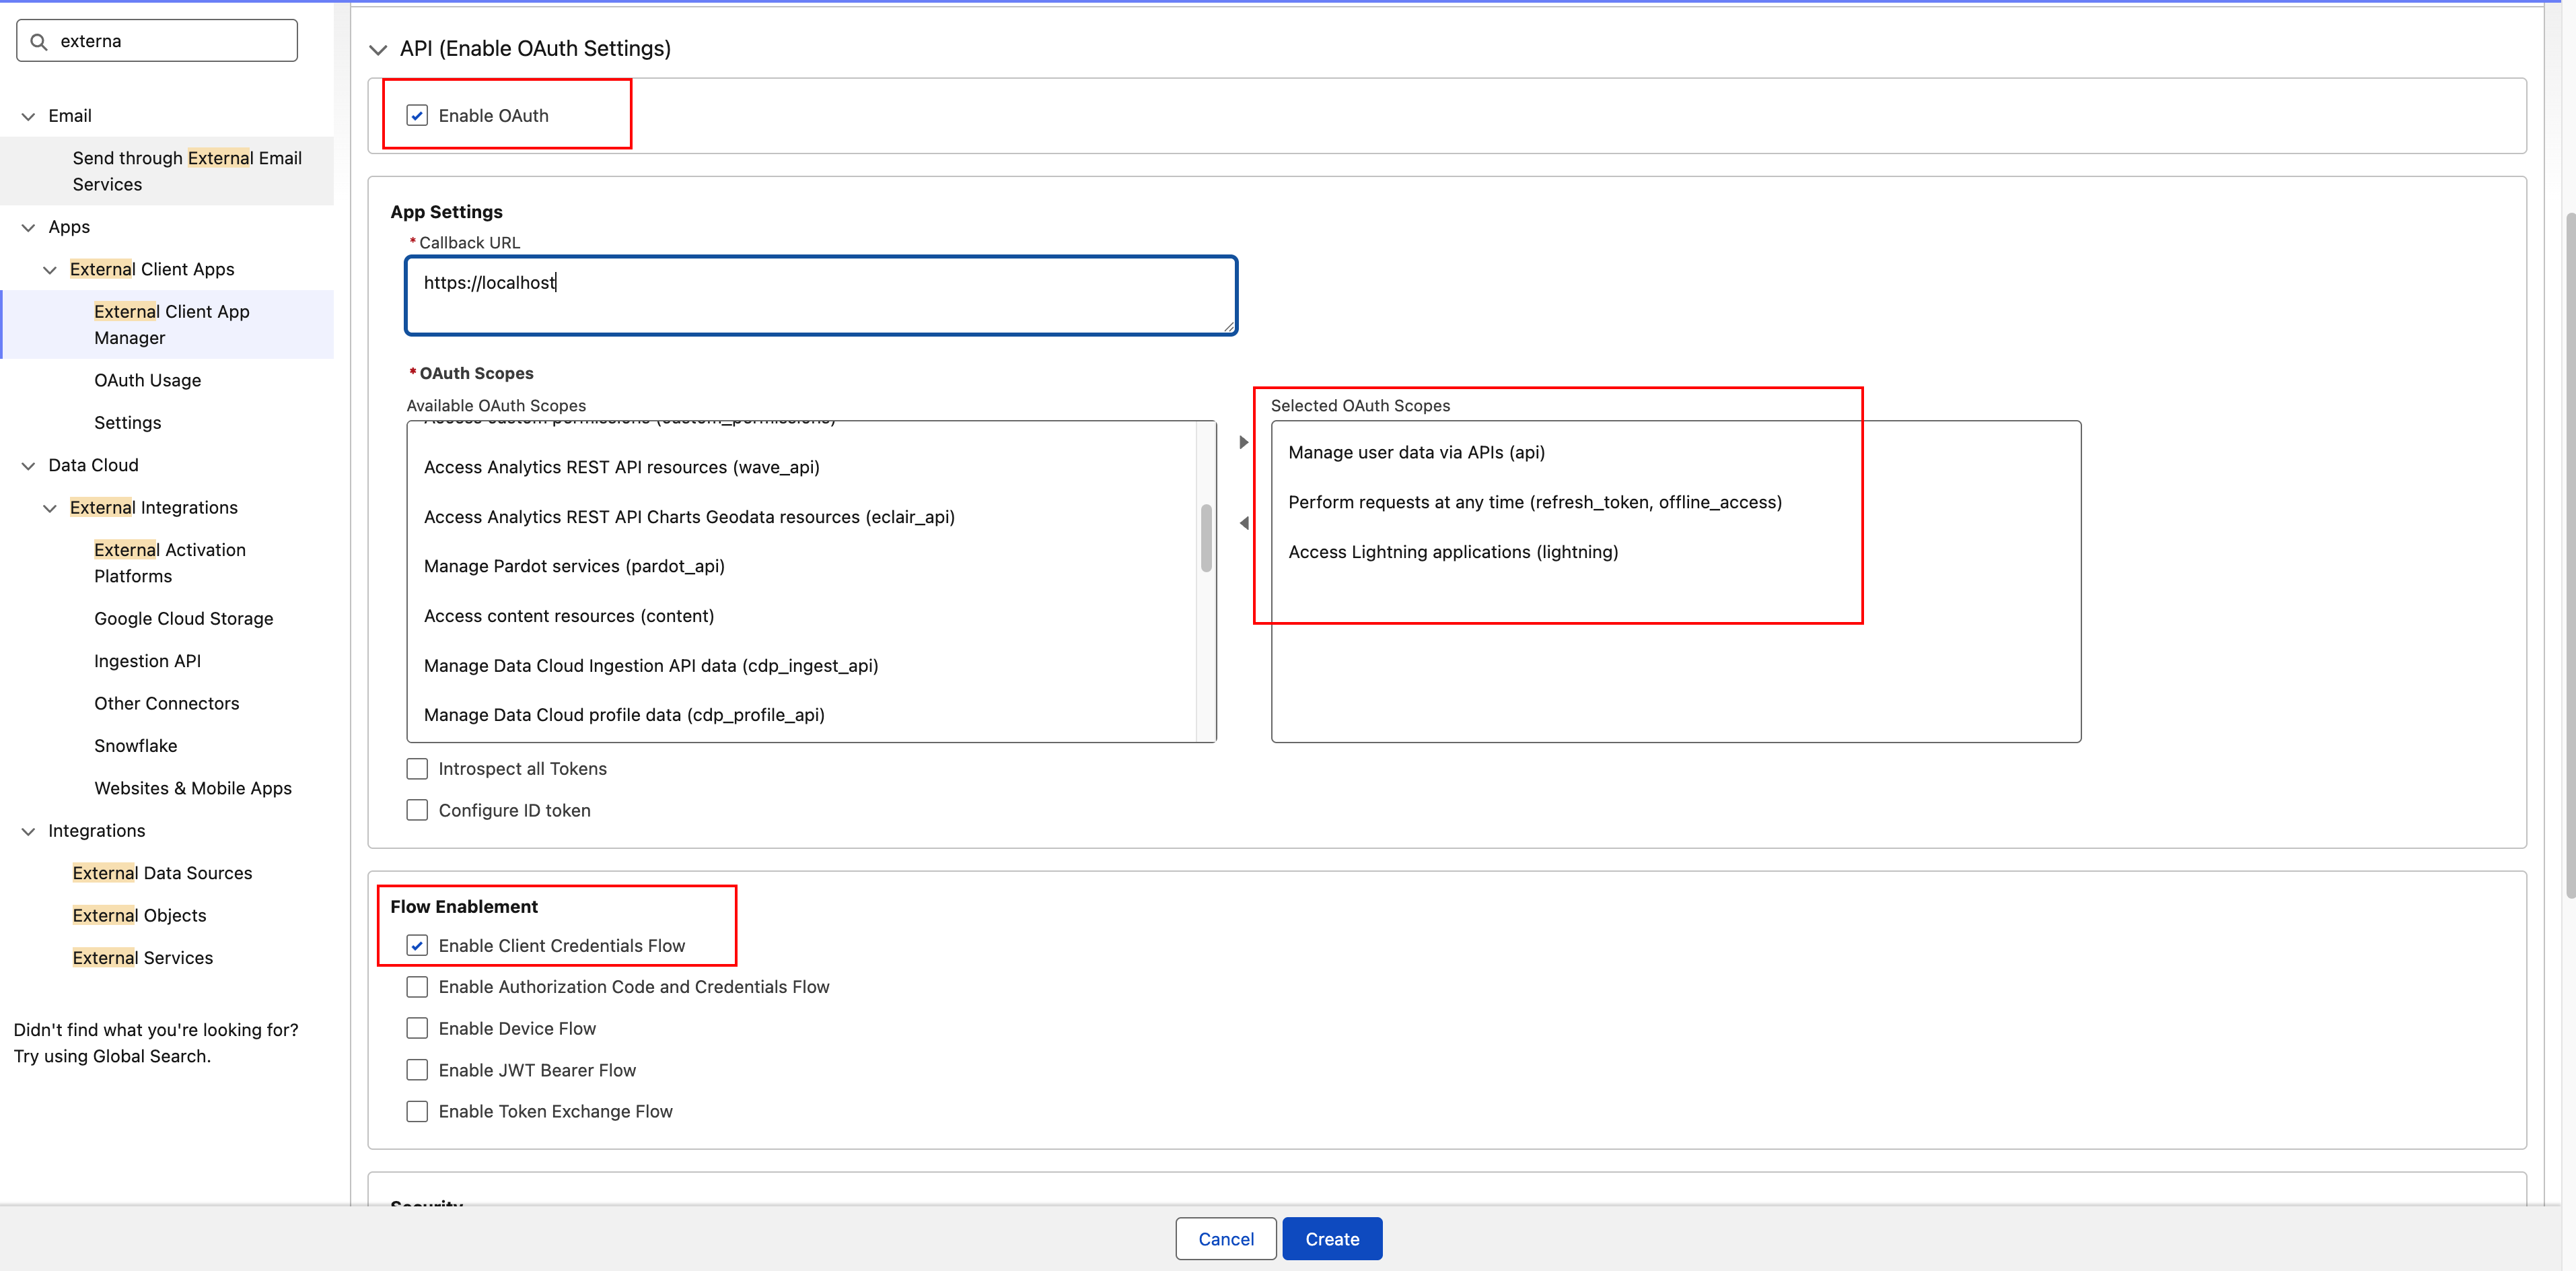
CatalogConnector. - In API, check Enable OAuth.
- Callback URL - We don’t use this, so you can enter any domain such as
https://localhost. - OAuth Scopes:
Access Lightning applications (lightning)Manage user data via APIs (api)Perform requests at any time (refresh_token, offline_access)
- Flow Enablement - In the same API section check the following:
Enable Client Credentials Flow
- Callback URL - We don’t use this, so you can enter any domain such as
- Other settings can be left at the default.
- Click Create.
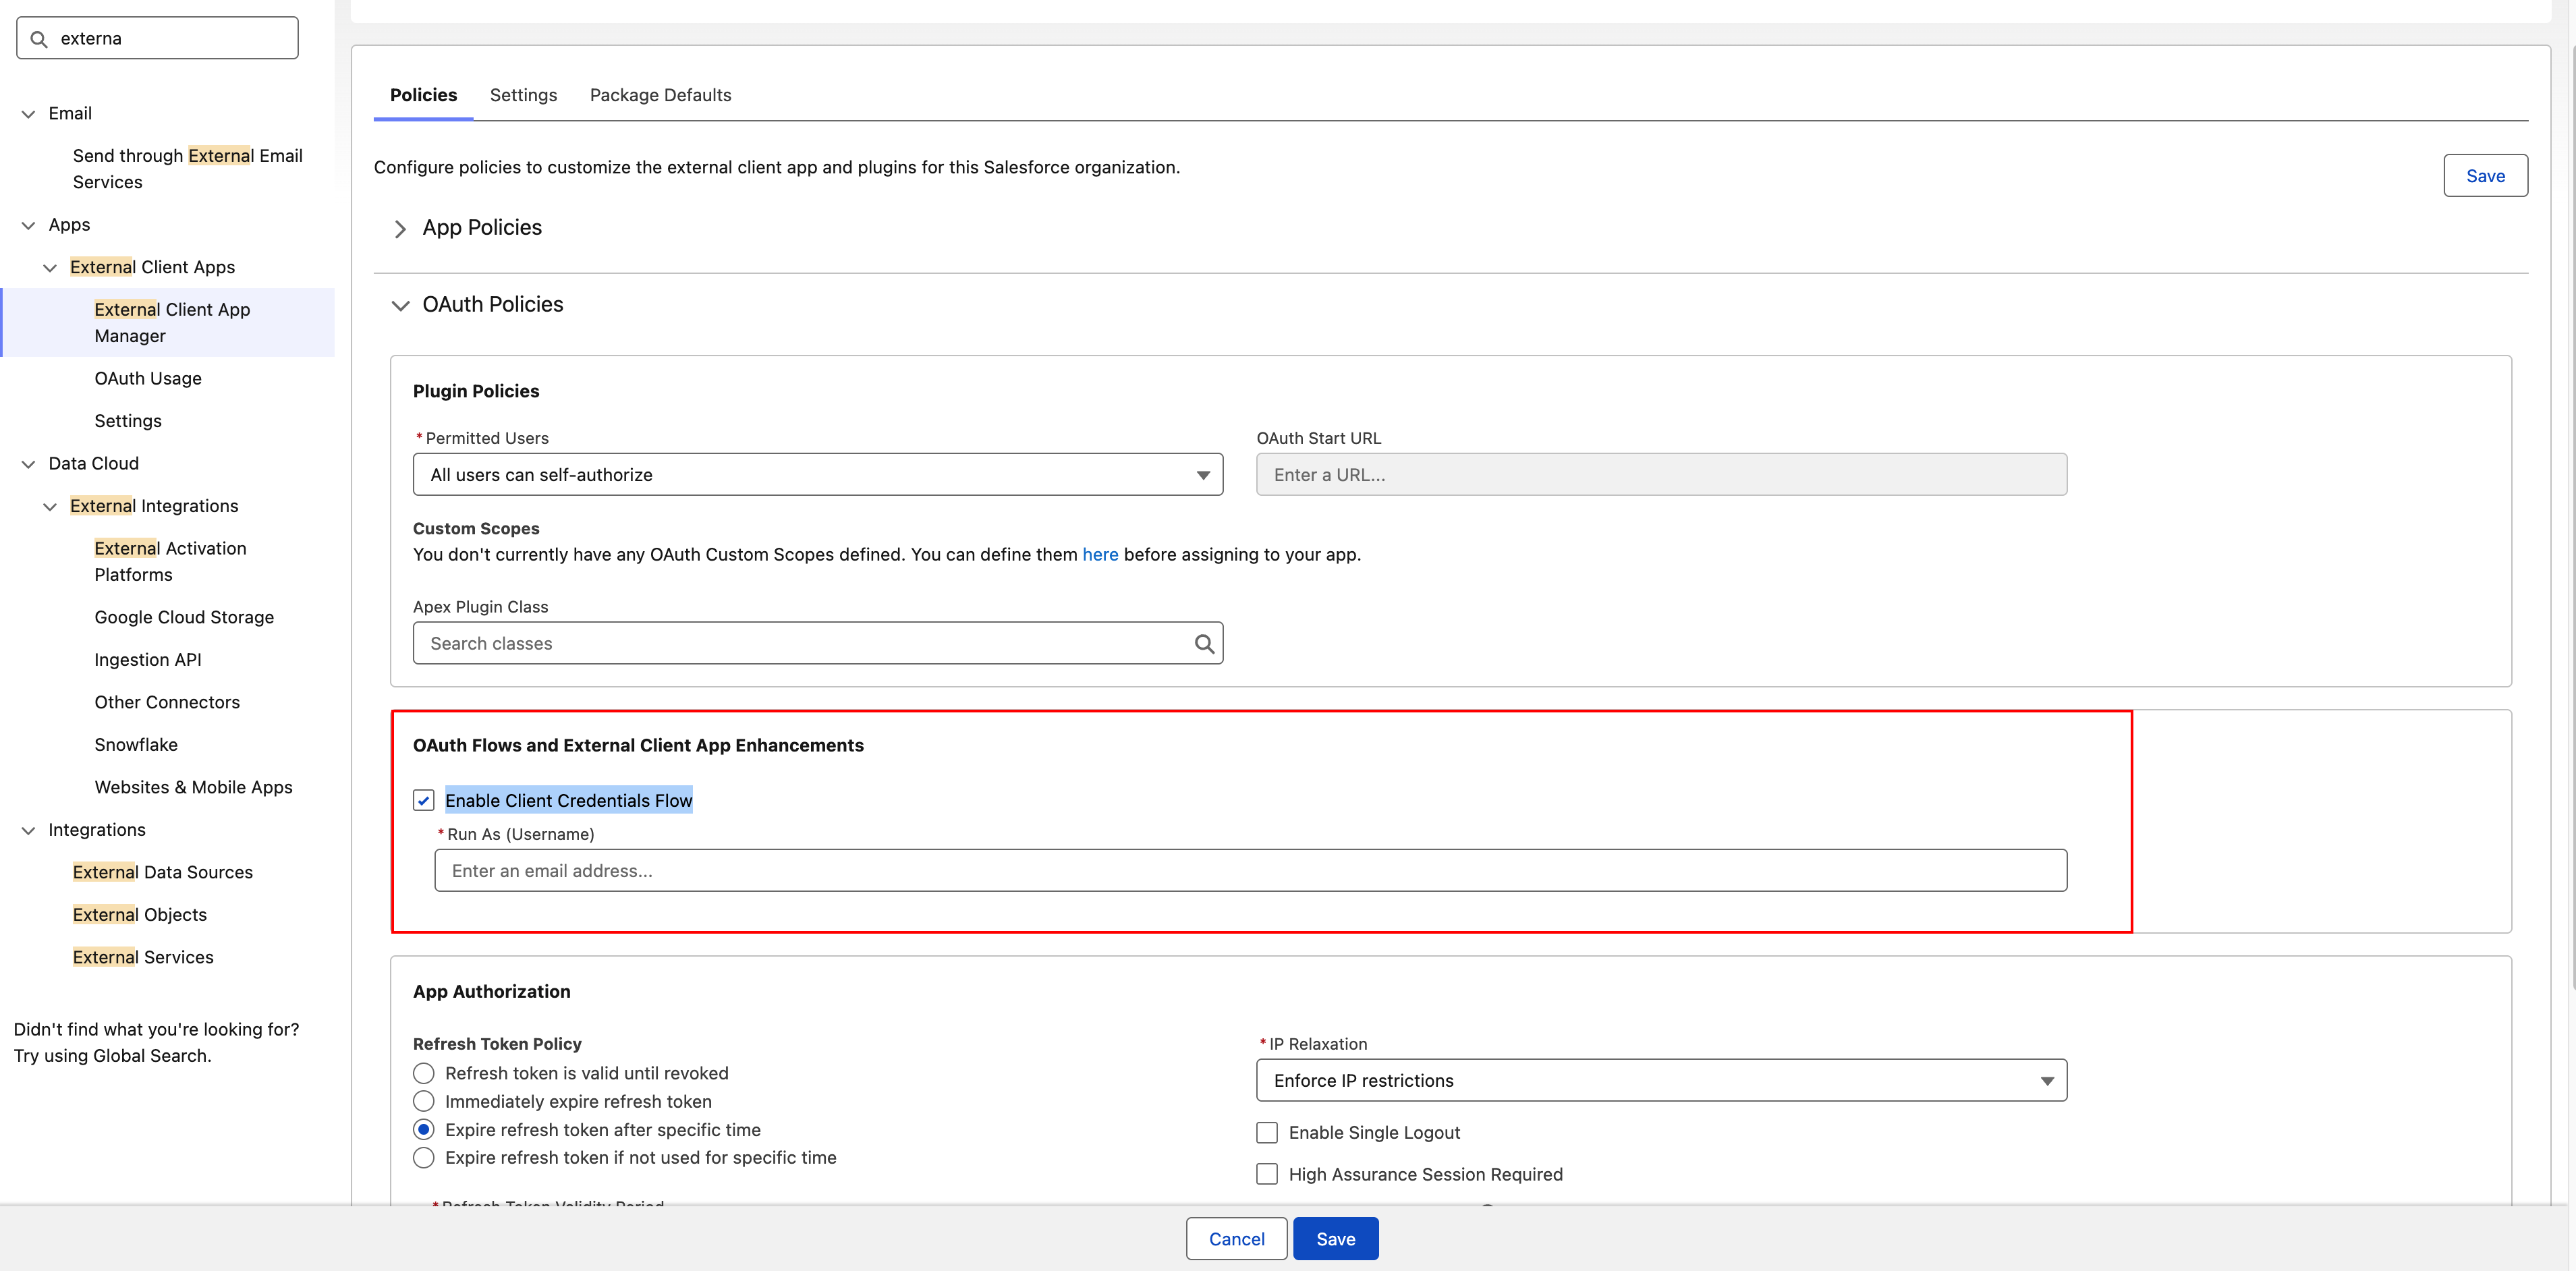
Enable OAuth Flows
- After saving, it will take you back to the app home page.
- Click on OAuth Policies.
- Under OAuth Flows and External Client App Enhancements check Enable Client Credentials Flow.
- Enter the Salesforce email of the user that will be doing the ingestion. See Get Your Domain and Username.
- The rest of the settings can be left as default.
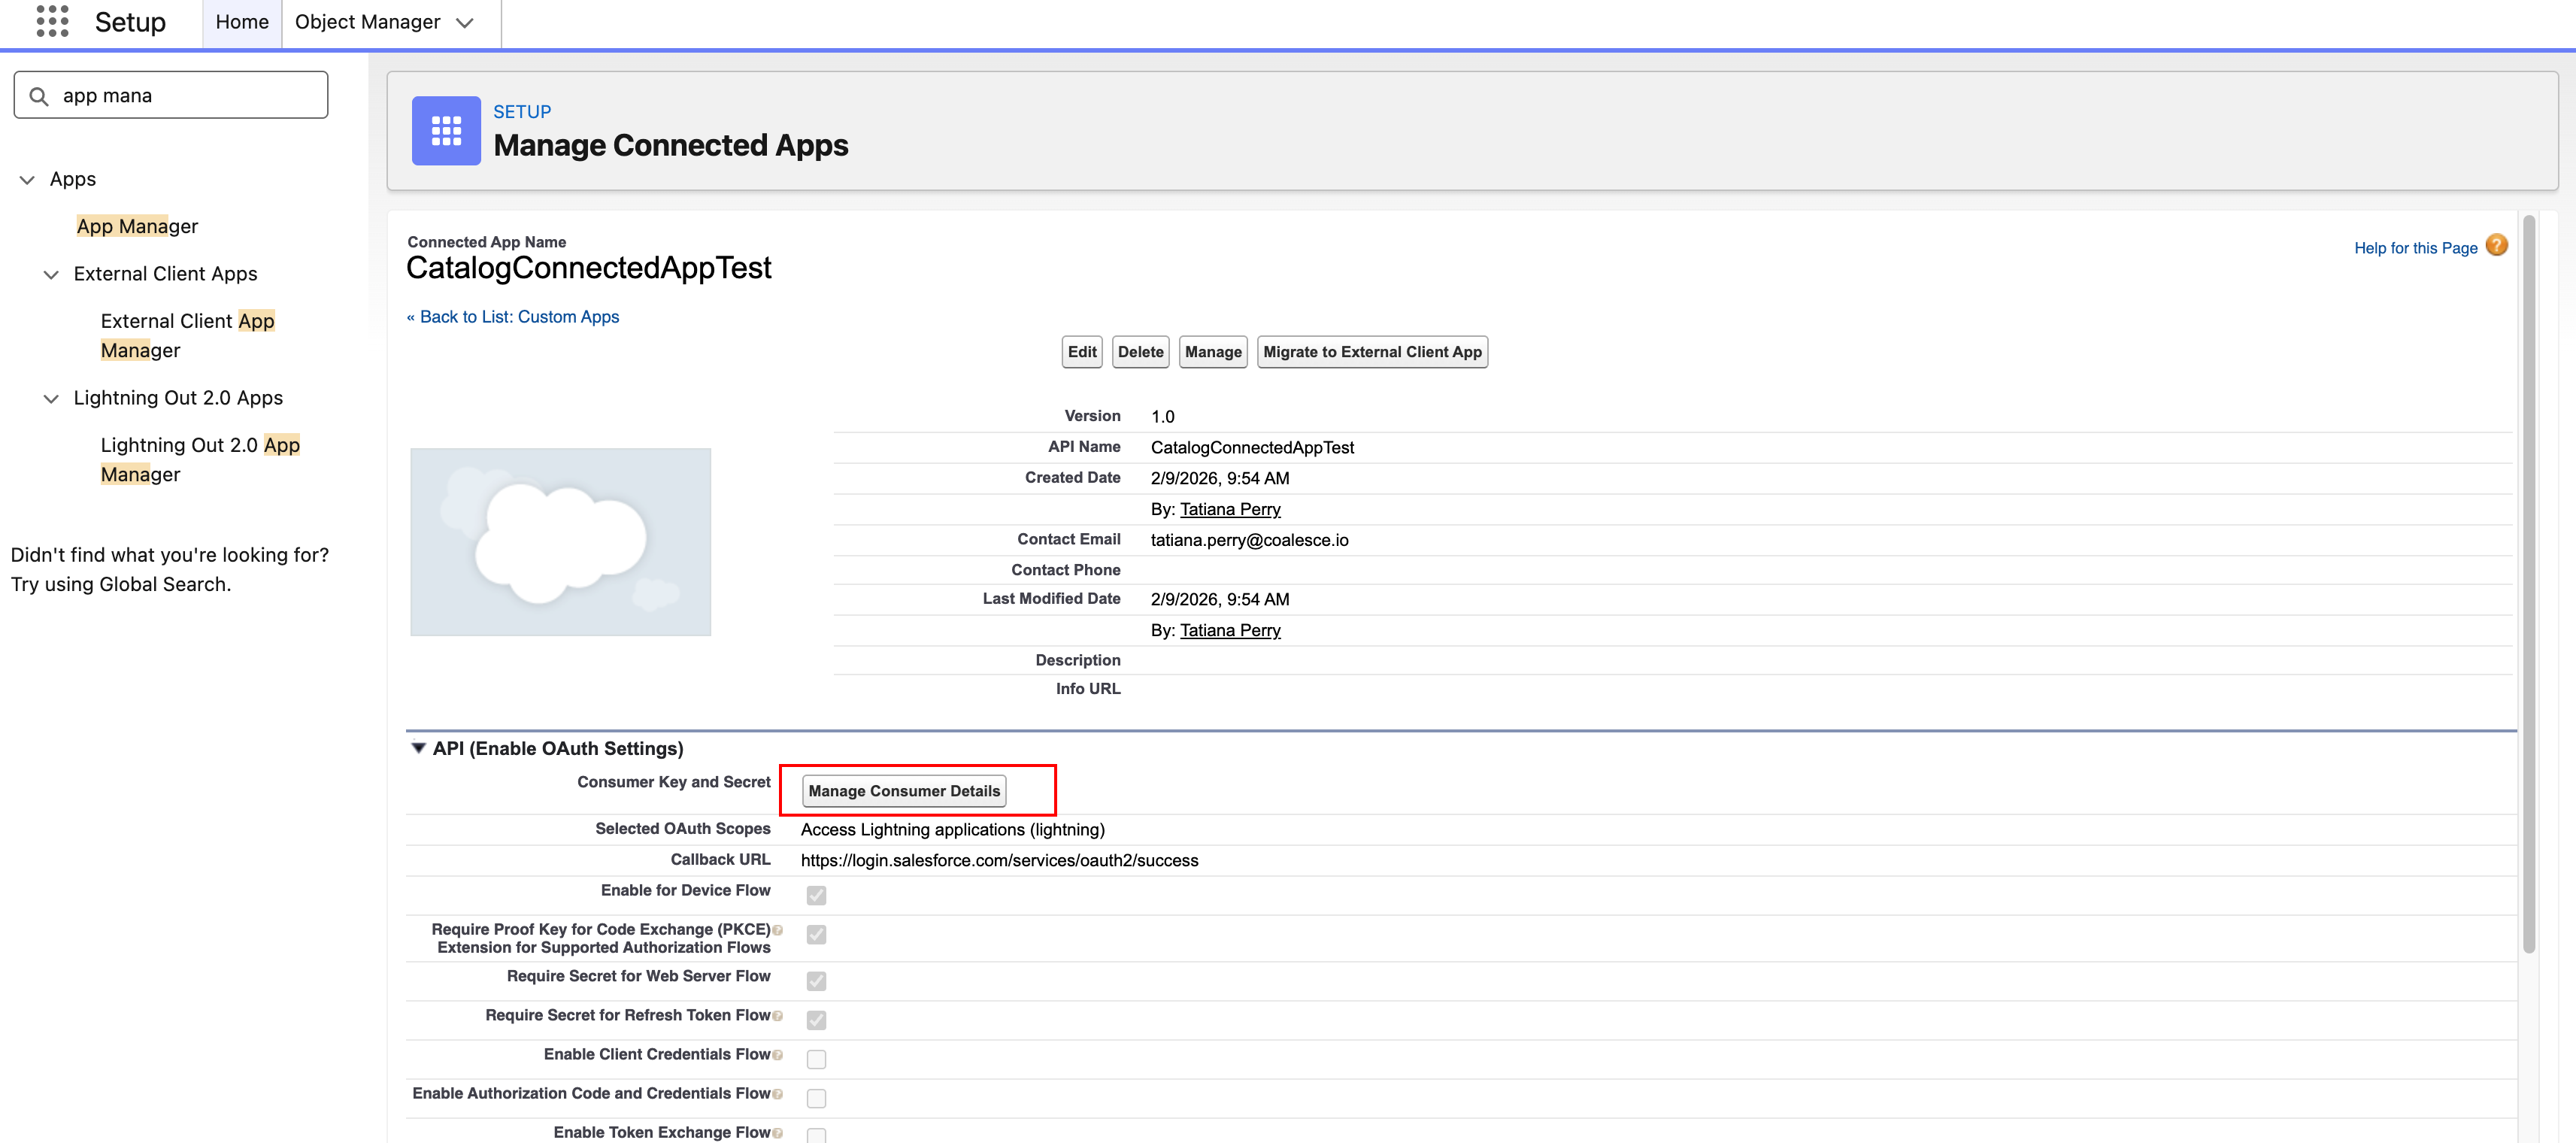
Get Connected App Client ID and Client Secret
- From Setup, in Quick Find, search for Apps > App Manager .
- Click on the dropdown next the app and choose View.
- Go to API (Enable OAuth Settings) and click Manage Consumer Details.
- Copy the Consumer Key and Secret.
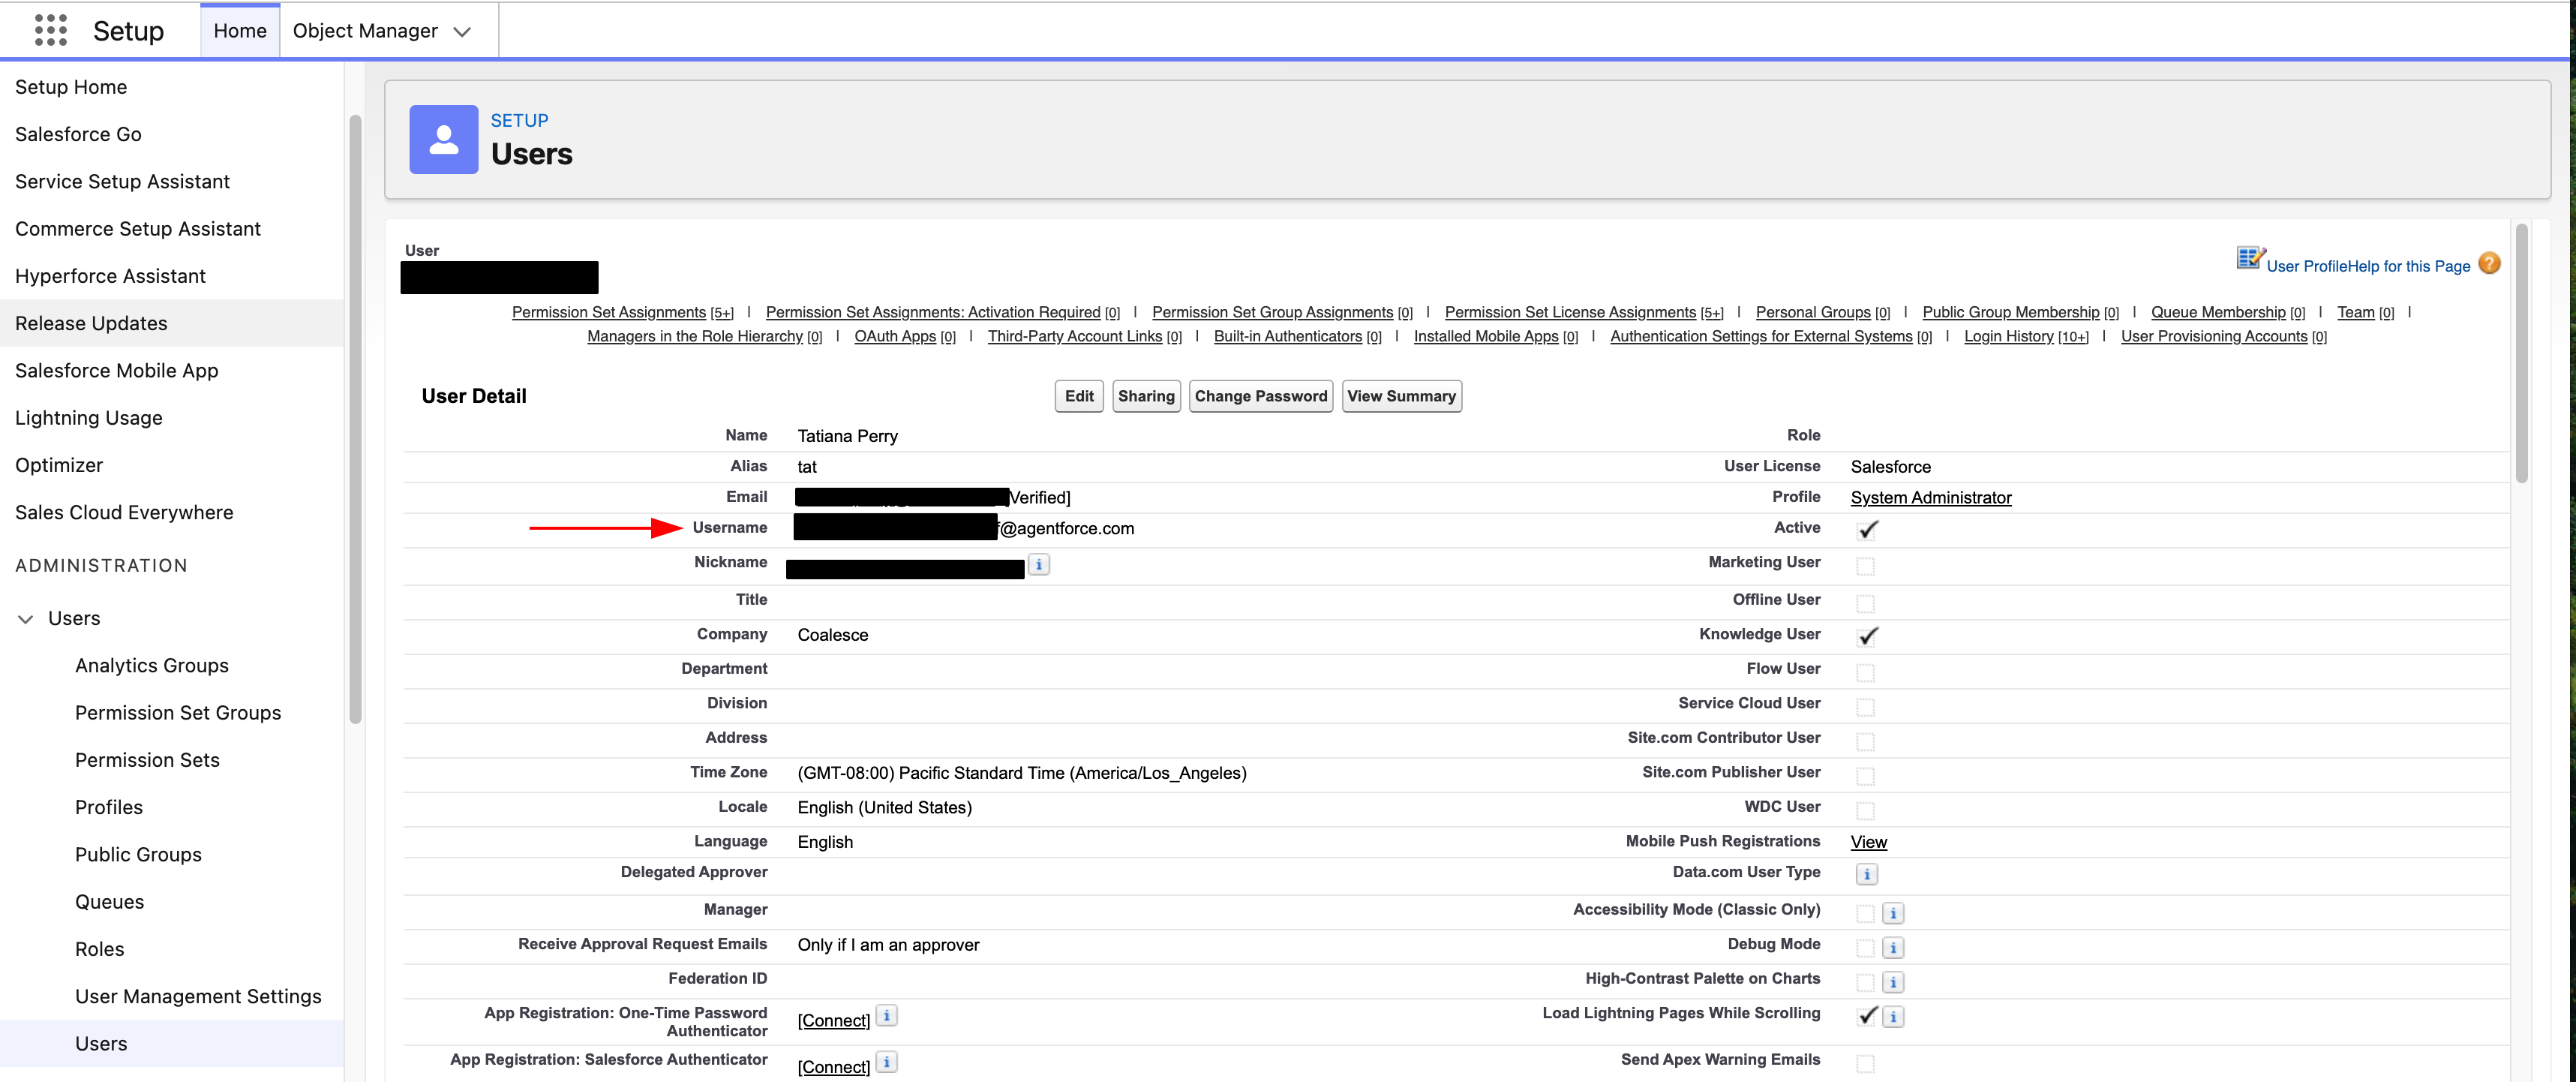
Get Your Domain and Username
The username is not the same as your email. The username will look like something like this: coalesce.support.a4bb07276aff@agentforce.com.
-
From Setup, in Quick Find, search for Users > Users.
-
Find the user and click on them. Copy the information in Username.
-
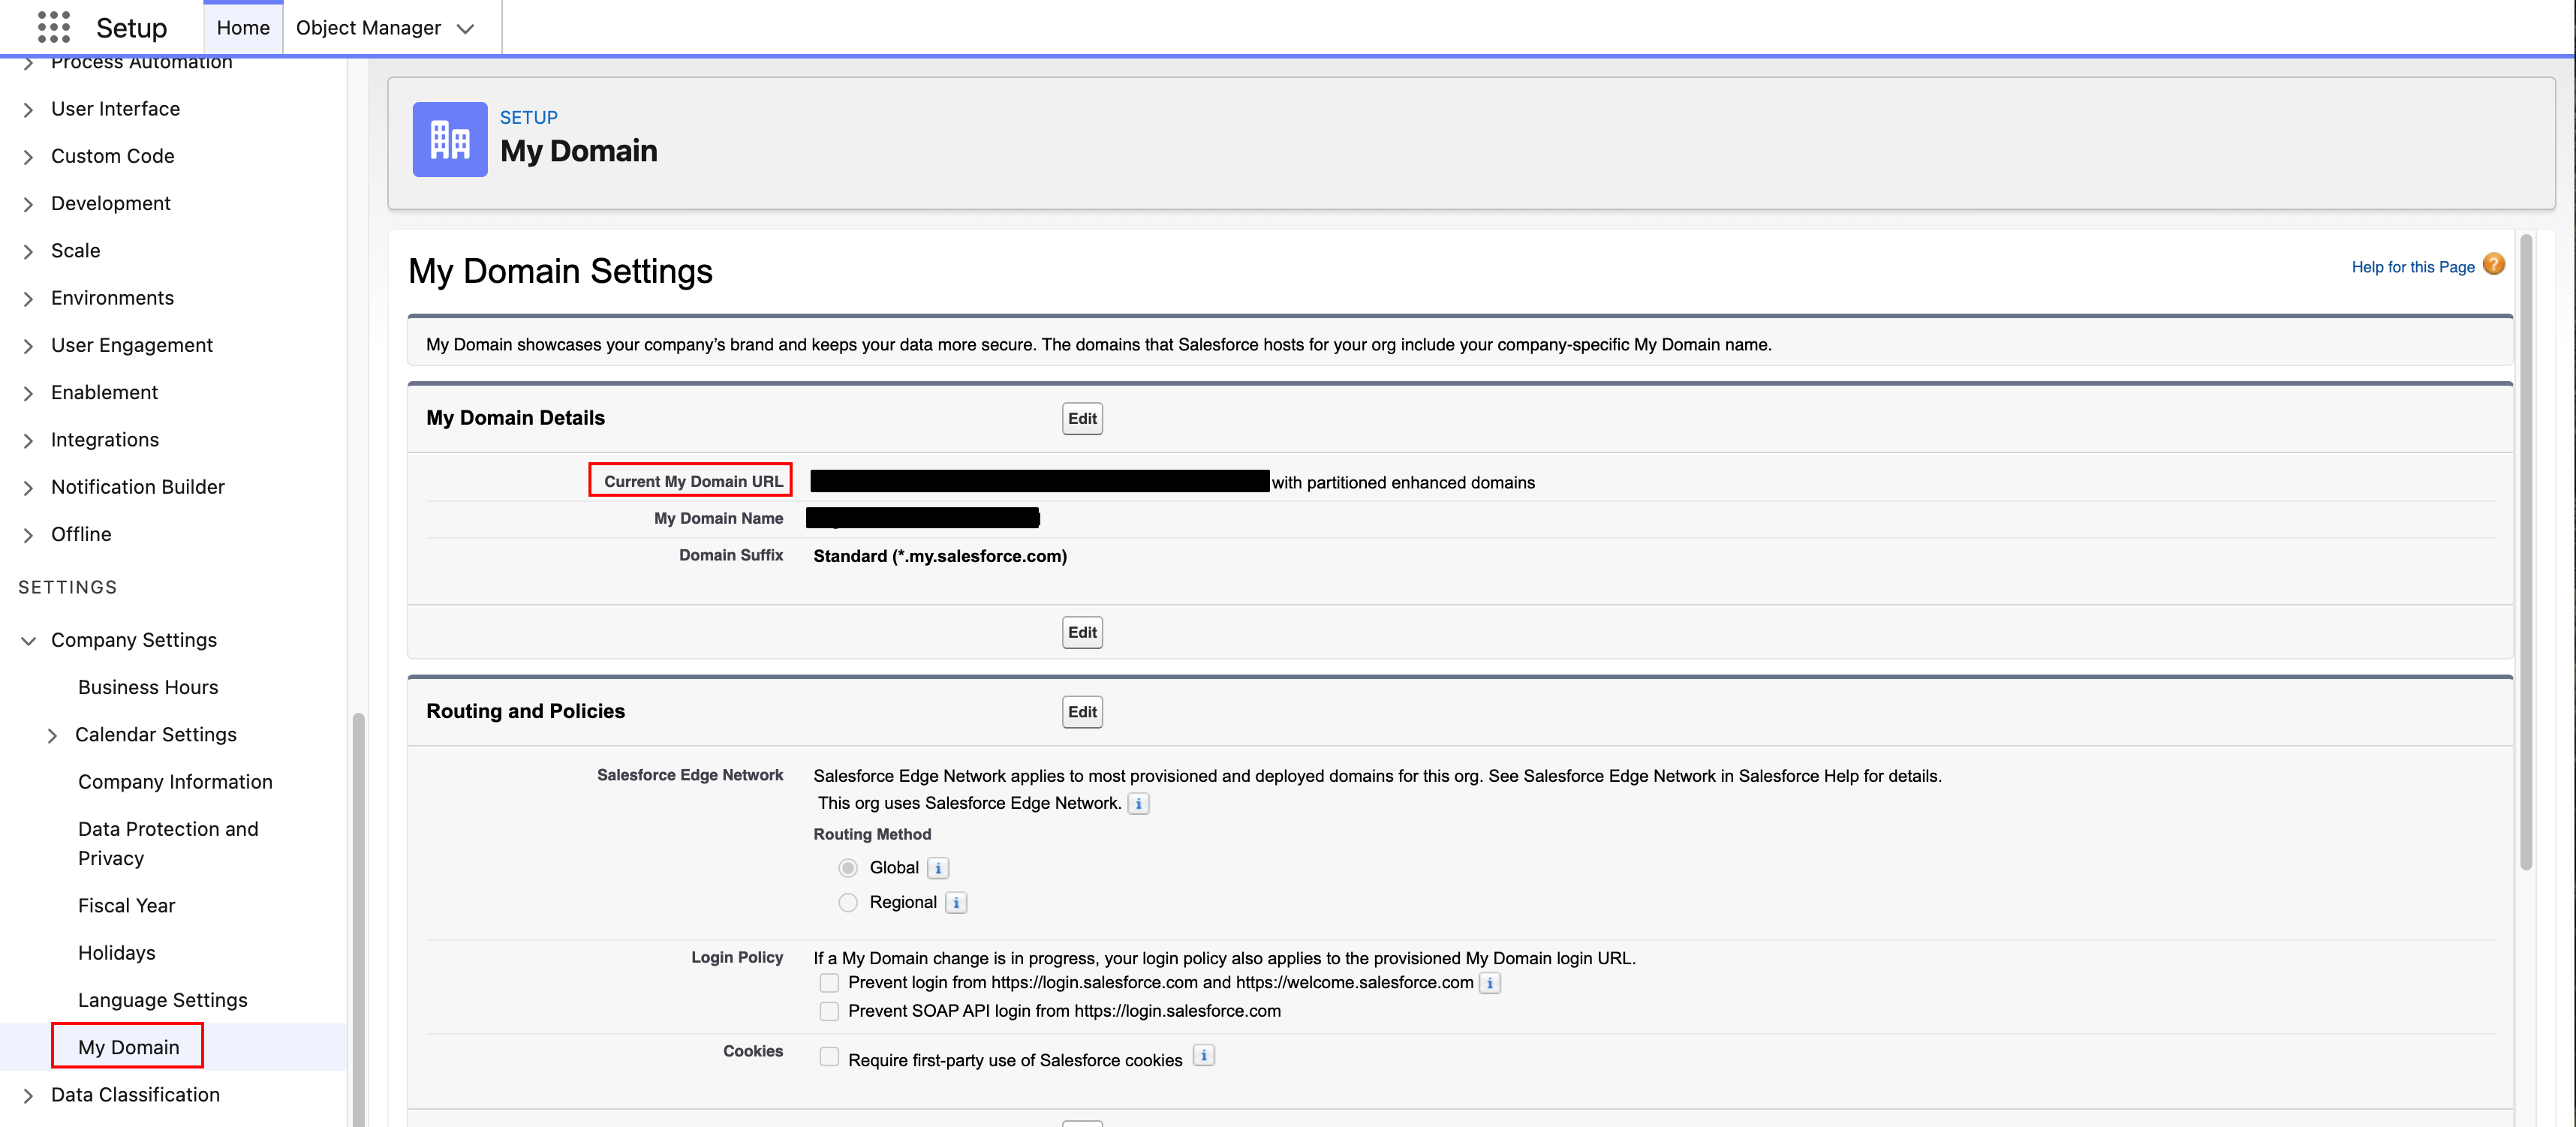
From Setup, in Quick Find, search for Company Settings > My Domain.
-
Copy Current My Domain URL.
Connect Catalog and Salesforce
- Go to Settings > Integrations.
- Find and click the Salesforce tile.
- Select Managed By Catalog.
- Give the source a name.
- Enter the credentials and click Save.
{
    "baseUrl": "<Your Salesforce host>",
    "clientId": "<The connected app consumer key>",
    "clientSecret": "<The connected app consumer secret>"
}

// example

{
    "baseUrl": "some-url-628db8712c-dev-ed.develop.my.salesforce.com",
    "clientId": "IitzUN13UdTsbHAQVr02NAVpTEMhYyQwJ",
    "clientSecret": "ENSGbqHF6QV7zTEfC3Z5VUW08"
}
For your first sync, it will take up to 48 hours and we will let you know when it is complete.
Troubleshooting
OAuth errors that match a wider pattern across Catalog integrations (redirect URIs, scopes, or credential updates in Catalog after a vendor change) are covered in Integration OAuth troubleshooting. The sections below focus on Salesforce-specific checks.
Check IP Restrictions
You might need to adjust your IP settings.
- From Setup, in Quick Find, search for Connected Apps > Manage Connected Apps .
- Click Edit next to the app.
- Review:
- IP Relaxation: Enforce IP restrictions
- Refresh Token Policy: Refresh token is valid until revoked

Need the Client ID and Client Secret
- From Setup, in Quick Find, search for Apps > App Manager .
- Click on the dropdown next the app and choose View.
- Go to API (Enable OAuth Settings) and click Manage Consumer Details.
- Copy the Consumer Key and Secret.
How To Test Your Connection Settings
You can make an API request to check that your credentials are correct.
The request can be done using cURL and should be x-www-form-urlencoded. Using a tool such as Postman or Insomnia makes it easy.
POST

curl --location 'your-domain-url.my.salesforce.com/services/oauth2/token' \
--header 'Content-Type: application/x-www-form-urlencoded' \
--data-urlencode 'client_id='consumer key' \
--data-urlencode 'client_secret=consumer secret' \
--data-urlencode 'grant_type=client_credentials'
View Login Information
You can also check the login history to see if the connection was successful.
- From Setup, in Quick Find, search for Users > Users.
- Click on the Catalog user.
- Scroll to Login History. You’re looking for the application along with the status message.

Reset Keys
- The Consumer Key and Consumer Secret can't be reset. Create a new app.
Client Managed
Follow these instructions if you want to upload your own data.
Running a One-Time Extract
For your trial, you can give Coalesce a one-time view of your BI tools and upload them directly in the Coalesce App.
Running the Extraction Package
Install the PyPI Package
pip install castor-extractor[salesforce-viz]
Make sure to use a version newer than 0.26.18 from which OAuth2.0 Client Credentials flow is supported.
Run pip install --upgrade castor-extractor to upgrade to the latest version.
For more details, see the castor-extractor PyPI page or our documentation on the extractor.
Run the PyPI Package
After the package is installed, run the following command in your terminal:
castor-extract-salesforce-viz [arguments]
Credentials
Use these arguments to provide your Salesforce credentials:
-c,--client-id: Salesforce client ID.-s,--client-secret: Salesforce client secret.-b,--base-url: Salesforce instance URL.
Basic Auth is deprecated, but you can still use username, password, security-token if you need to.
Make sure NOT to use any of username, password, security-token for OAuth2.0 Client Credentials flow.
Other Arguments
-o,--output: Target folder to store the extracted files.
You can also run --help for a full list of arguments.
Scheduling and Pushing to Catalog
When you move out of your trial, you'll want to refresh your Salesforce Reporting content in Catalog. The Catalog team will provide you with the following:
- Catalog Identifier: An ID to match your Salesforce files with your Catalog instance.
- Catalog Token: An API token.
Use the castor-upload command:
castor-upload [arguments]
Arguments
-k,--token: Token provided by Catalog.-s,--source_id: Account ID provided by Catalog.-t,--file_type: Source type to upload. Currently supported types areDBT,VIZ, andWAREHOUSE.
Target Files
To specify target files, provide one of the following:
-f,--file_path: Push a single file.-d,--directory_path: Push several files at once.
The tool uploads all files in the given directory. Make sure the directory contains only the extracted files before pushing.
After configuring your target files, schedule the script run and the push to Catalog using your preferred scheduler to create this job.