Documentation index: llms.txt. This page is also available as markdown: append .md to this URL or send Accept: text/markdown.
Google SSO
In this guide, you'll learn how to set up Google as a Single Sign-On provider in Coalesce.
You must be a Google Cloud or Google Workspace Administrator with access to the Google Cloud Console to complete this process.
Before You Begin
Check Your Subdomain
Your subdomain is the subdomain of your Coalesce instance. For example, if you log in at https://yoursubdomain.app.coalescesoftware.io/, your subdomain is yoursubdomain.
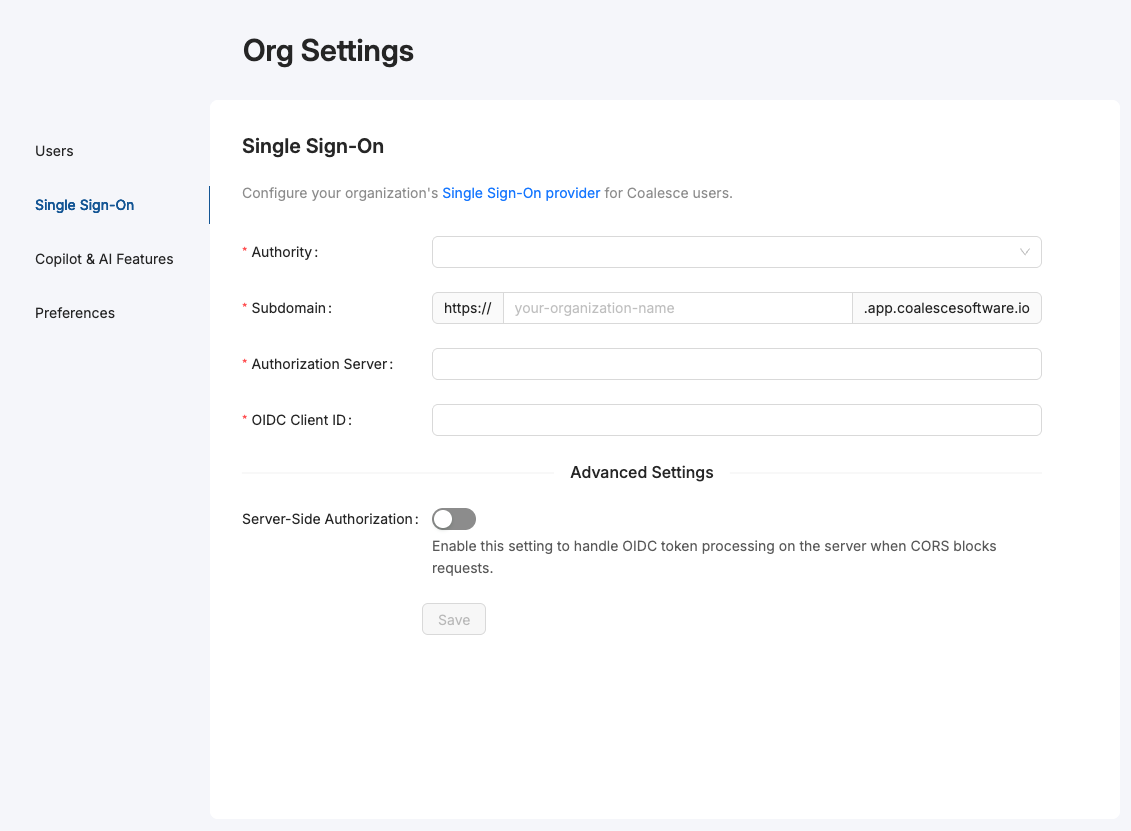
To check if you already have a subdomain, go to your organization's Single Sign-On settings.
If you don't have a subdomain, you can add one in the Subdomain box. Coalesce automatically configures your subdomain based on the name you enter. Check with your IT team before adding it to your organization's settings.
Google Setup
Google uses OpenID Connect for SSO. You'll create an OAuth 2.0 Client ID in the Google Cloud Console, which produces the Client ID and Client Secret you enter in Coalesce.
Configure the OAuth Consent Screen
- In the Google Cloud Console, select or create the project you want to use for SSO.
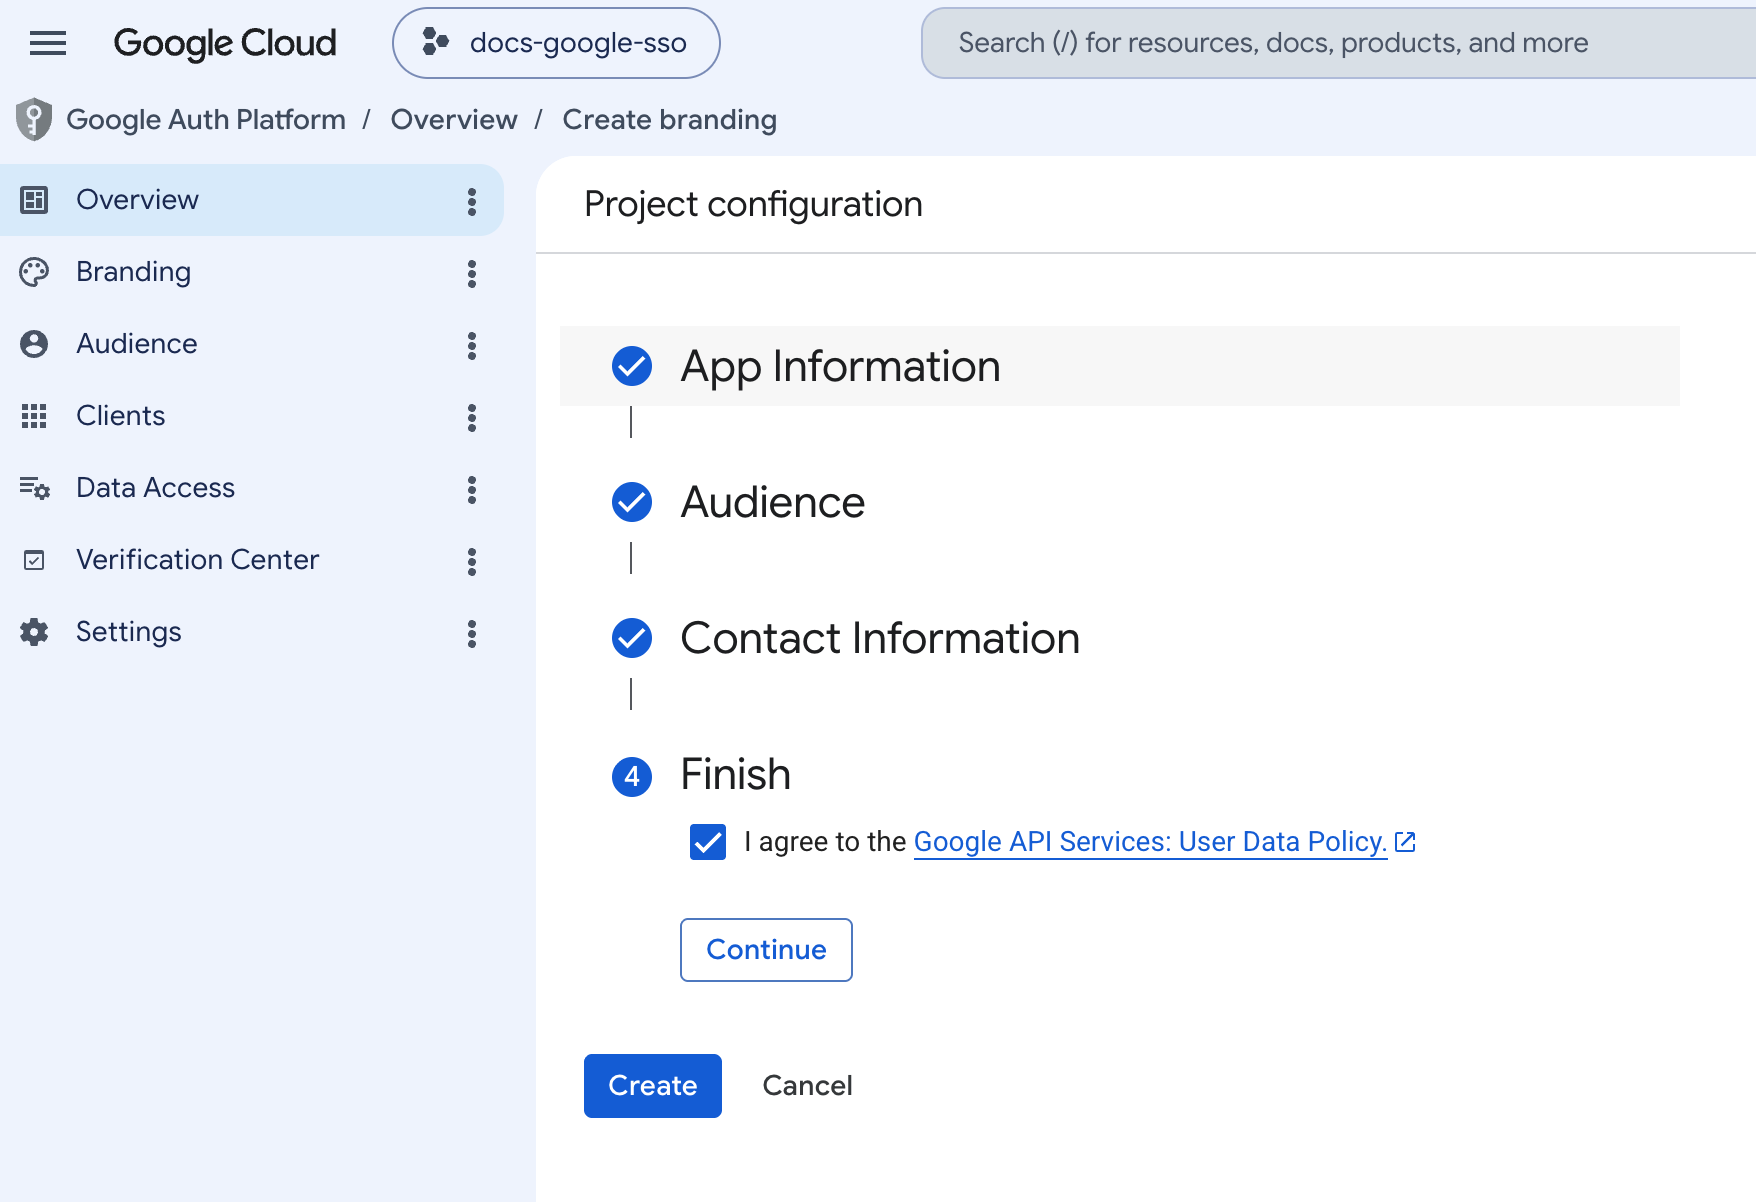
- If you have not already configured the OAuth consent screen, go to APIs & Services > OAuth consent screen, then click Get Started.
- On App Information, enter the required details:
- App name
- User support email
- On Audience, select Internal. This limits the application to users in your organization.
- On Contact Information, enter the email address for someone who needs to be notified of changes by Google.
- On Finish, accept the Google API Services User Data Policy, then click Create.
Configure Credentials
-
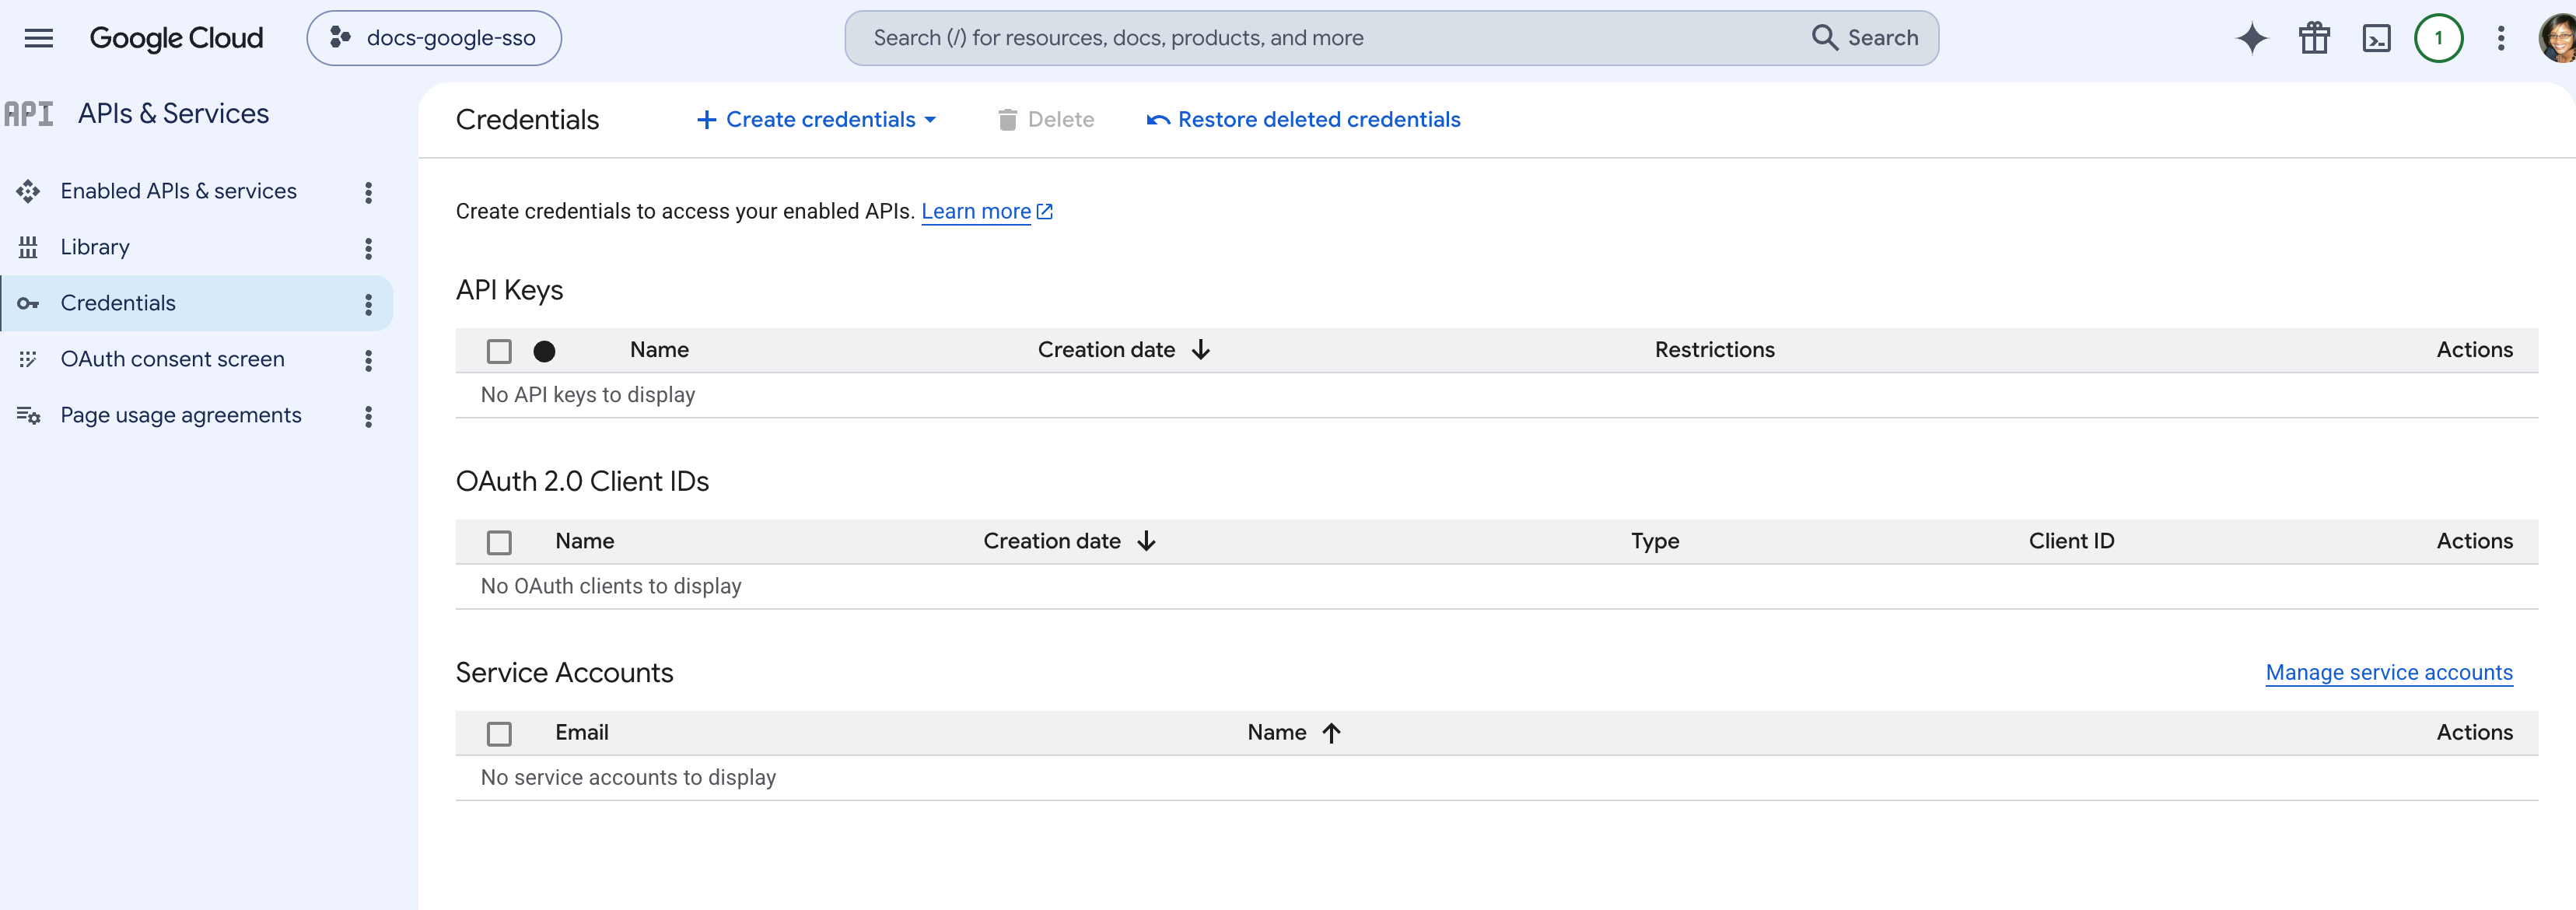
Go to APIs & Services > Credentials.
-
Click Create Credentials, then select OAuth client ID.
-
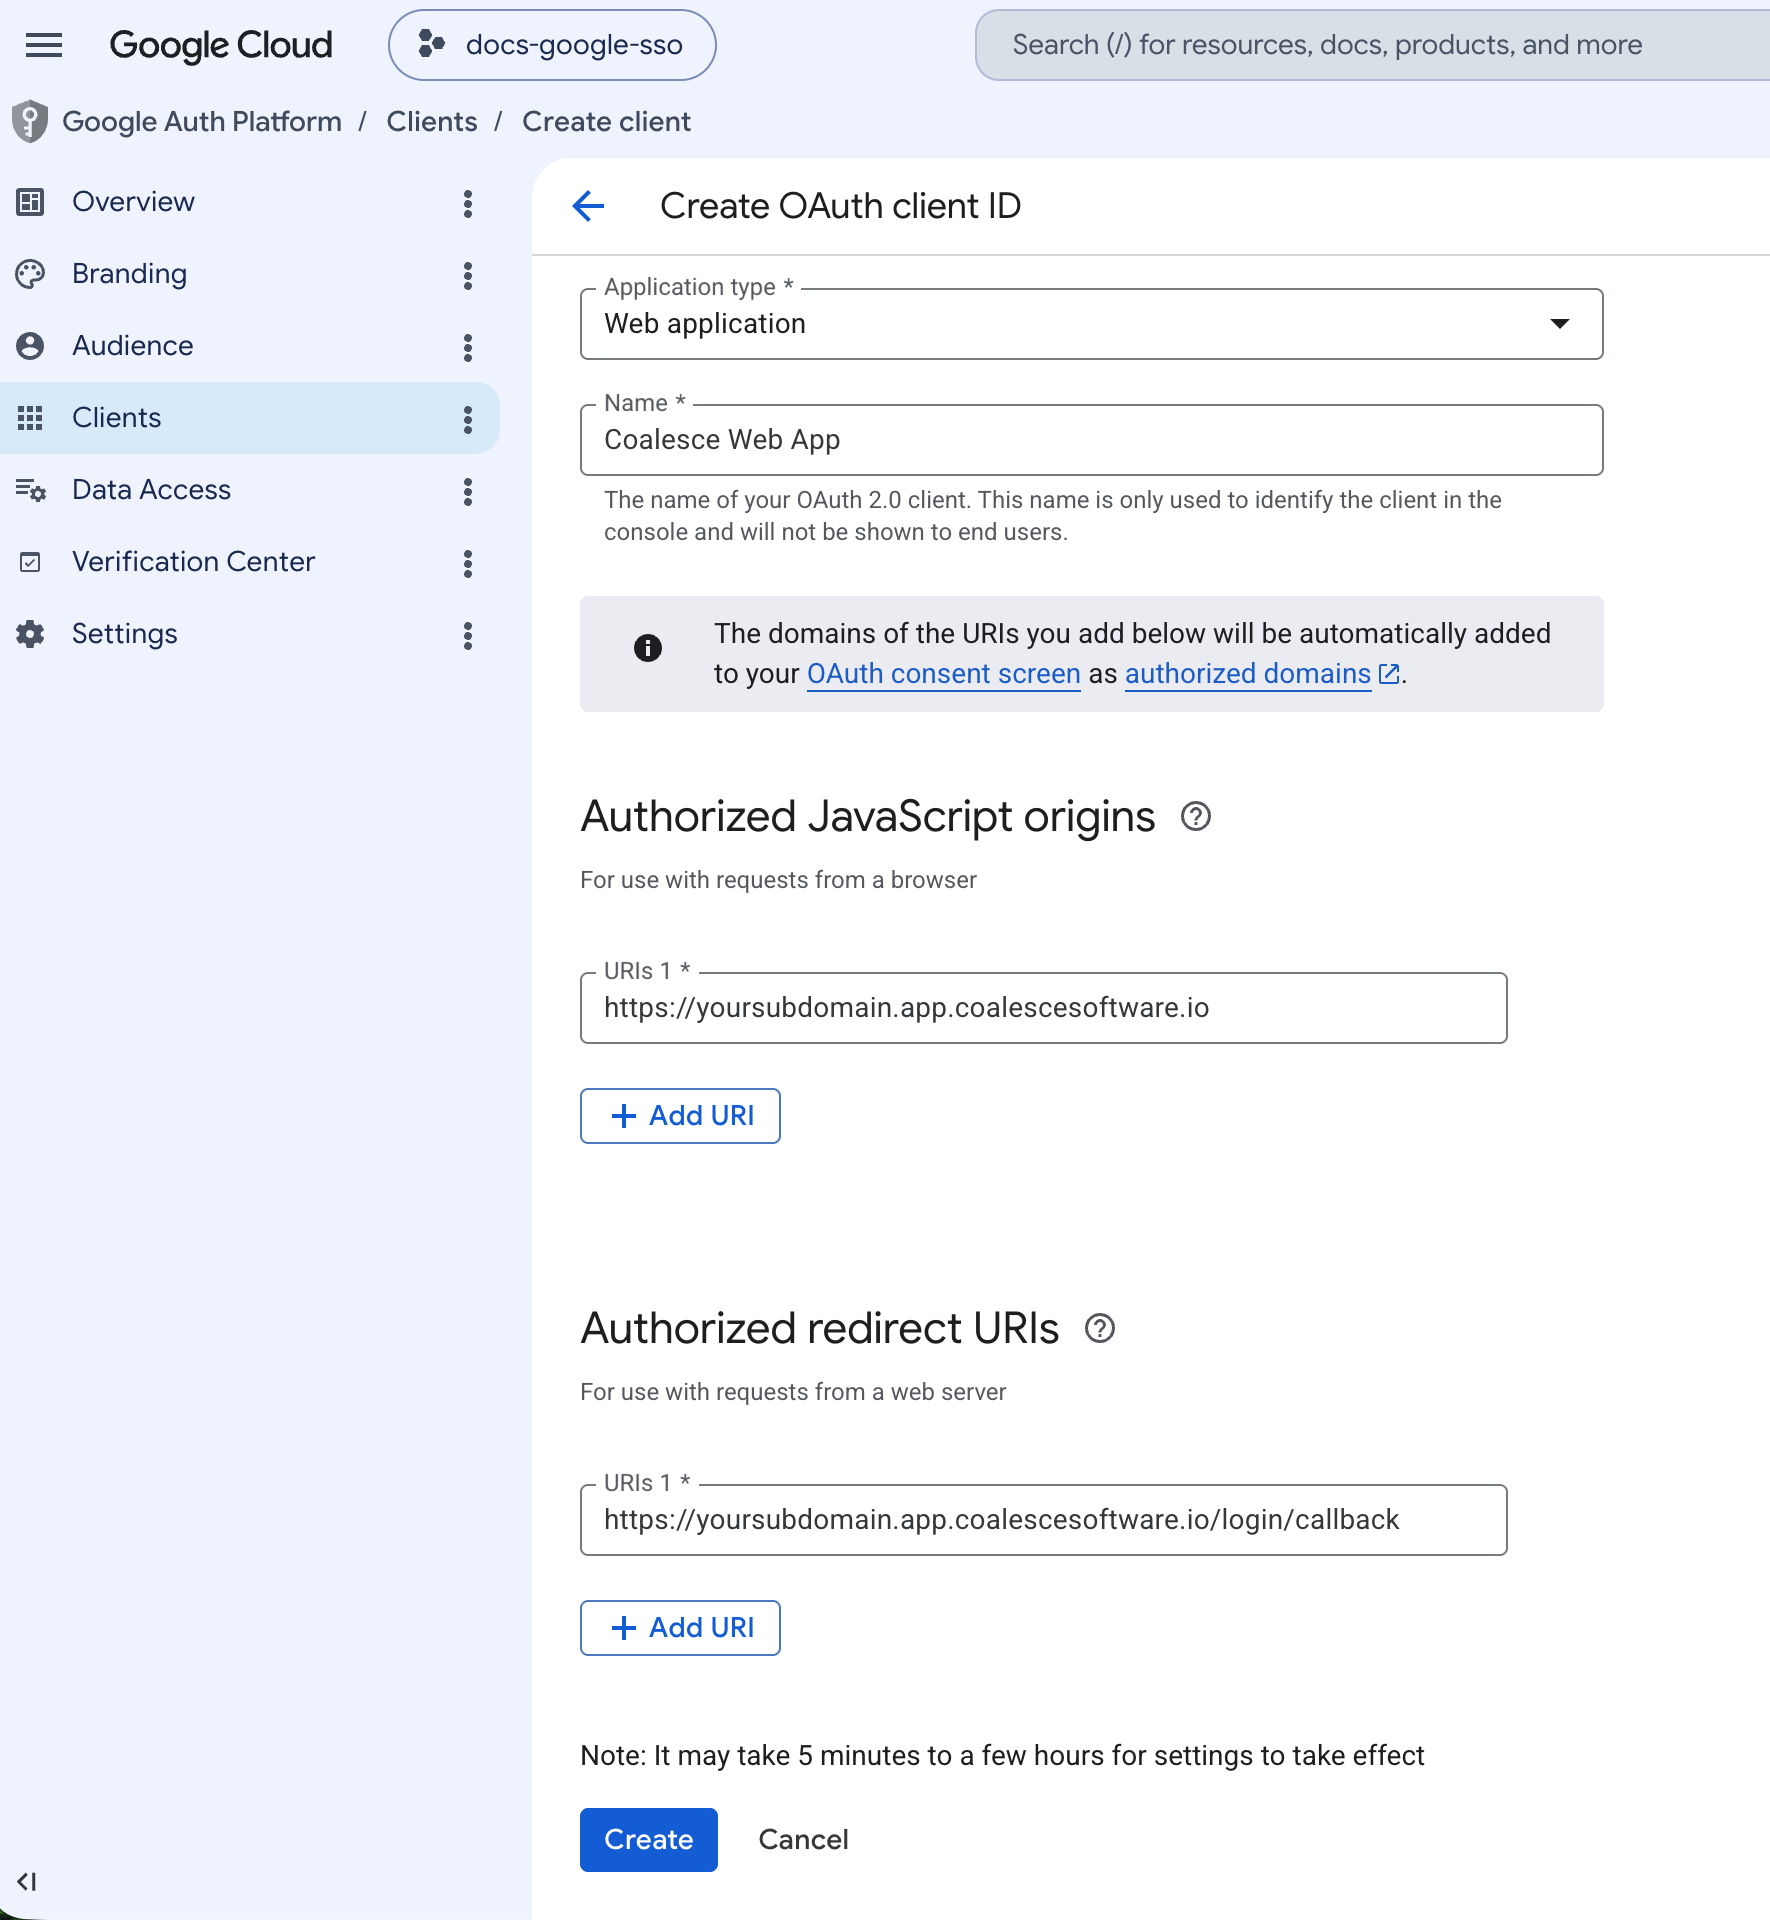
Set Application type to Web application and enter a name, for example
Coalesce SSO. -
Under Authorized redirect URIs, add the Coalesce callback URL. Replace
yoursubdomainwith the subdomain you created in Coalesce:https://yoursubdomain.app.coalescesoftware.io/login/callback
-
Optional: Under Authorized JavaScript origins, add your Coalesce login origin:
https://yoursubdomain.app.coalescesoftware.io
-
Click Create. Google displays a popup with your Client ID and Client Secret. Copy both values. You'll enter them in the Coalesce SSO configuration. You can also retrieve the Client Secret later from the credential details page.
Coalesce SSO Configuration
-
Open a new window.
-
Sign in to your Coalesce App using your username and password.
-
Go to Organization Settings > Single Sign-On.
-
Use the table below to map each Coalesce field to the Google values you collected:
Field Description Authority The system being used for Single Sign-On. Choose Other. Subdomain The subdomain you created during Before You Begin. Authorization Server https://accounts.google.comOIDC Client ID The Client ID from Google. It ends in .apps.googleusercontent.com.Server-Side Authorization Toggle on. Google blocks browser cross-origin requests to its OpenID configuration and token endpoints, so server-side authorization is required. Authorization Endpoint https://accounts.google.com/o/oauth2/auth. This field appears when Server-Side Authorization is on.Client Secret The Client Secret from Google. Required for OIDC providers such as Google that require a client secret for server-side authentication. Click Edit to enter or update it. 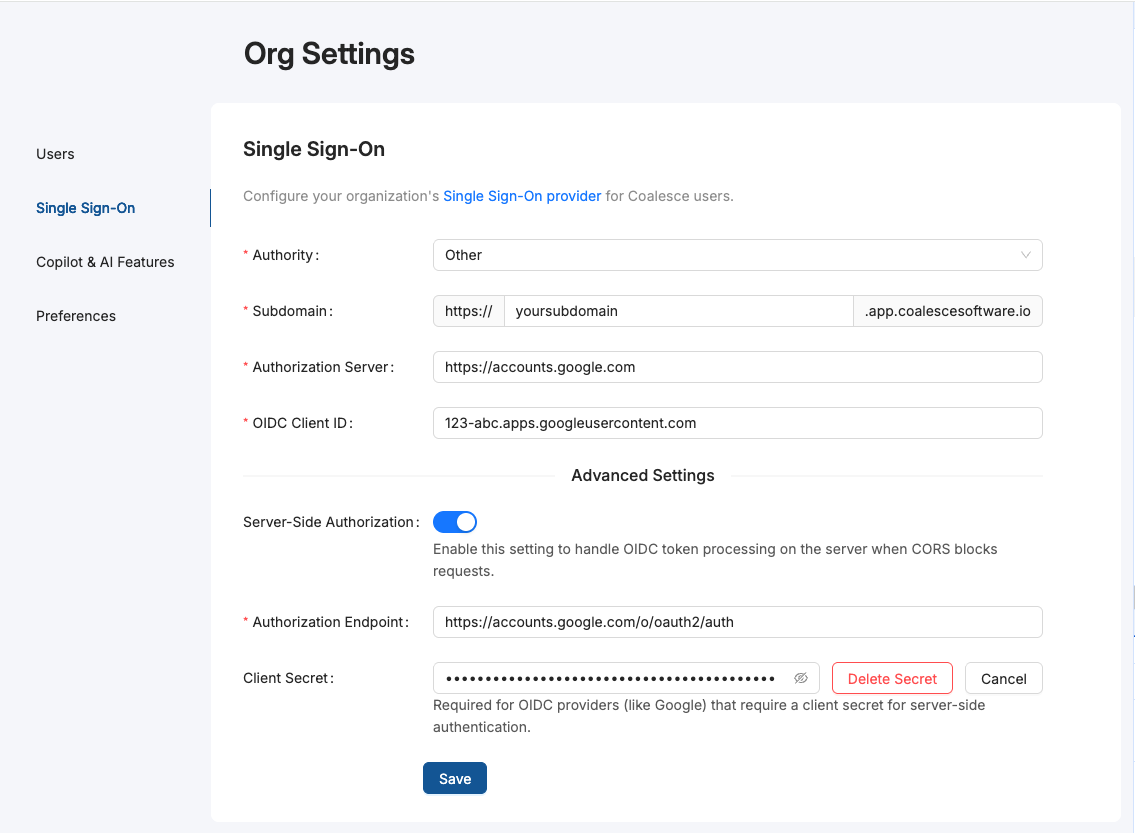
-
Click Save.
-
Log out of Coalesce.
-
Go to your Coalesce login page, for example
https://yoursubdomain.app.coalescesoftware.io/, and click Use Single Sign-On to log in with Google.
If you see an error message instead of the sign-on button, check that you entered the Client ID, Client Secret, and Authorization Endpoint correctly in your Coalesce SSO settings. If the problem persists, reach out to our Support Team.
Duplicate Accounts After SSO Setup
The creation of a separate SSO account is expected behavior and does not affect your existing basic auth account's permissions.
When you first authenticate using SSO in Coalesce, the system creates a new SSO account separate from your existing basic authentication account. This new SSO account is automatically assigned Org Member permissions by default.
If you previously had admin permissions through your basic auth account, you'll need to update the permissions for your new SSO account. To do this:
- Log in using your basic authentication credentials.
- Update the permissions for your SSO account.
- If you don't have admin access, contact your organization's admin to update the permissions.
What's Next?
- If your SSO appears successful but Coalesce shows a blank or spinning screen, see Troubleshooting Browser Login Issues.
- Review Troubleshooting Common SSO Errors for additional SSO error messages and fixes.