Documentation index: llms.txt. This page is also available as markdown: append .md to this URL or send Accept: text/markdown.
Databricks Connection Guide
This guide will take you through connecting your Databricks account to Coalesce.
Pre-Requisites
There are different guidelines for Databricks and Coalesce.
A Project can only be associated with one data platform.
Databricks
- Your workspace must be using the Unity catalog.
- Must be a Databricks account admin create to OAuth applications.
- Databricks users must be given the permission to create a Personal Access Token (PAT) for Token authentication.
Coalesce
- Must be a Coalesce org admin.
- For Coalesce, have a Project with version control.
- Any users need to be added to Coalesce by either adding them manually by the org admin or setting up SSO(Single-Sign-On) to Coalesce so they are added automatically.
Get Your Databricks Account URL
You'll need your Databricks account URL for authentication. Your account URL is the URL after logging in. You only need the information in the brackets. No backslashes or HTTPS is needed.
https://<abc-11111111-2222.cloud.databricks.com>/settings/workspace/
OAuth User-to-Machine
User-to-Machine is used for your daily work access. If you want to set up any automation, use Machine-to-Machine. You will need to create a App Connection and get the client ID and client secret along with the URL and path.
-
Go to the Account console. If you don't have access, you'll need to reach out to your Databricks administrator.
-
Then go to Settings > App Connections and click Add connection.
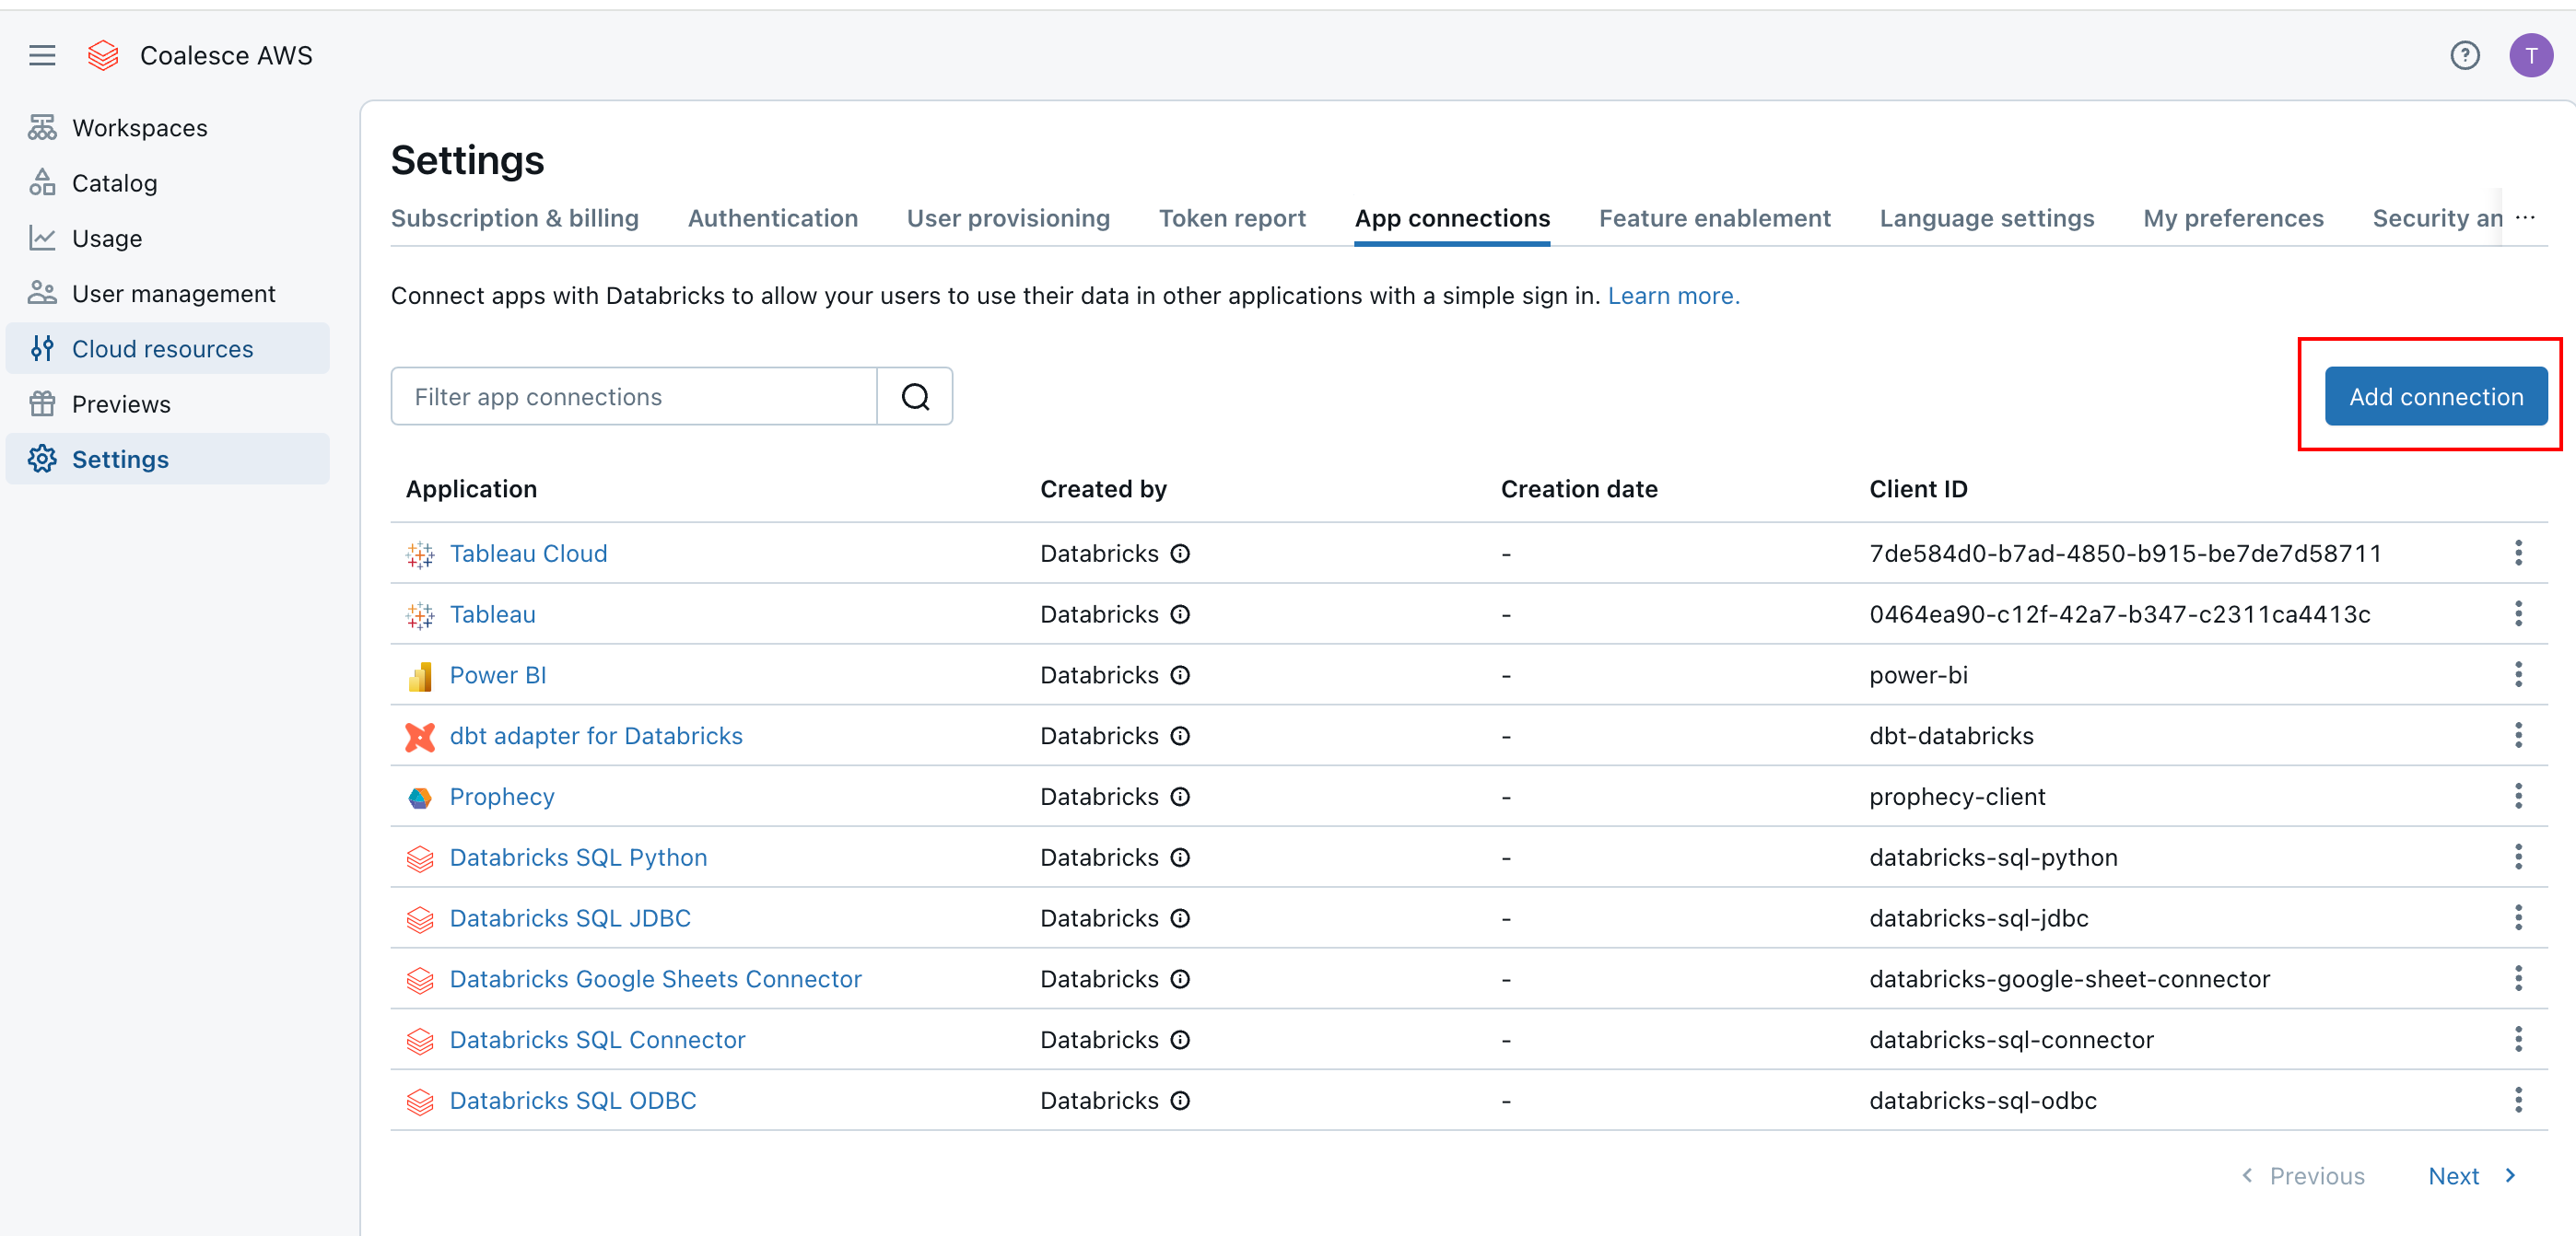
Databricks - Settings > App connections -
Give the app a Name:
-
Redirect URL is your Coalesce account URL at
oauthredirect. This is usually the URL you use to log into Coalesce. For example,https://<COALESCE_APP_DOMAIN>/oauthredirect,https://app.coalesce.io/oauthredirect.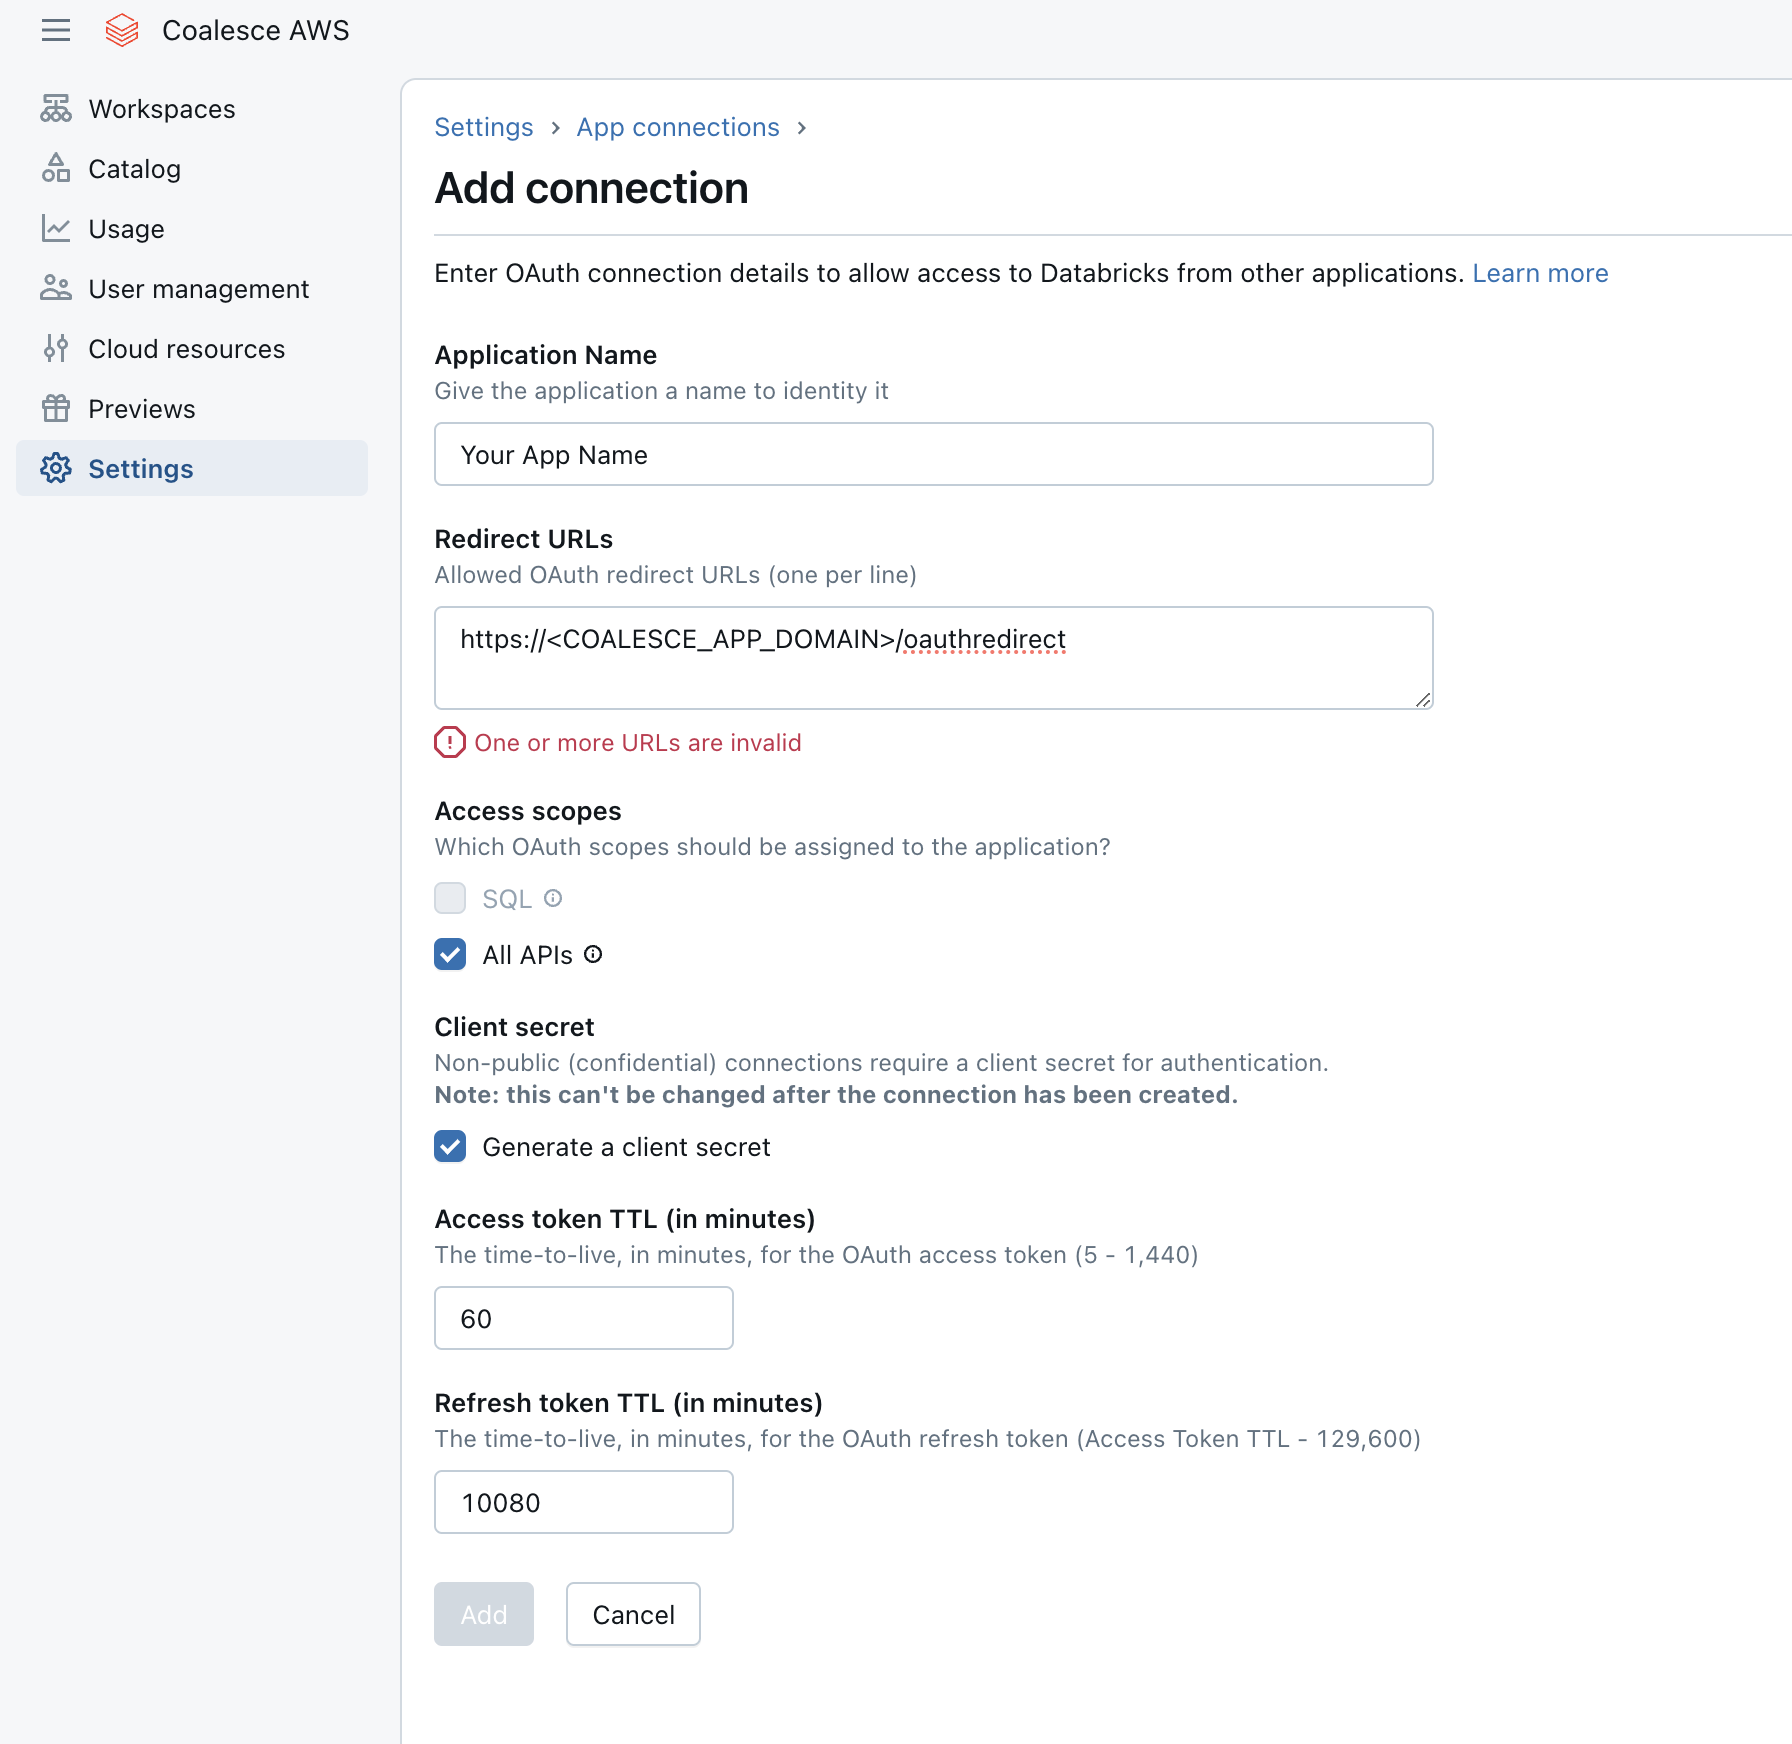
Databricks - Add Connection -
Change the Access Scopes to All APIs.
-
Generate client secret is checked.
-
You can leave TTL as the default or change it.
-
-
Click Add.
-
A Client ID and Client Secret will pop-up. Save them for later.
User-to-Machine Coalesce Configuration
You should have your Databricks client ID, client secret, and Databricks account URL before continuing.
-
In Coalesce, go to a Project and Workspace that has been configured for Databricks. This means the repo attached is either empty or has only been used for Databricks previously.
-
Open the Build Settings, then Workspace, and click on the cog next to the Workspace name to open Workspace Settings.
-
Add your Databricks account URL. The account URL can’t contain a backslash, spaces, or
https://.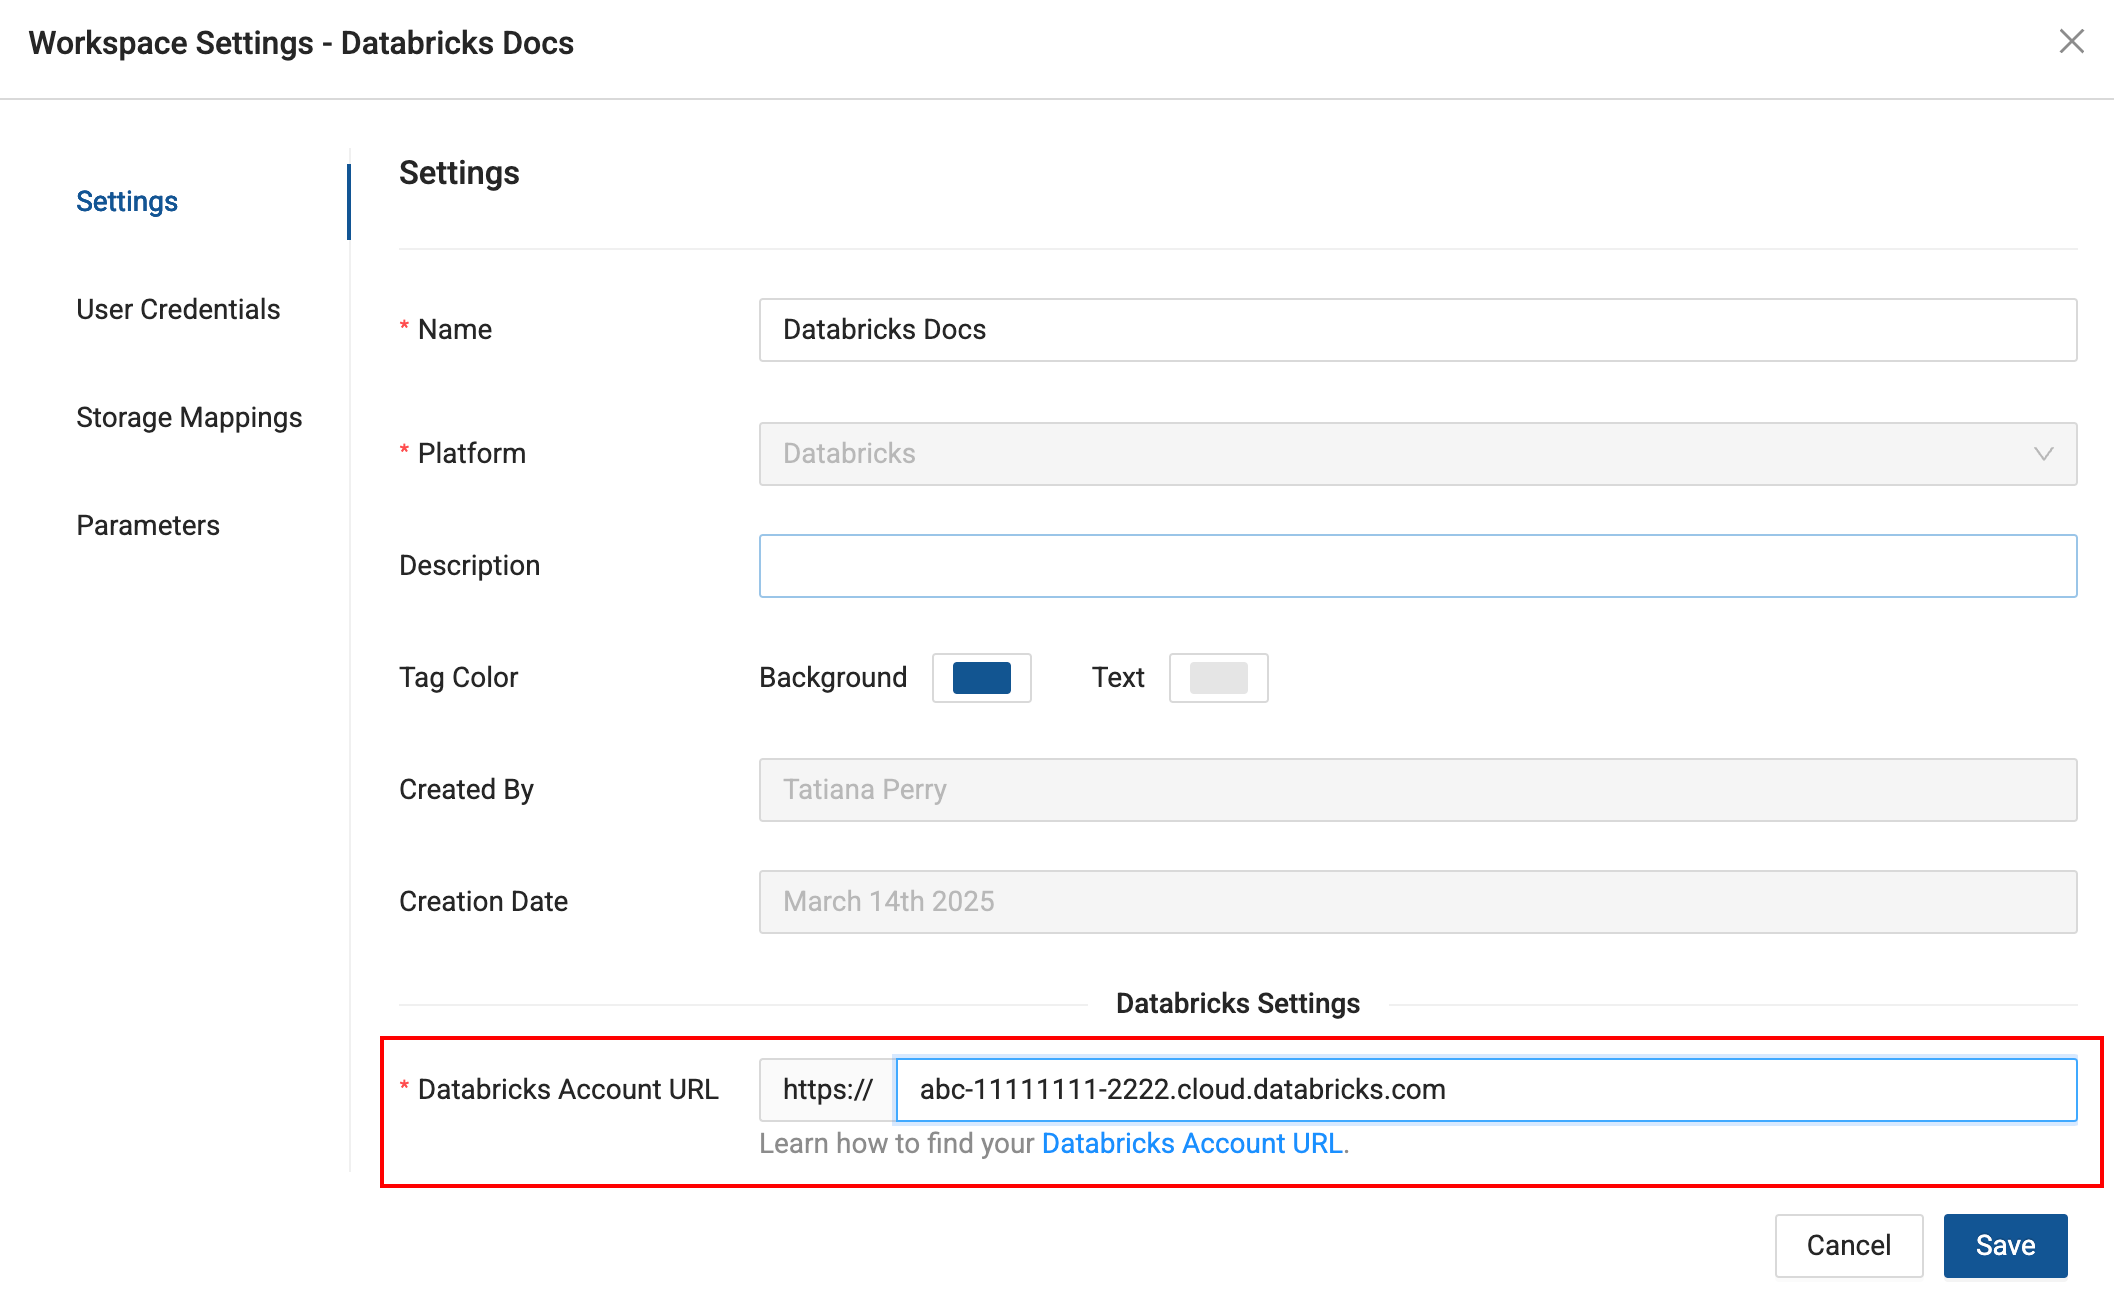
Workspace Settings > User Credentials -
Click on User Credentials.
-
Set Authentication Type to OAuth (User-to-Machine).

Workspace Settings > User Credentials -
Go to OAuth Settings and toggle Enable OAuth.
-
Click Edit and enter the Client ID and Client Secret from Databricks.
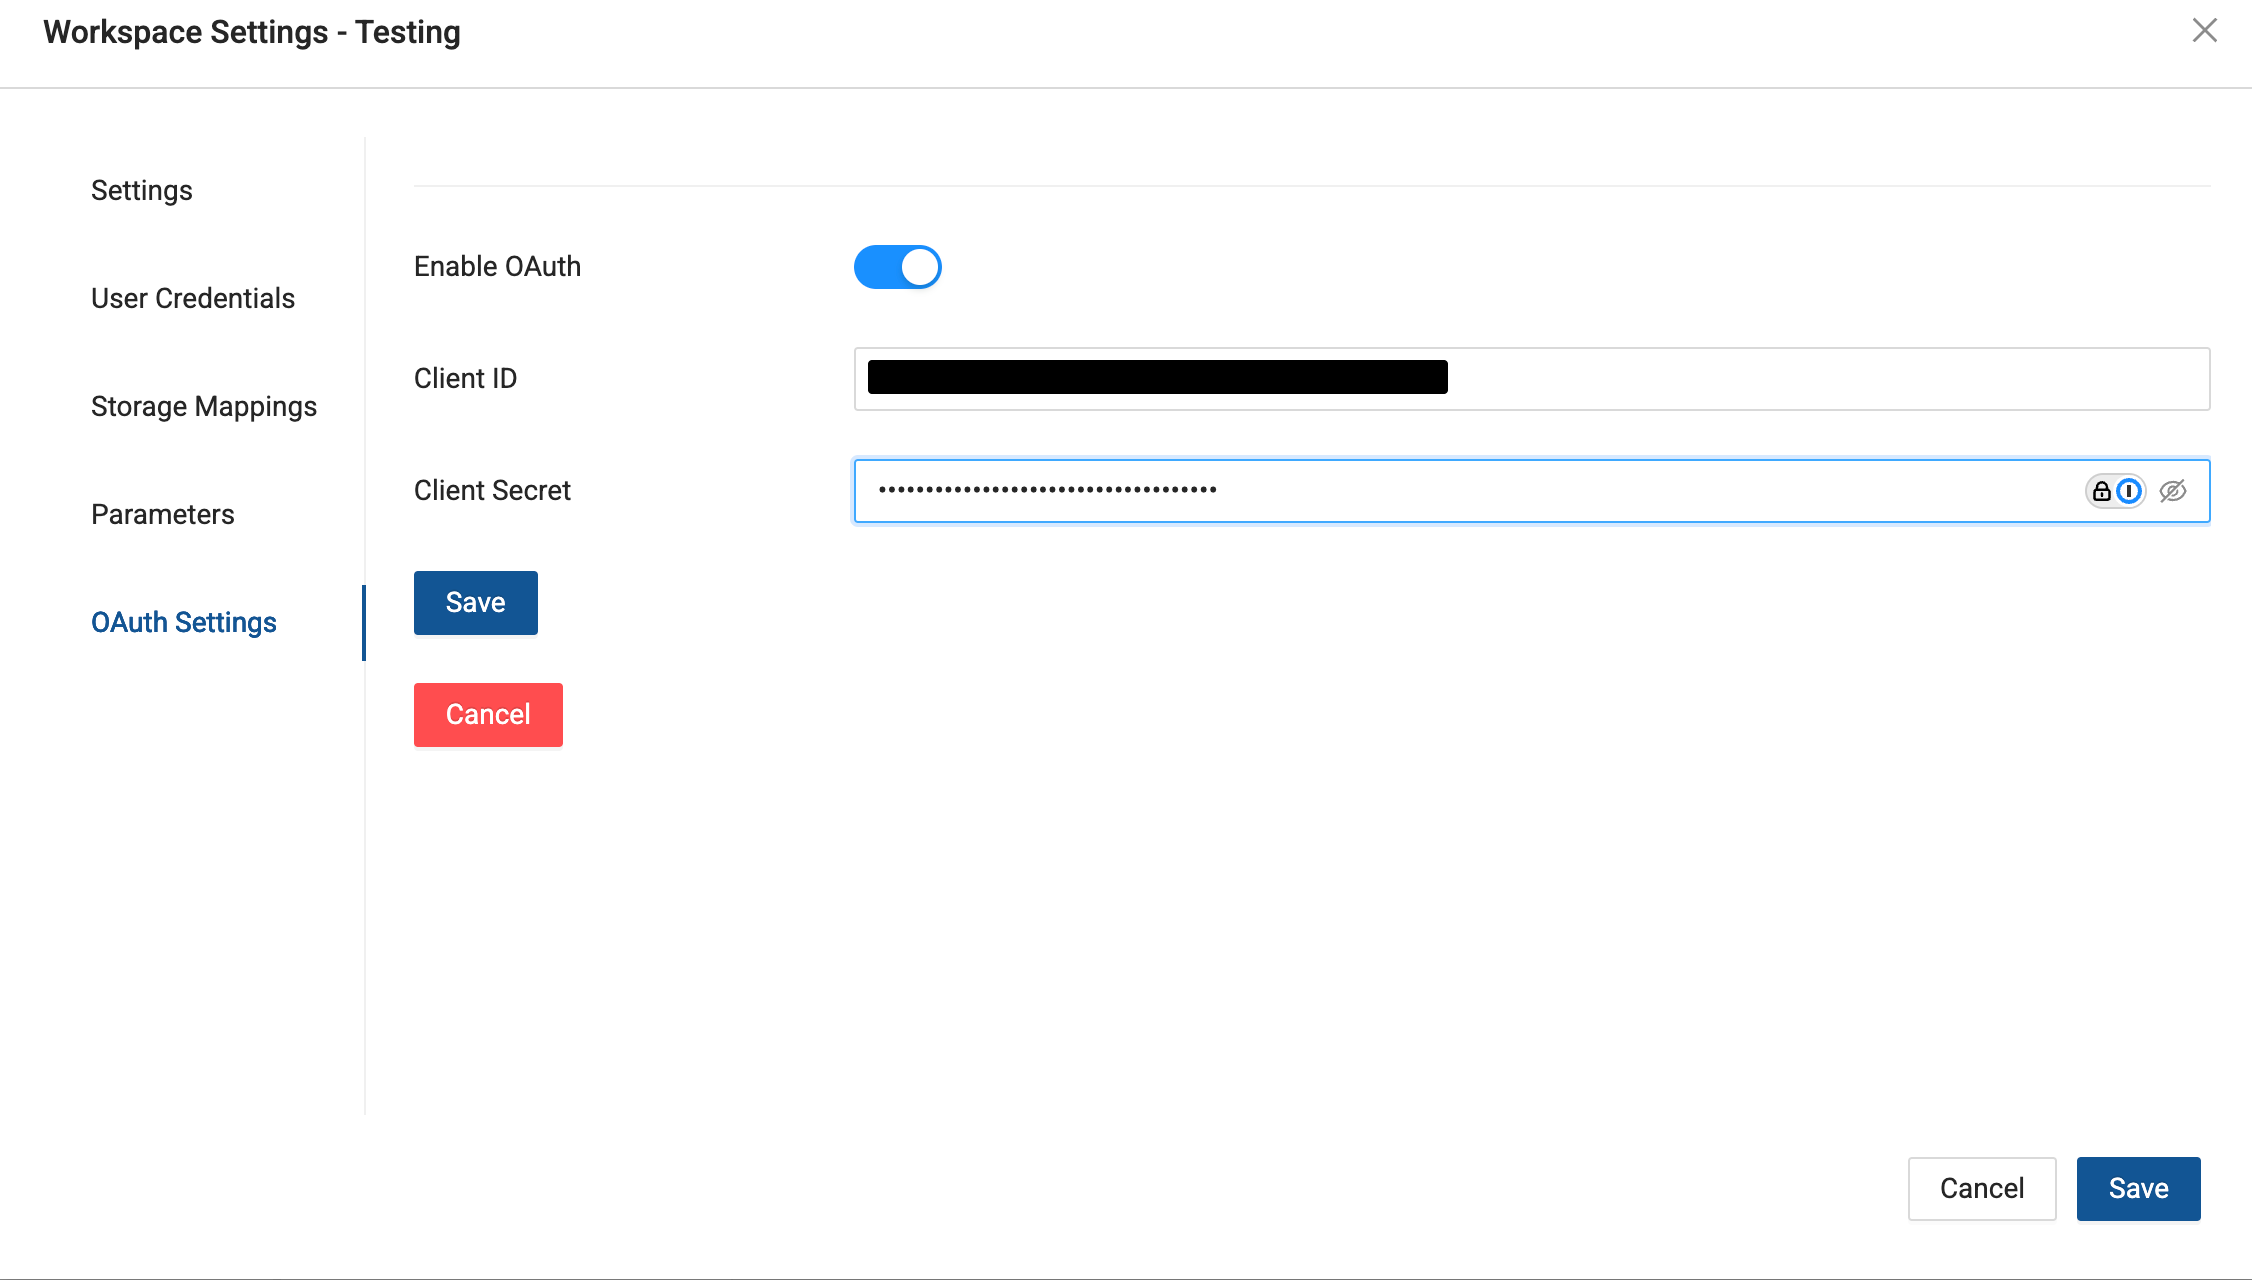
Workspace Settings > Add Client ID and Client Secret -
Click Save.
-
Go back to User Credentials and click Authenticate.
-
You'll be taken to the Build Page and see a testing, then success message.

OAuth Machine-to-Machine
Machine-to-Machine is used for automation. You'll need to create a Service Principal.
-
On the Databricks Account Console, go to User Management and select Service Principals.
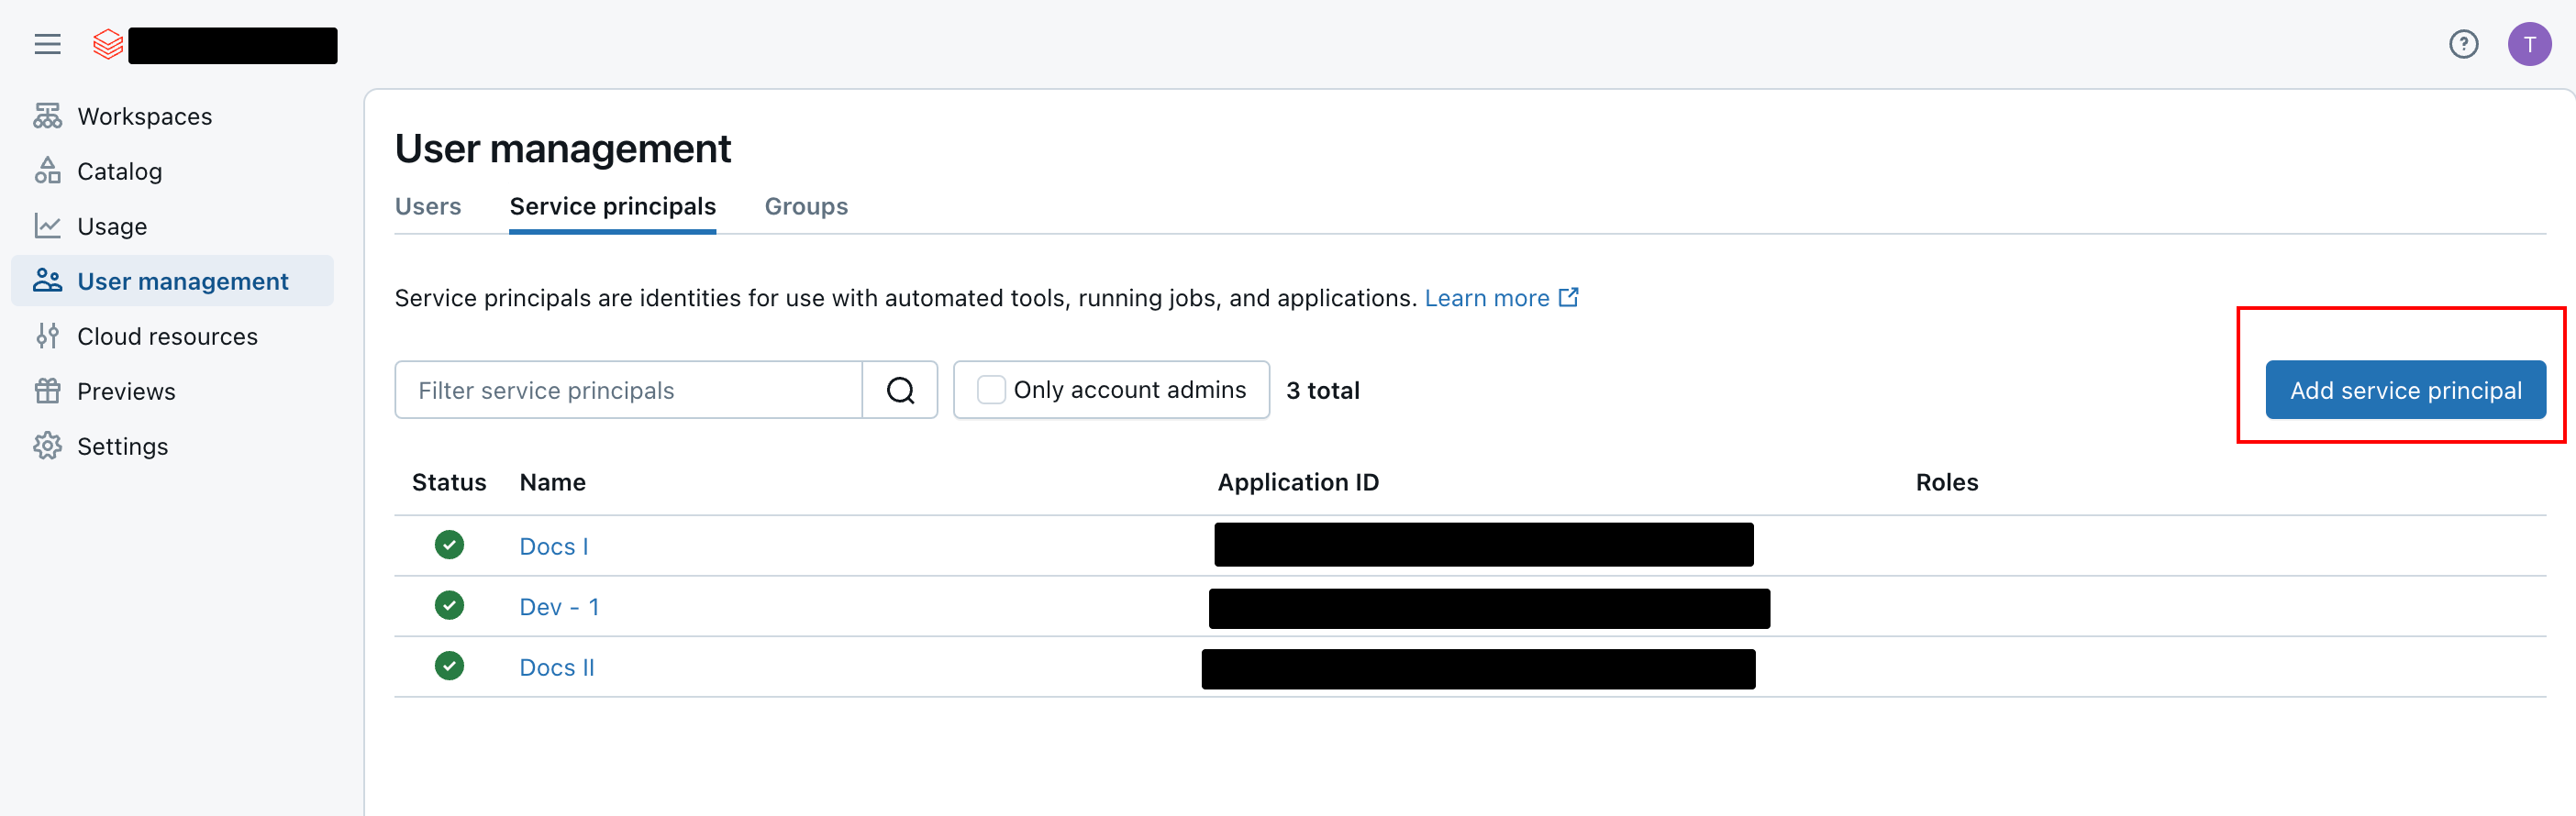
Databricks User management -
After giving the service principal a name, you'll grant the right permissions, then create the client ID and client secret.
- The service principal should have Workspace, Warehouse, and Catalog permissions.
-
Click on the service principal and go to the Permissions tab and click Grant Access. Add the service principal you just created as a User.
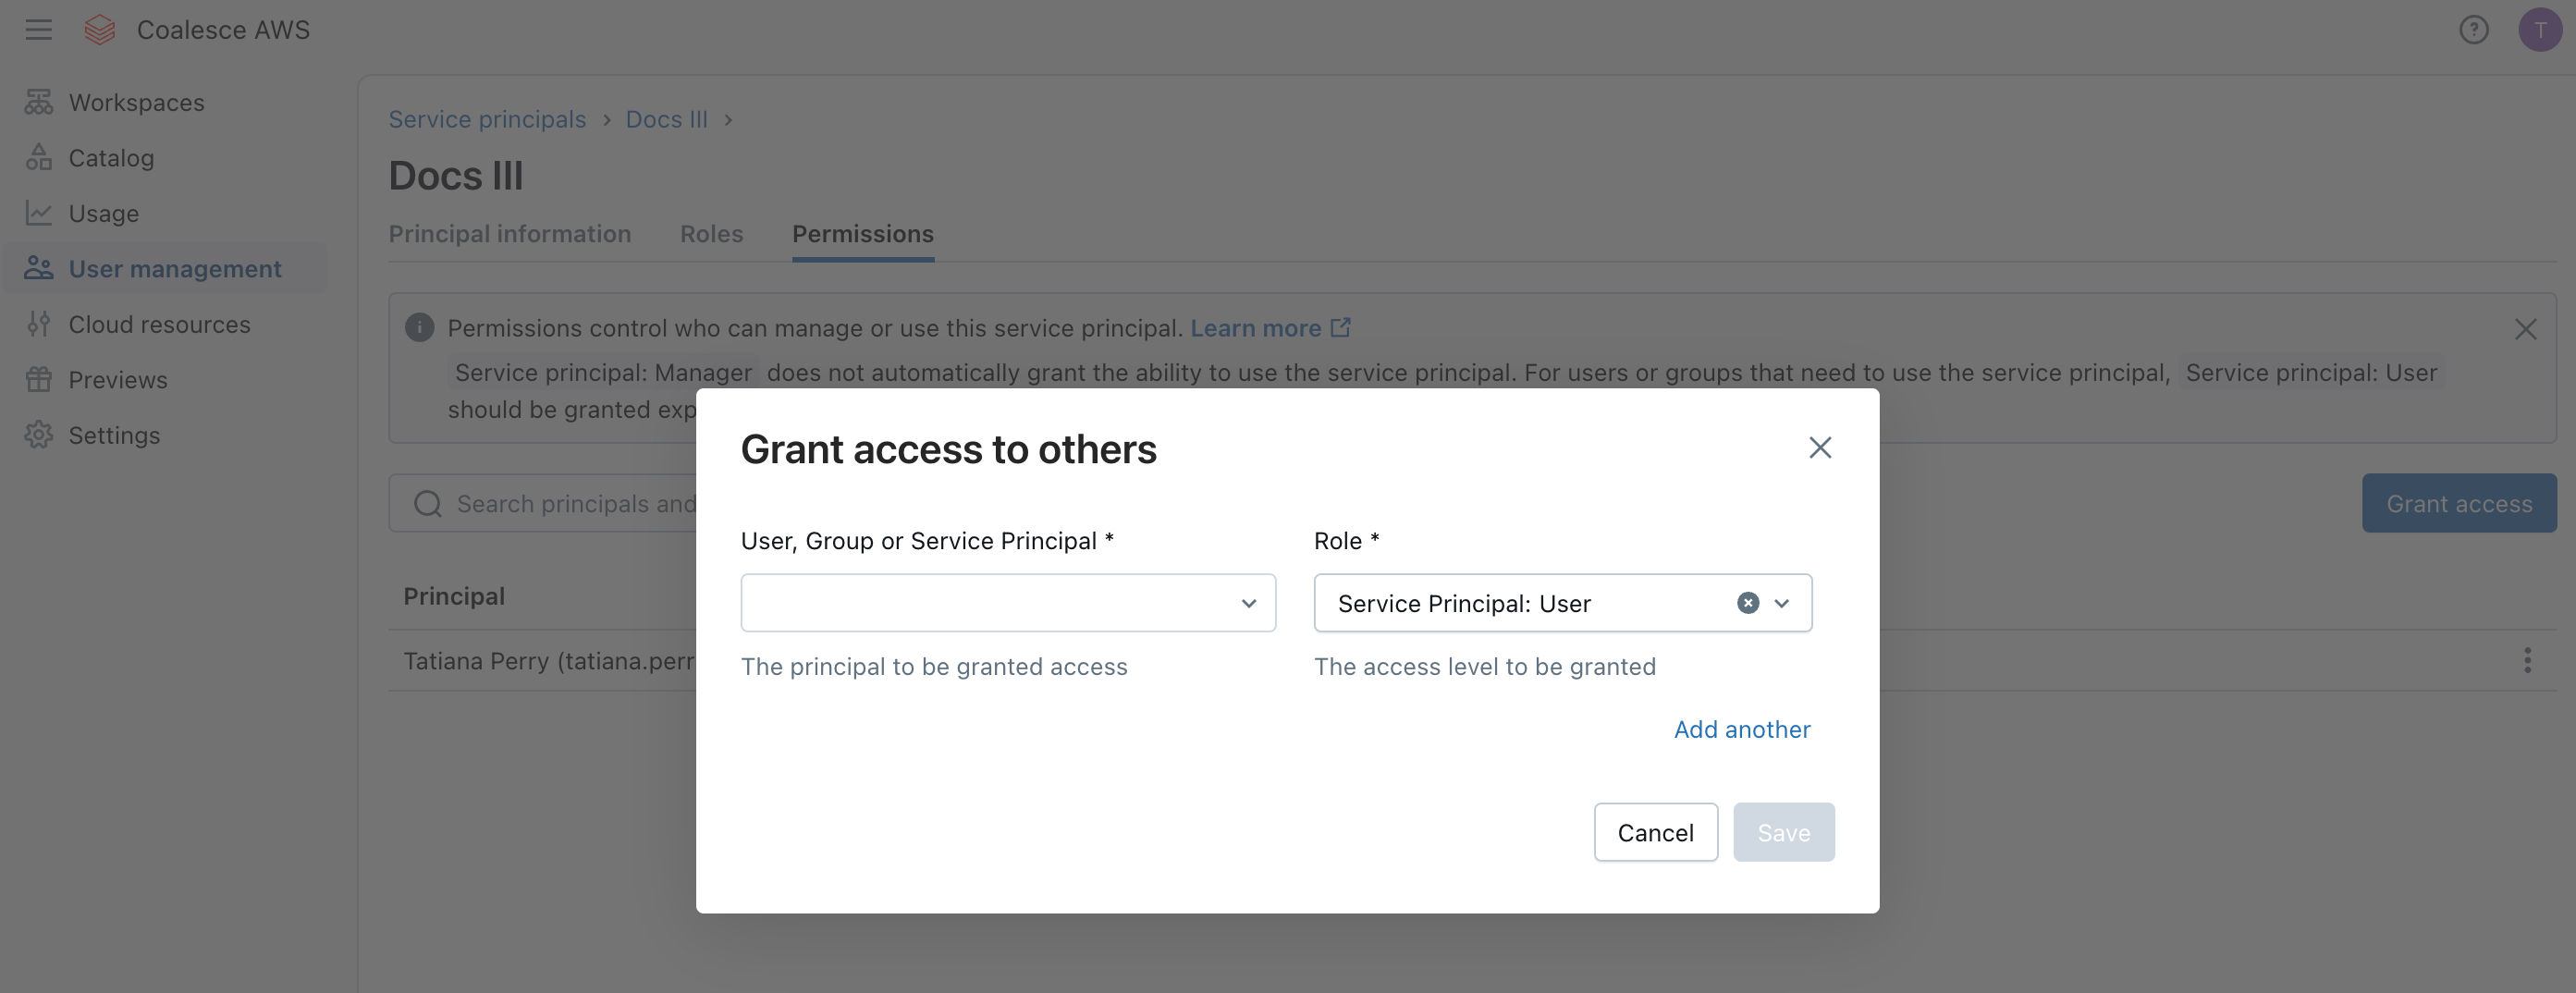
Add the new service principal as user -
Go to the Databricks Catalog and select the catalog the service principal should have access to.
-
Click Grant.
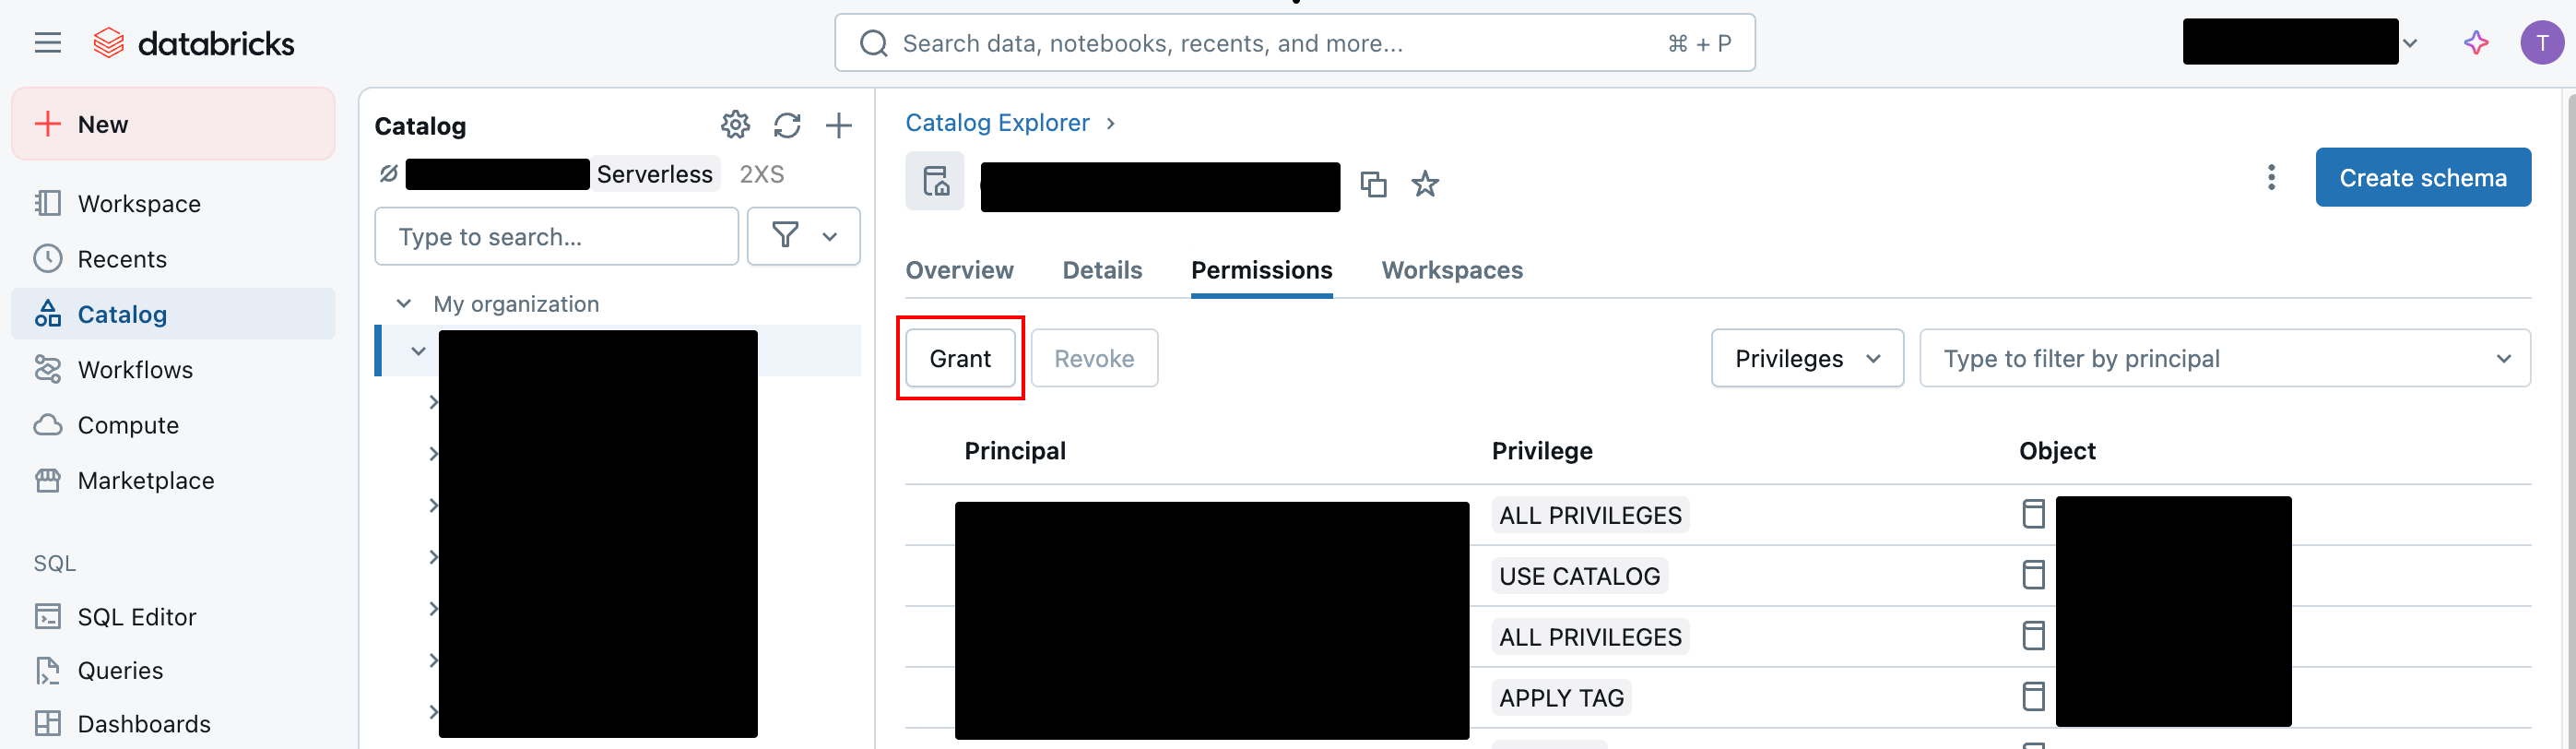
Click Grant on the catalog -
Choose the service principal and then select Data Editor.
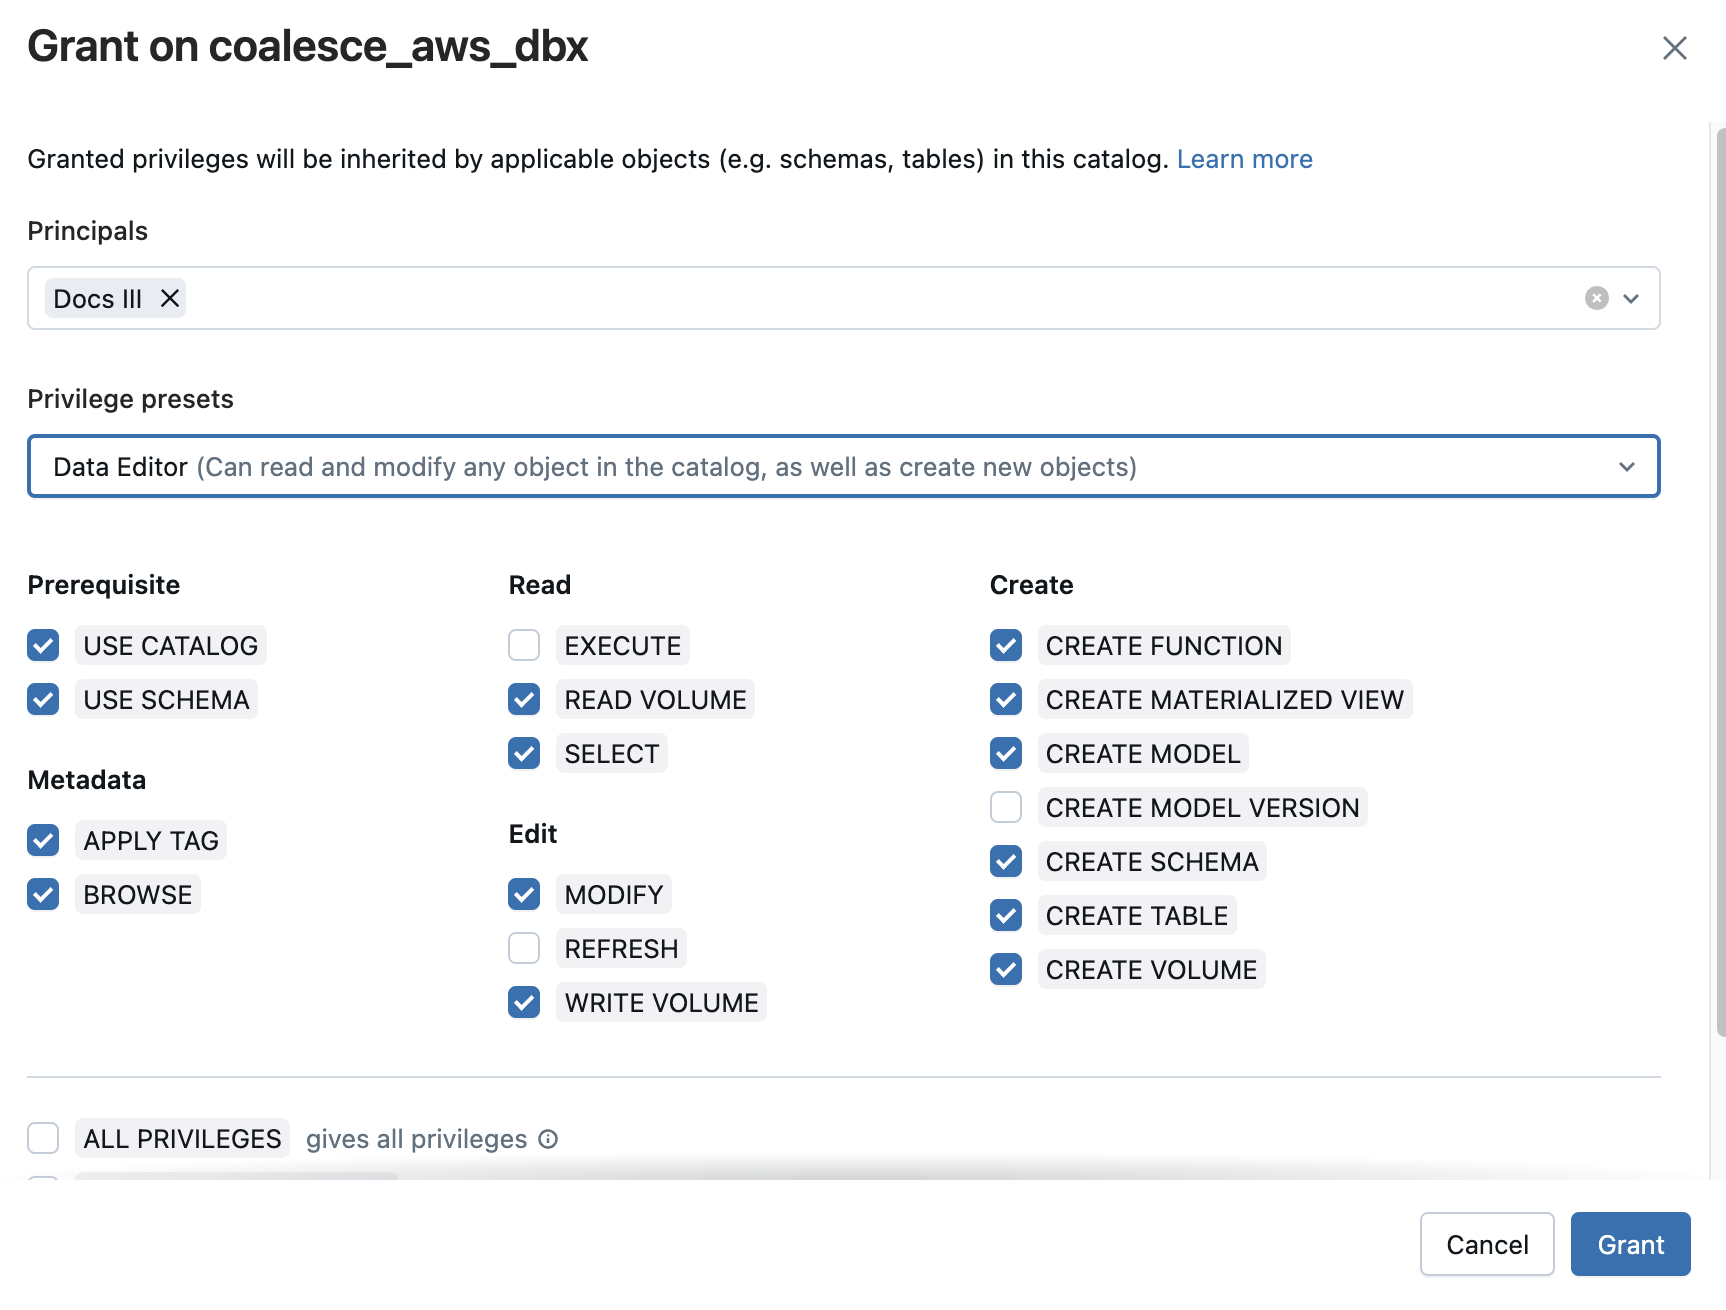
Grant the Data Editor Role -
Then go to SQL Warehouses, and select the warehouse the service principal should have access to.

SQL Warehouse Permissions -
Click Permissions, and select the service principal from the list. Set it to Can Use.
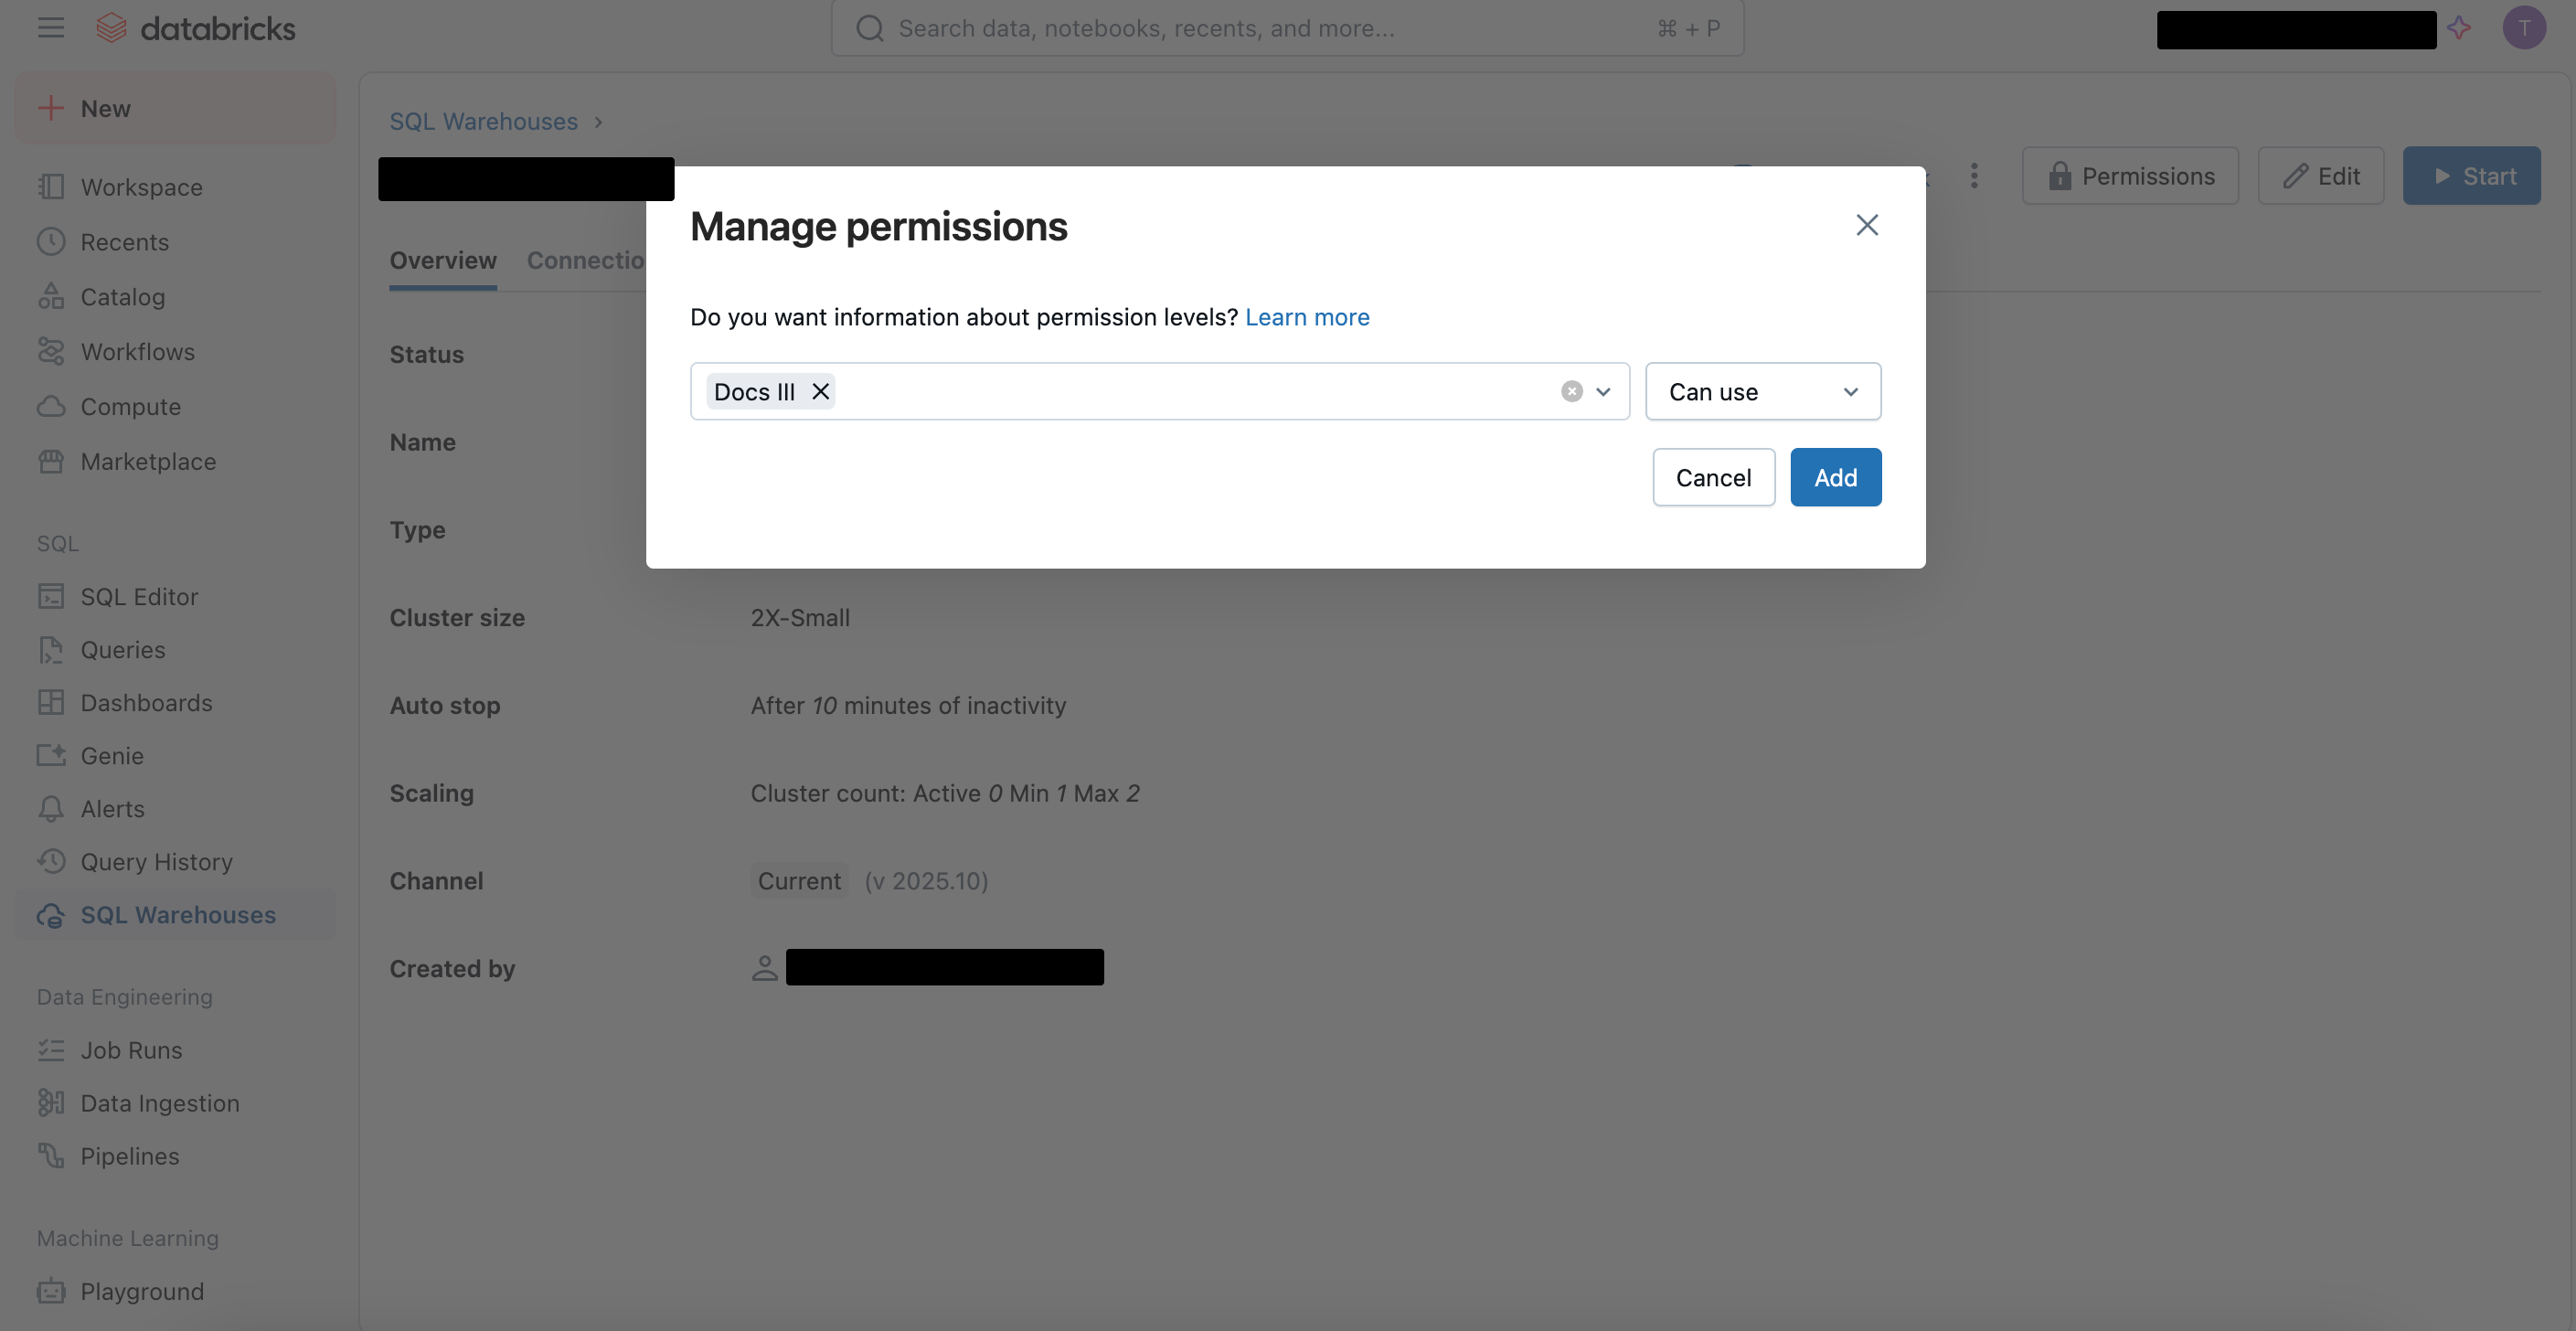
Permission Level is Can Use Service Principal Missing From ListIf your service principal is missing from the list, go to your user Settings > Identity and access > Service principals, and add it there too. Then go back to the SQL Warehouse step.
-
Go to the Account console in Databricks.
-
Select User management > Service principals.
-
Click the one you created, then click Generate secret.
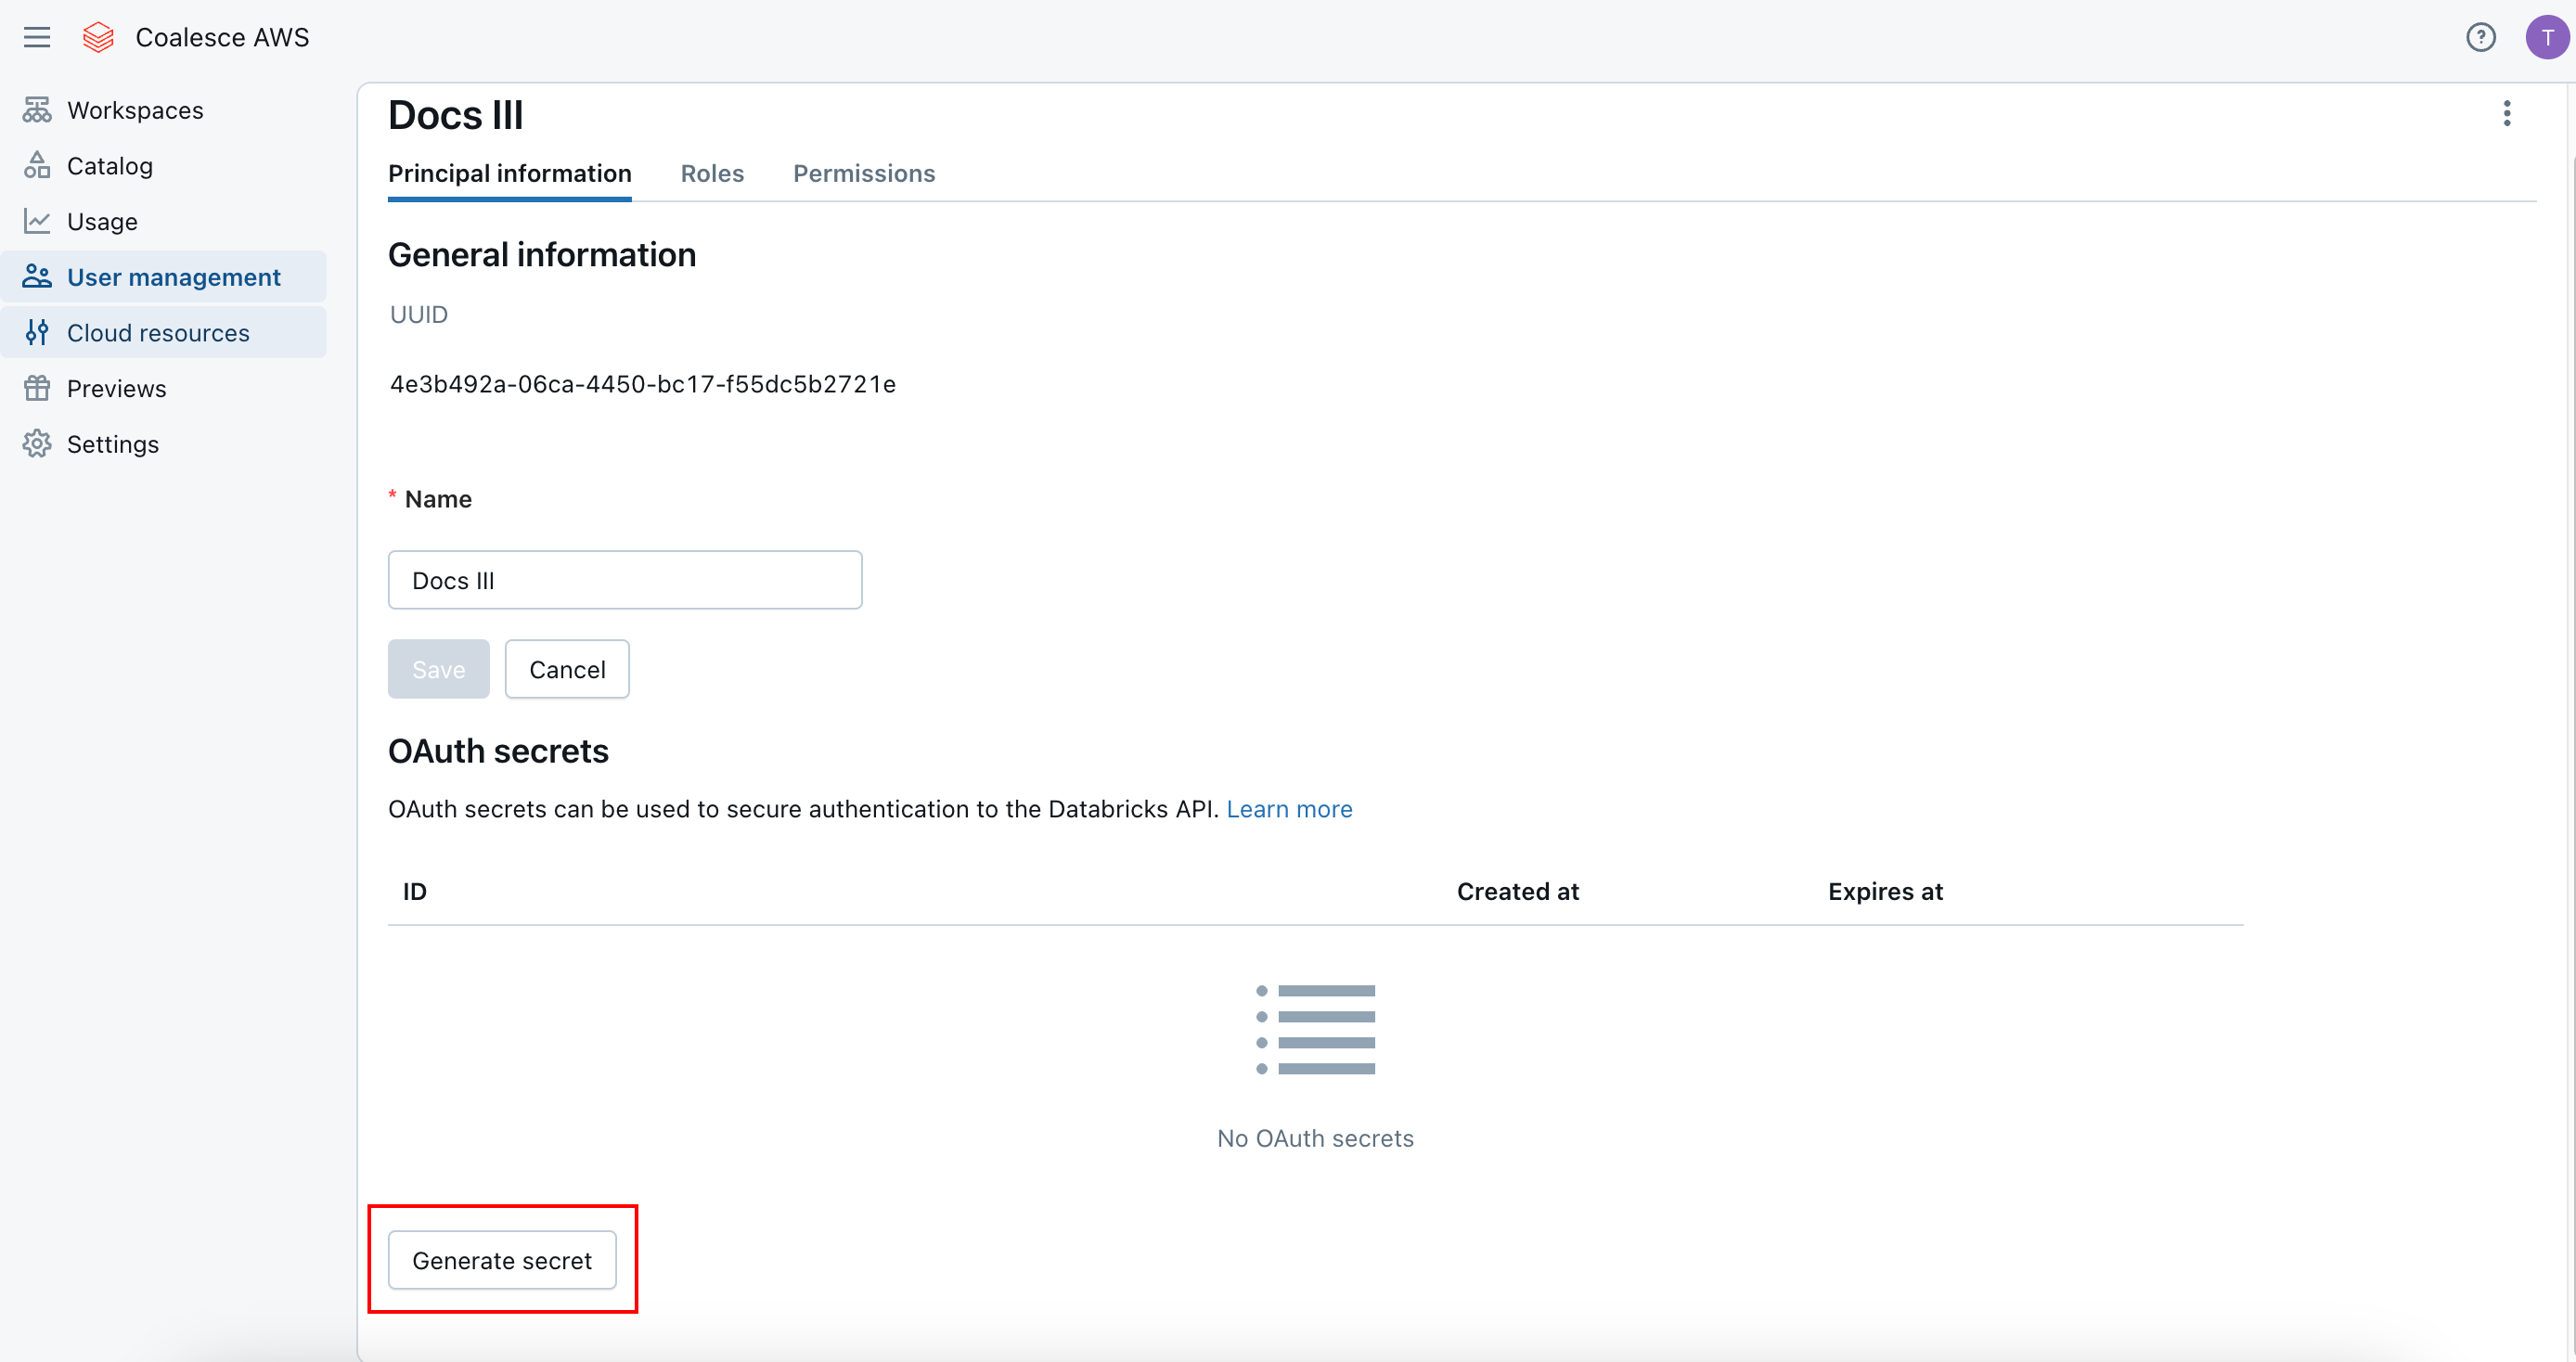
Generate Your Client ID and Client Secret -
Choose how long the token should be valid for, then click Generate.
-
Save the Client ID and Client Secret for configuring in Coalesce.
Machine-to-Machine Coalesce Configuration
You should have your Databricks client ID, client secret, your Databricks path, and Databricks account URL before continuing.
-
In Coalesce, go to a Project and Workspace that has been configured for Databricks. This means the repo attached is either empty or has only been used for Databricks previously.
-
Open the Build Settings, then Workspace, and click on the cog next to the Workspace name to open Workspace Settings.
-
Add your Databricks account URL. The account URL can’t contain a backslash, spaces, or
https://.Workspace Settings > User Credentials -
Click on User Credentials.
-
Set Authentication Type to OAuth (Machine-to-MACHINE).
-
Add your Databricks path and click Save.
-
Click Edit and add enter the Client ID and Client Secret from Databricks.
-
You must click Save first.
-
Then click Test Connection.
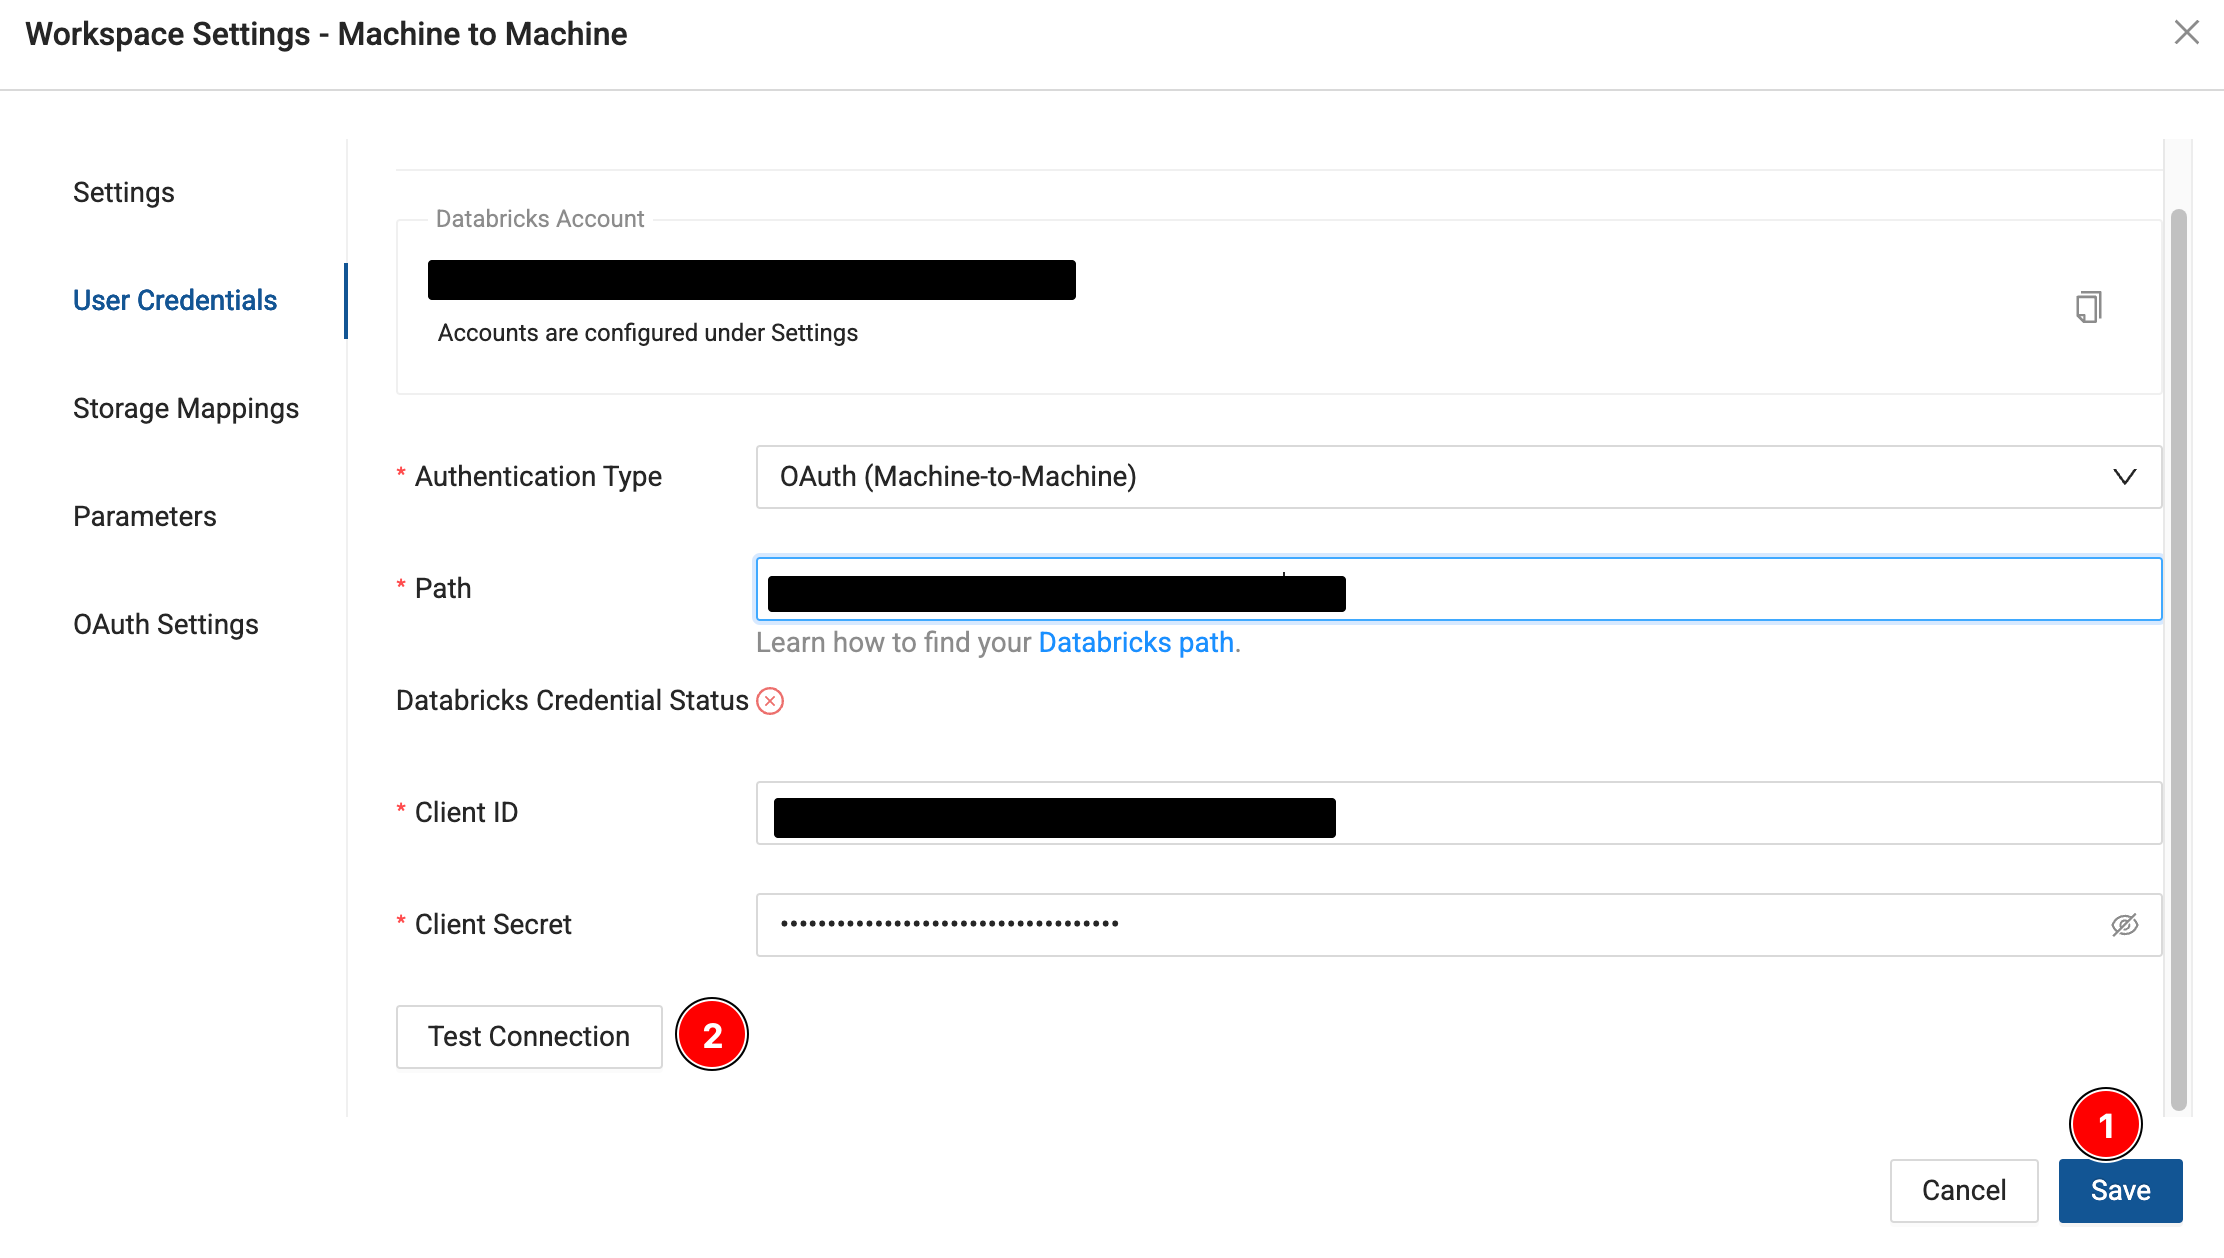
Workspace Settings -
You'll be taken to the Build Page and see a testing, then success message.
Testing and Success Message
Token
We recommend using OAuth for authentication.
Tokens or Personal Access Tokens (PAT) are used in Databricks to authenticate at the workspace level.
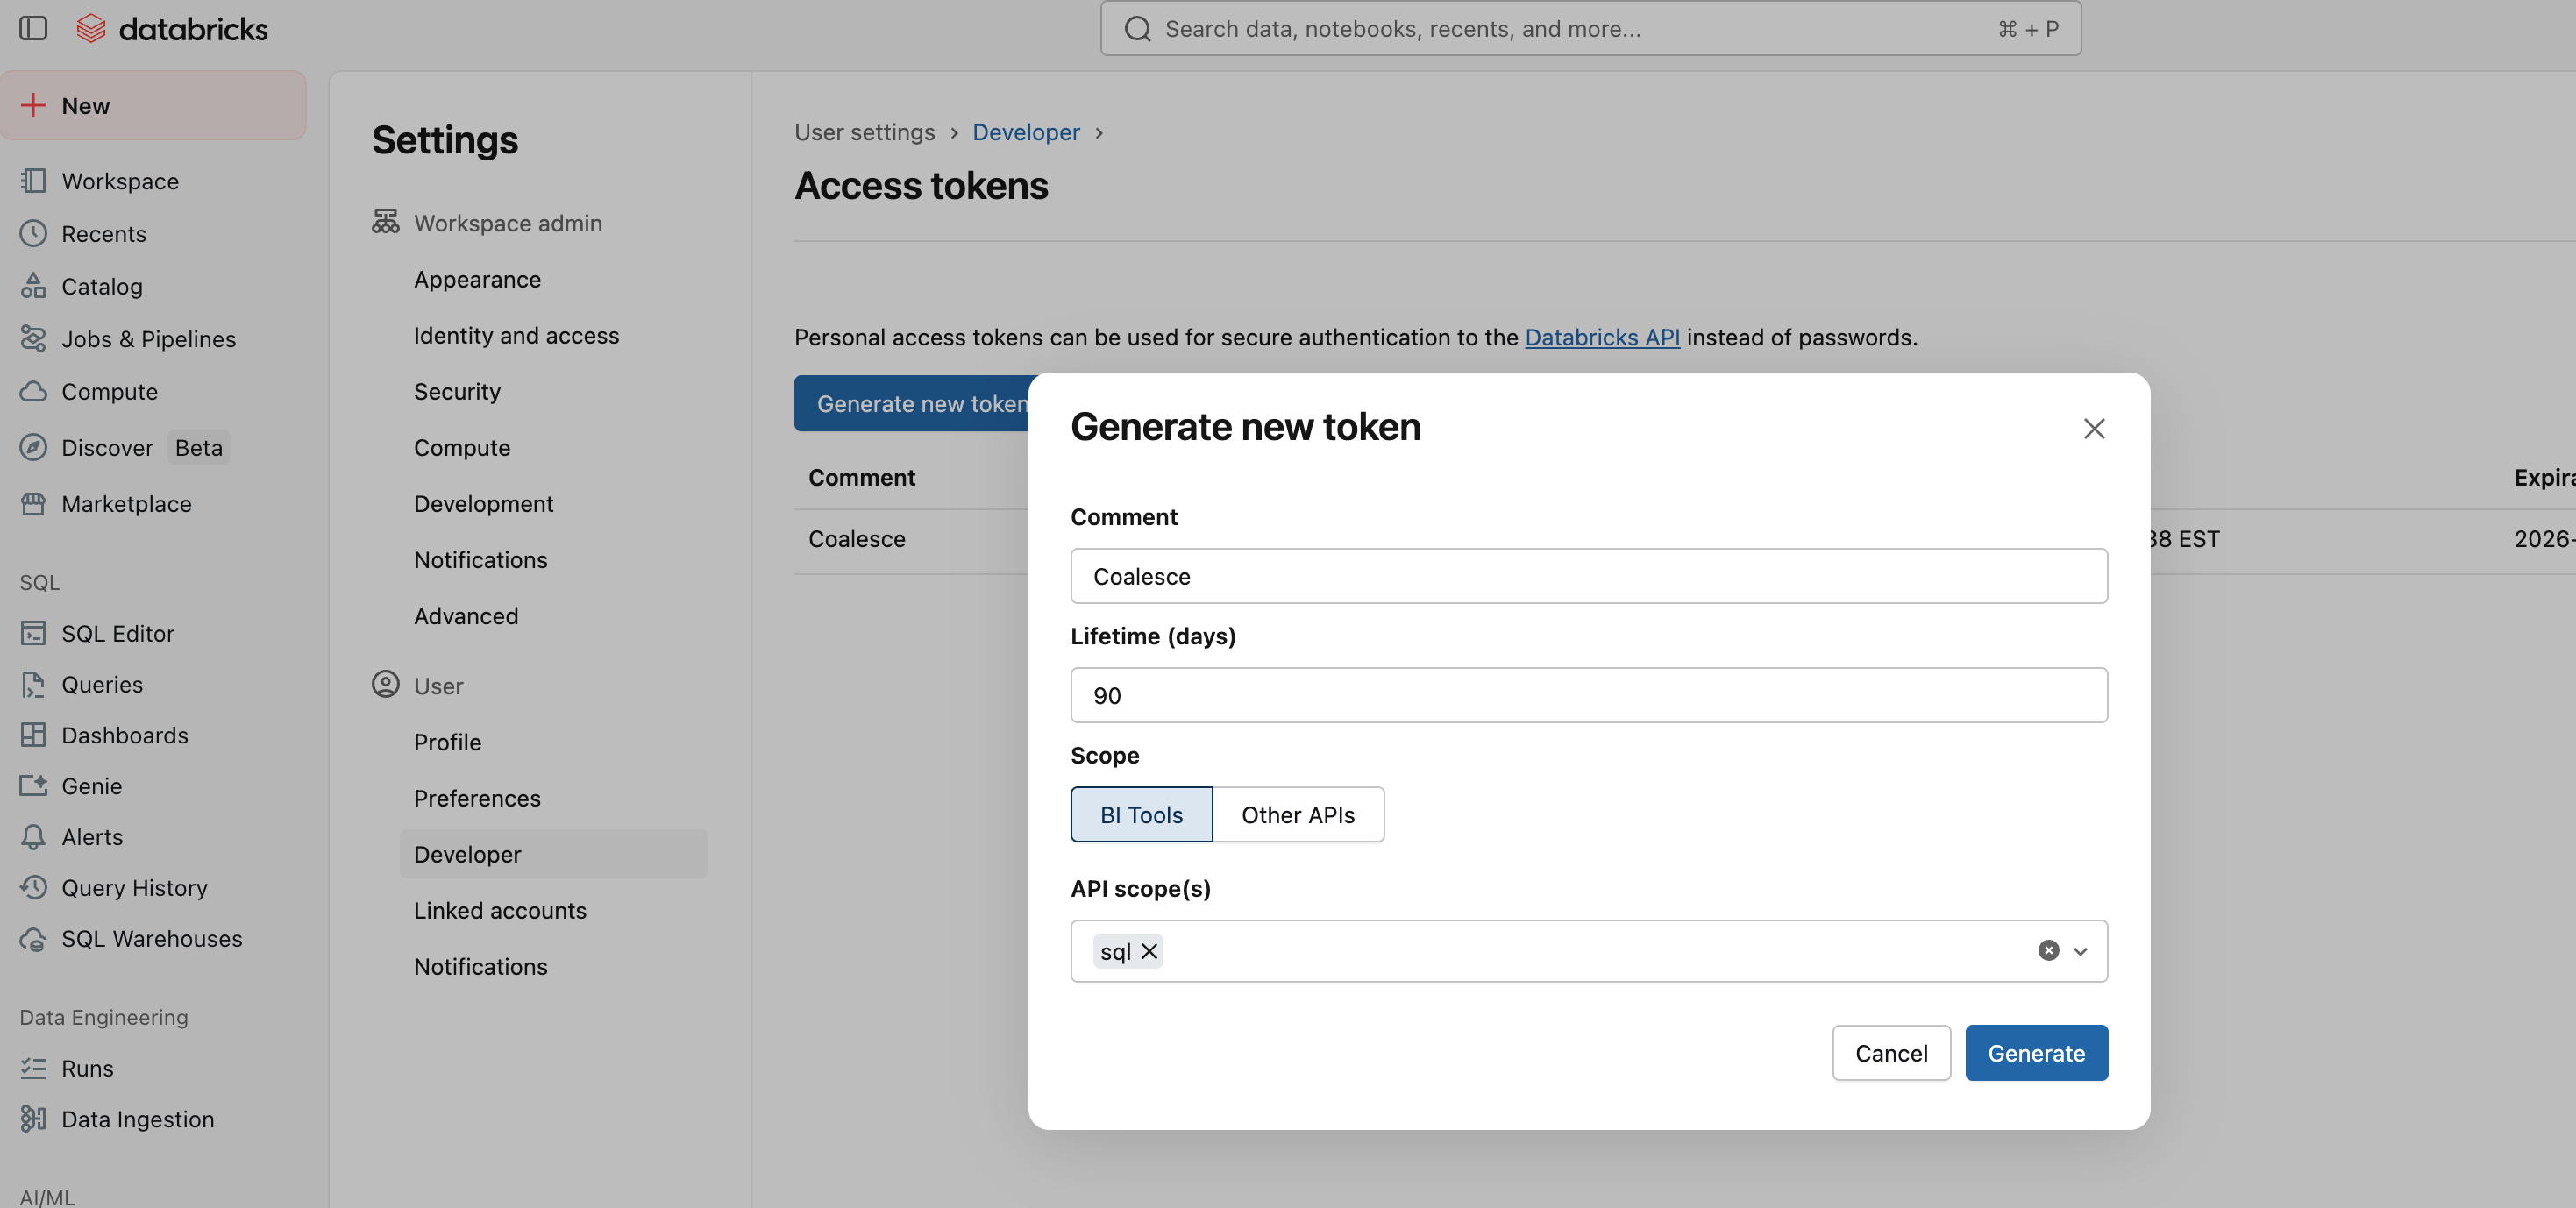
Get Your Databricks Access Token
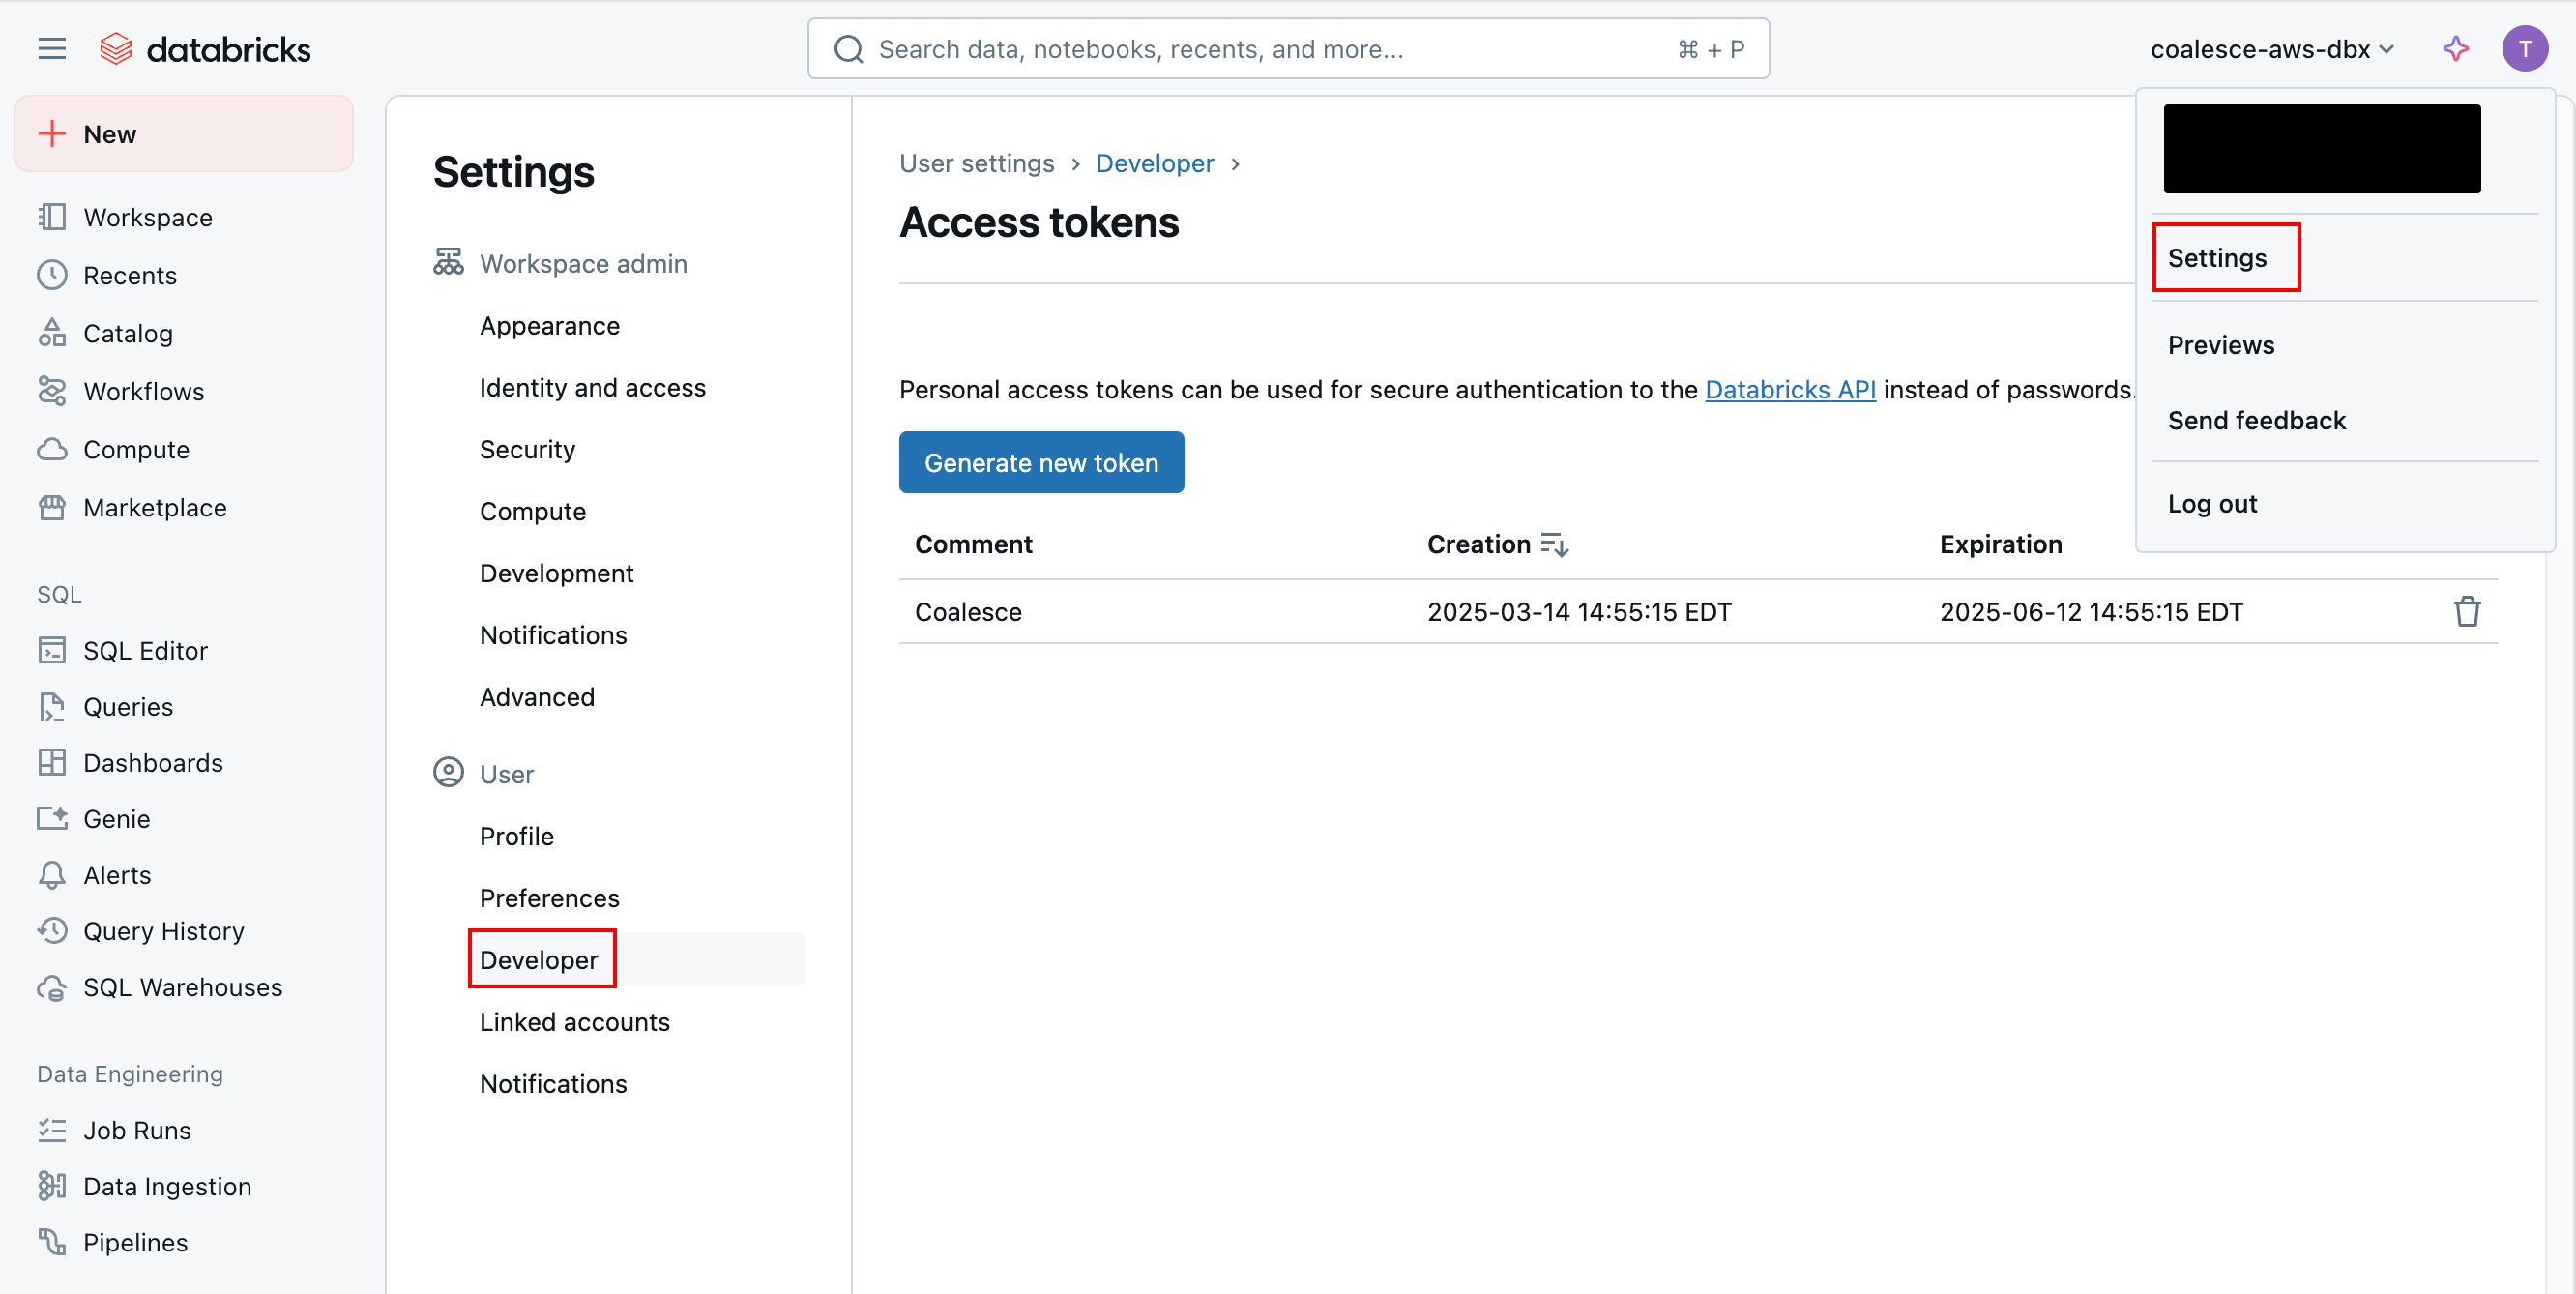
- Log into your Databricks account.
- Go to your username at the top and select Settings.
- Under User, select Developer.
- Next to Access Tokens, click Manage.
- Click Generate new token.
- Write a description for the token and choose the lifetime.
- Set the scope to BI Tools and select sql.
- Make sure to save the access token somewhere secure. It can’t be recovered or shown again.
Read the Databricks documentation on Databricks personal access token authentication to learn more about managing your access tokens in Databricks.
Add Your Connection Details in Coalesce
You should have your Databricks access token, your Databricks path, and Databricks account URL before continuing.
-
In Coalesce, go to a Project and Workspace that has been configured for Databricks. This means the repo attached is either empty or has only been used for Databricks previously.
-
Open the Build Settings, then Workspace, and click on the cog next to the Workspace name to open Workspace Settings.
-
Add your Databricks account URL. The account URL can’t contain a backslash, spaces, or
https://.Workspace Settings -
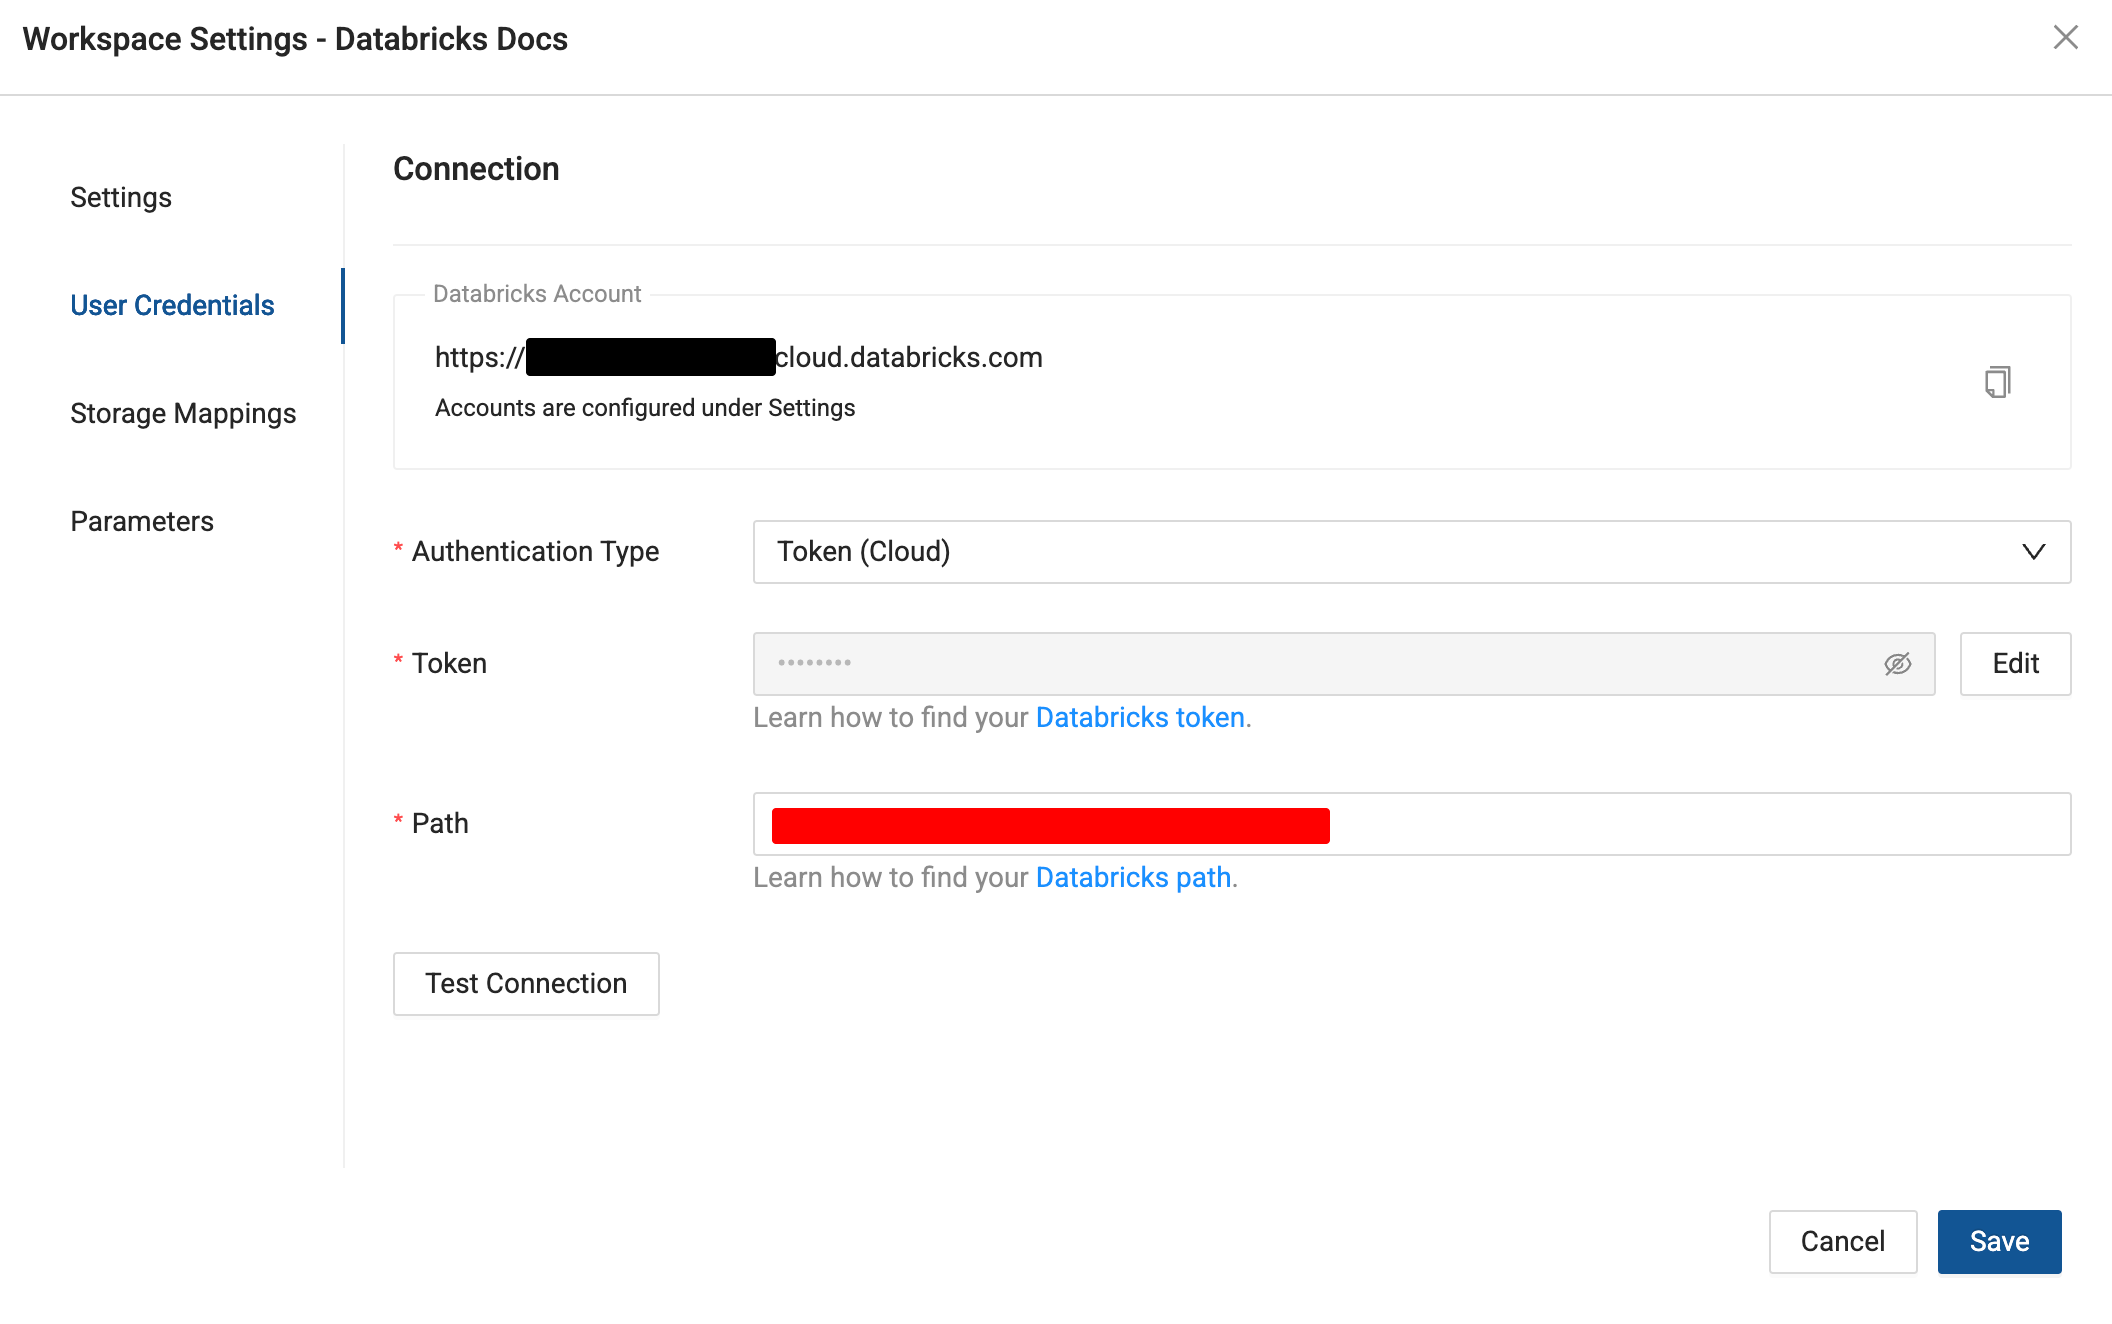
Click on User Credentials.
-
Set Authentication Type to Token (Cloud).
-
Token is your Databricks access token.
-
Path is the Databricks HTTP path.
-
Click Test Connection.
Workspace Settings > User Credentials
Congratulations, you’ve connected Databricks to Coalesce.