Documentation index: llms.txt. This page is also available as markdown: append .md to this URL or send Accept: text/markdown.
Step 3: Create a Workspace
Before creating a Workspace, you should make sure you have a Project created with version control. You can choose from username and password or OAuth.
A Workspace is a sandbox environment where you can complete the development of your data, refine, and perform preliminary validation before merging them into the codebase. When creating a Workspace, you'll add your Storage Locations, Git URL, and connect to your data platform.
Workspace Best Practices
Before you begin, make sure you have administrator access to your chosen platform and the necessary permissions to create authentication credentials.
Just need a quick reference for authentication? Look at the Connection guides for your data platform.
Choose Your Platform
Select the platform you want to connect to:
- BigQuery (Private Preview)
- Databricks
- Snowflake
An admin or a user with the ability to assign permissions is needed for BigQuery.
Set Up Project Level Permissions.
-
Make sure you're in the project you want to add the service account to.
-
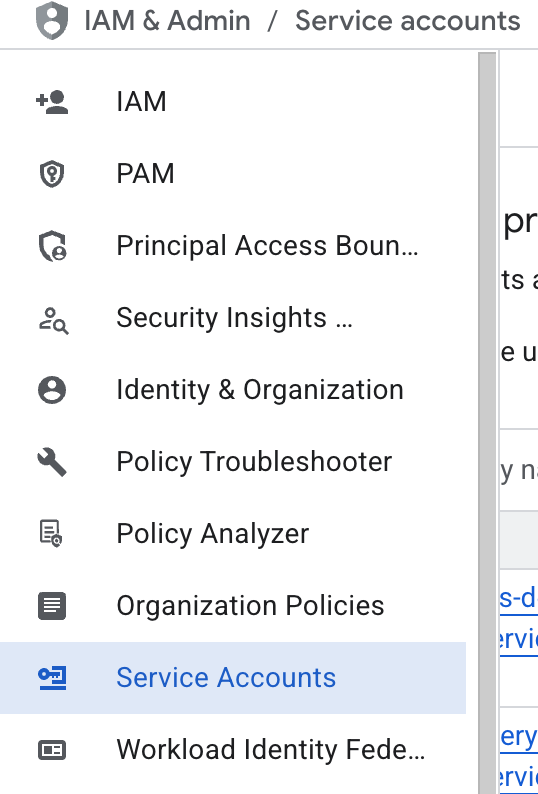
Go to IAM & Admin > Service Accounts in Google Cloud.
-
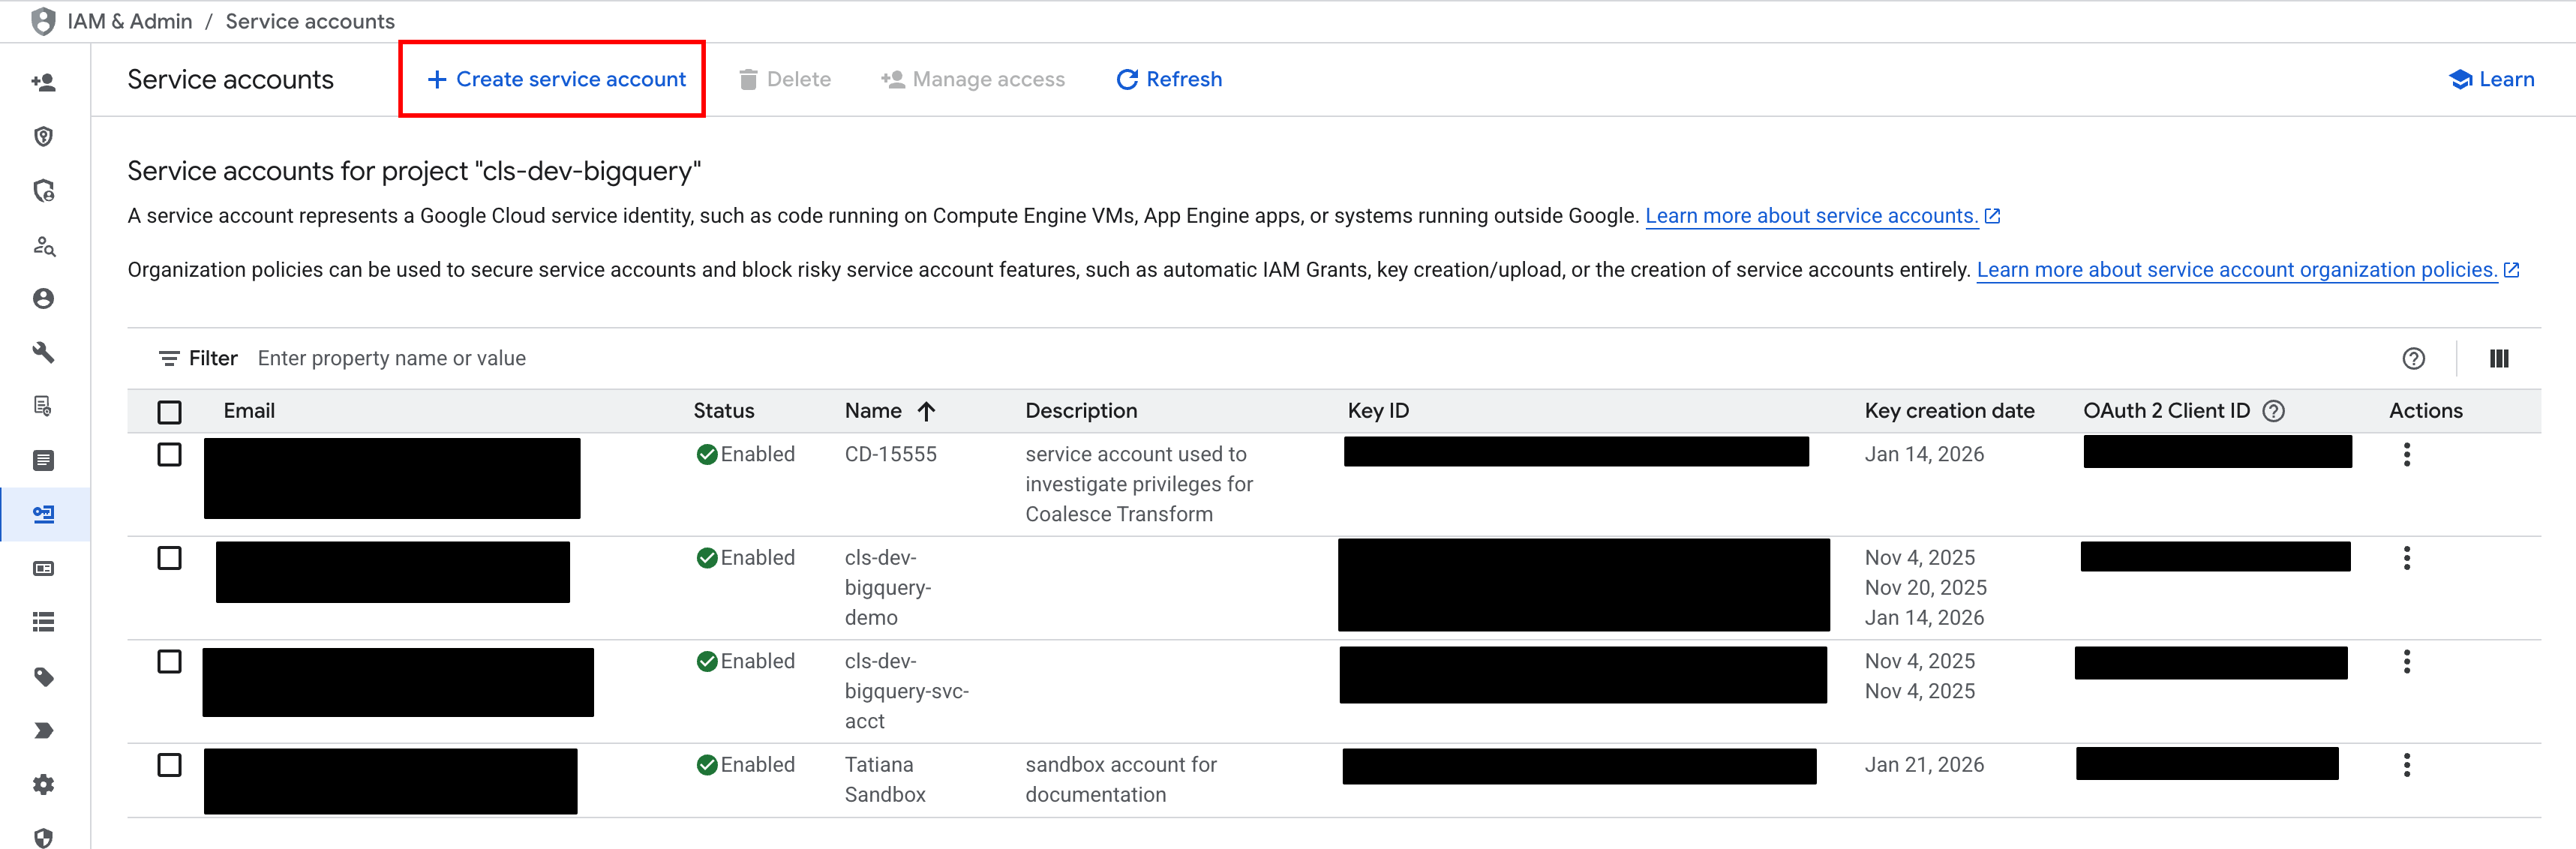
Click Create service account.
-
Fill out the required Service account ID and any other information required by your company's policy. Click Create and Continue.
-
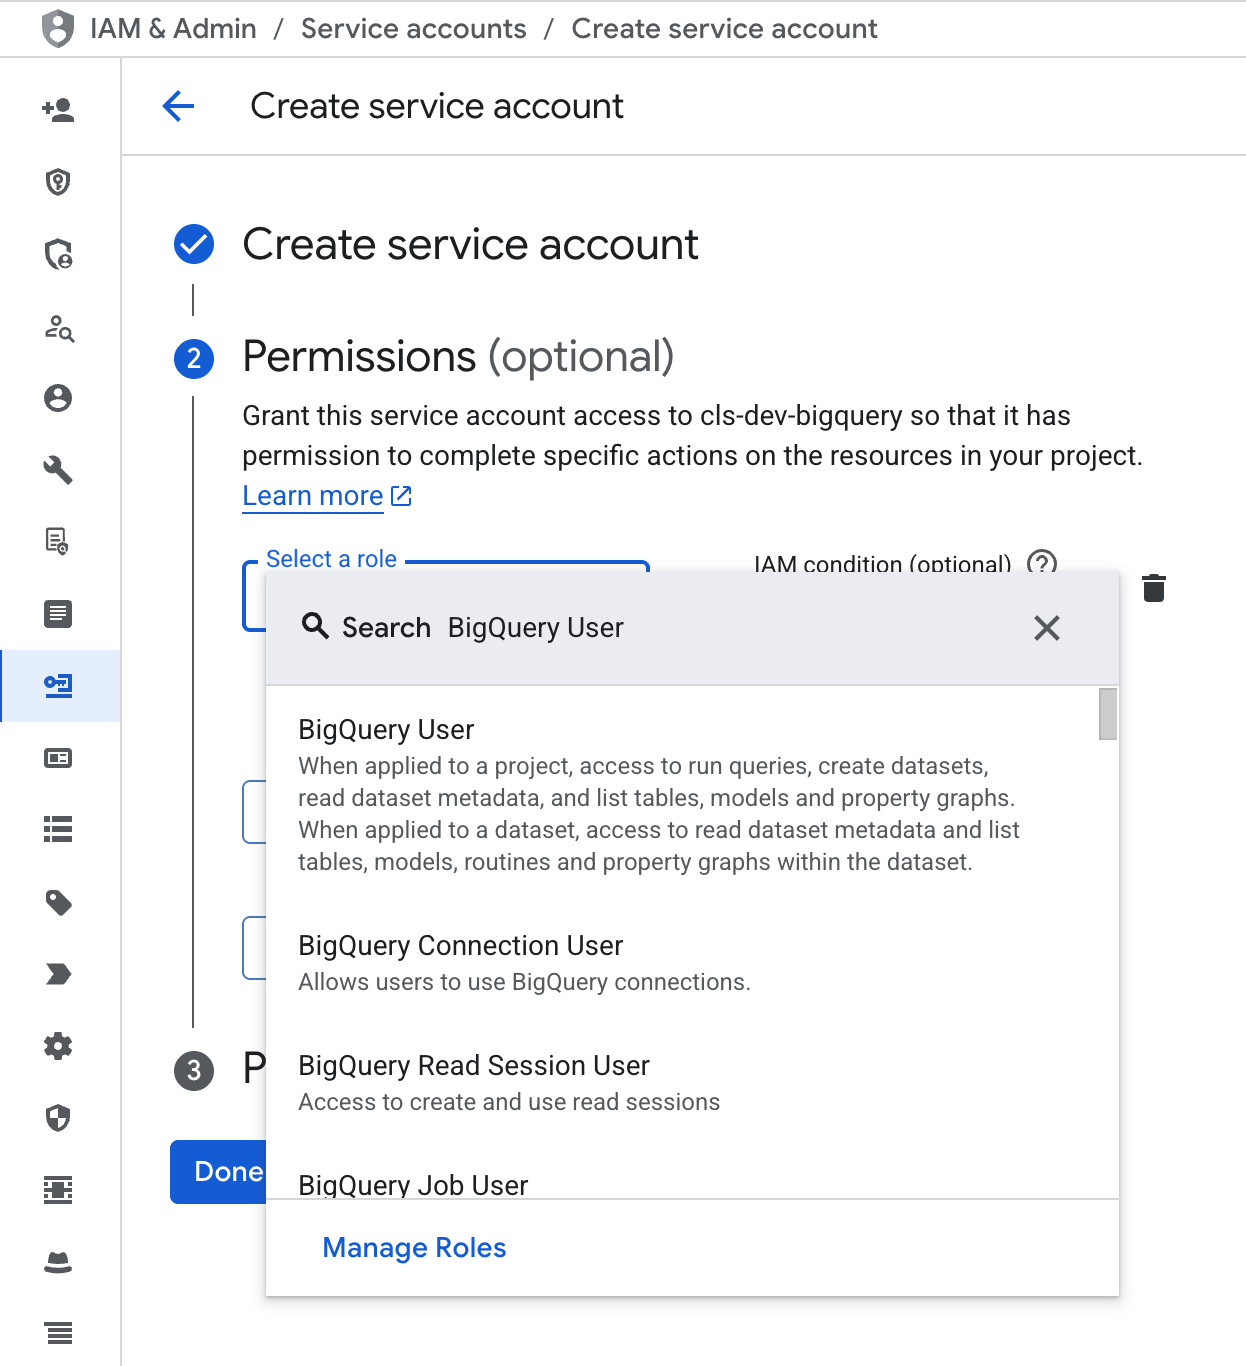
Search for the role BigQuery User. Click Continue.
-
You can skip Principals with access. Click Done. Move on to setting data set level permissions.
Set Up Dataset Level Permissions.
-
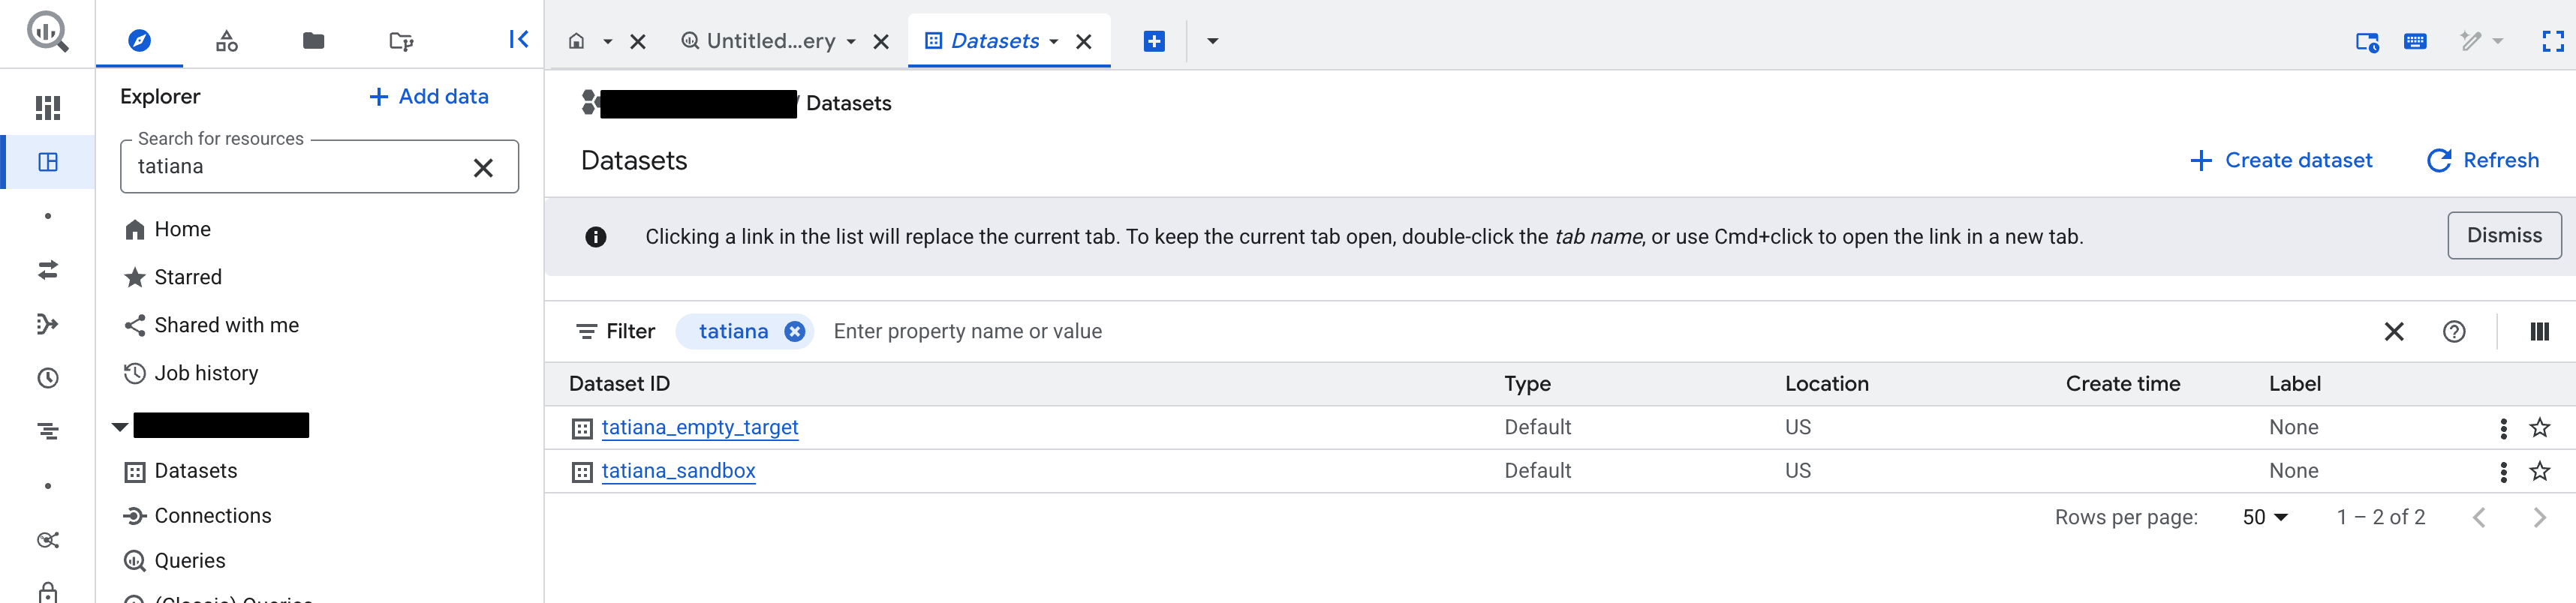
Go to BigQuery Studio.
-
In the Explorer, find the data set you want to add to Coalesce.
-
In the data set, click Share > Manage Permissions.
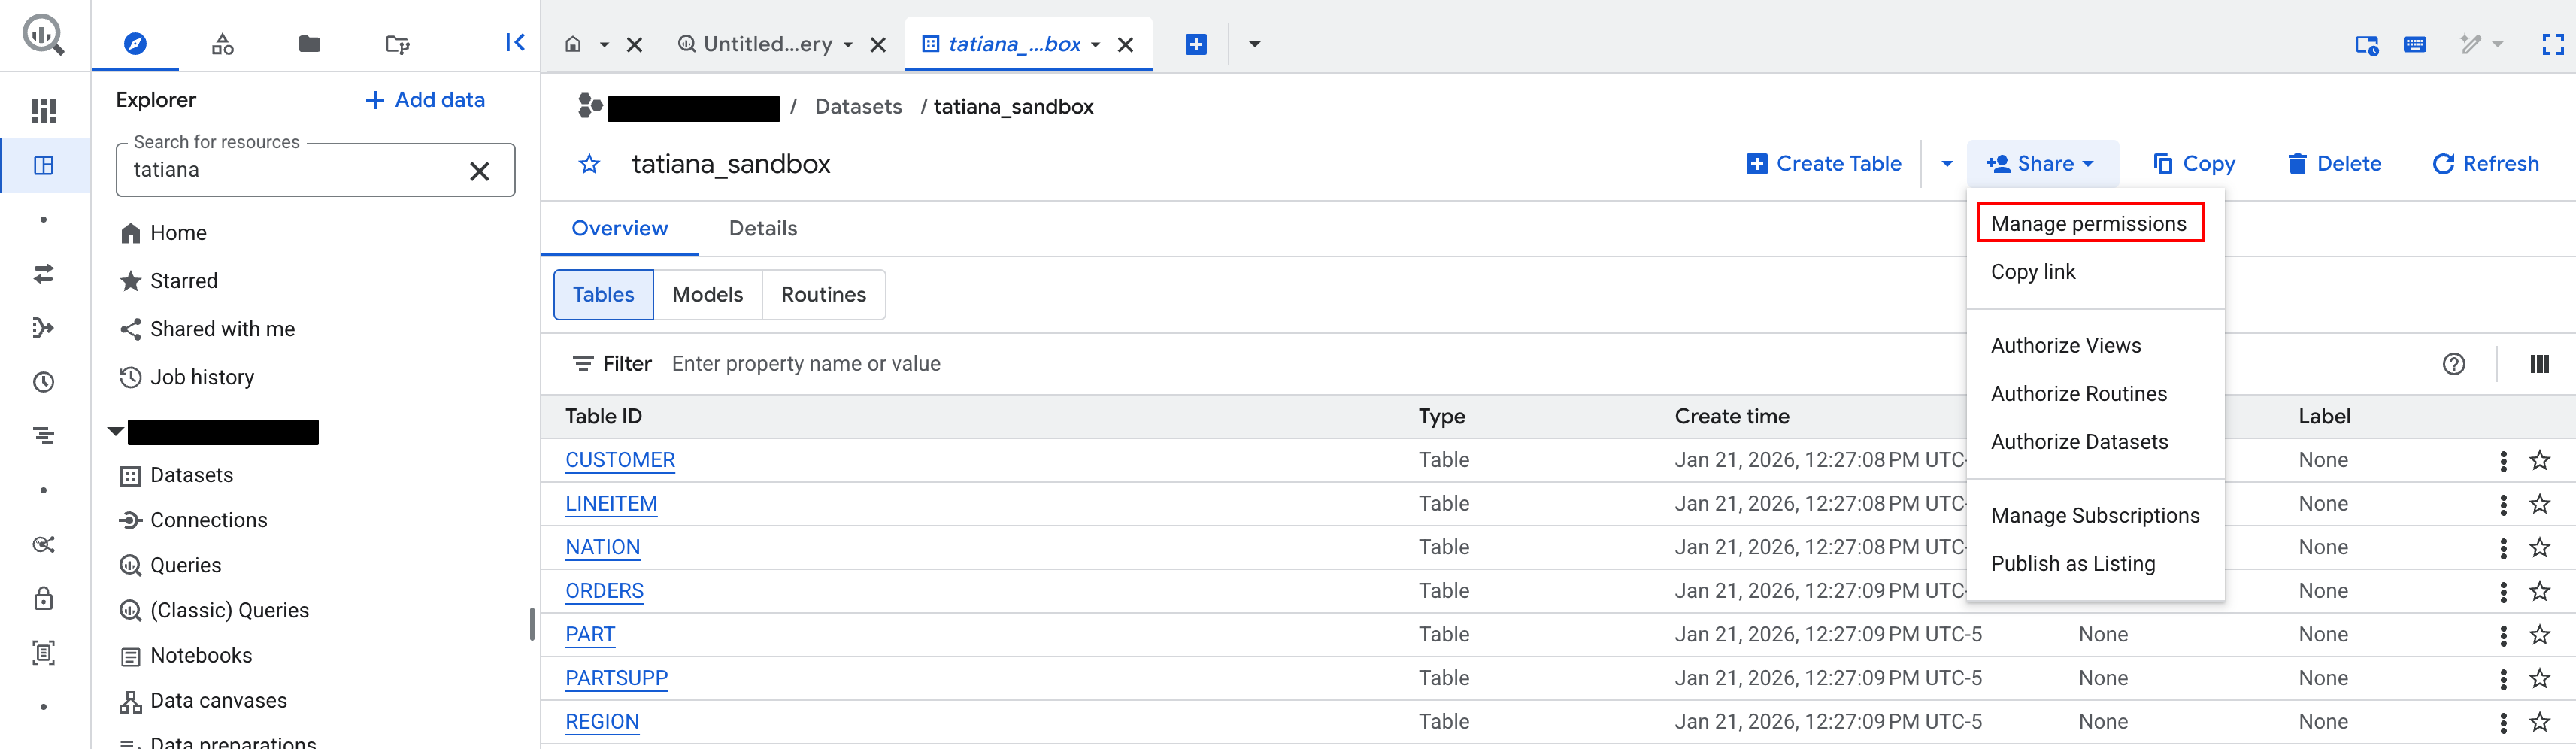
-
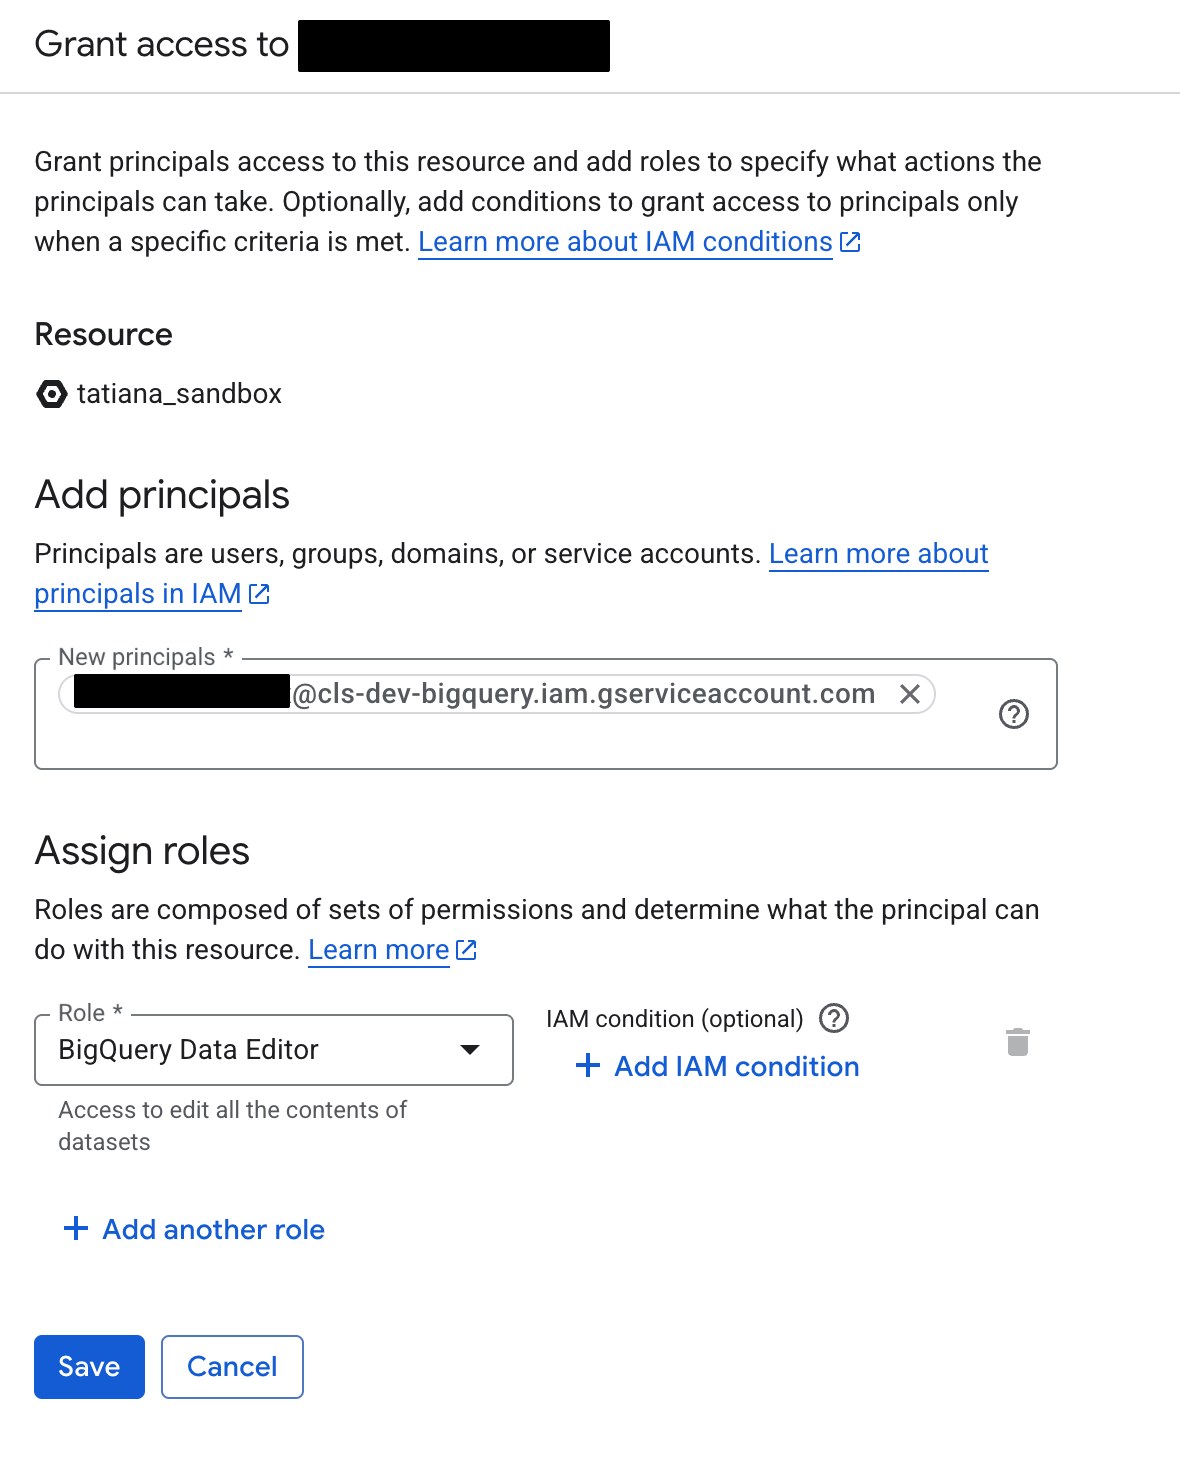
Click Add principal.
-
Search for your service account name. It should look similar to
name@projectname.iam.gserviceaccount.com. -
Then assign roles as BigQuery Data Editor.
-
Go to IAM & Admin > Service Accounts in Google Cloud.
-
Click on the service account created for Coalesce.
-
Click Keys.
-
Then Add key > Create new key.
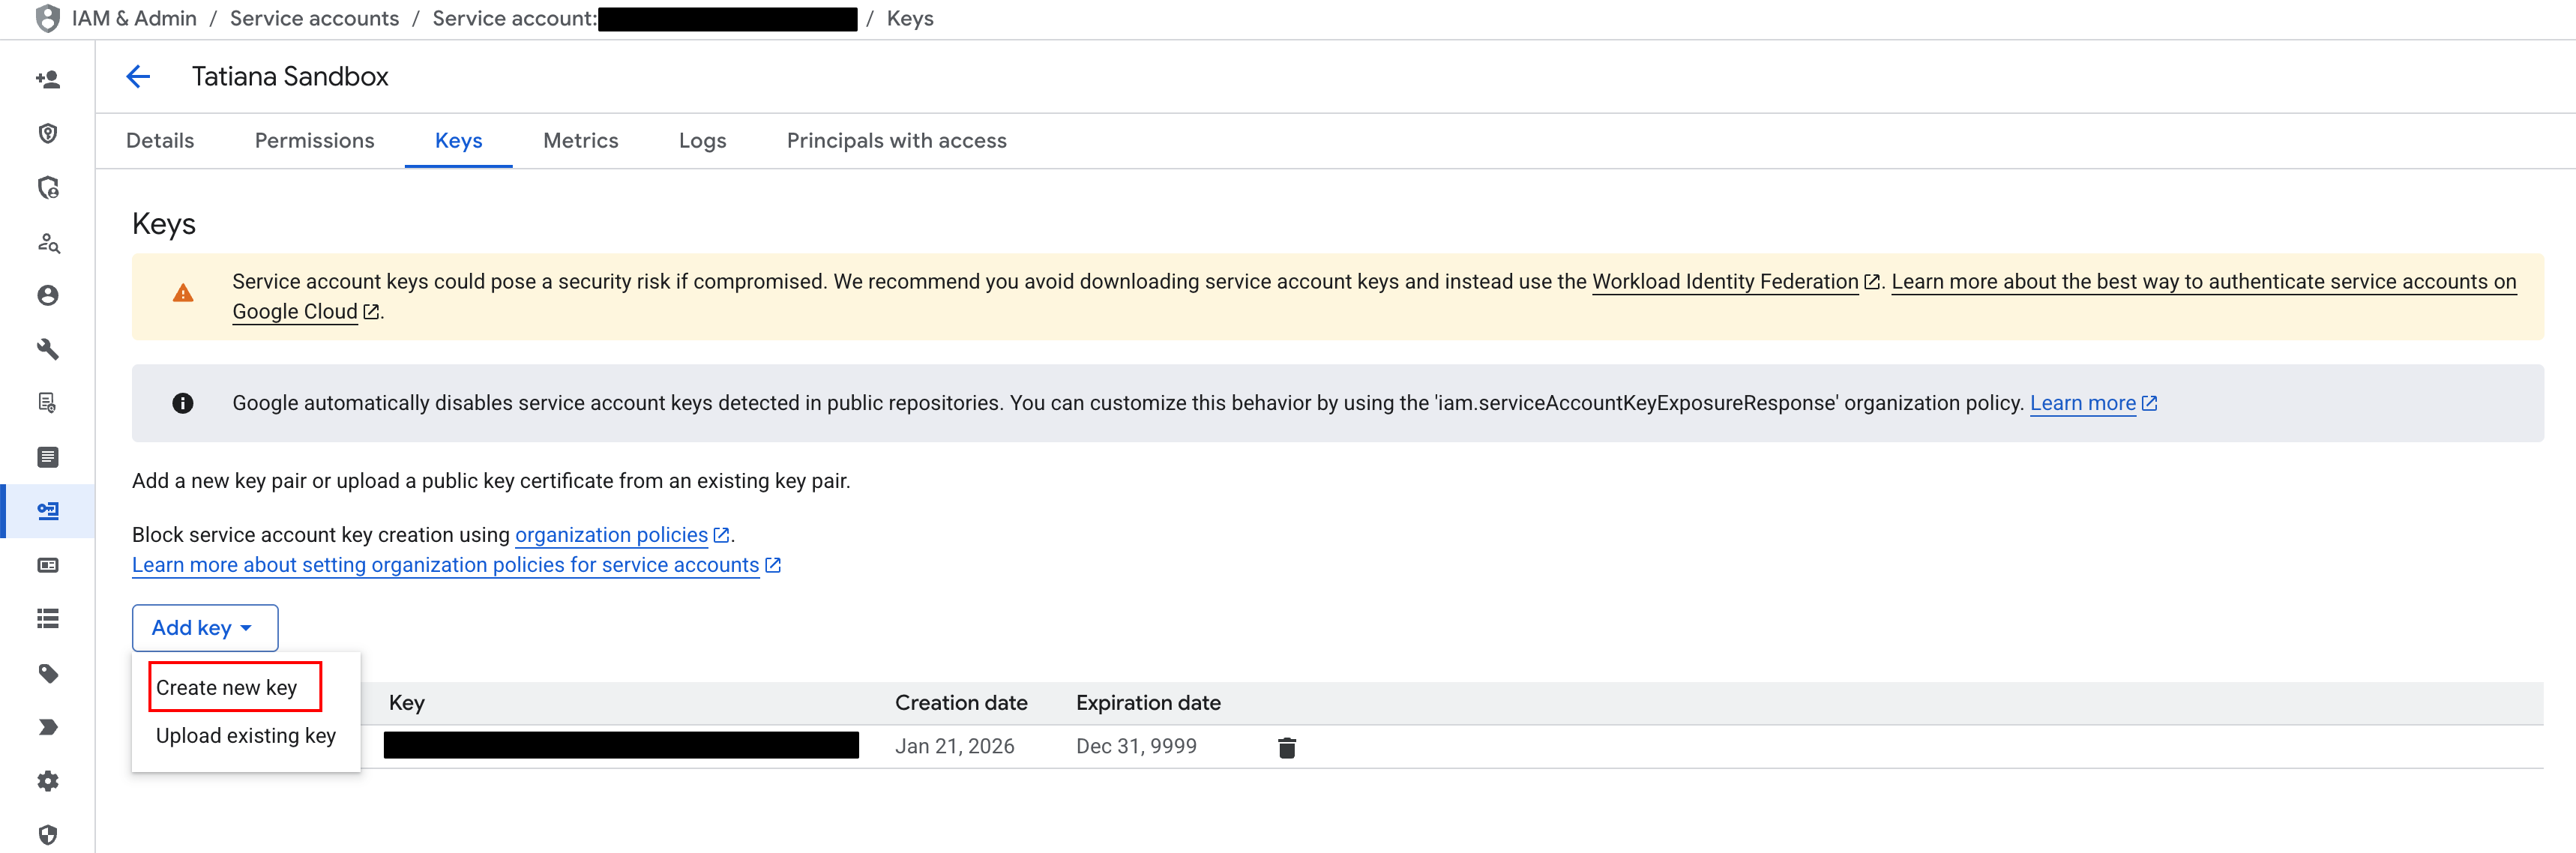
-
Download the JSON file.
Create Your Workspace.
-
Select the Project you want to create the Workspace in.
-
Click Create Workspace.
-
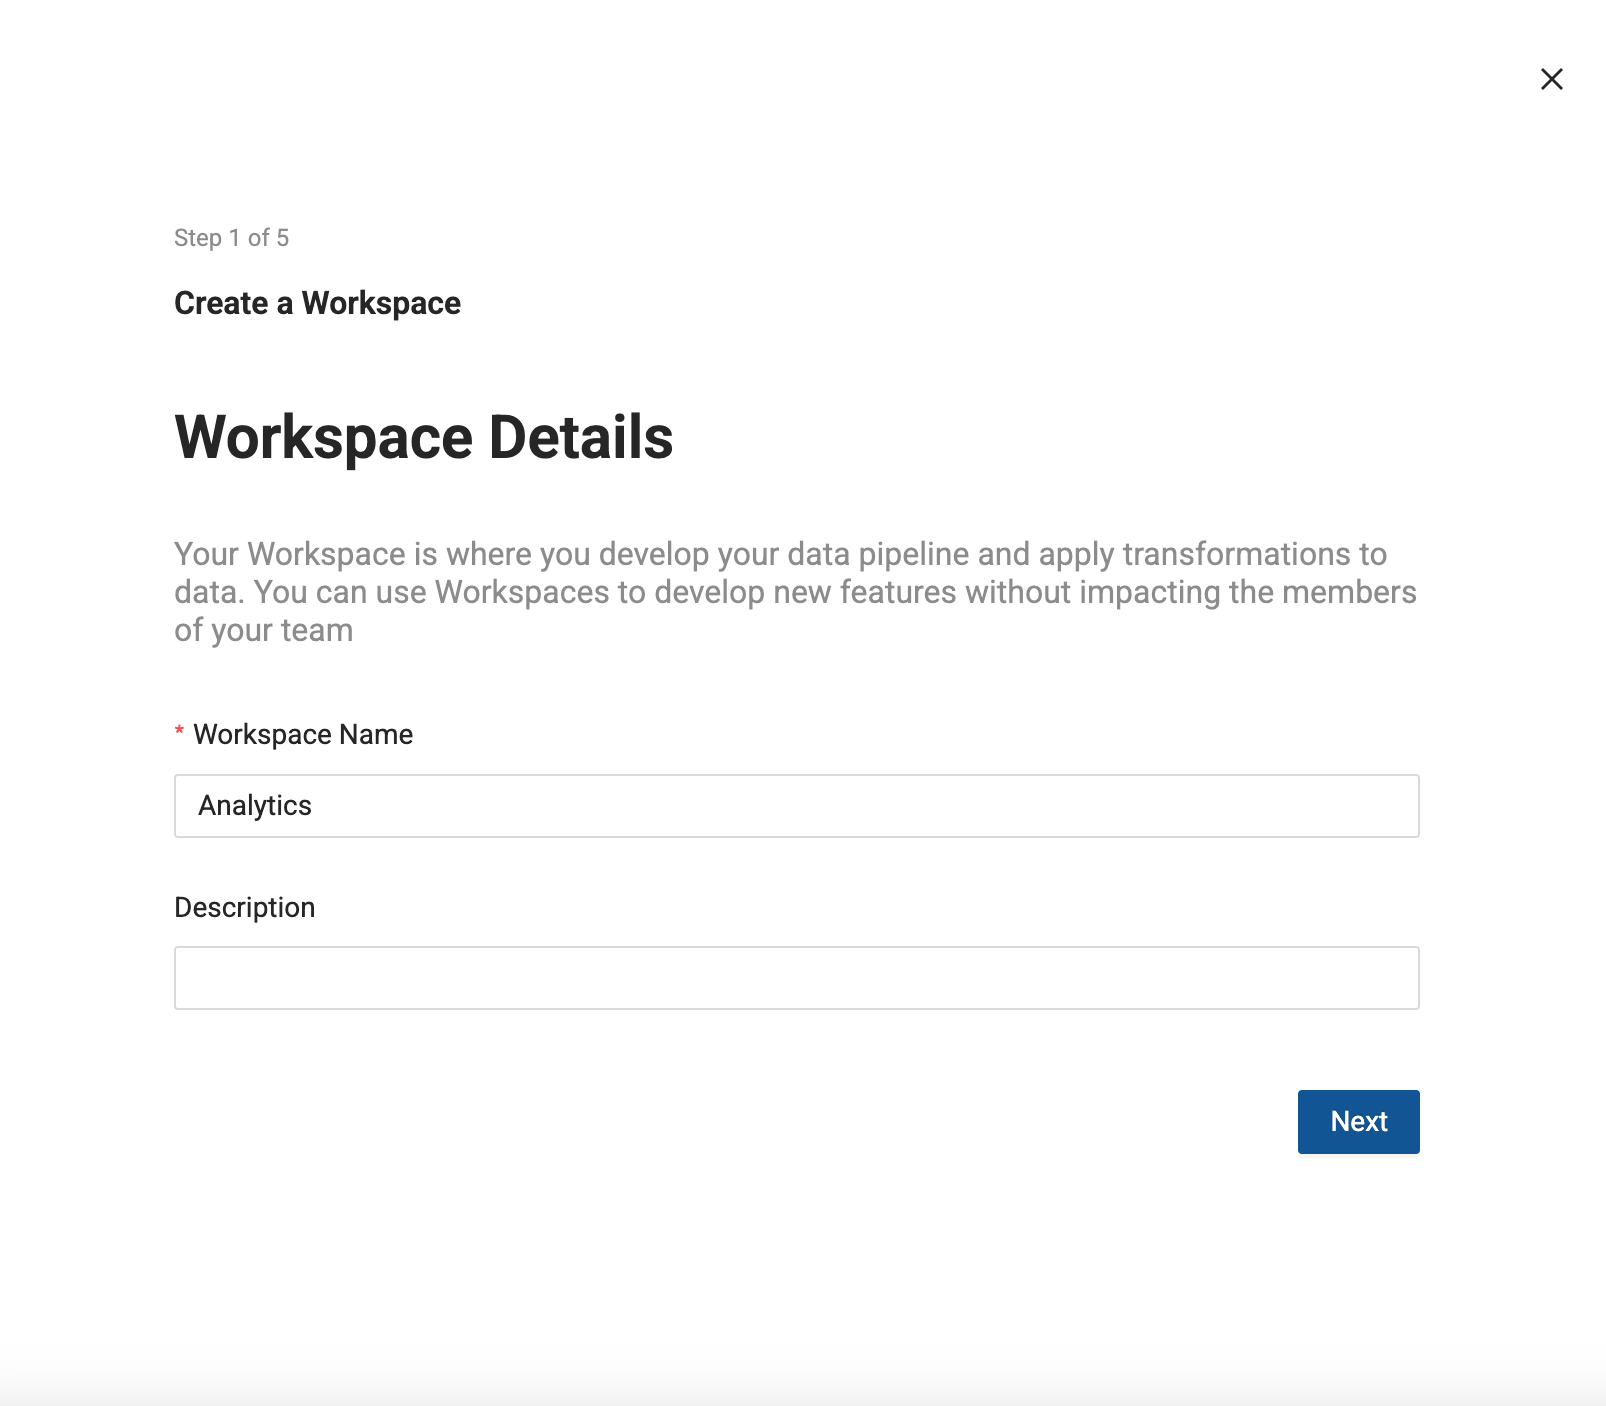
Workspace Details
-
Give your Workspace a Name and Description(optional).
-
Click Next.
-
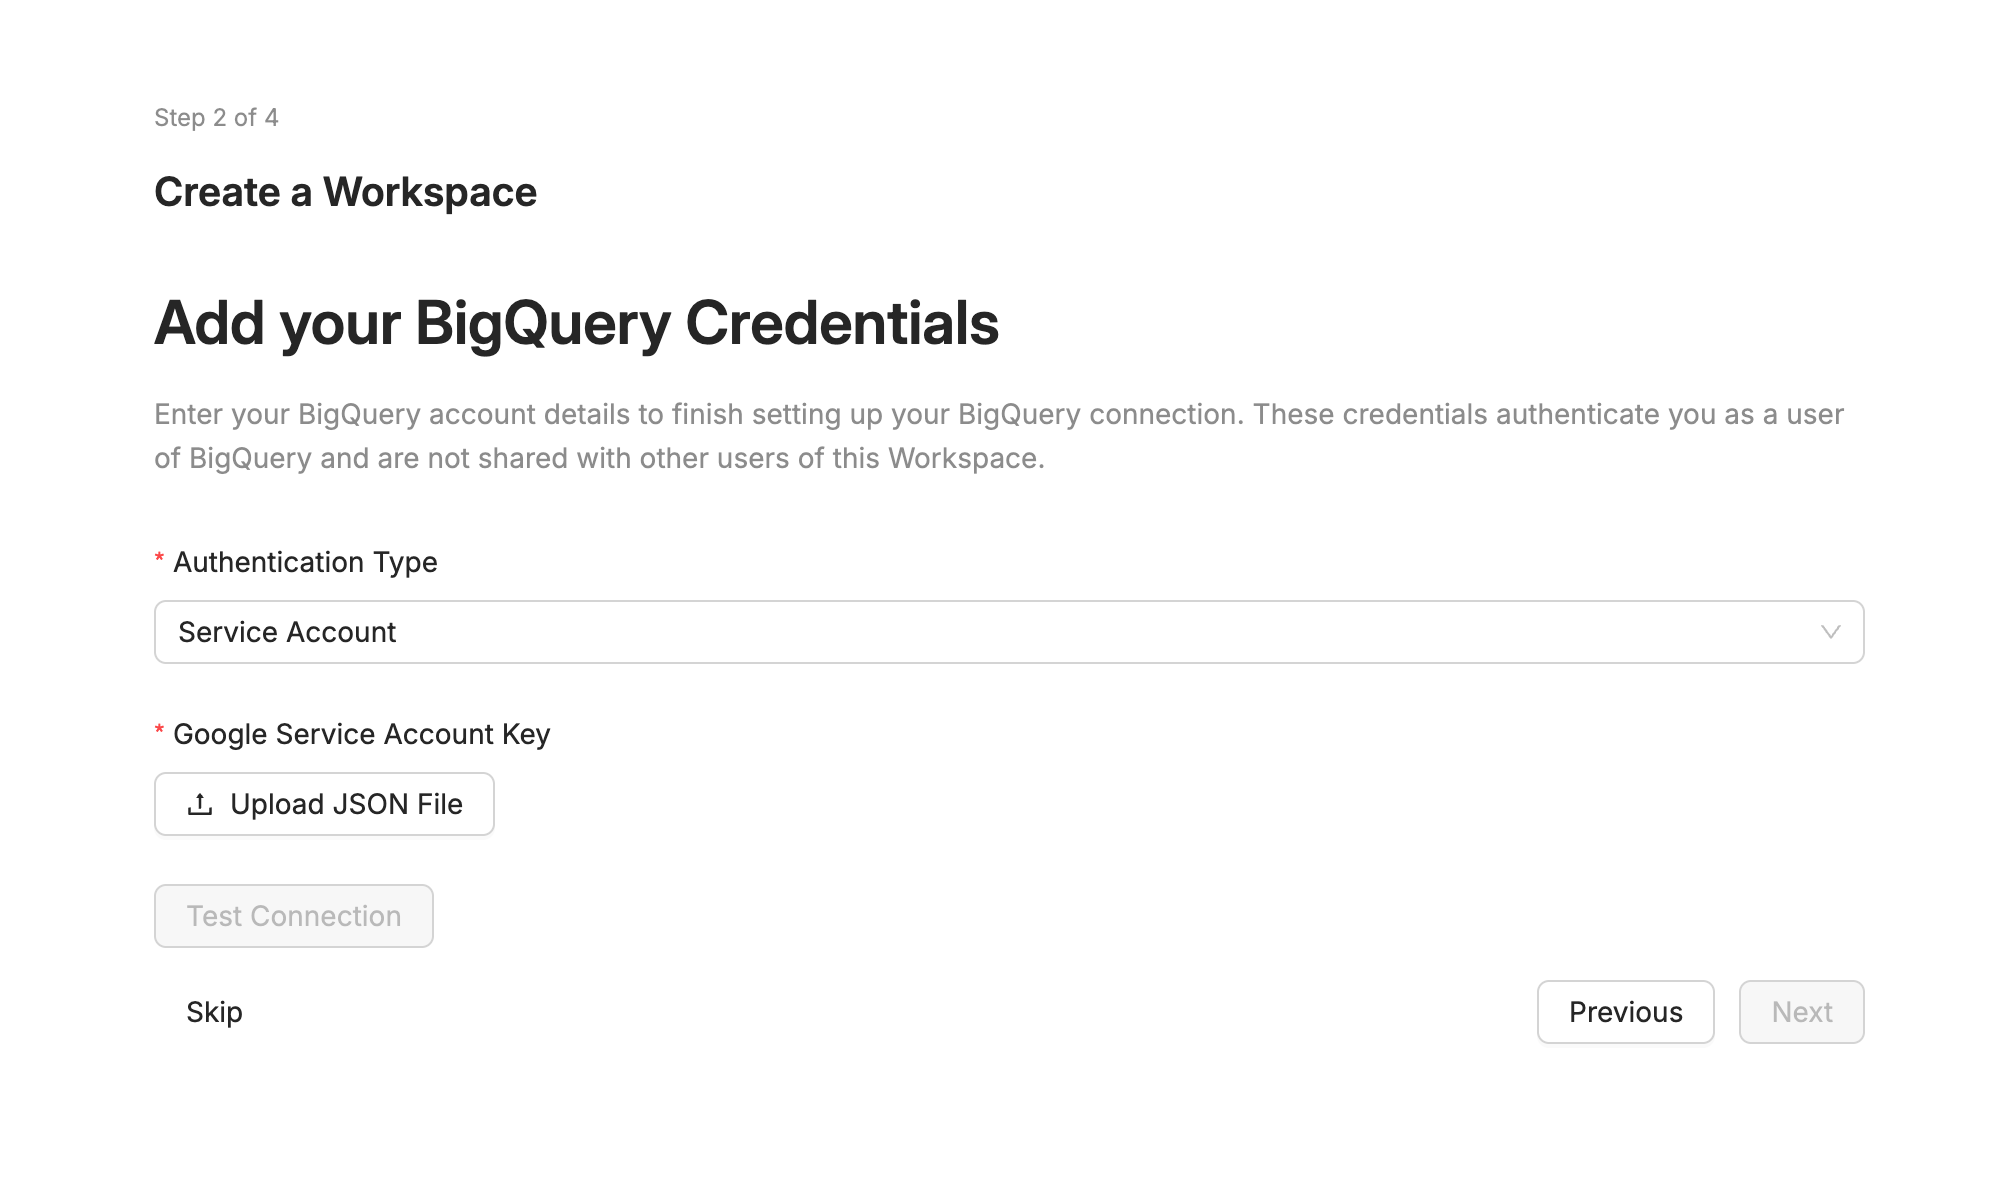
Add your BigQuery Credentials
-
Upload the JSON file from Google Cloud IAM. Then click Test Connection.
-
Click Next.
-
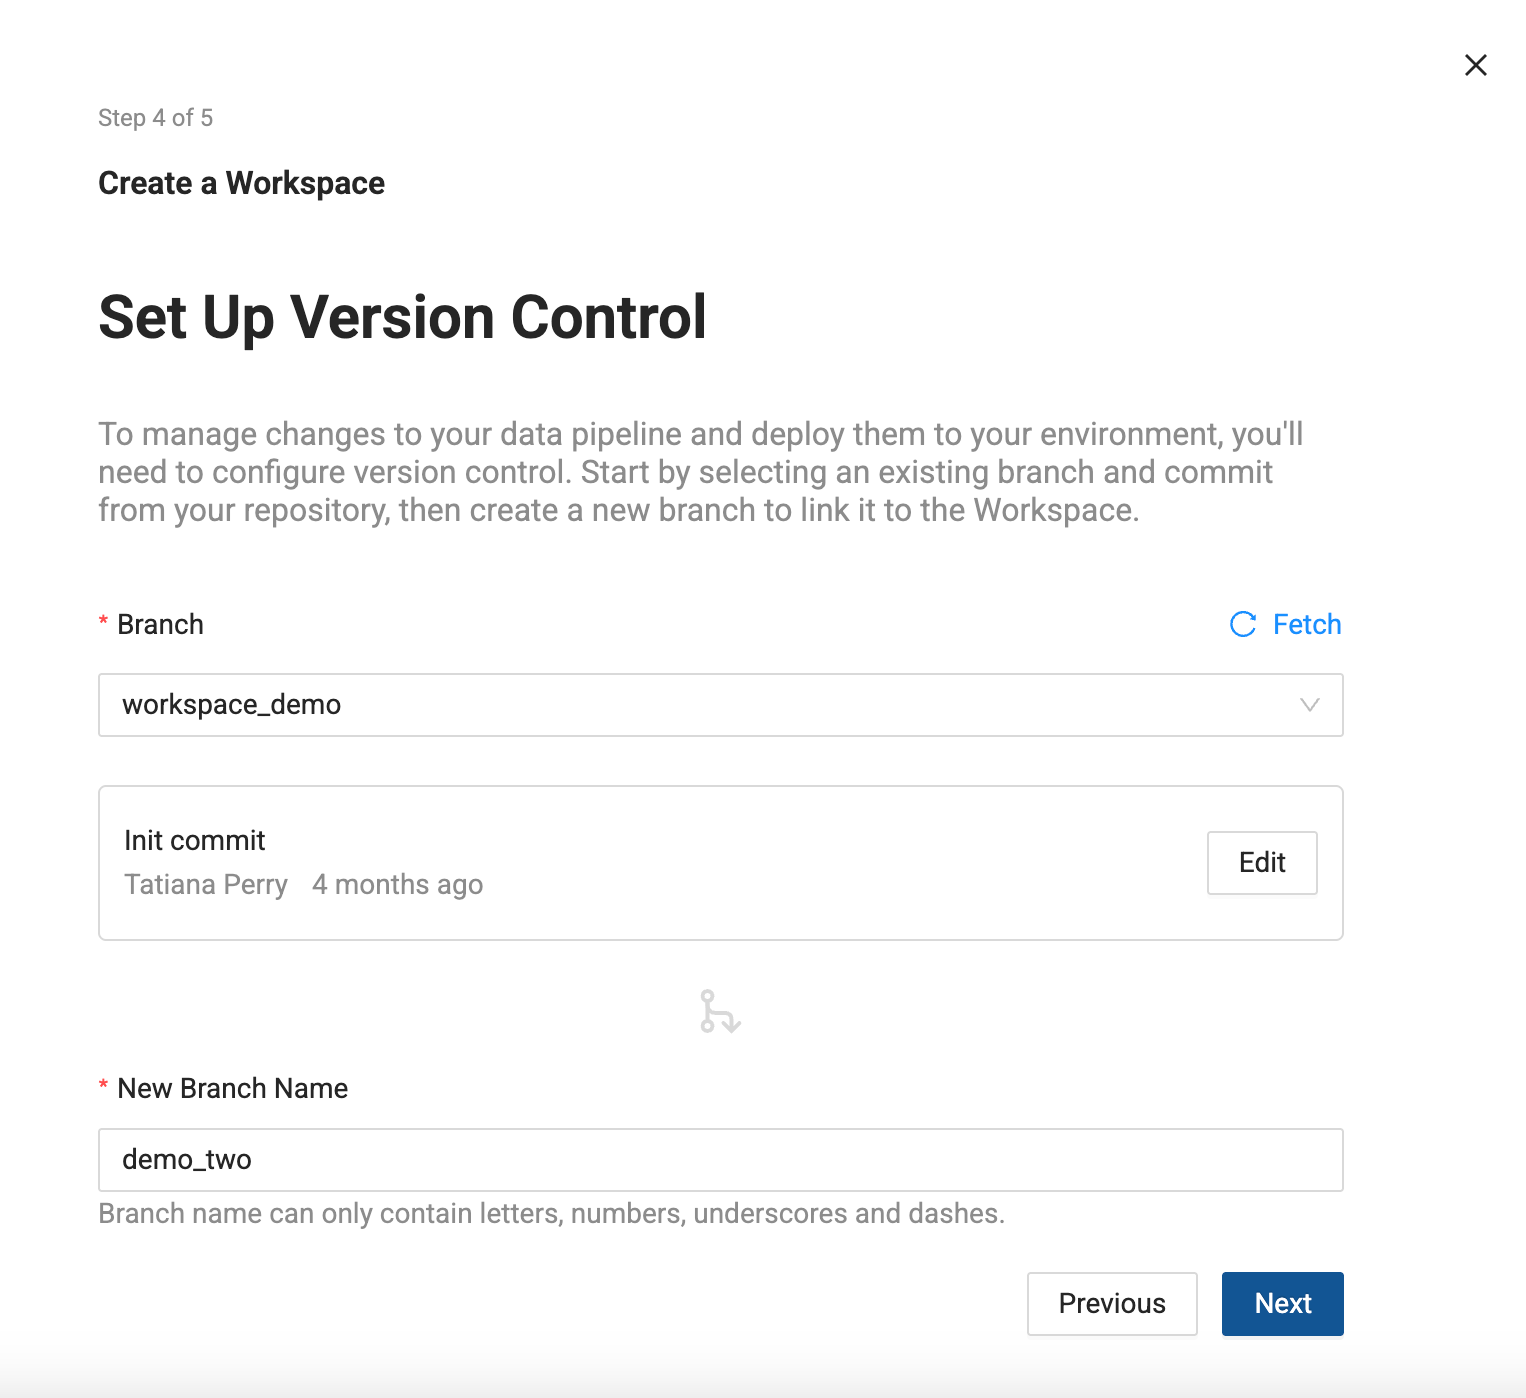
Set Up Version Control
-
Workspaces let you work on a branch. This is the version control repo you created in Setup Version Control and added to your Project. You will need to select a branch and commit to make a new branch. For example, if you want to create a branch off main, select main, then select the commit in main to create your branch from.
-
Then give the new branch a name.
-
Click Next.
-
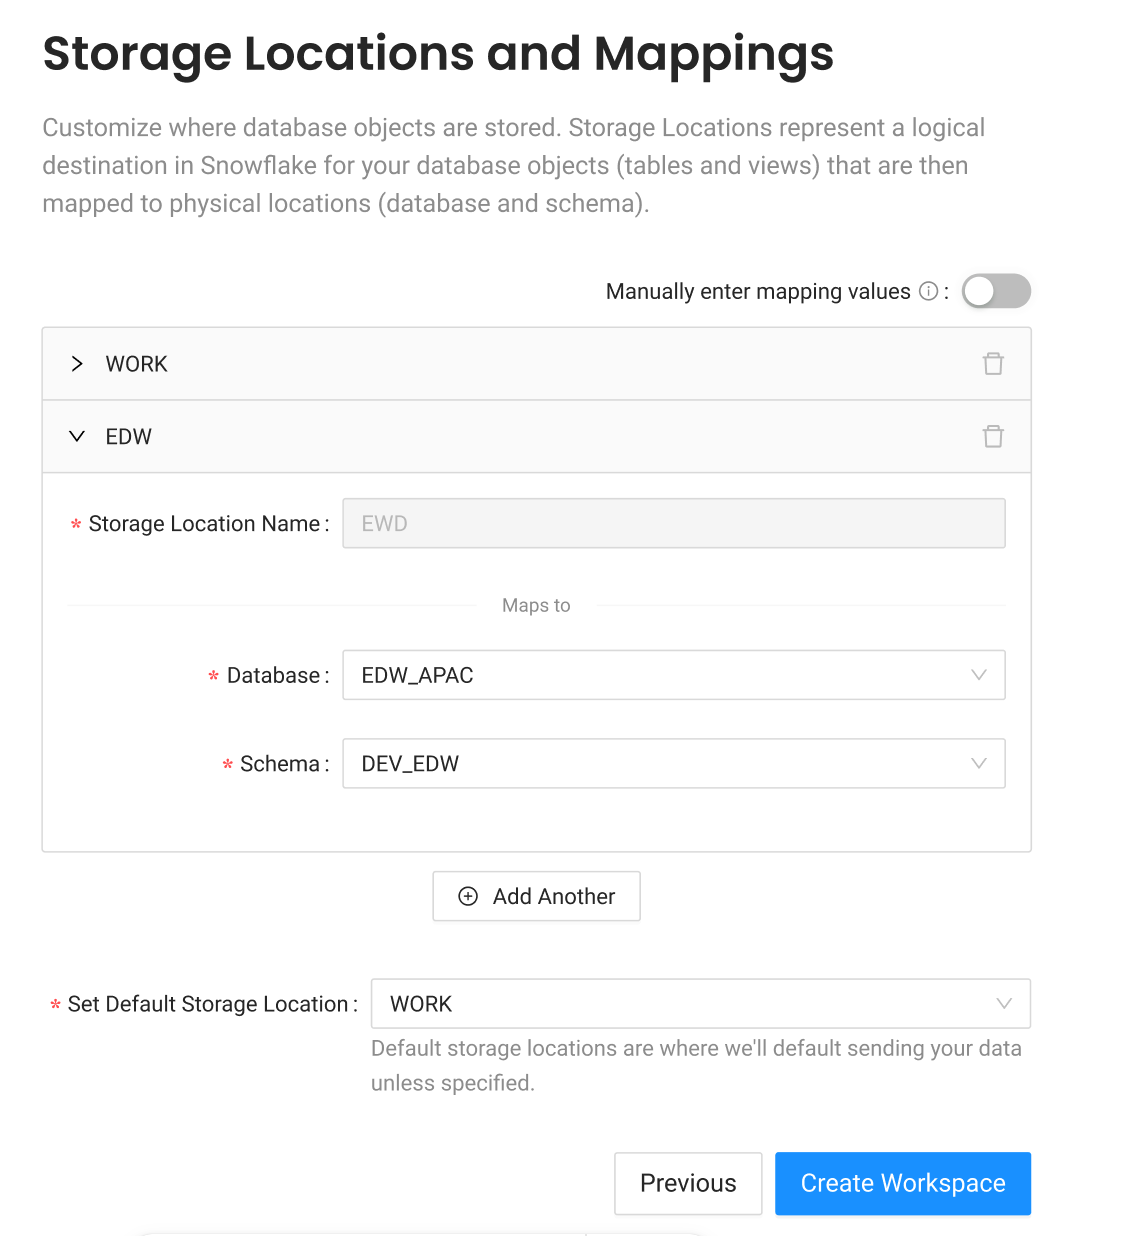
Storage Location and Storage Mappings
-
Add Storage Locations and Storage Mappings to your Workspace. If you have any existing Storage Locations and Storage Mappings from your repo, they will be listed here. You can delete the defaults and add new Storage Locations.
-
Click Create Workspace.
Before starting with Databricks authentication, make sure the following is in place:
- Your workspace must be using the Unity catalog.
- Must be a Databricks account admin create to OAuth applications.
- Databricks users must be given the permission to create a Personal Access Token (PAT) for Token authentication.
- Token Authentication
- OAuth Machine-to-Machine (M2M)
- OAuth User-to-Machine (U2M)
We recommend using OAuth for authentication.
Tokens or Personal Access Tokens (PAT) are used in Databricks to authenticate at the workspace level.
In this section, you get your access token from Databricks and then add it to Coalesce as part of creating a Workspace.
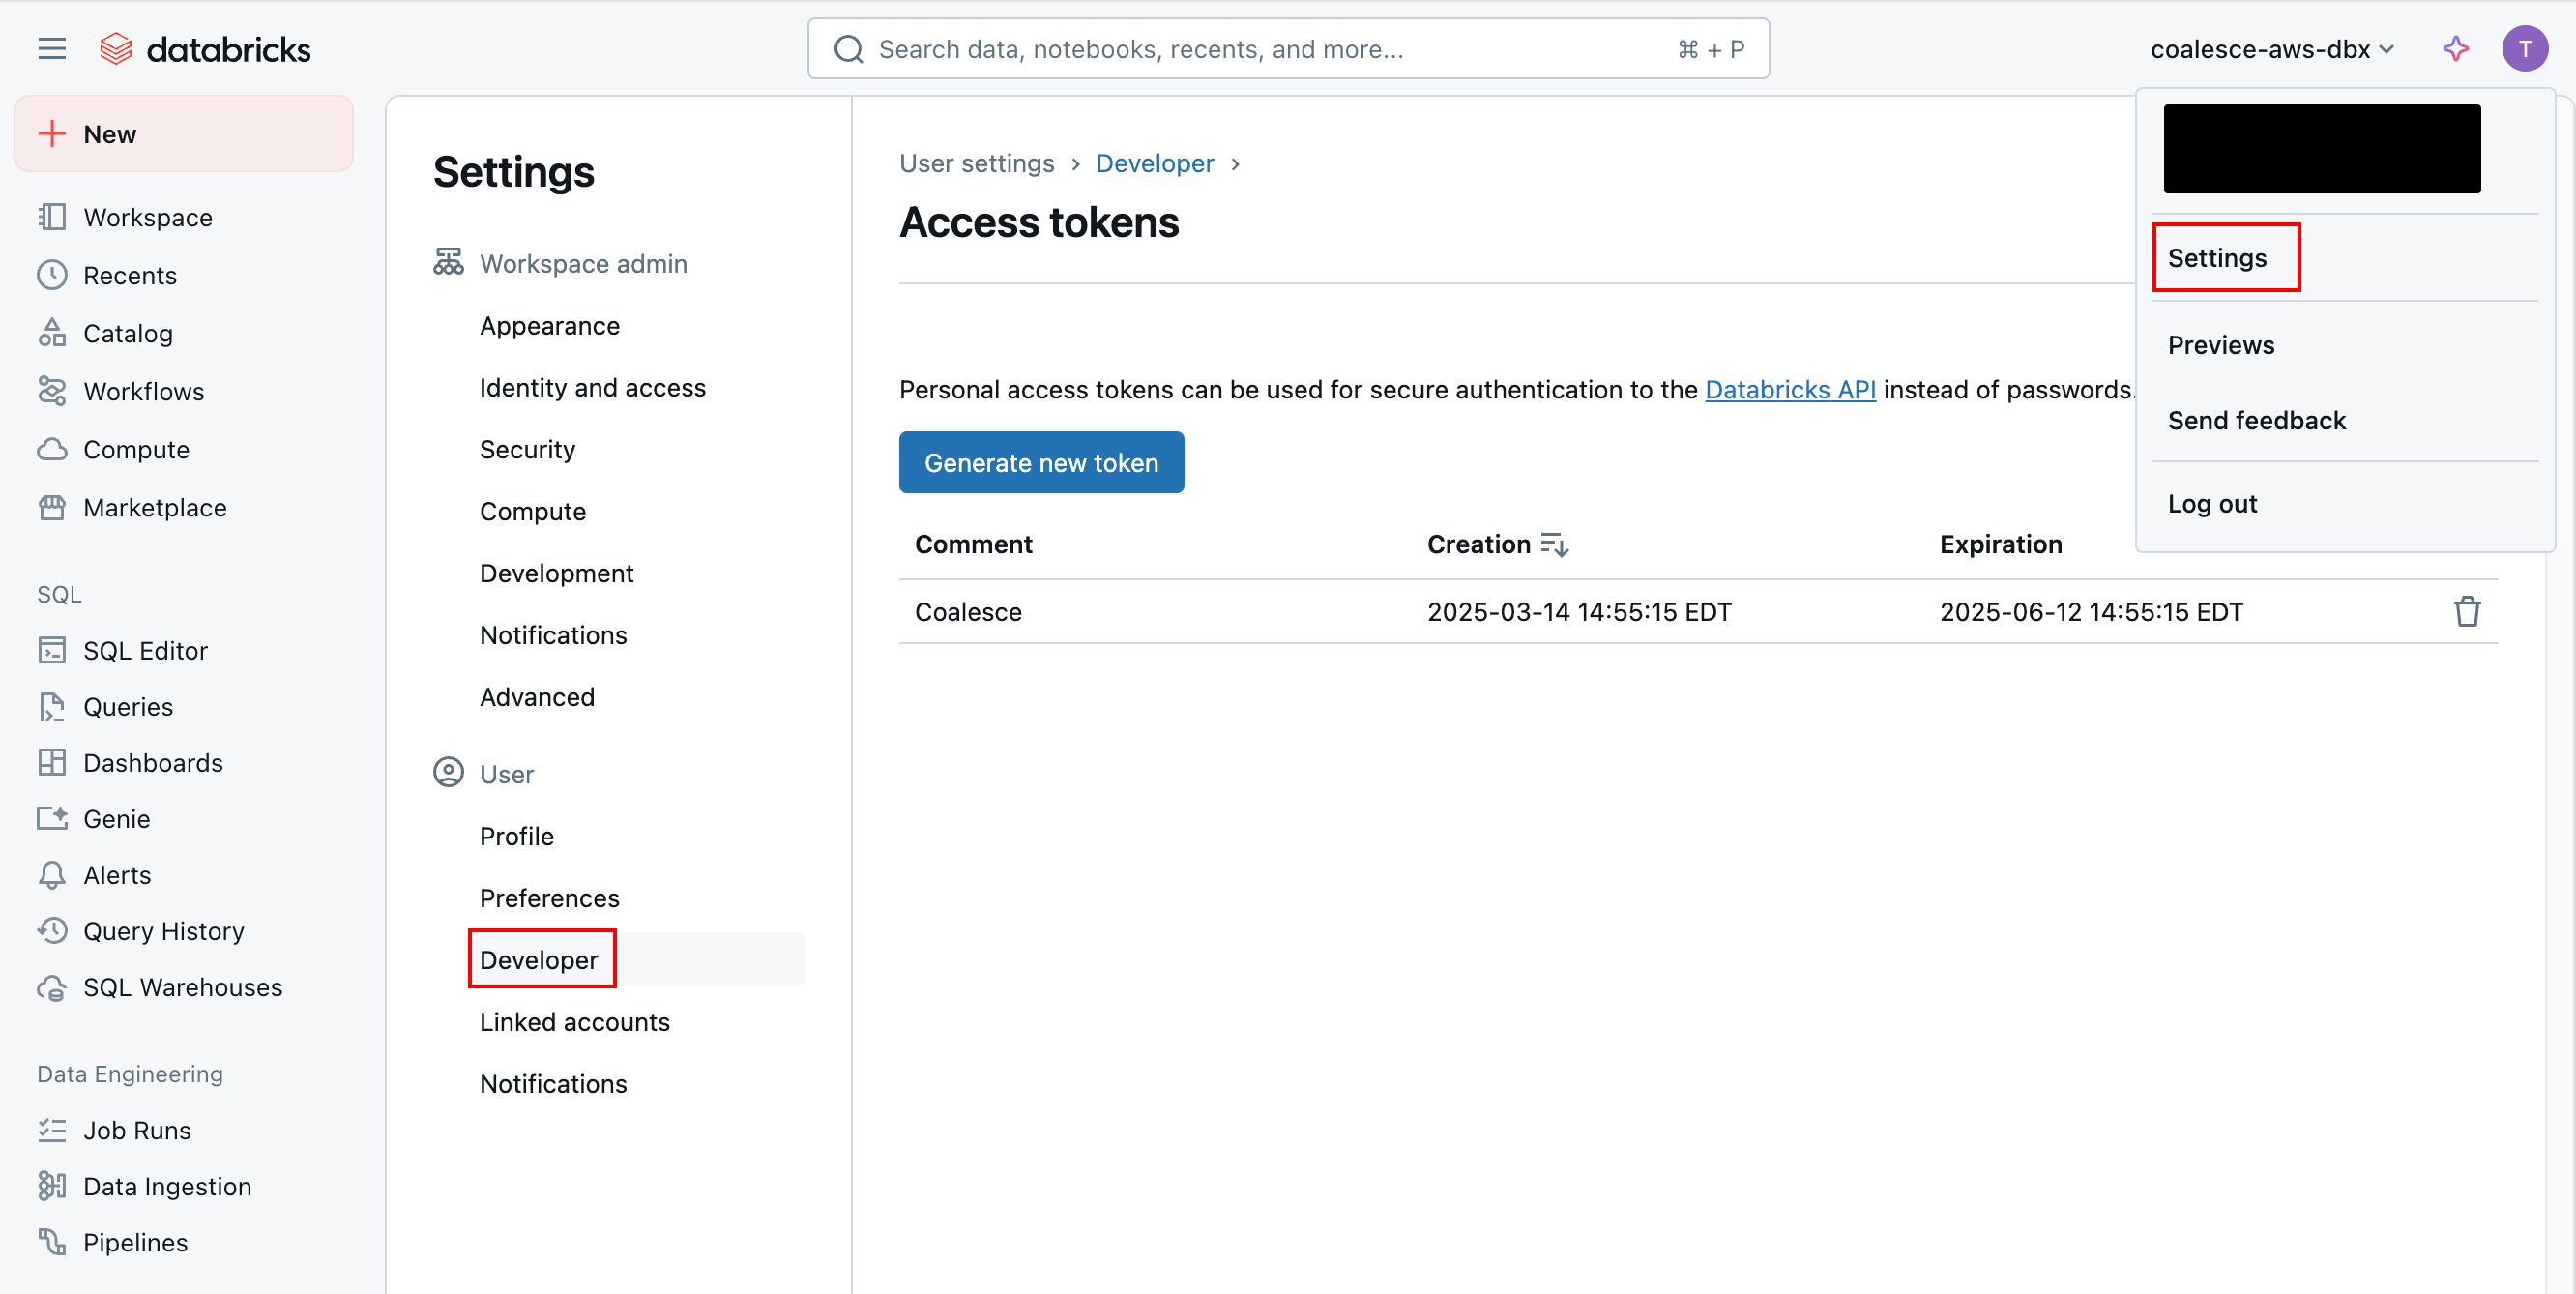
Get Your Databricks Token.
- Log into your Databricks account.
- Go to your username at the top and select Settings.
- Under User, select Developer.
- Next to Access Tokens, click Manage.
- Click Generate new token.
- Write a description for the token and choose the lifetime.
- Make sure to save the access token somewhere secure. It can’t be recovered or shown again.
Read the Databricks documentation on Databricks personal access token authentication to learn more about managing your access tokens in Databricks.
Create Your Workspace.
-
Select the Project you want to create the Workspace in.
-
Click Create Workspace.
-
Workspace Details
-
Give your Workspace a Name and Description(optional).
-
Click Next.
-
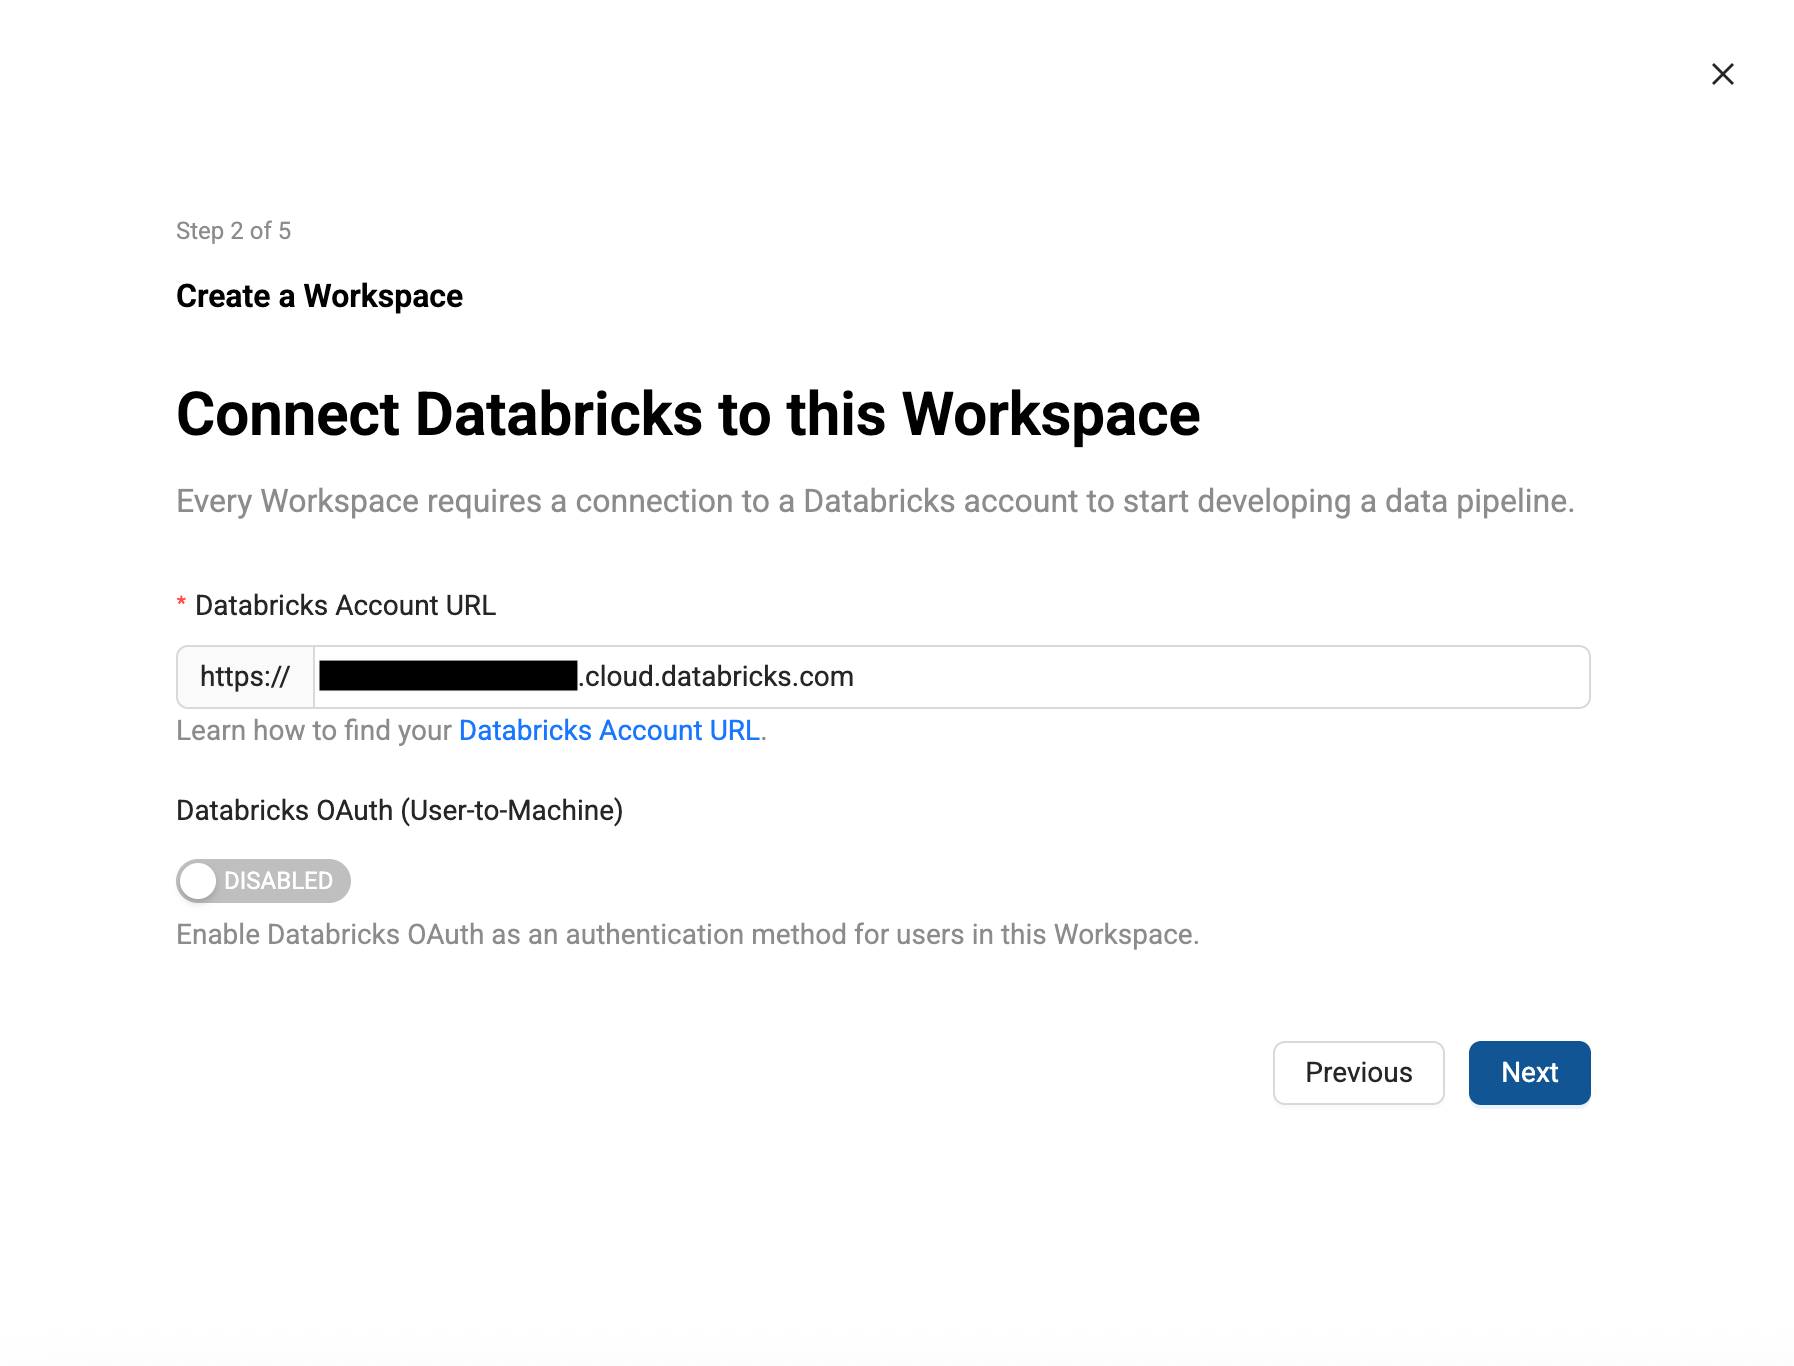
Connect Databricks to this Workspace
-
Enter your Databricks Account URL.
-
Click Next.
-
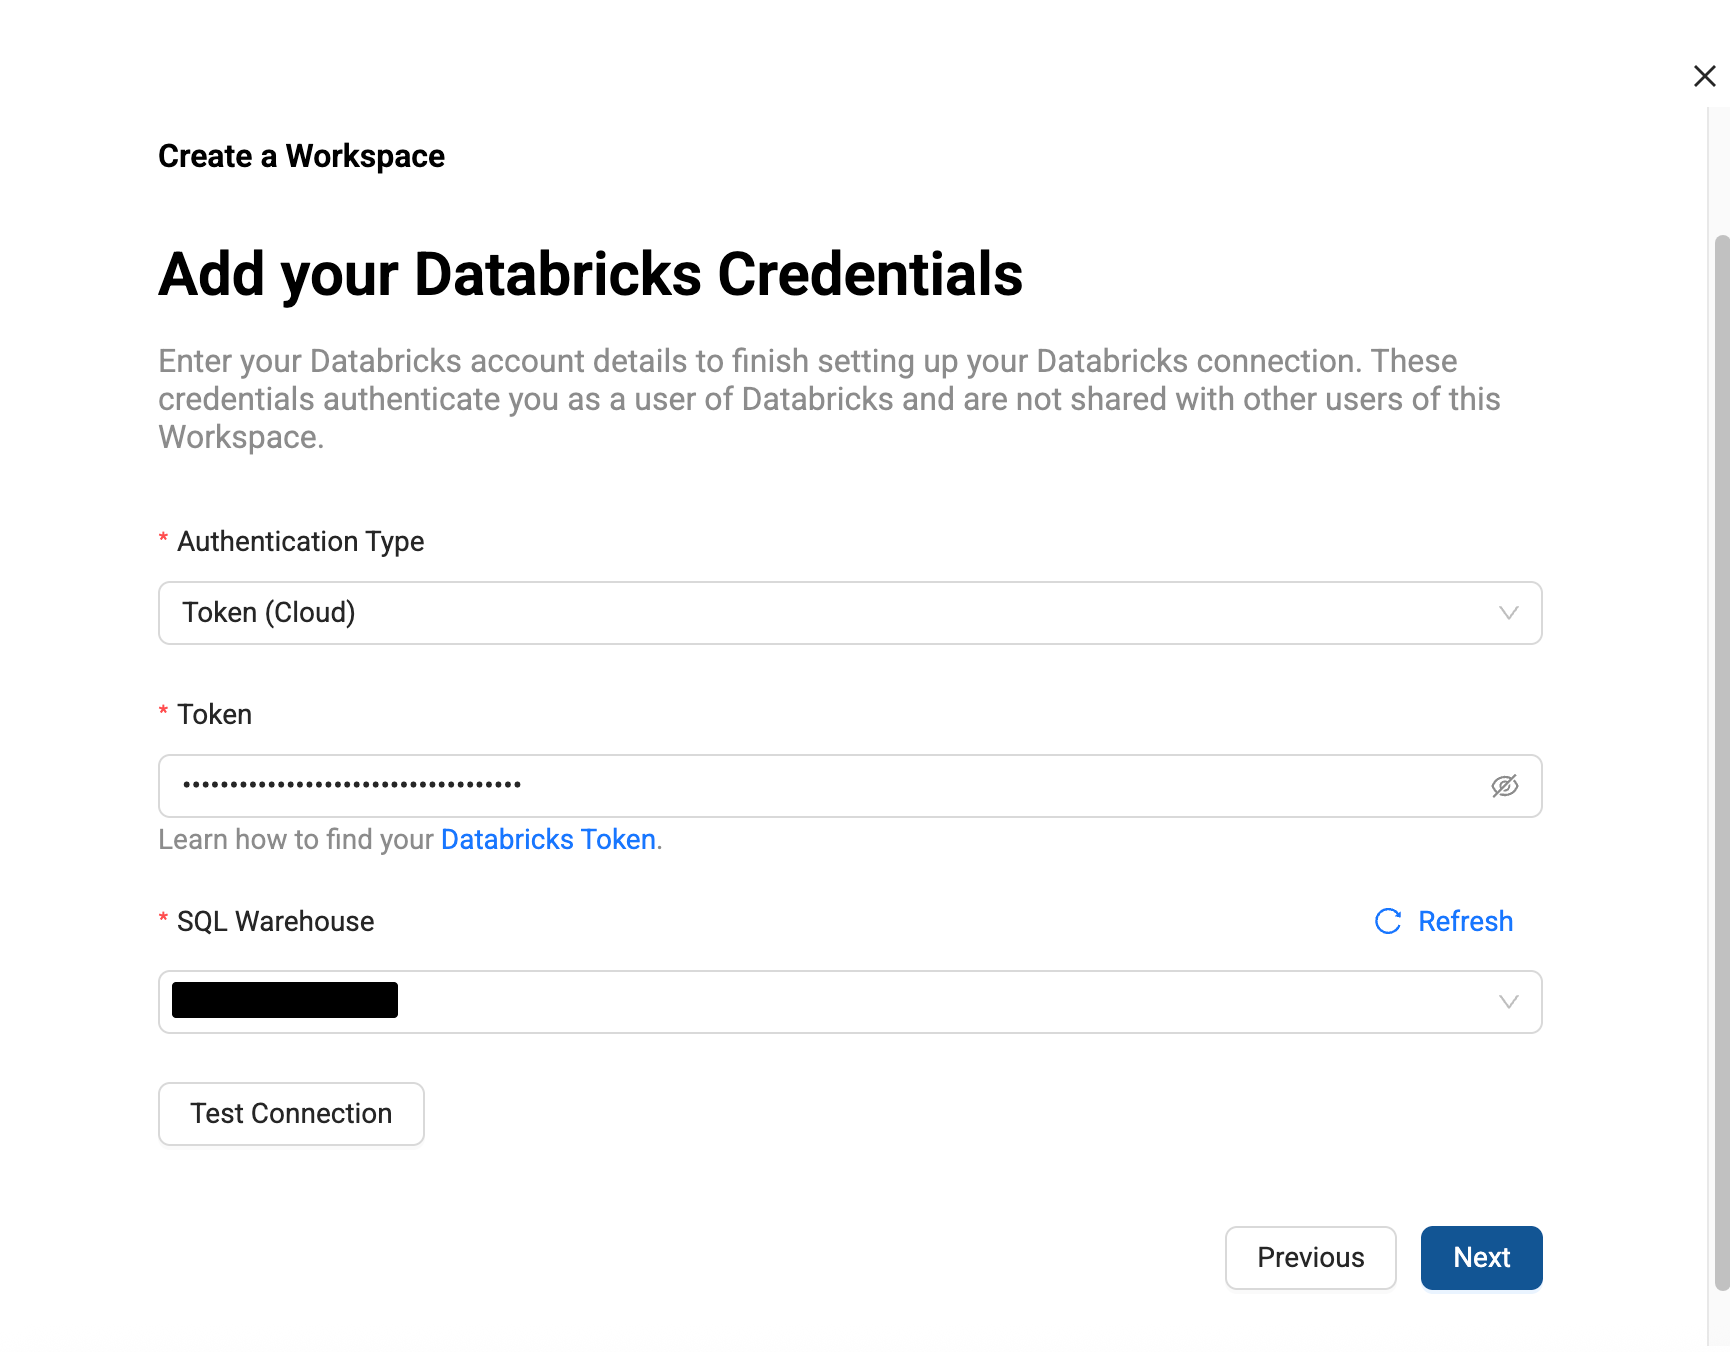
Add your Databricks Credentials,
-
Enter the token and then click Retrieve Warehouses. Select the one you want to use.
-
Click Next.
-
Set Up Version Control
-
Workspaces let you work on a branch. This is the version control repo you created in Setup Version Control and added to your Project. You will need to select a branch and commit to make a new branch. For example, if you want to create a branch off main, select main, then select the commit in main to create your branch from.
-
Then give the new branch a name.
-
Click Next.
-
Storage Location and Storage Mappings
-
Add Storage Locations and Storage Mappings to your Workspace. If you have any existing Storage Locations and Storage Mappings from your repo, they will be listed here. You can delete the defaults and add new Storage Locations.
-
Click Create Workspace.
Machine-to-Machine is used for automation. You'll need to create a Service Principal.
-
On the Databricks Account Console, go to User Management and select Service Principals.
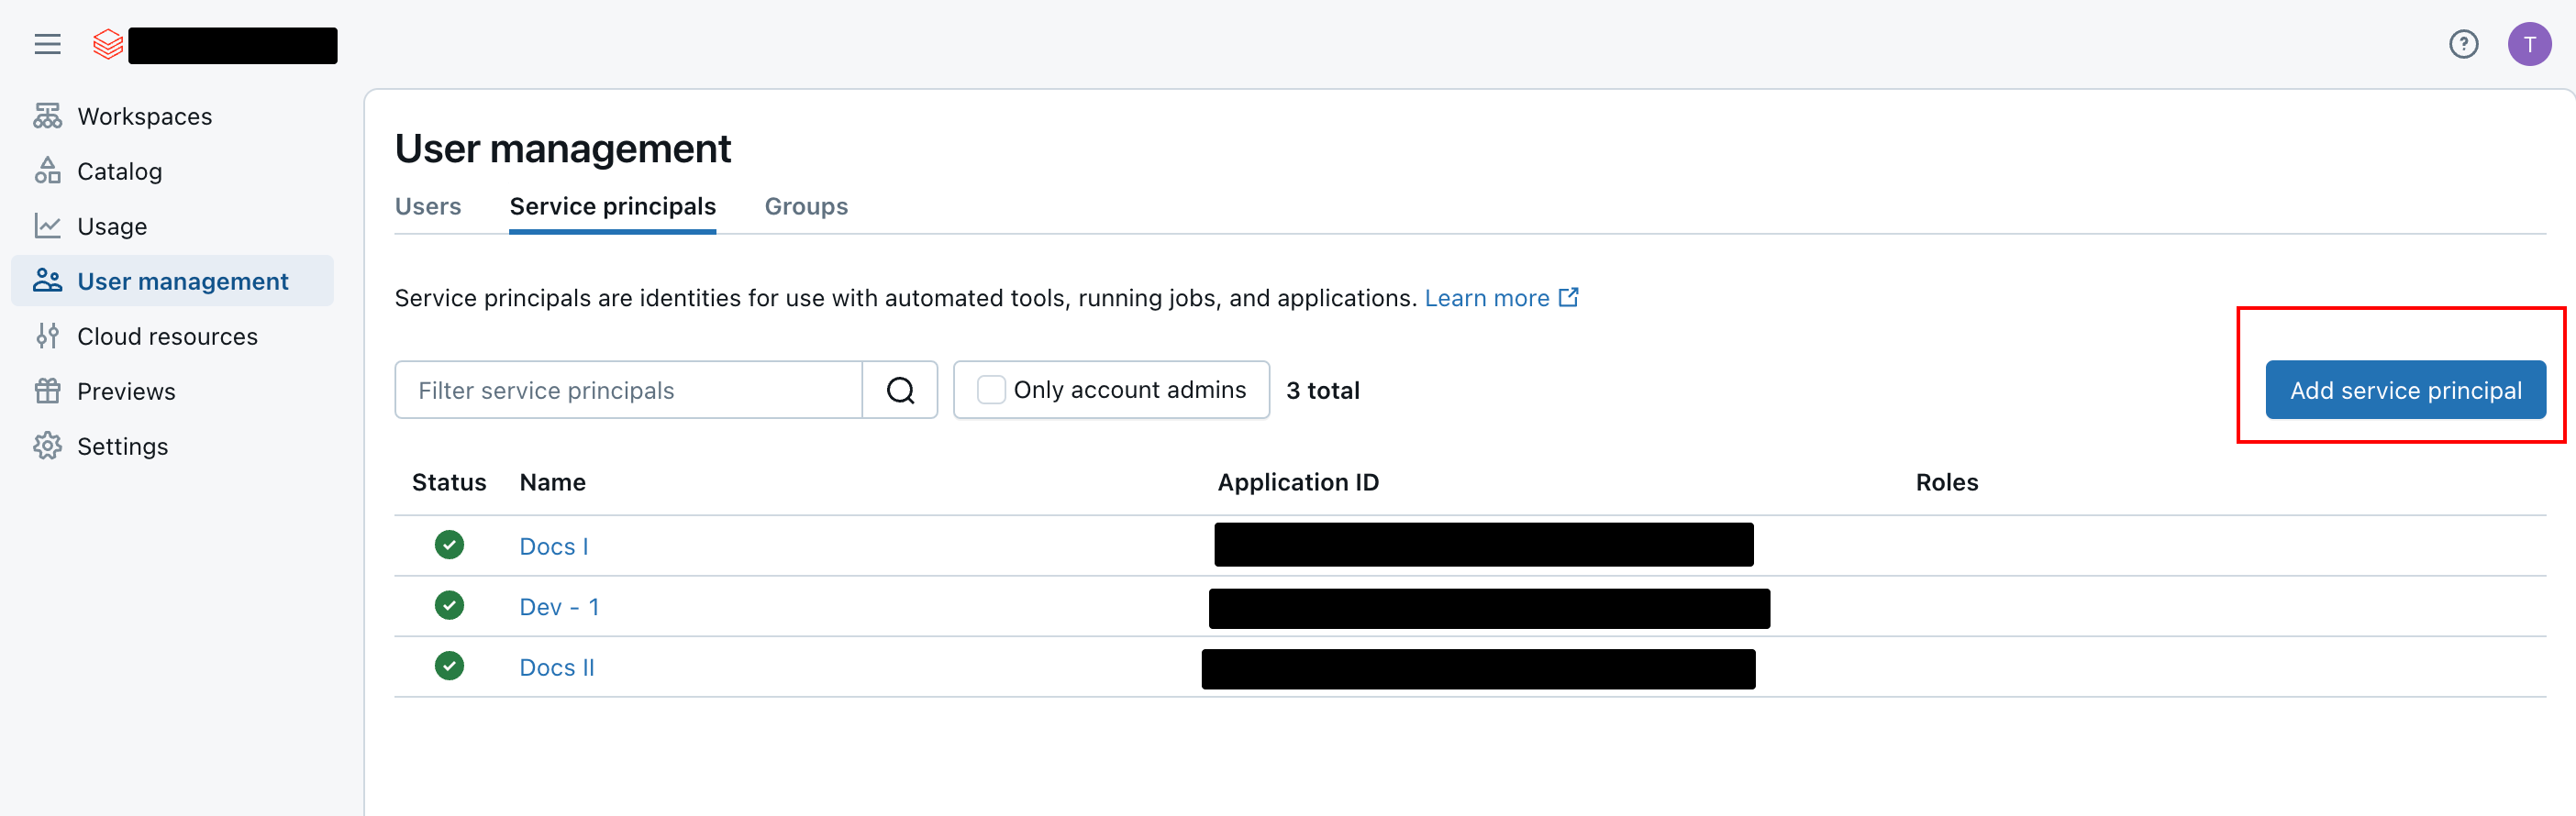
Databricks User management -
After giving the service principal a name, you'll grant the right permissions, then create the client ID and client secret.
- The service principal should have Workspace, Warehouse, and Catalog permissions.
-
Click on the service principal and go to the Permissions tab and click Grant Access. Add the service principal you just created as a User.
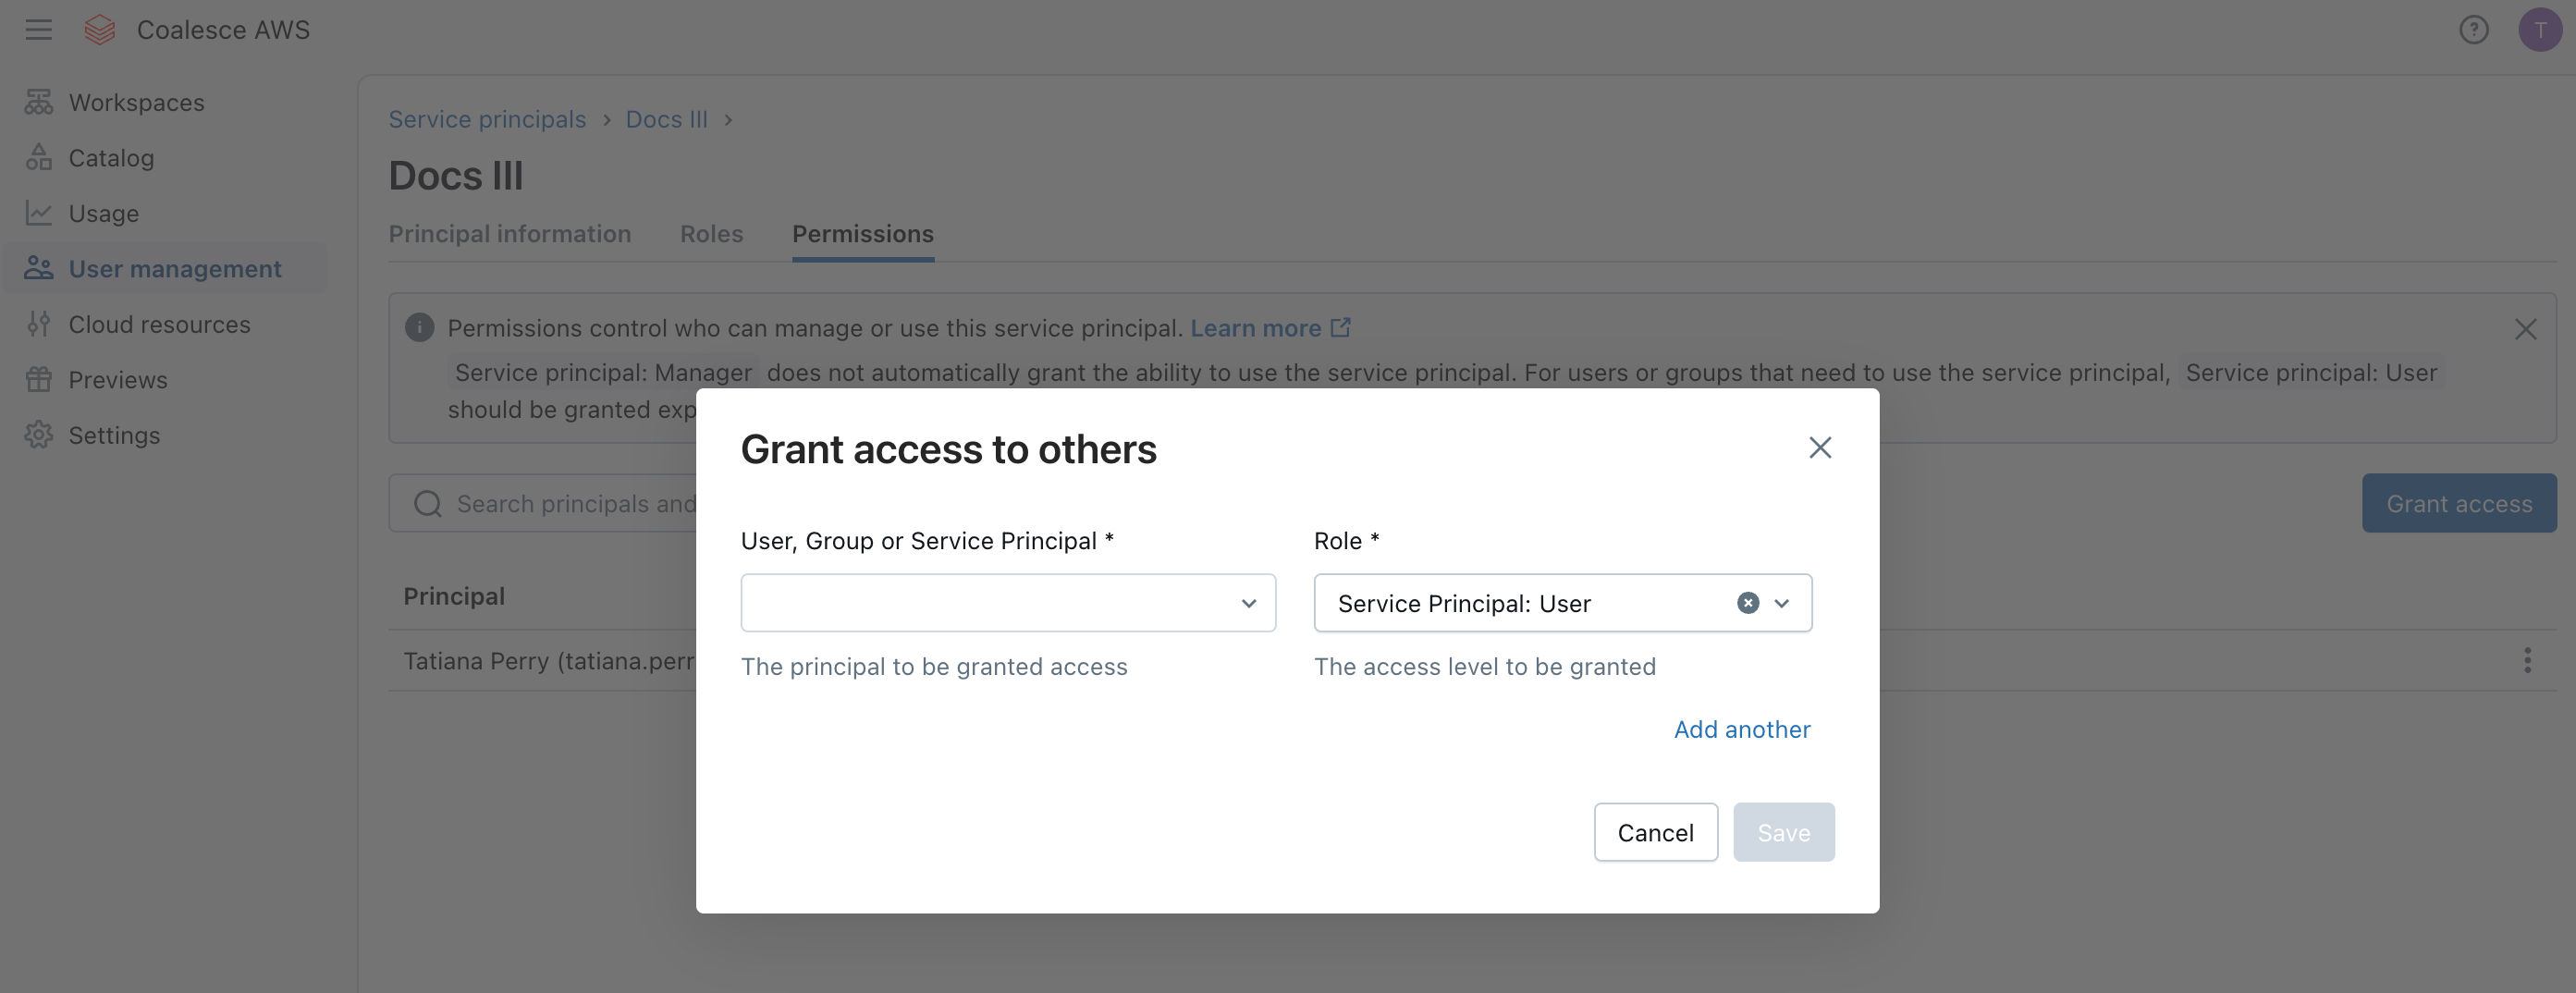
Add the new service principal as user -
Go to the Databricks Catalog and select the catalog the service principal should have access to.
-
Click Grant.
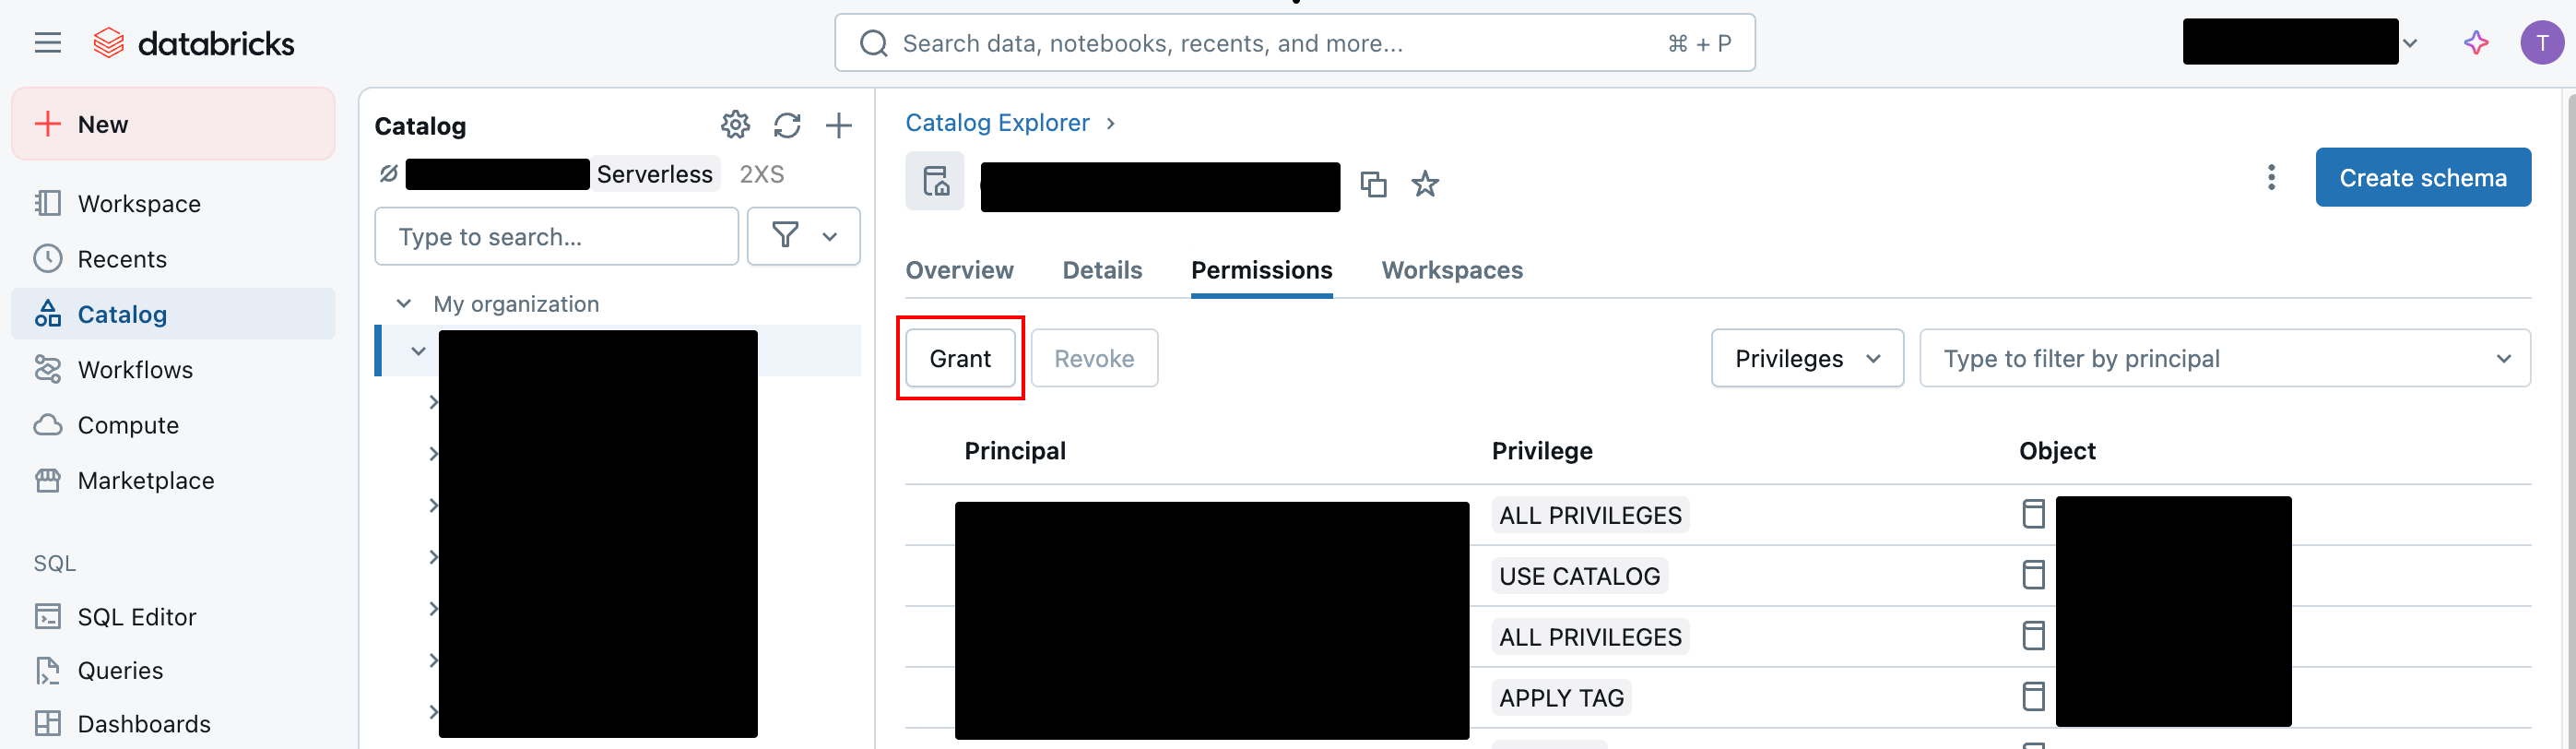
Click Grant on the catalog -
Choose the service principal and then select Data Editor.
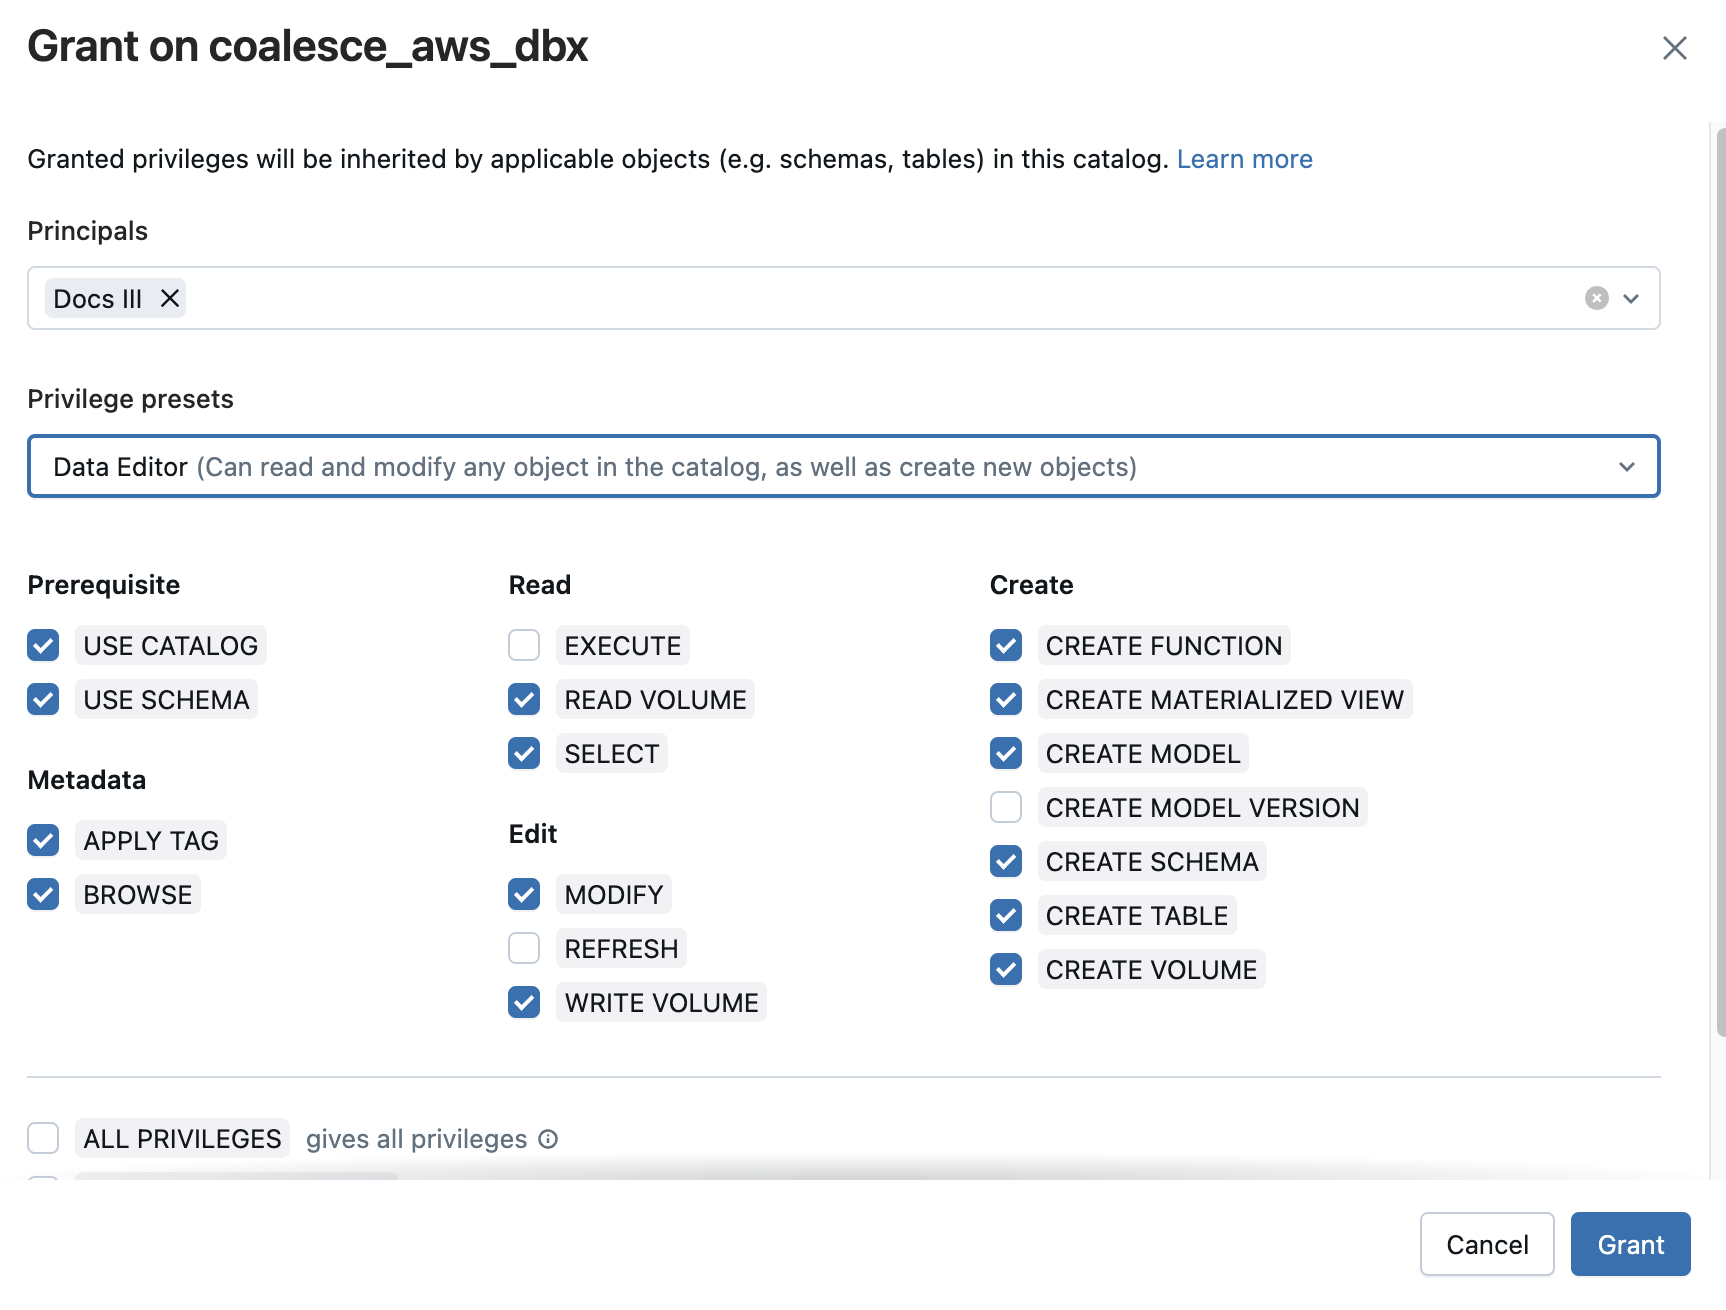
Grant the Data Editor Role -
Then go to SQL Warehouses, and select the warehouse the service principal should have access to.

SQL Warehouse Permissions -
Click Permissions, and select the service principal from the list. Set it to Can Use.
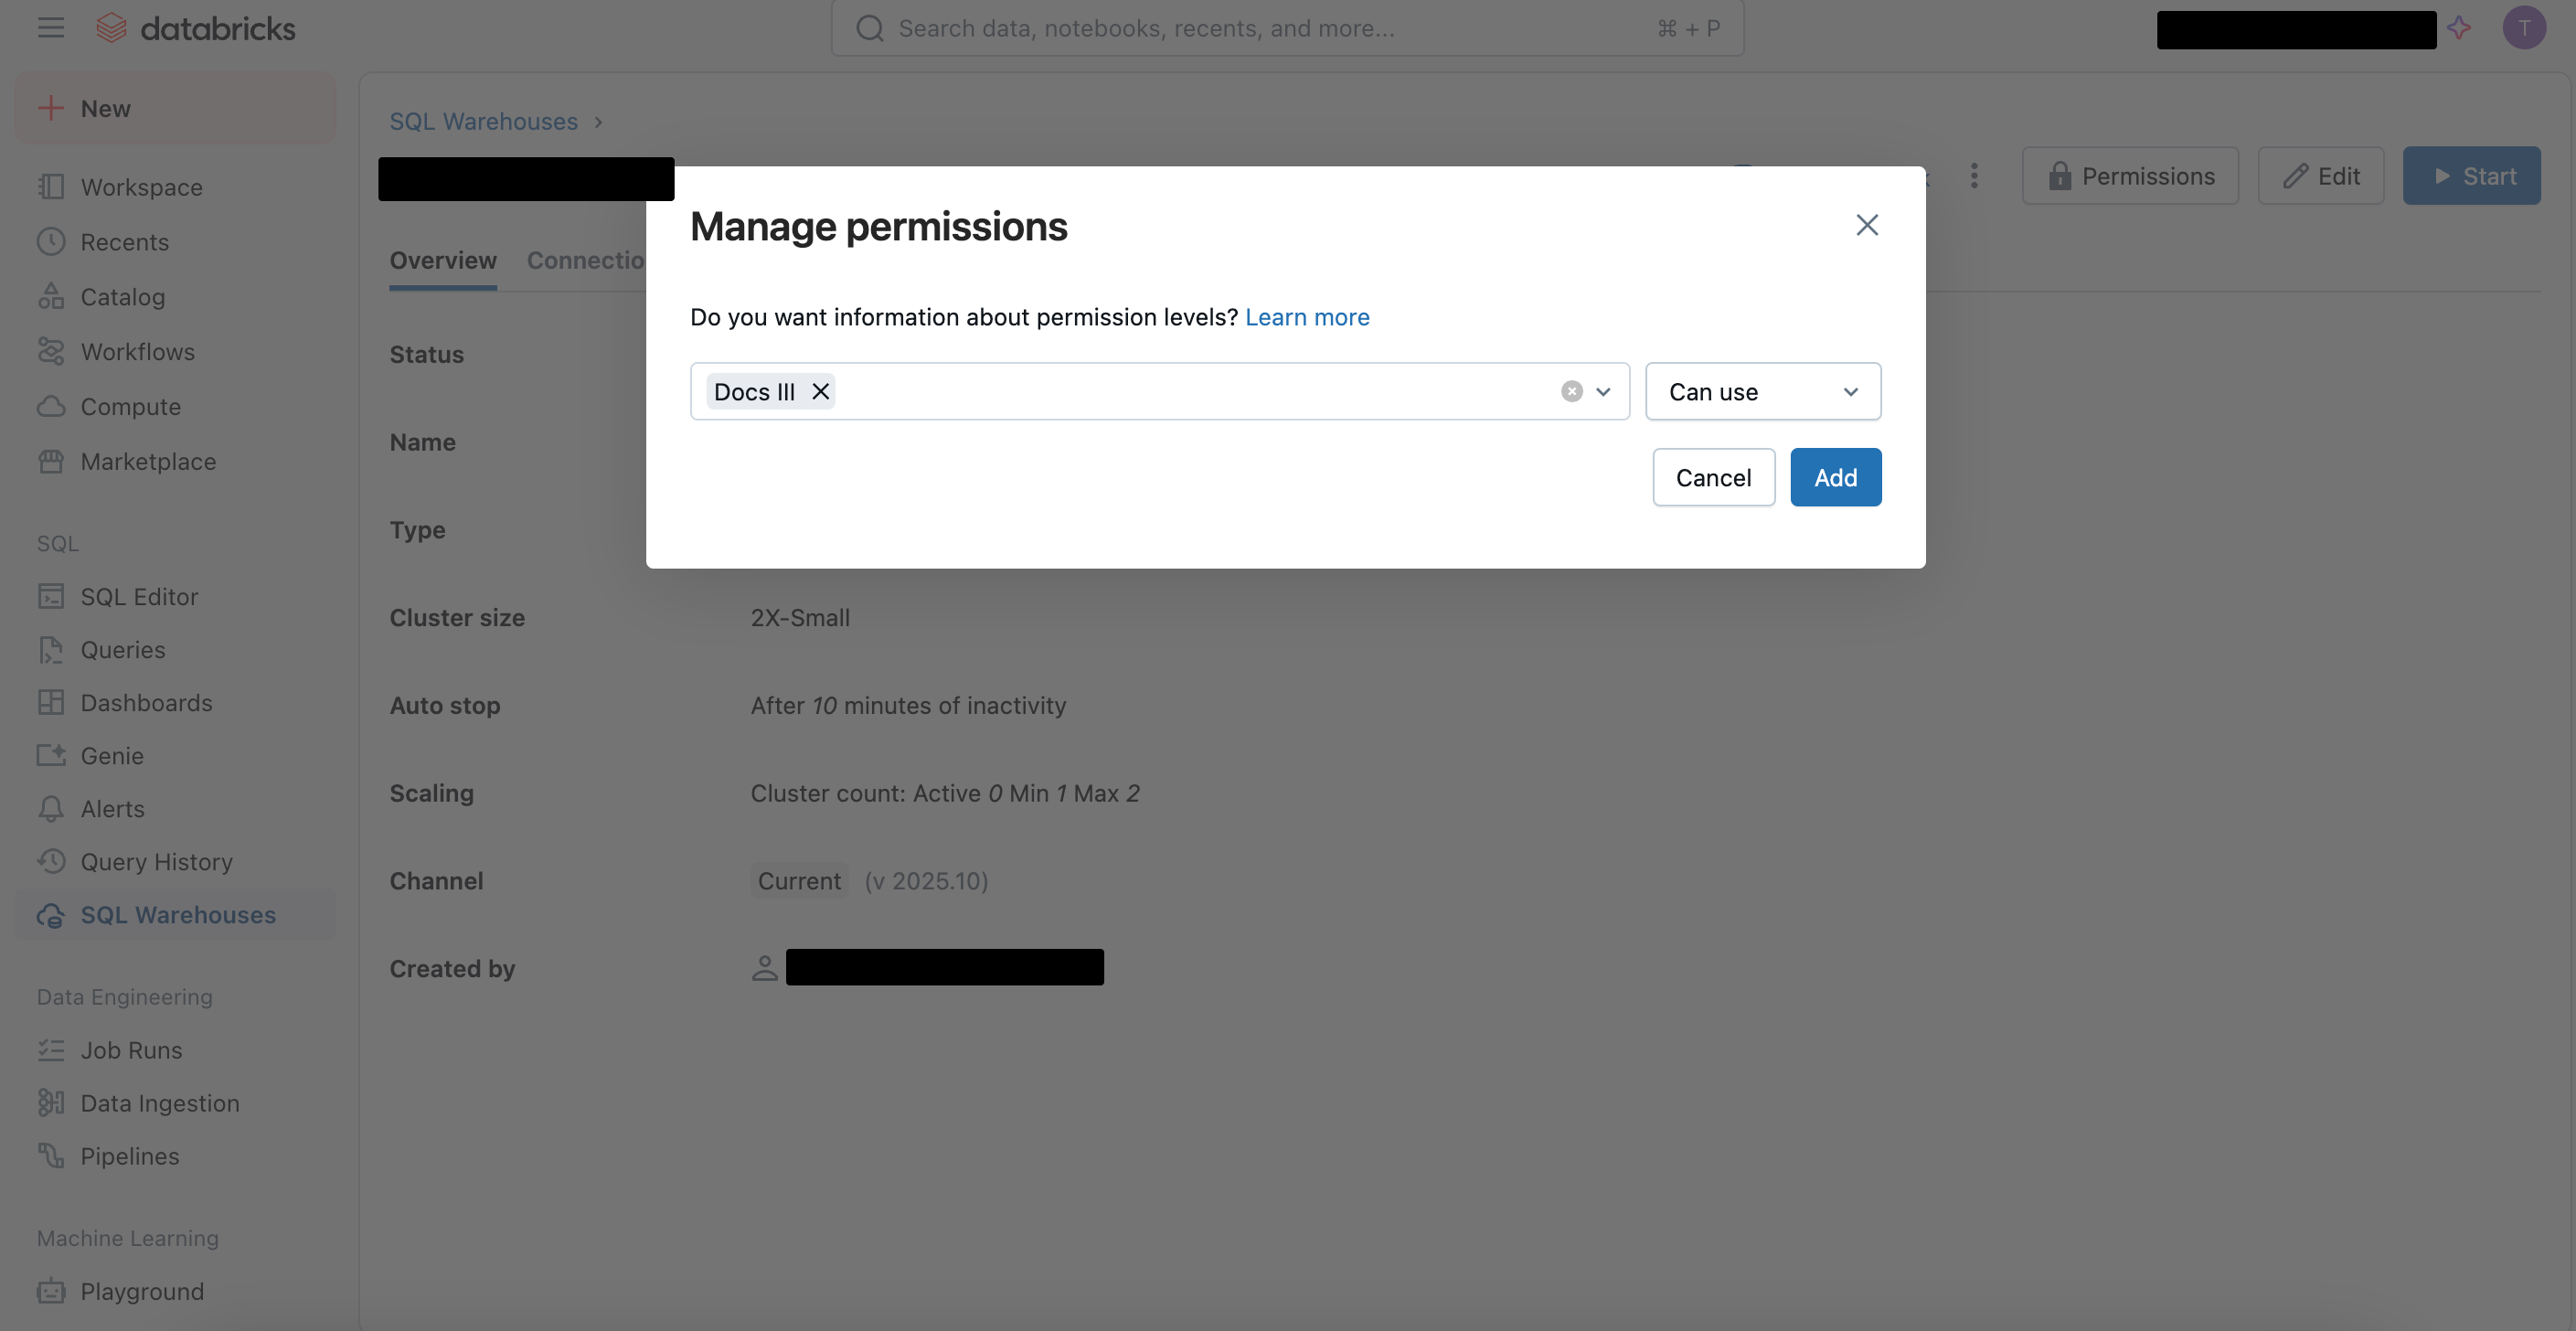
Permission Level is Can Use Service Principal Missing From ListIf your service principal is missing from the list, go to your user Settings > Identity and access > Service principals, and add it there too. Then go back to the SQL Warehouse step.
-
Go to the Account console in Databricks.
-
Select User management > Service principals.
-
Click the one you created, then click Generate secret.
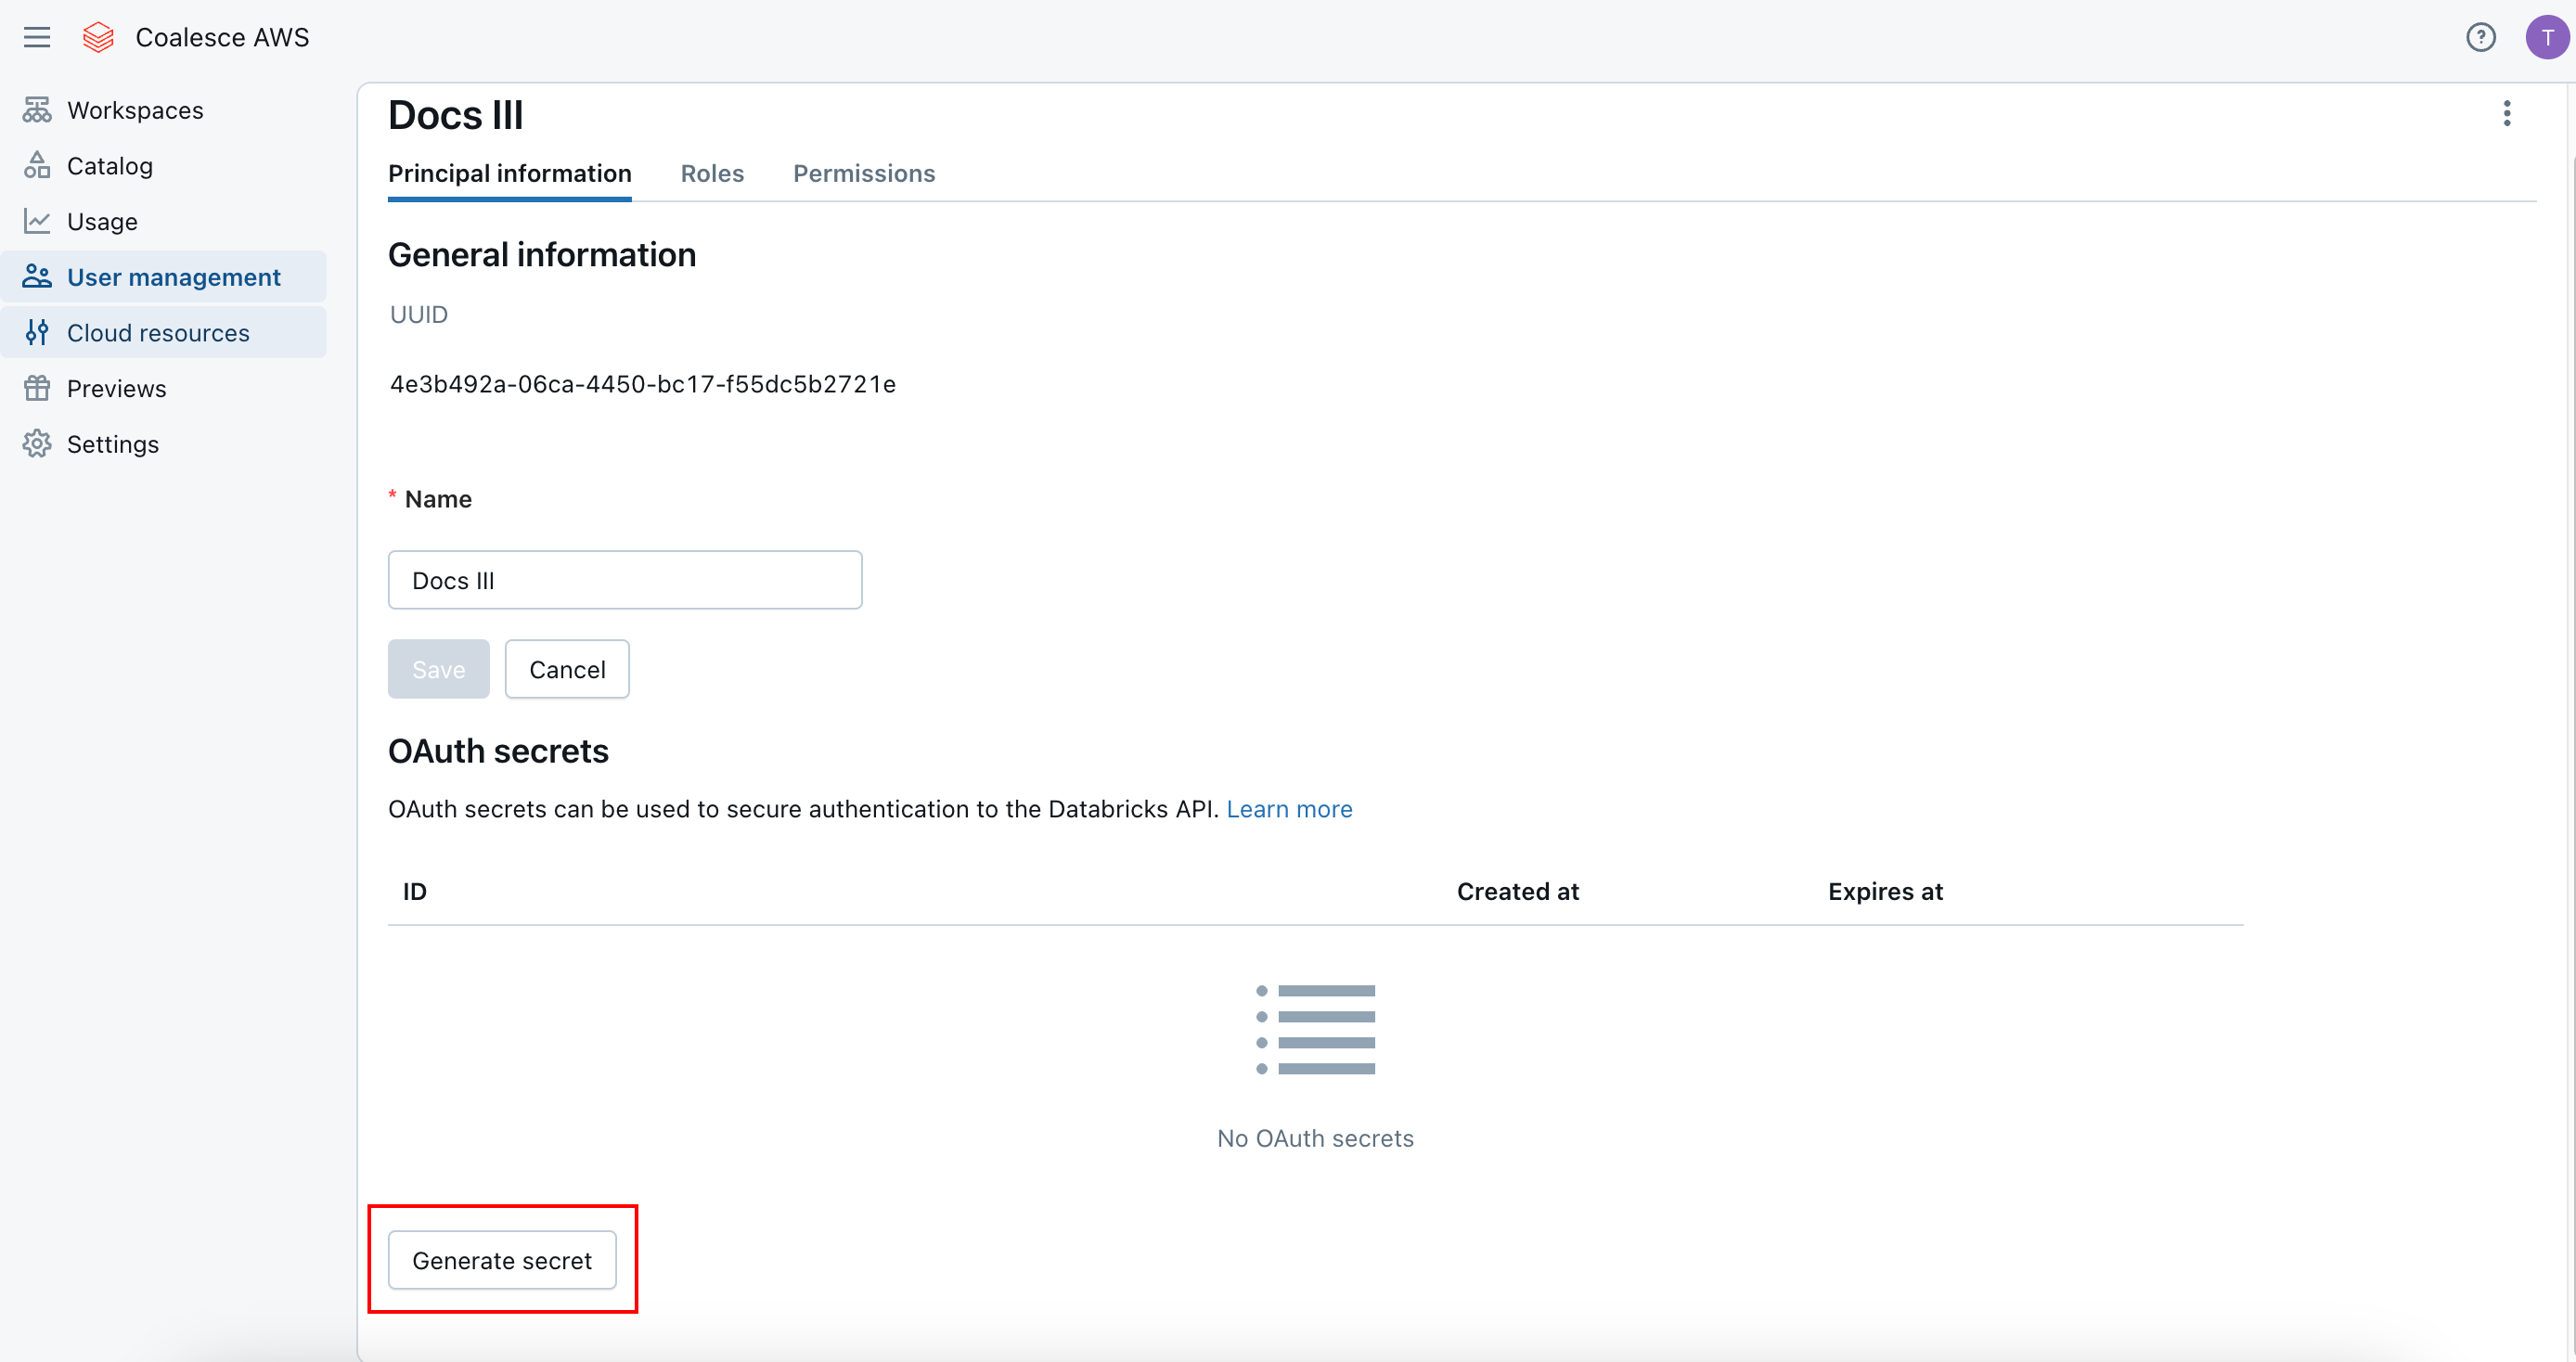
Generate Your Client ID and Client Secret -
Choose how long the token should be valid for, then click Generate.
-
Save the Client ID and Client Secret for configuring in Coalesce.
Create Your Workspace.
-
Select the Project you want to create the Workspace in.
-
Click Create Workspace.
-
Workspace Details
-
Give your Workspace a Name and Description(optional).
-
Click Next.
-
Connect Databricks to this Workspace
-
Enter your Databricks Account URL.
-
Click Next.
-
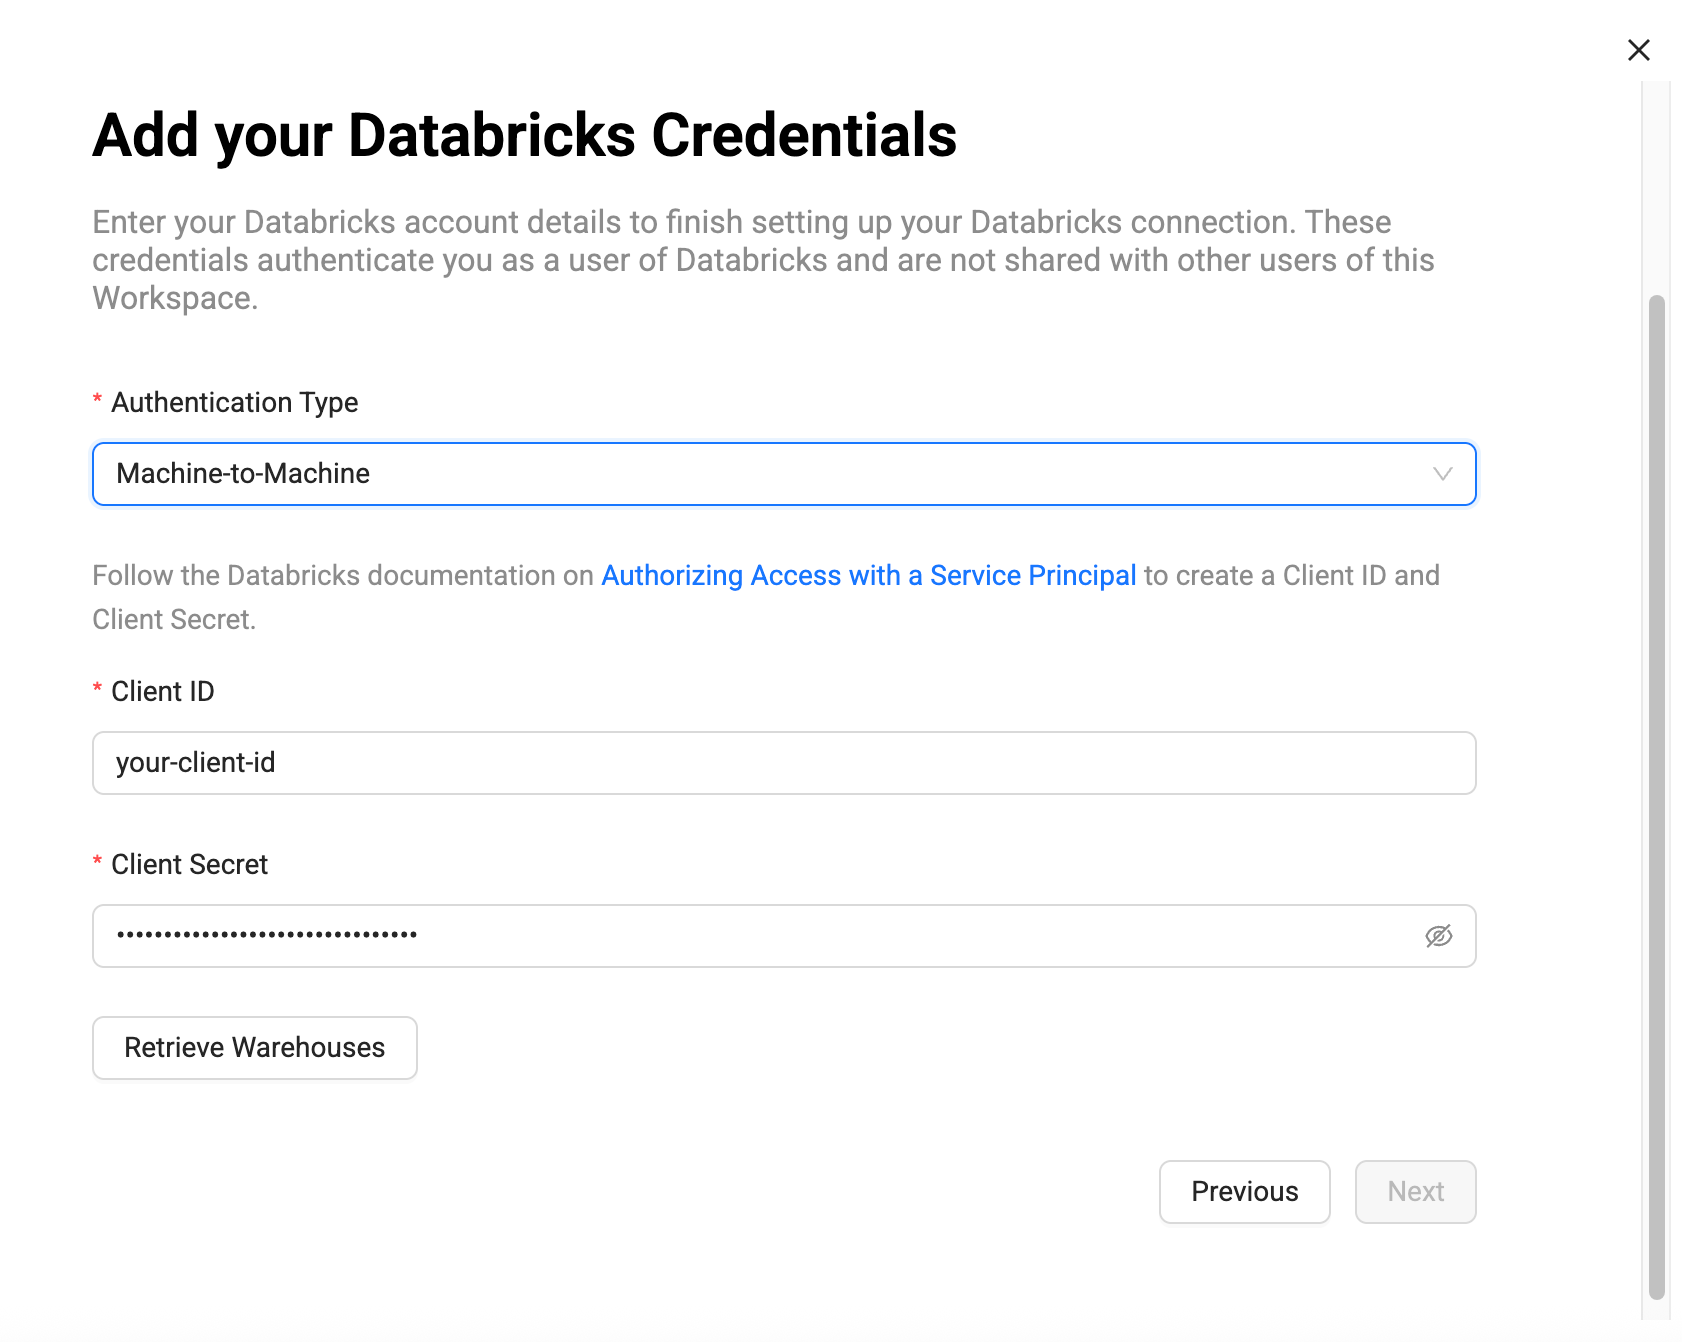
Add your Databricks Credentials.
-
Change the Authentication Type to Machine-to-Machine.
-
Enter the Client ID and Client Secret, then click Retrieve Warehouses. Select the one you want to use.
-
Click Next.
-
Set Up Version Control
-
Workspaces let you work on a branch. This is the version control repo you created in Setup Version Control and added to your Project. You will need to select a branch and commit to make a new branch. For example, if you want to create a branch off main, select main, then select the commit in main to create your branch from.
-
Then give the new branch a name.
-
Click Next.
-
Storage Location and Storage Mappings
-
Add Storage Locations and Storage Mappings to your Workspace. If you have any existing Storage Locations and Storage Mappings from your repo, they will be listed here. You can delete the defaults and add new Storage Locations.
-
Click Create Workspace.
User-to-Machine is used for your daily work access. If you want to set up any automation, use Machine-to-Machine. You will need to create a App Connection and get the client ID and client secret along with the URL and path.
-
Go to the Account console. If you don't have access, you'll need to reach out to your Databricks administrator.
-
Then go to Settings > App Connections and click Add connection.
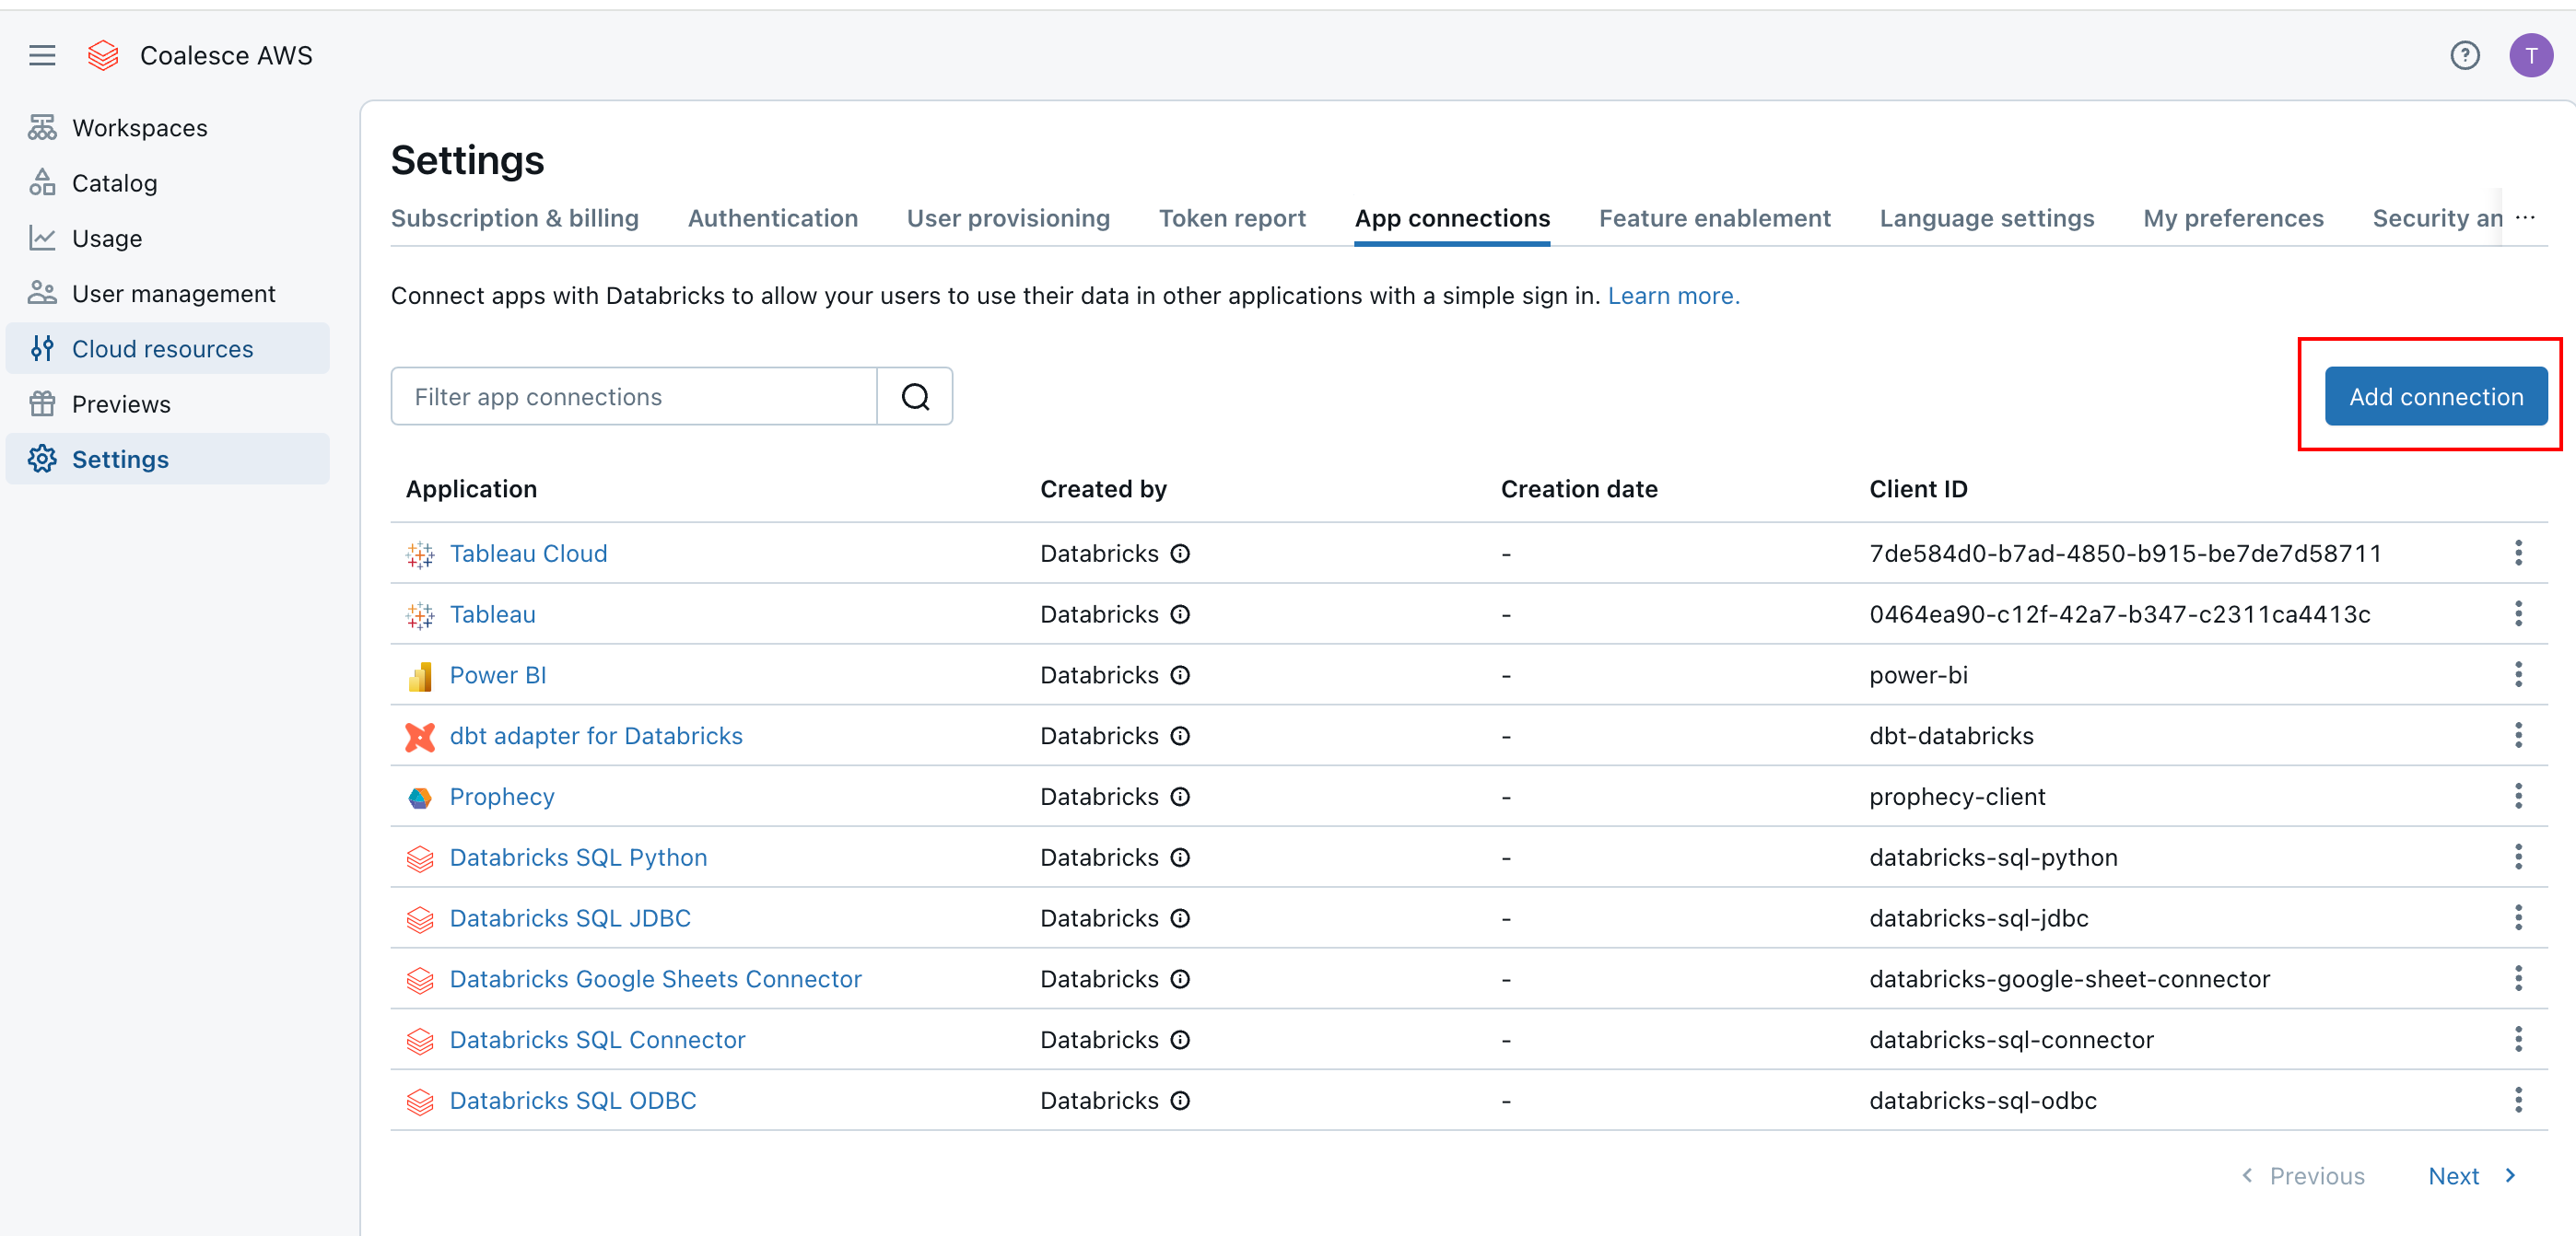
Databricks - Settings > App connections -
Give the app a Name:
-
Redirect URL is your Coalesce account URL at
oauthredirect. This is usually the URL you use to log into Coalesce. For example,https://<COALESCE_APP_DOMAIN>/oauthredirect,https://app.coalesce.io/oauthredirect.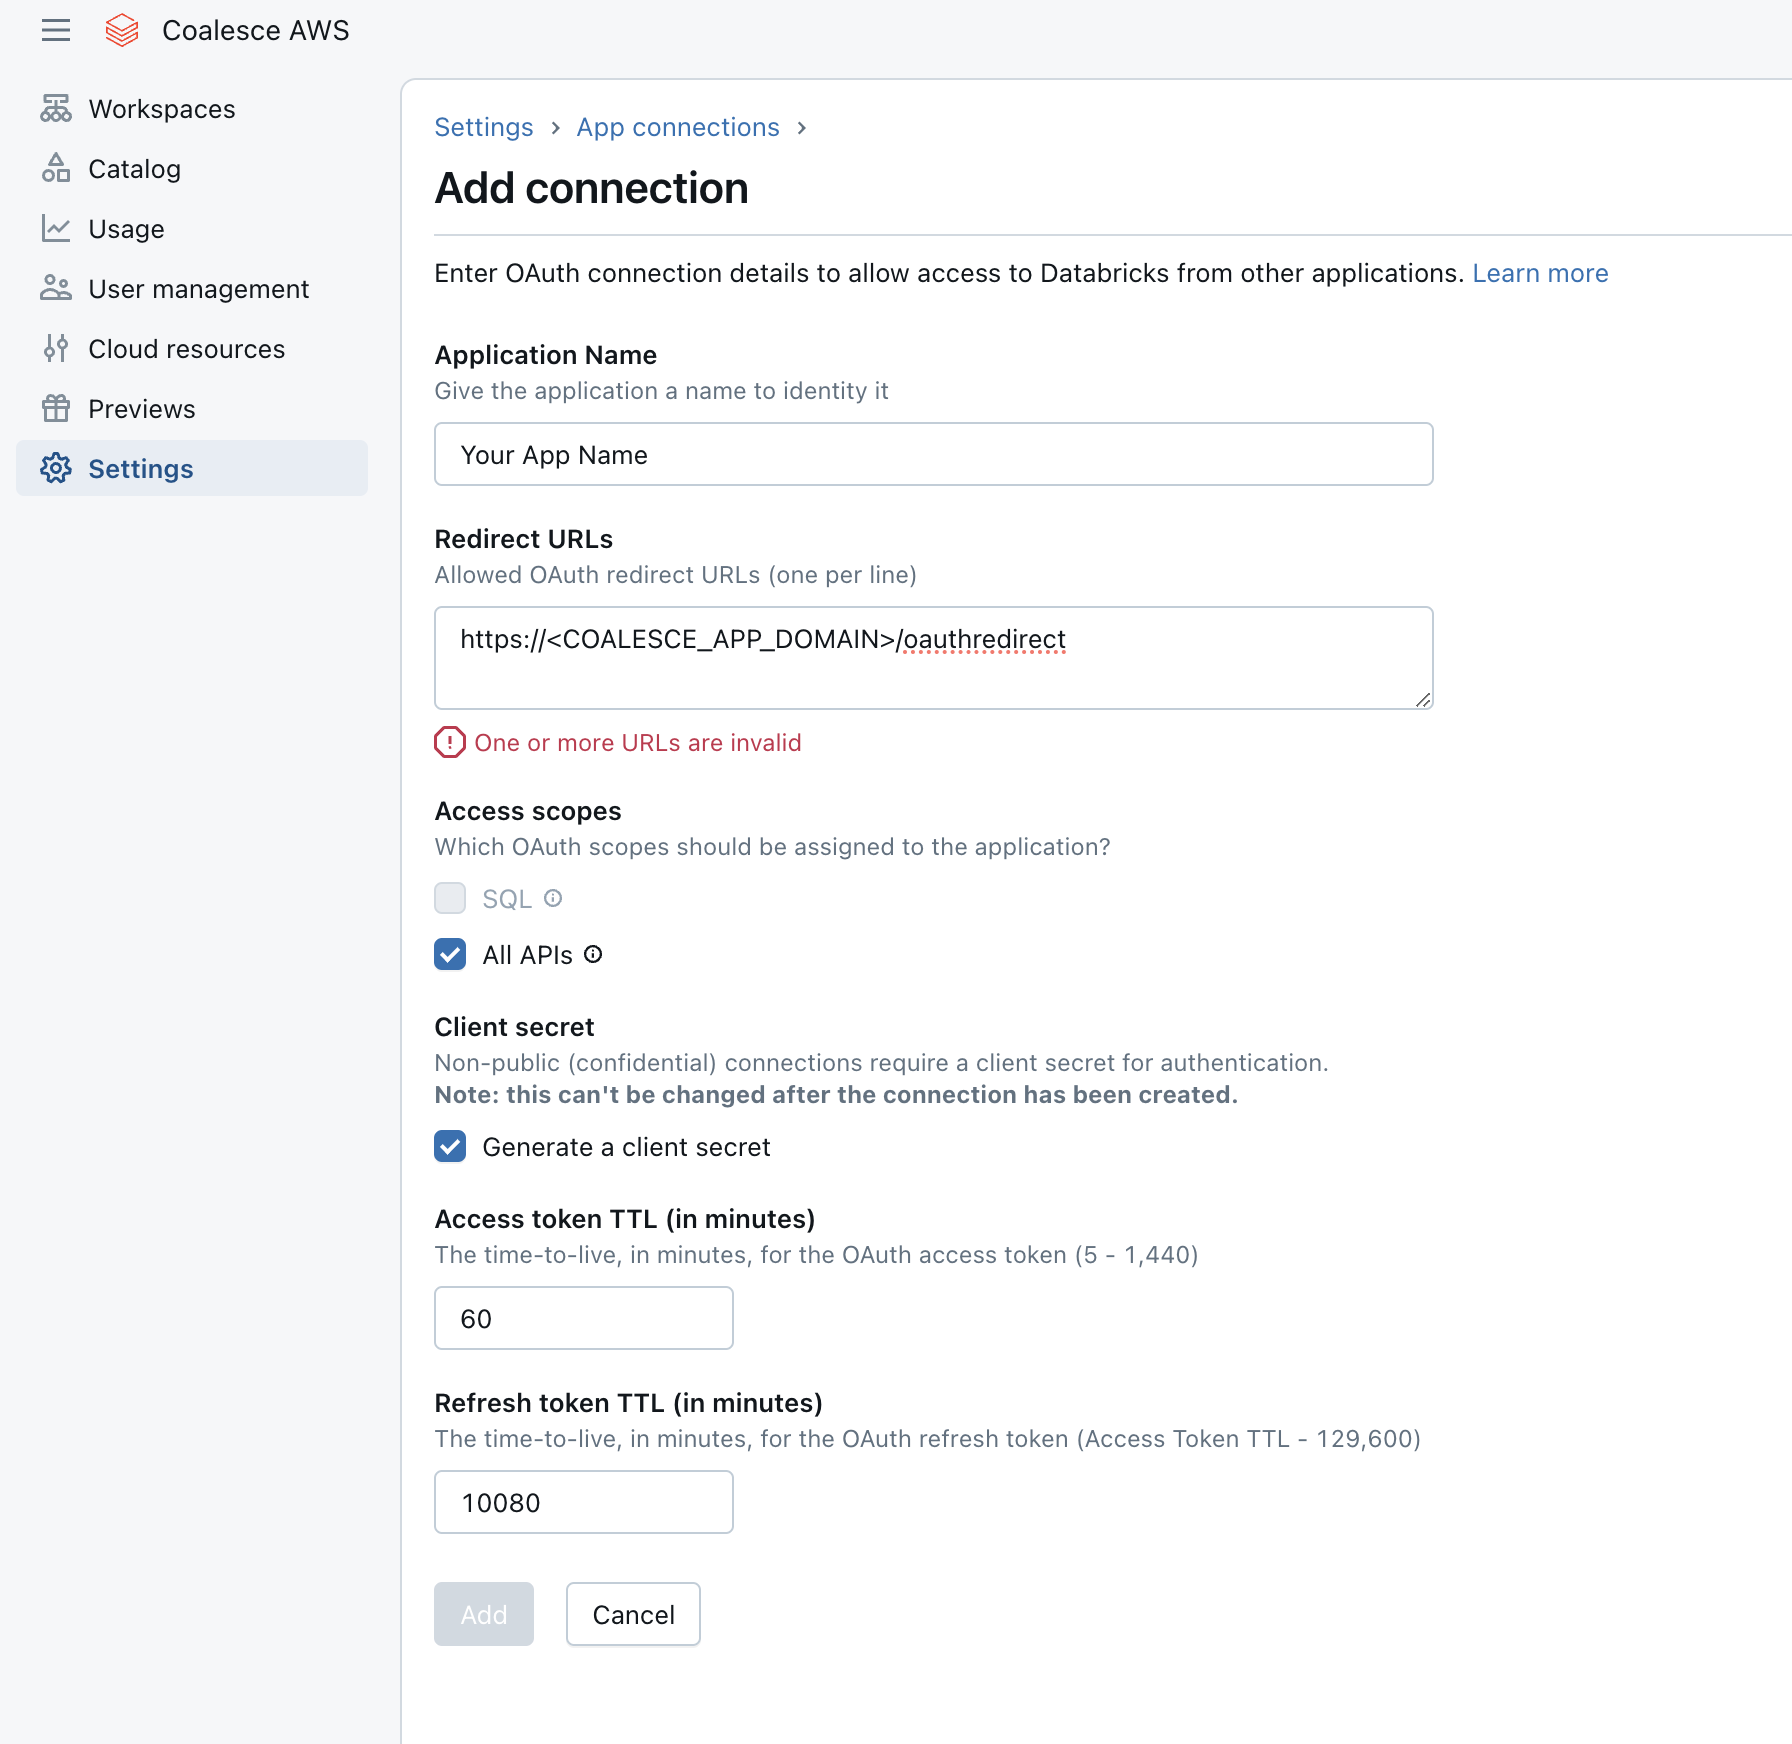
Databricks - Add Connection -
Change the Access Scopes to All APIs.
-
Generate client secret is checked.
-
You can leave TTL as the default or change it.
-
-
Click Add.
-
A Client ID and Client Secret will pop-up. Save them for later.
Create Your Workspace.
-
Select the Project you want to create the Workspace in.
-
Click Create Workspace.
-
Workspace Details
-
Give your Workspace a Name and Description(optional).
-
Click Next.
-
Connect Databricks to this Workspace
-
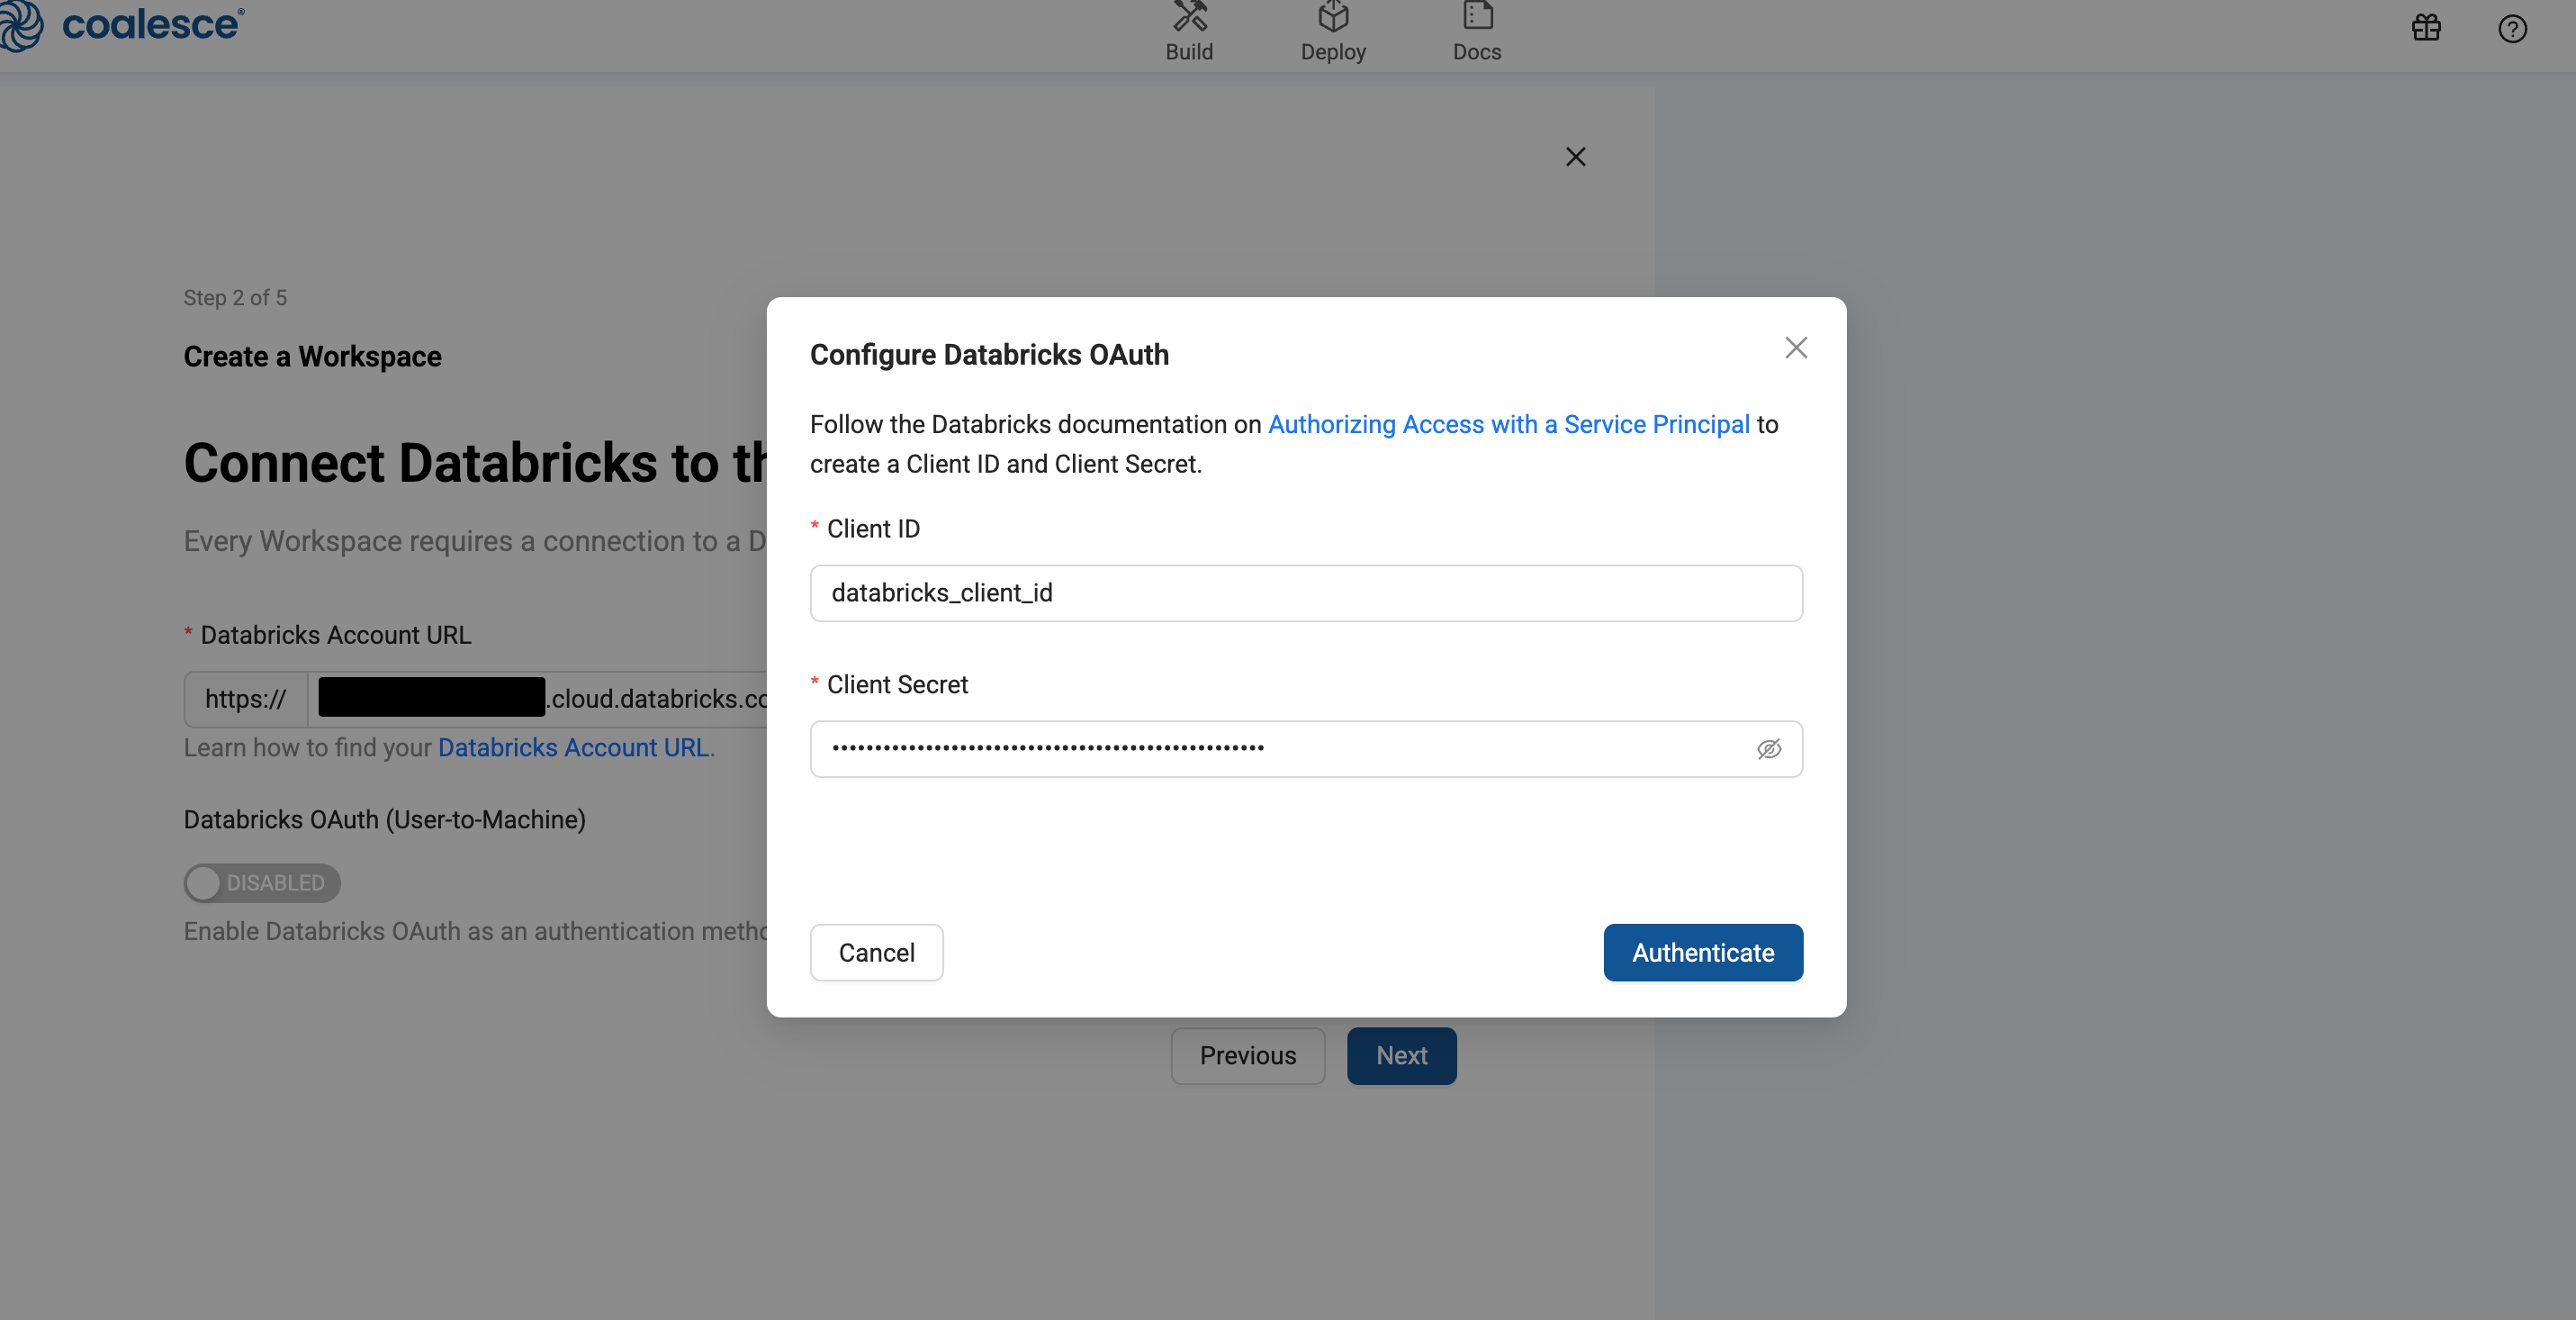
Enter your Databricks Account URL.
-
Toggle Databricks OAuth (User-to-Machine) on. This will open a window where you can enter the Client ID and Secret.
-
Coalesce will verify the connect and then you can click Next to move to the next step.
-
Add your Databricks Credentials
-
Select the SQL Warehouse you want to use, then click Next.

-
Set Up Version Control
-
Workspaces let you work on a branch. This is the version control repo you created in Setup Version Control and added to your Project. You will need to select a branch and commit to make a new branch. For example, if you want to create a branch off main, select main, then select the commit in main to create your branch from.
-
Then give the new branch a name.
-
Click Next.
-
Storage Location and Storage Mappings
-
Add Storage Locations and Storage Mappings to your Workspace. If you have any existing Storage Locations and Storage Mappings from your repo, they will be listed here. You can delete the defaults and add new Storage Locations.
-
Click Create Workspace.
Before you begin, you'll need your Snowflake account URL.
- Follow the instructions in Snowflake for Finding the organization and account name for an account.
- On the Account Details screen, copy the Account/Server URL. You'll need the first part. For example, if your URL is
ABC123-1234567.snowflakecomputing.com, you'll needABC123-1234567.
- OAuth
- Key Pair Authentication
- Username and Password (Not recommended)
Only a Snowflake ACCOUNTADMIN role or a role with the global CREATE INTEGRATION privilege can create security integrations.
-
Select the Project you want to create the Workspace in.
-
Click Create Workspace.
-
Workspace Details
-
Give your Workspace a Name and Description(optional).
-
Connect Snowflake to this Workspace
-
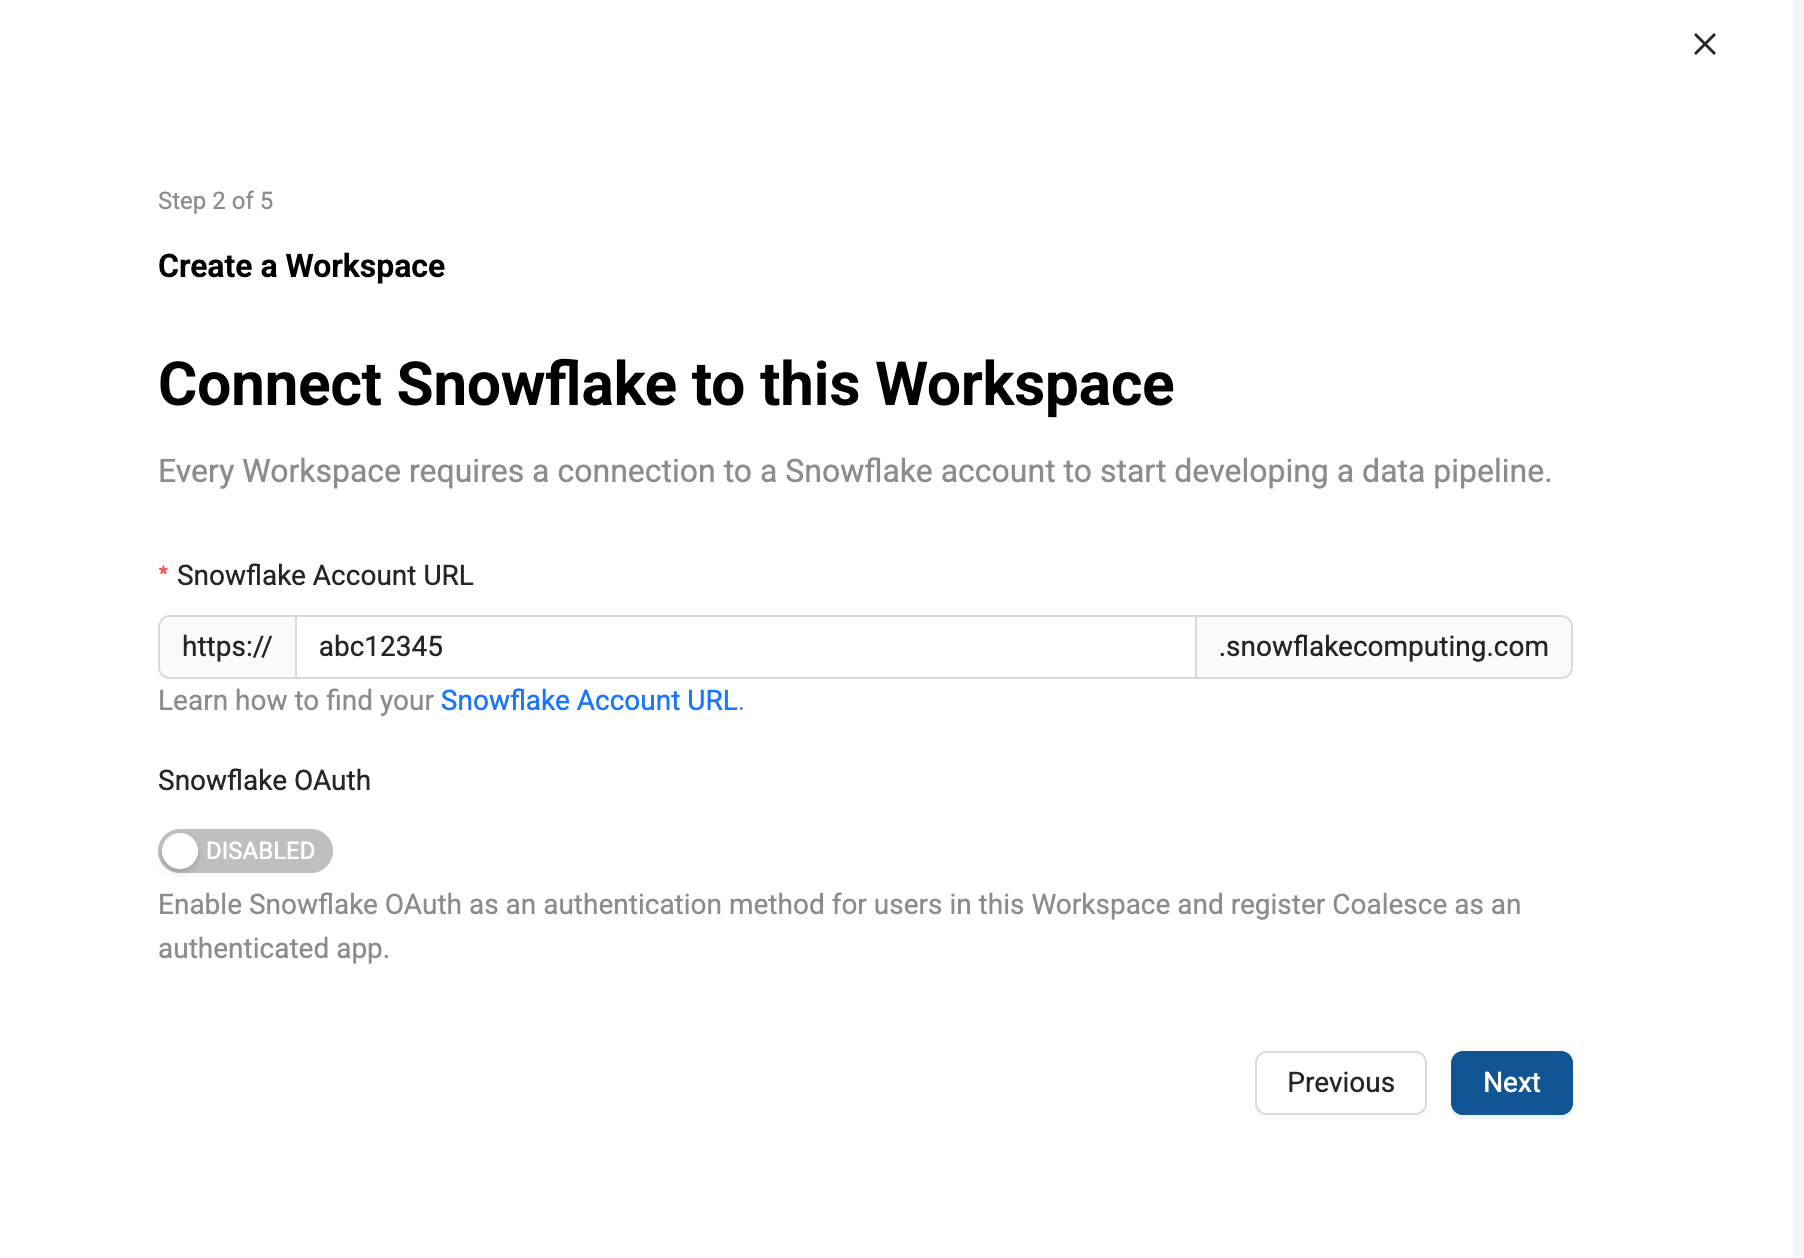
Enter your Snowflake Account URL.
-
Then enable Snowflake OAuth.
-
A popup will include the code needed to create the Client ID and Client Secret. First run
Create Security Integration, then runFetch ClientID and ClientSecret.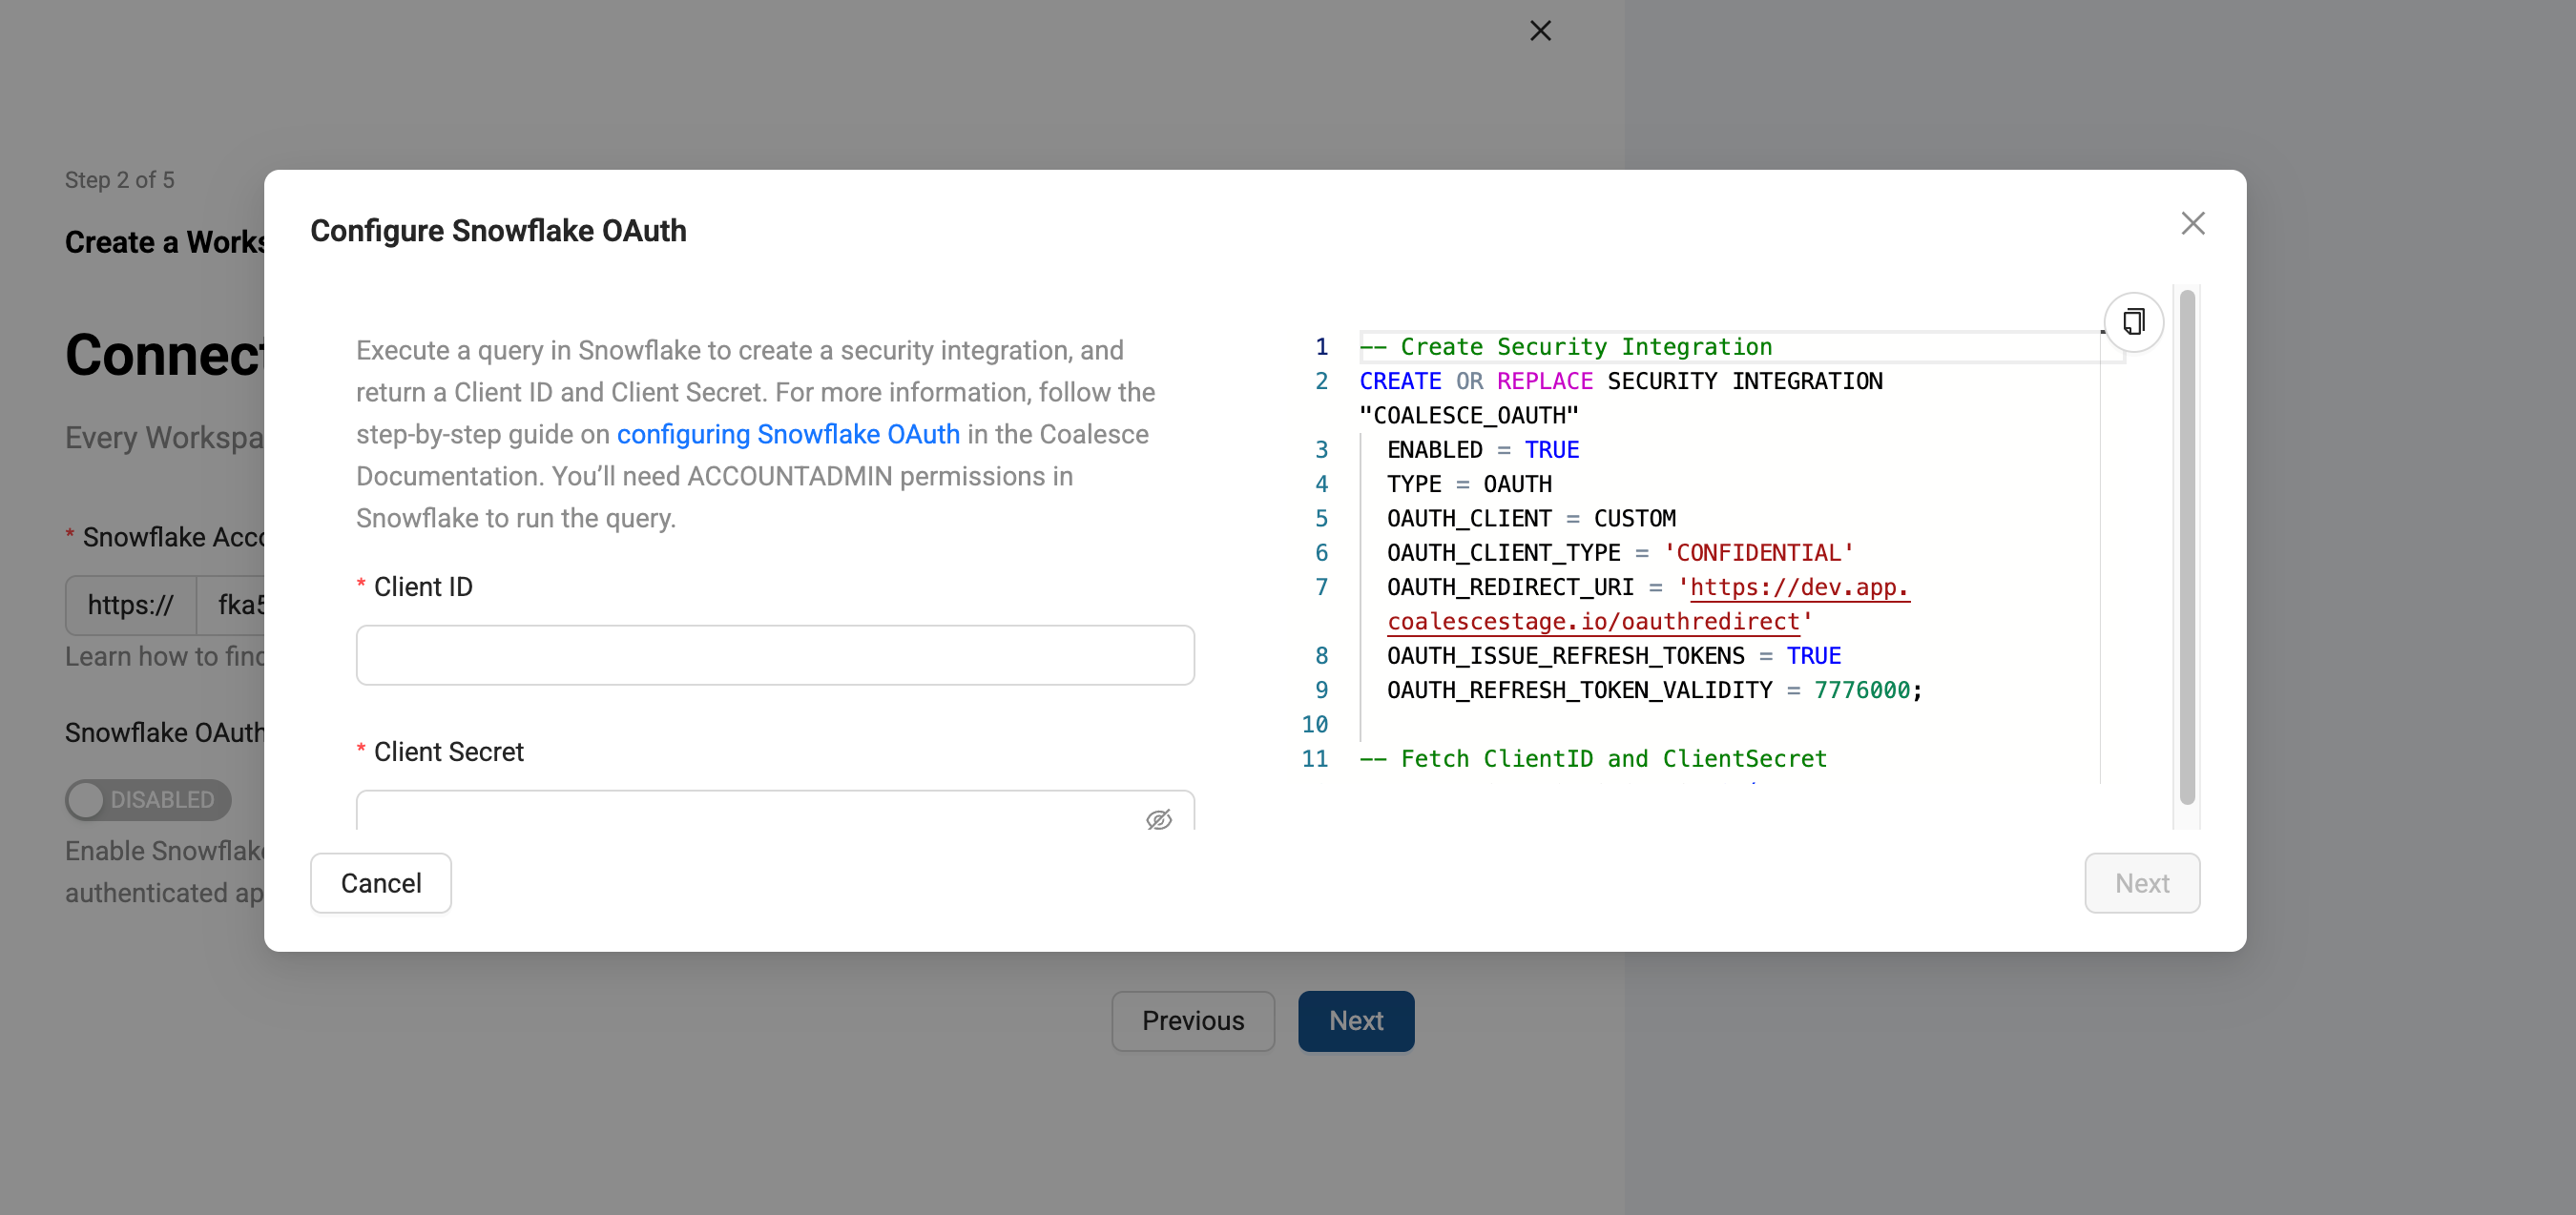
The OAUTH_REDIRECT_URI will match your Coalesce app domain. -
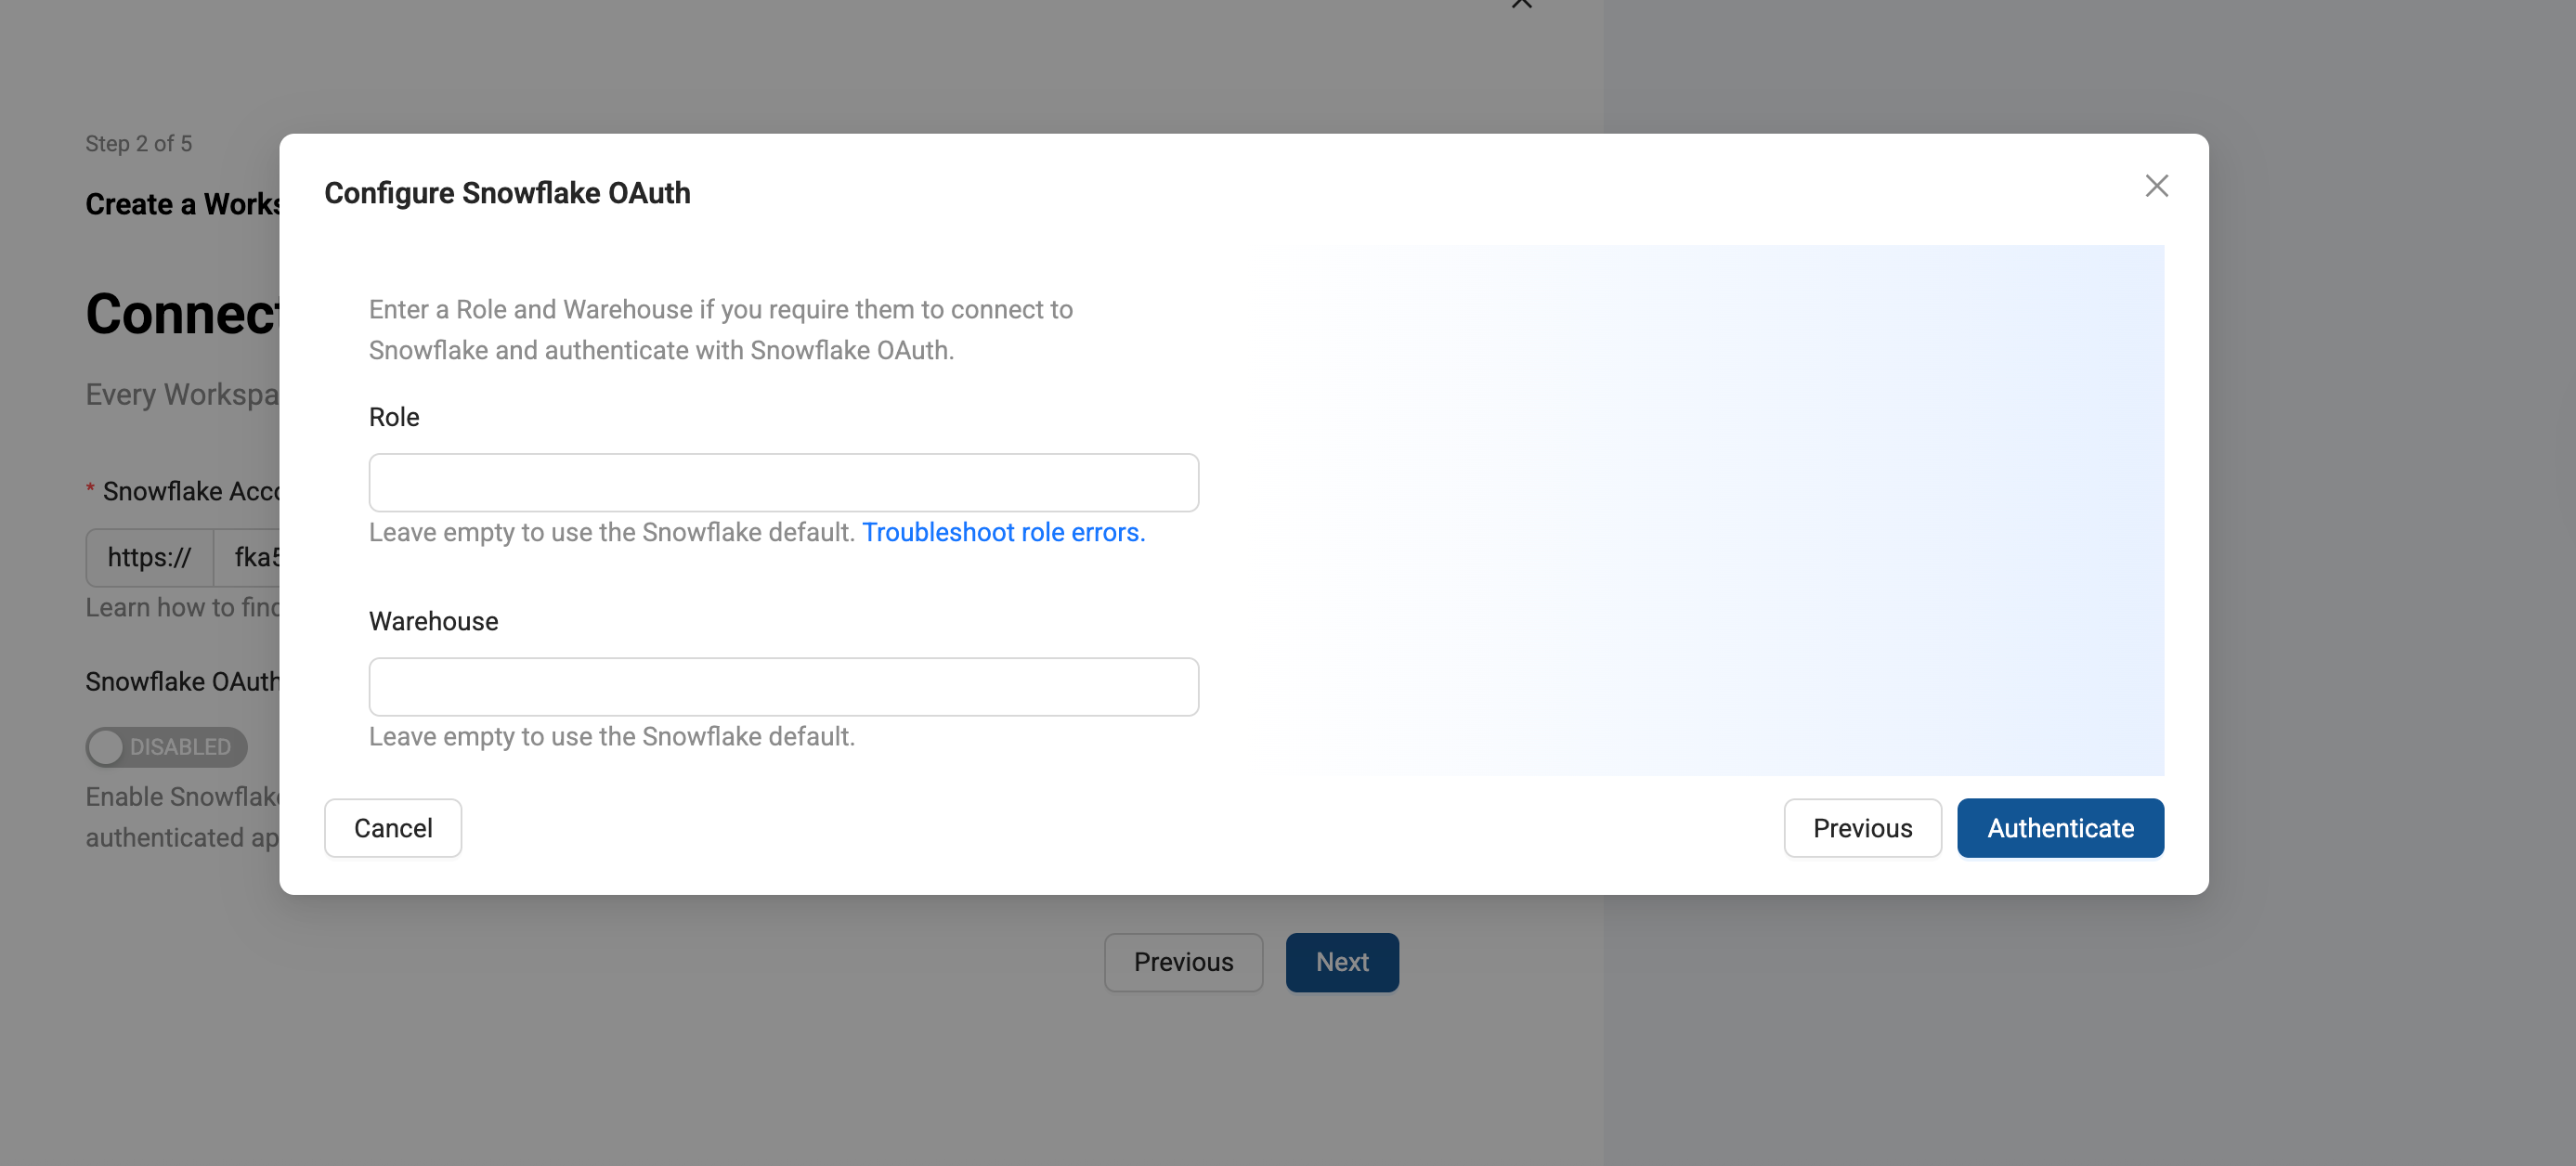
The next screen will ask you to enter your Role (
SYSADMIN) and Warehouse if they are required. Click Authenticate. -
You'll be asked to sign in to your Snowflake instance.
-
Coalesce will confirm the connection, then click Next.
-
Set Up Version Control
-
Workspaces let you work on a branch. This is the version control repo you created in Setup Version Control and added to your Project. You will need to select a branch and commit to make a new branch. For example, if you want to create a branch off main, select main, then select the commit in main to create your branch from.
-
Then give the new branch a name.
-
Click Next.
-
Storage Location and Storage Mappings
-
Add Storage Locations and Storage Mappings to your Workspace. If you have any existing Storage Locations and Storage Mappings from your repo, they will be listed here. You can delete the defaults and add new Storage Locations.
-
Click Create Workspace.
-
Select the Project you want to create the Workspace in.
-
Click Create Workspace.
-
Workspace Details
-
Give your Workspace a Name and Description(optional).
-
Connect Snowflake to this Workspace
-
Enter your Snowflake Account URL.
-
Click Next.
-
Add your Snowflake Credentials
-
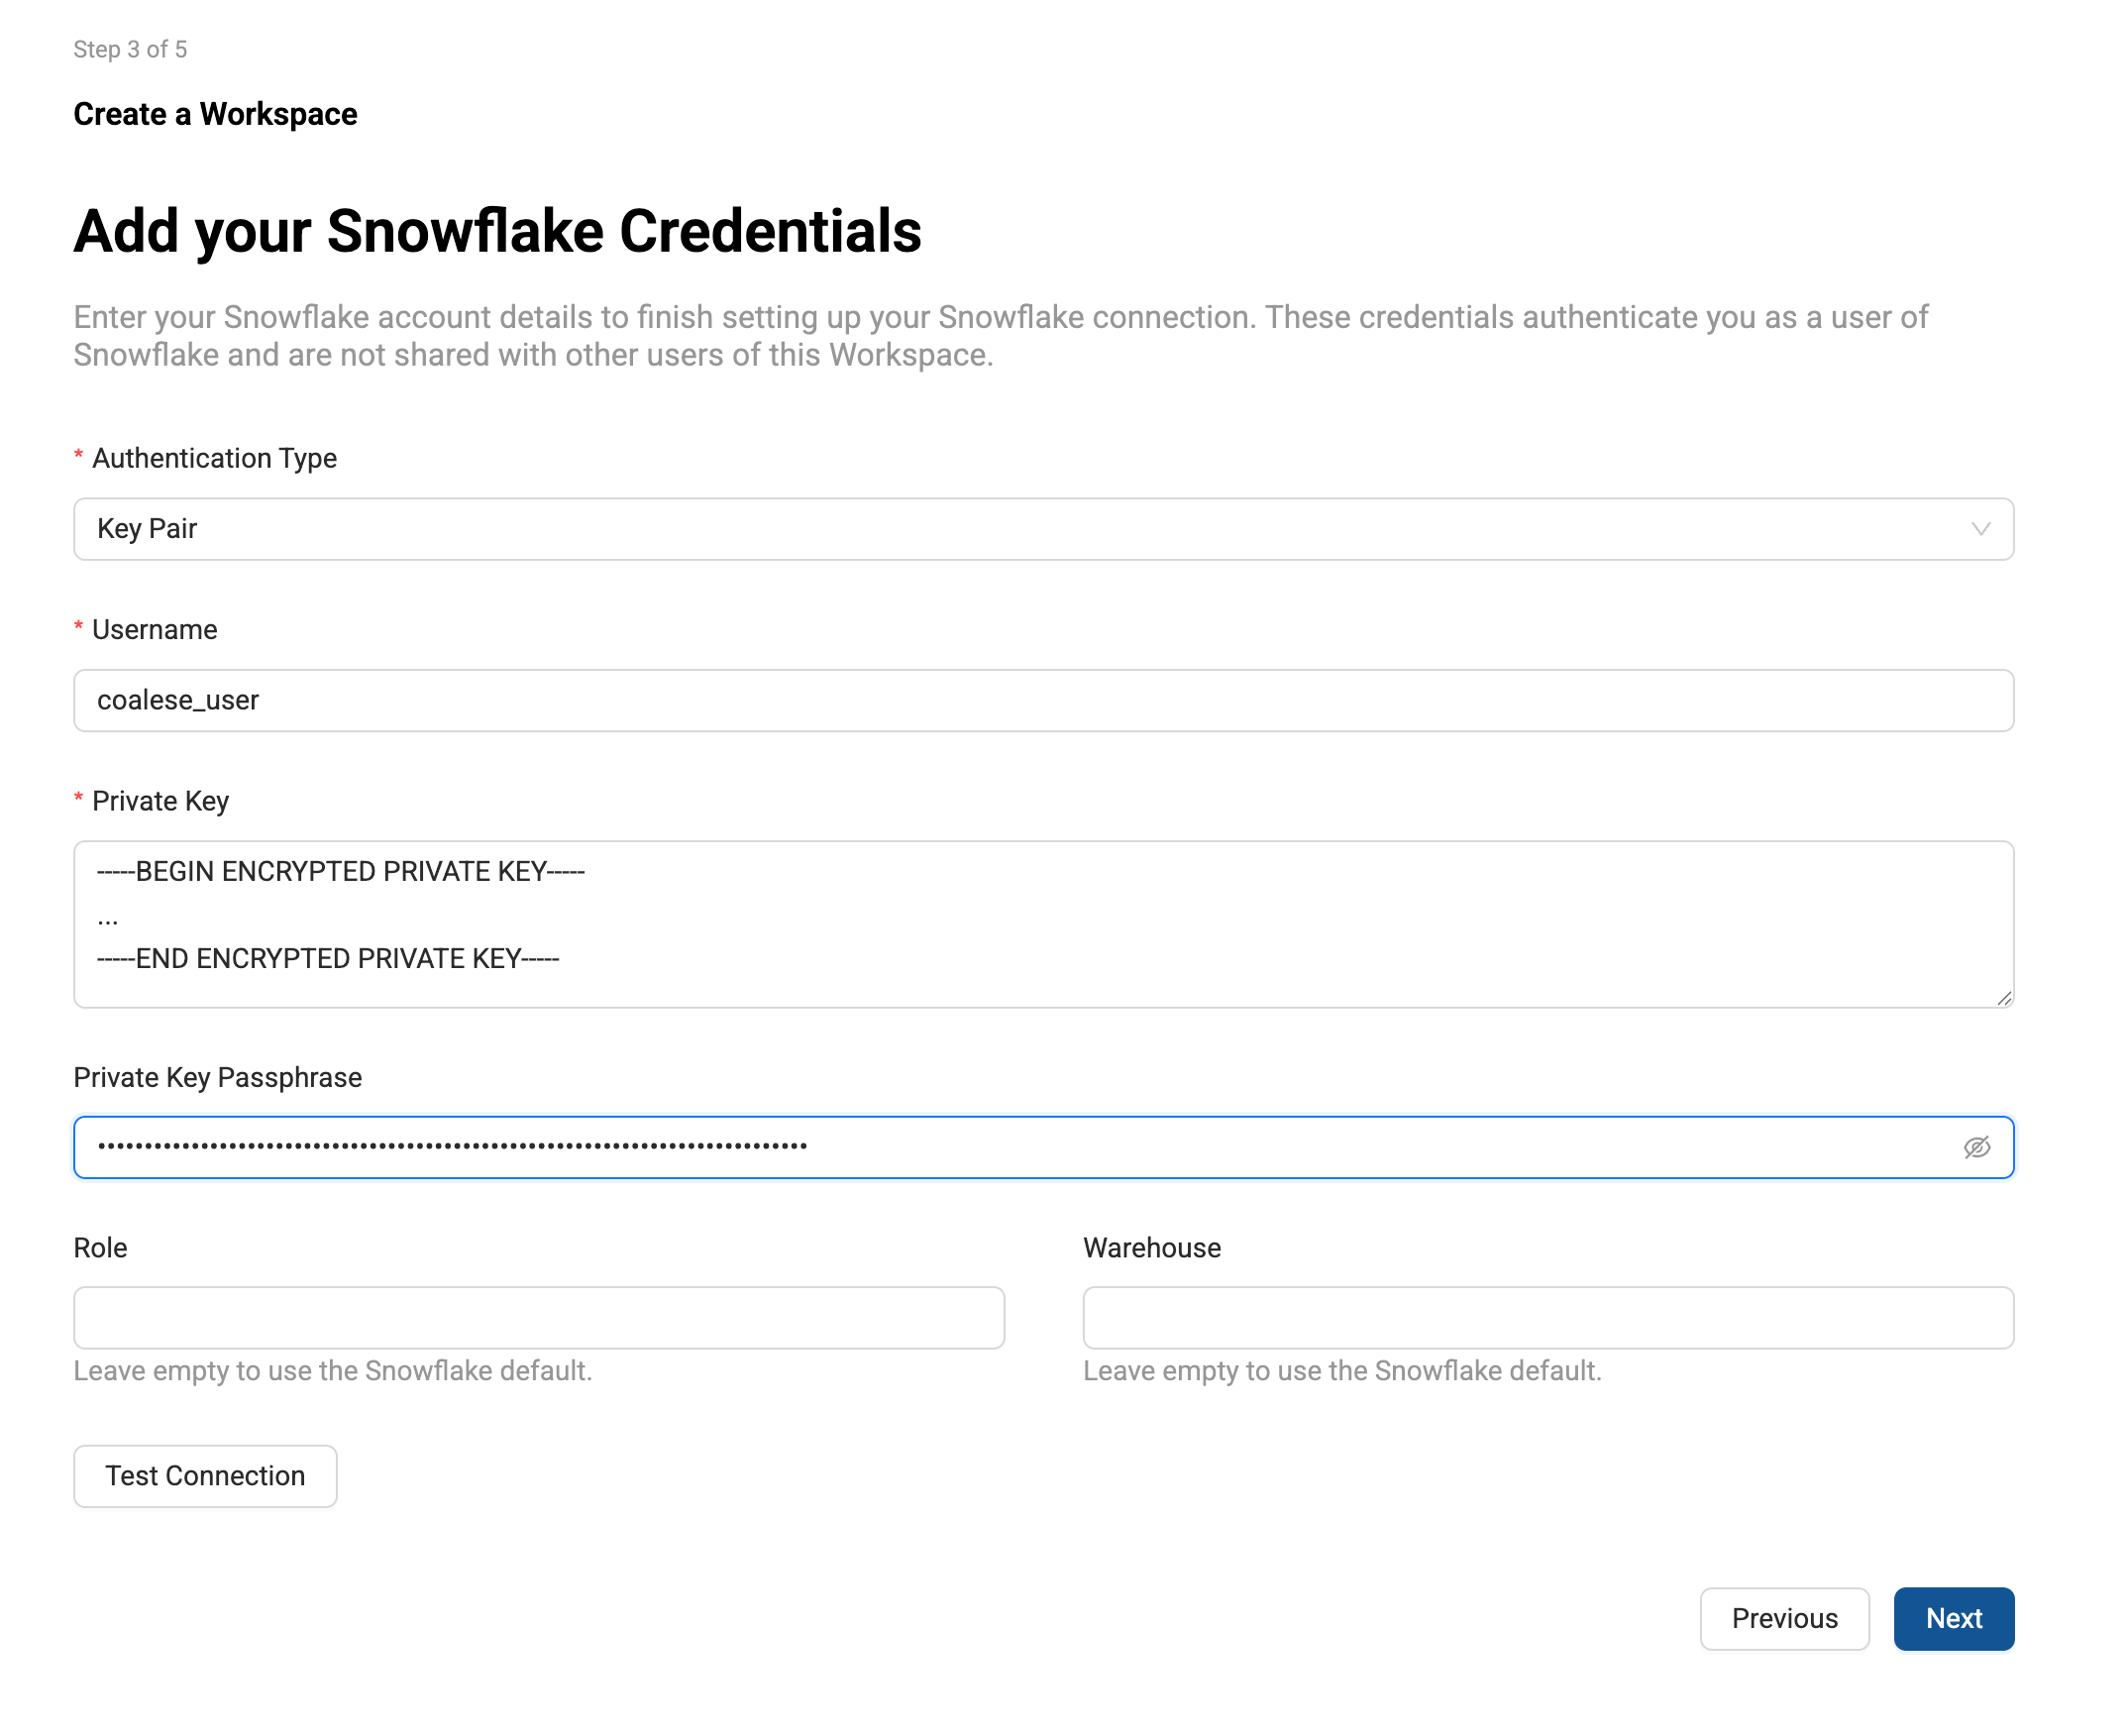
Choose Key Pair as the Authentication Type.
- Go through Snowflake’s key pair authentication steps to generate your keys.
- Make sure to generate a private key and save it for use in Coalesce.
- Generate your public key using the private key created for Coalesce.
- Assign the public key to your Snowflake user.
-
Add your Private Key and Private Key Passphrase.
-
Click Test Connection.
Adding Your Private KeyWhen entering your private key, make sure it's formatted properly. It must include the full private key including the lines BEGIN ENCRYPTED PRIVATE KEY and END ENCRYPTED PRIVATE KEY.
-----BEGIN ENCRYPTED PRIVATE KEY-----...-----END ENCRYPTED PRIVATE KEY----- -
After authentication is successful, click Next.
-
Set Up Version Control
-
Workspaces let you work on a branch. This is the version control repo you created in Setup Version Control and added to your Project. You will need to select a branch and commit to make a new branch. For example, if you want to create a branch off main, select main, then select the commit in main to create your branch from.
-
Then give the new branch a name.
-
Click Next.
-
Storage Location and Storage Mappings
-
Add Storage Locations and Storage Mappings to your Workspace. If you have any existing Storage Locations and Storage Mappings from your repo, they will be listed here. You can delete the defaults and add new Storage Locations.
-
Click Create Workspace.
-
Select the Project you want to create the Workspace in.
-
Click Create Workspace.
-
Workspace Details
-
Give your Workspace a Name and Description(optional).
-
Connect Snowflake to this Workspace
-
Enter your Snowflake Account URL.
-
Click Next.
-
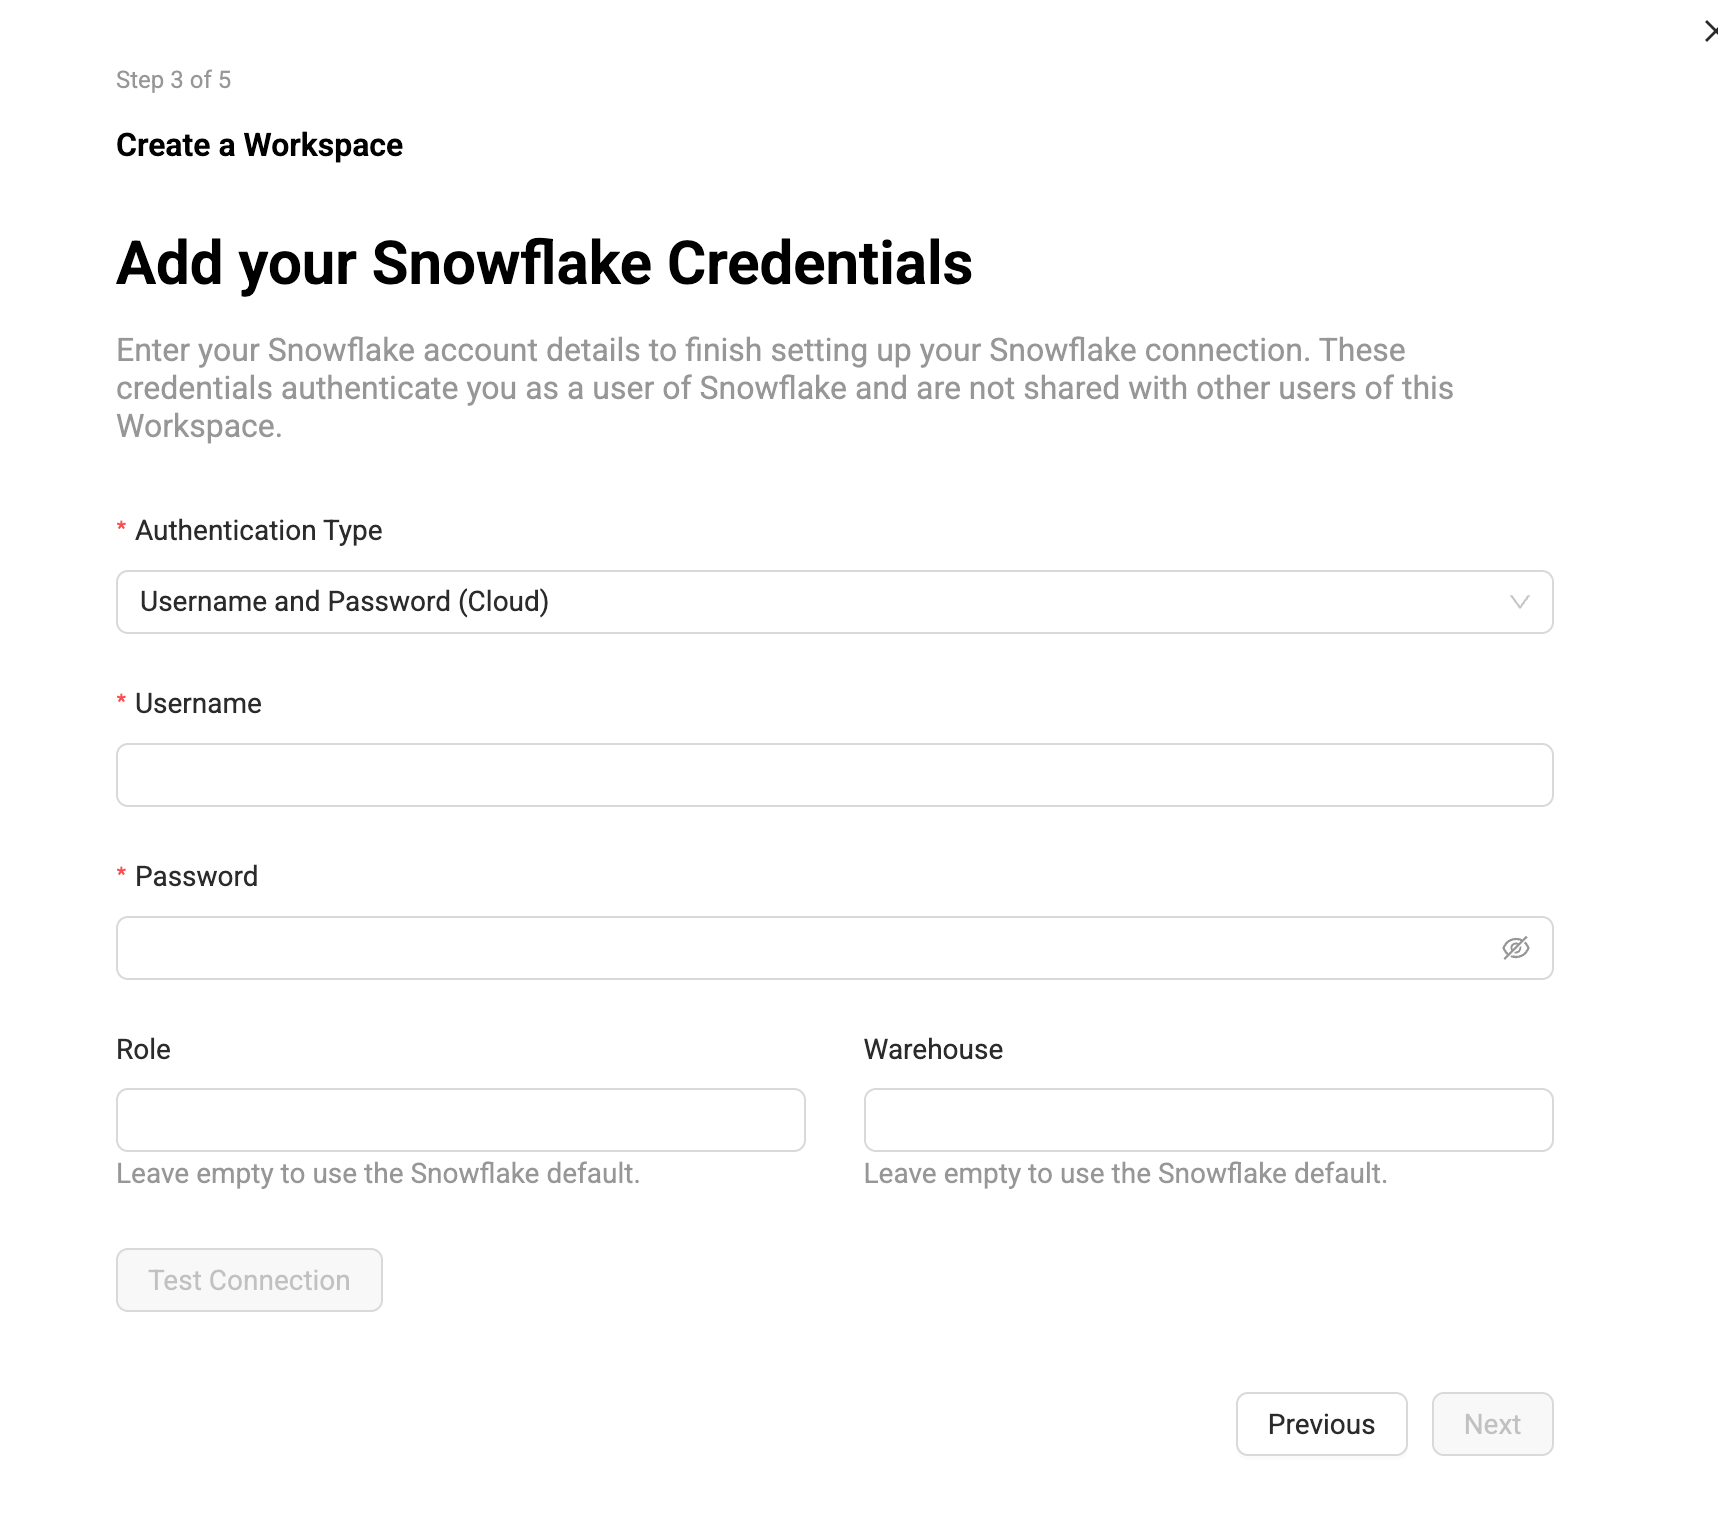
Add your Snowflake Credentials
-
Enter your Snowflake username and password.
-
Enter the Role and Warehouse.
-
After authentication is successful, click Next.
-
Set Up Version Control
-
Workspaces let you work on a branch. This is the version control repo you created in Setup Version Control and added to your Project. You will need to select a branch and commit to make a new branch. For example, if you want to create a branch off main, select main, then select the commit in main to create your branch from.
-
Then give the new branch a name.
-
Click Next.
-
Storage Location and Storage Mappings
-
Add Storage Locations and Storage Mappings to your Workspace. If you have any existing Storage Locations and Storage Mappings from your repo, they will be listed here. You can delete the defaults and add new Storage Locations.
-
Click Create Workspace.
What's Next?
Review the Coalesce Fundamentals to learn more about: