Documentation index: llms.txt. This page is also available as markdown: append .md to this URL or send Accept: text/markdown.
Step 7: Create Your Environments
This guide goes over configuring Environments for deploy and refresh. Environments let you push your changes to different locations such as production, testing, and QA.
Each Environment can have it's own Storage Location, Storage Mappings, and connection settings.
Environment Best Practices
Create Your Environment and Authenticate
-
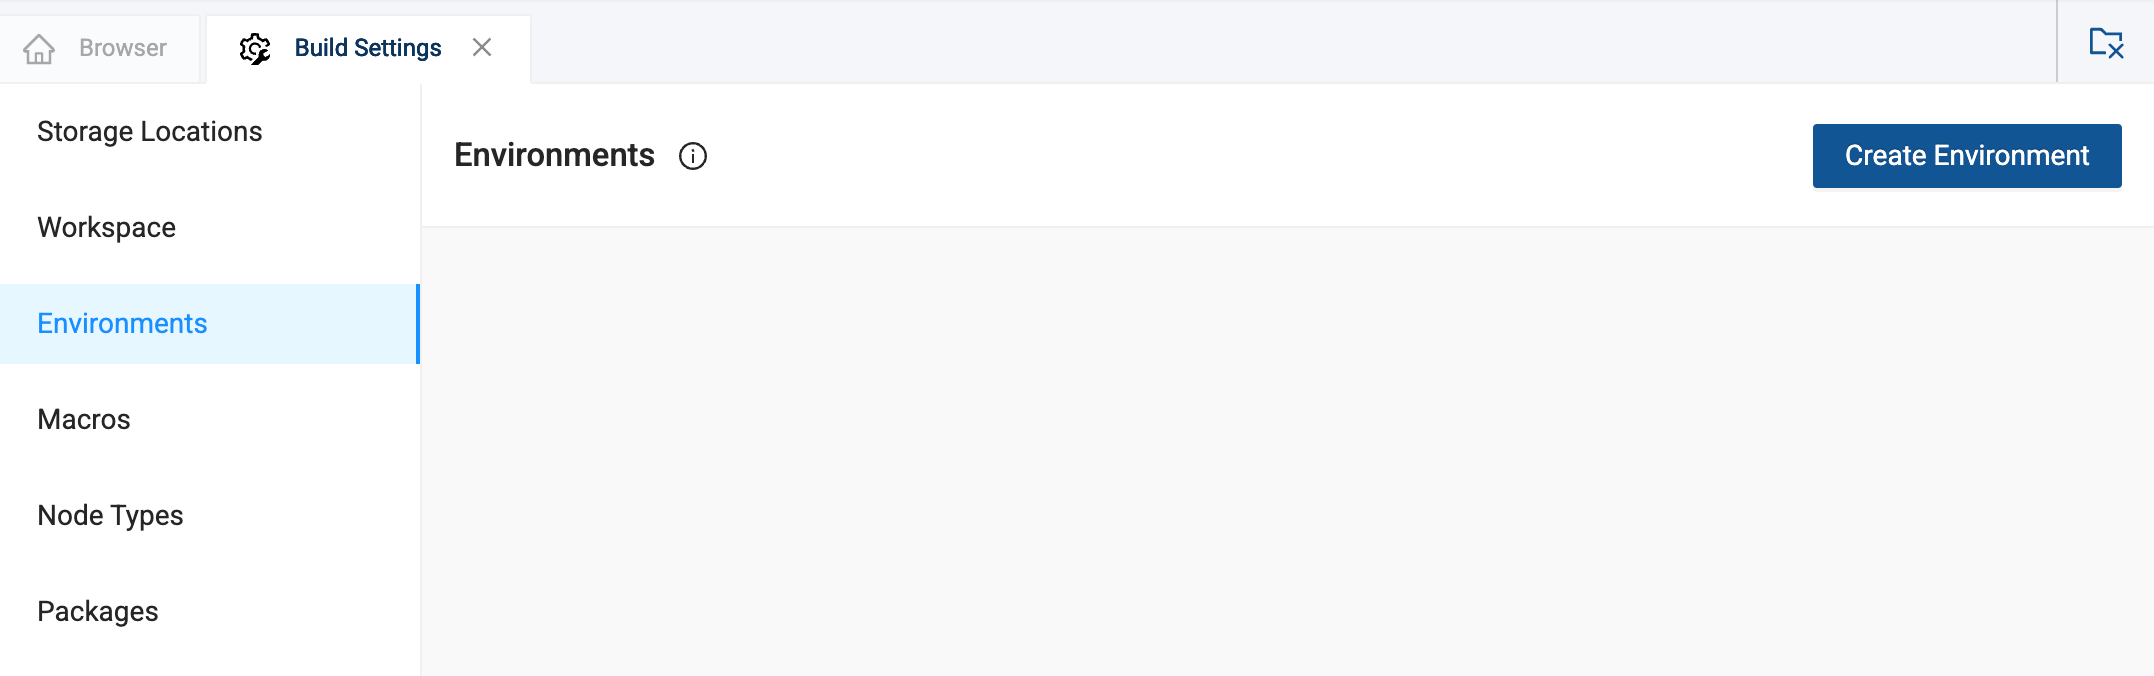
In your Workspace, go to Build Settings > Environments.
-
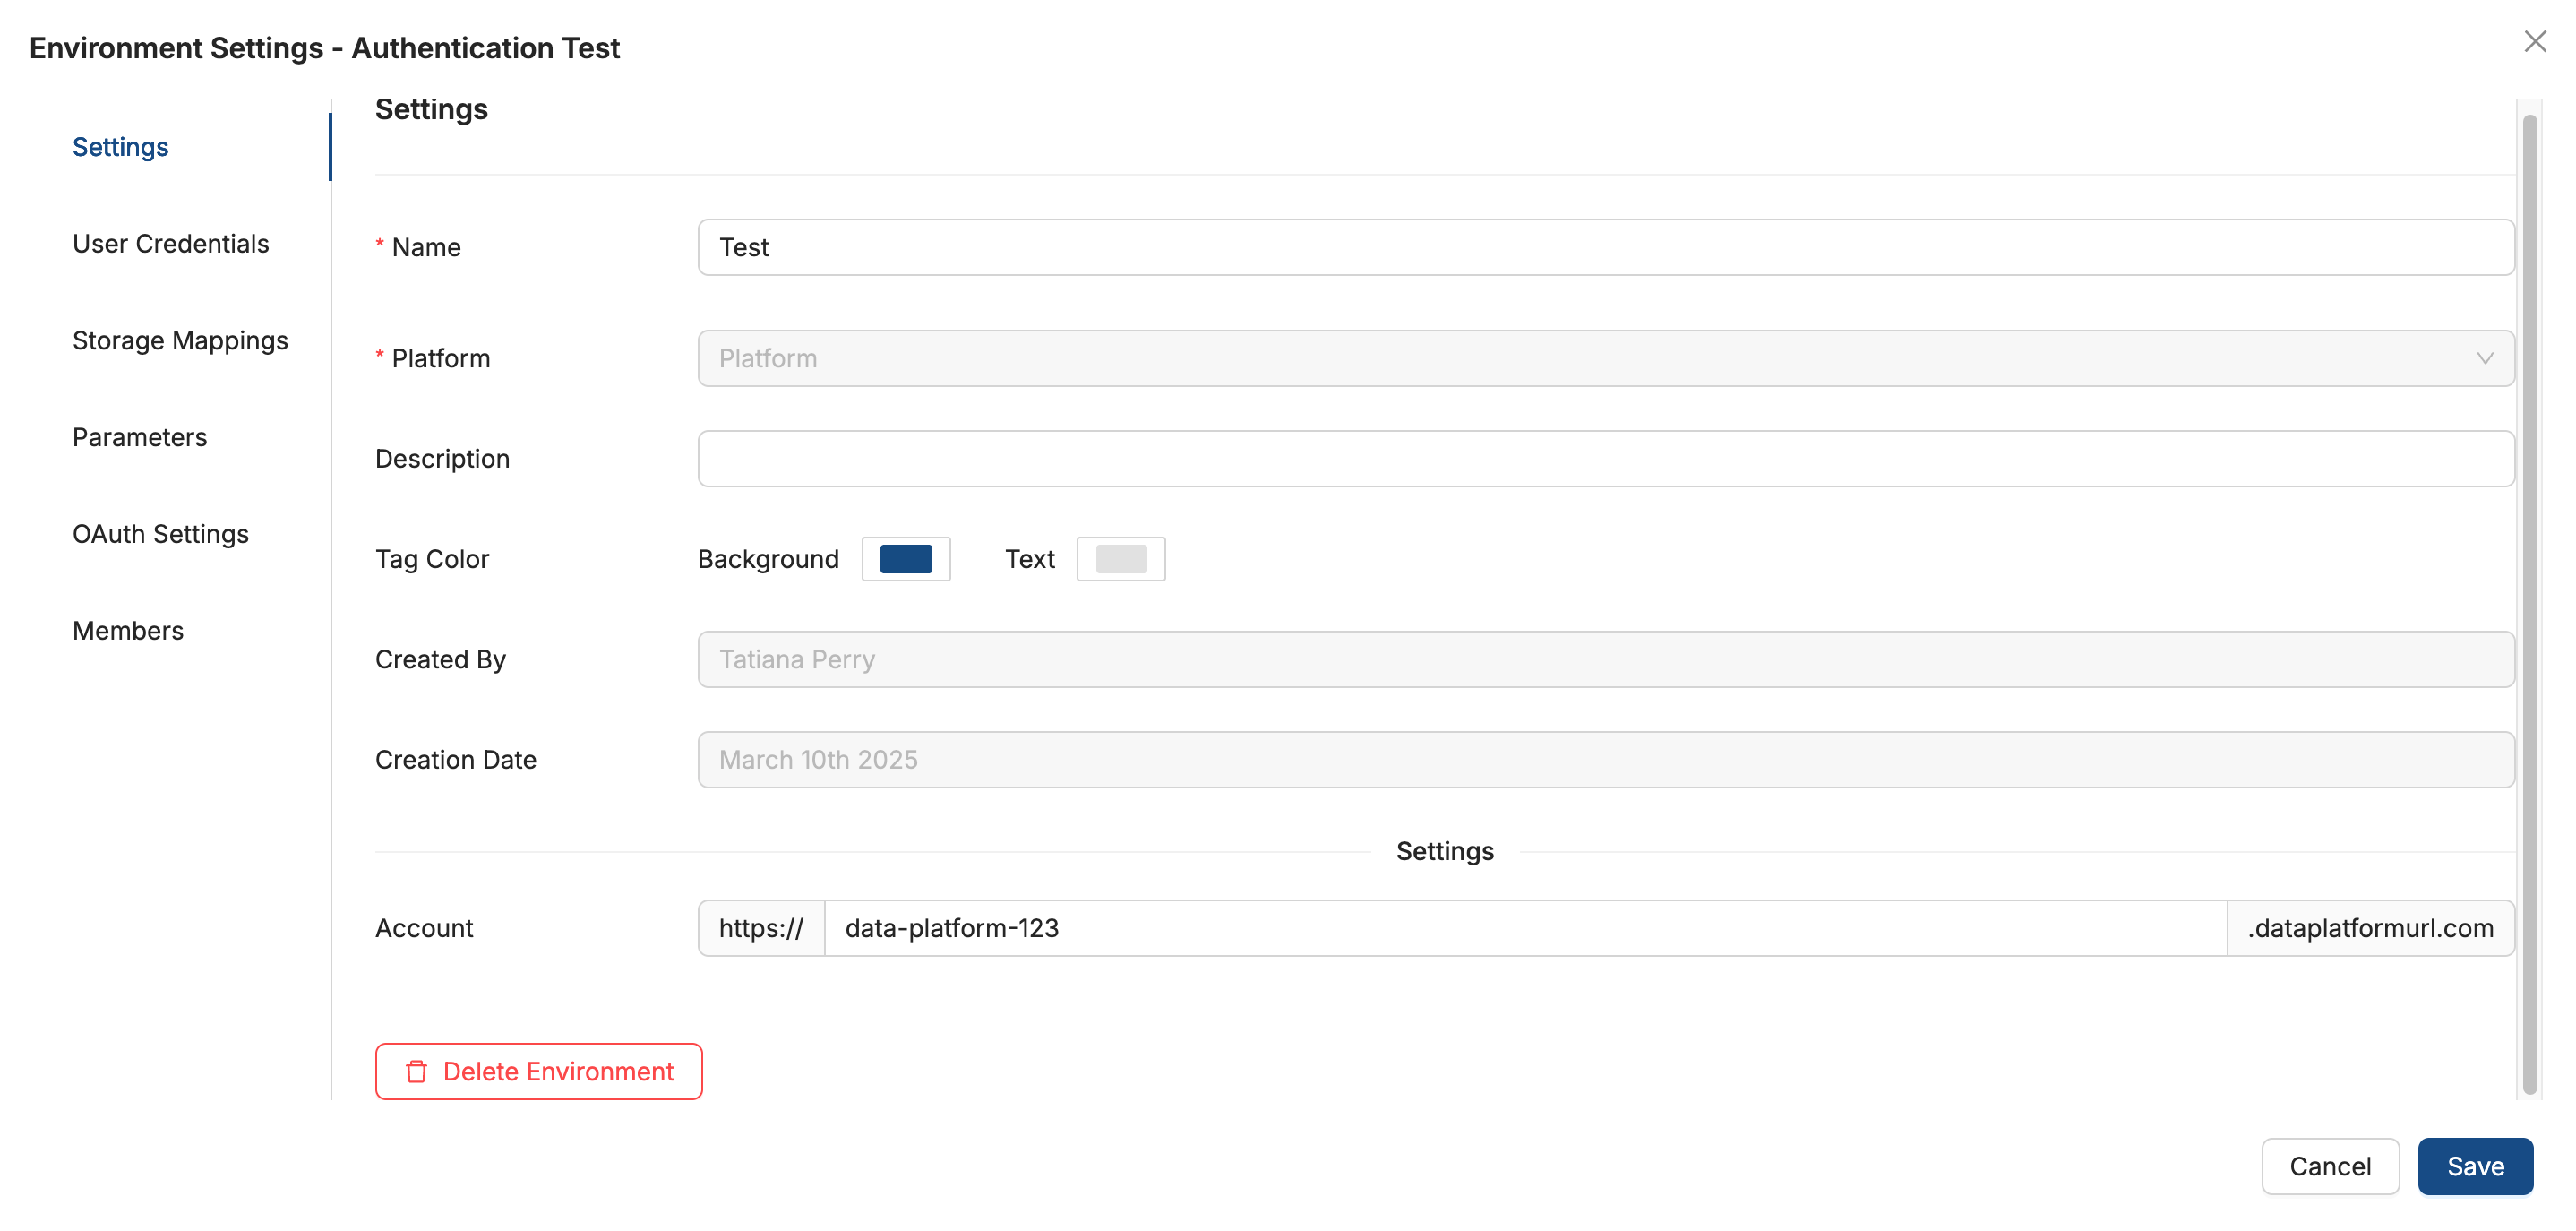
Give the Environment a descriptive name.
-
You'll need to authenticate your Environment, even if another Workspace or Environment has been authenticated.
- On the Setting page, enter your account URL.
-
Decide how you want to authenticate your Environment. You can use:
- Username and Password
- OAuth
- Key Pair Authentication
-
Review the authentication method for your data platform and choose the best method for you. For Snowflake non-development Environments, follow Setting Up a Snowflake Service Account for Coalesce and configure key pair authentication.
-
Go to User Credentials and enter your credentials. The steps below use username and password as an example. For Snowflake QA, staging, and production Environments, enter the service account username and private key instead. Optionally enter the role and warehouse. Click Save.

Add Storage Mappings
The Storage Mapping is the database and schema in your data provider you want to deploy to.
- While in Environment Settings, go to Storage Mappings.
- Select the database and schema.

Override Mapping Values
To input database and schema objects manually, instead of choosing them from the dropdown menu, activate the Override Mapping Values option. This step may be necessary when mapping to a database or schema for which you lack access permissions.
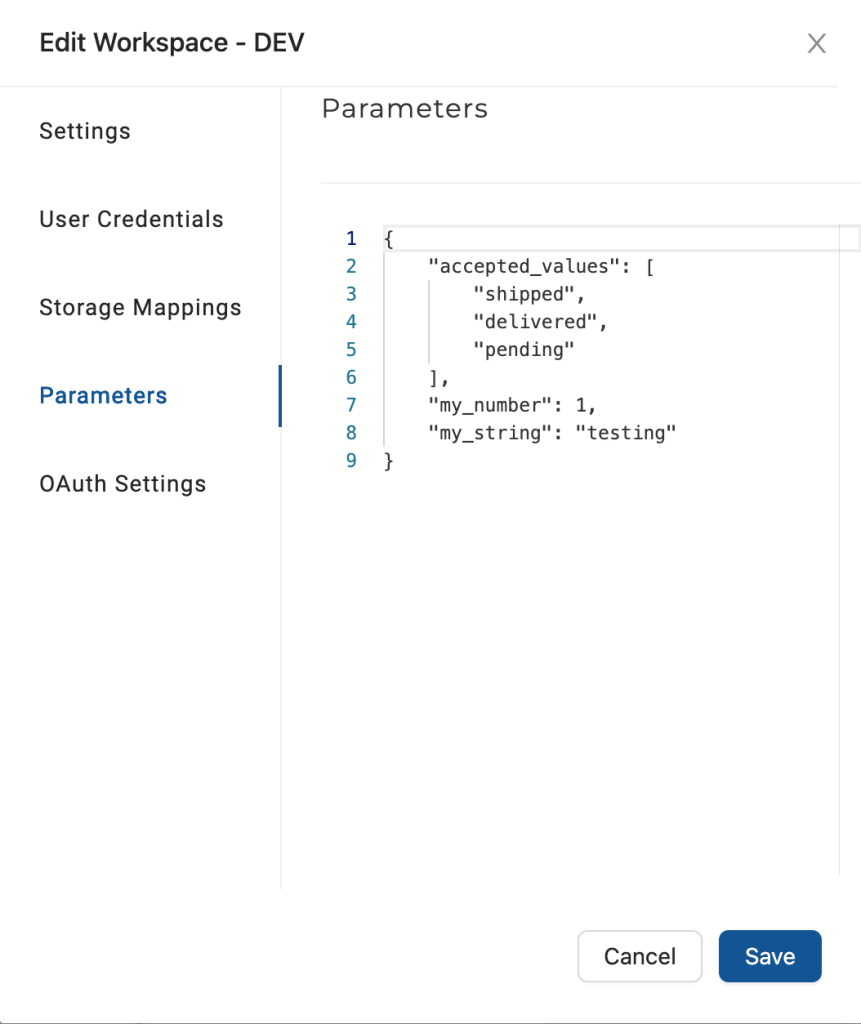
Parameters
Parameters act as read-only environment variables. Parameters are defined as a JSON blob set by the user that can be accessed in the metadata during template rendering.
- Click on Parameters and add your Parameters in JSON format.
- Make sure to click Save to save your new parameters.
What's Next?
Review the Coalesce Fundamentals to learn more about: