Documentation index: llms.txt. This page is also available as markdown: append .md to this URL or send Accept: text/markdown.
Refreshing Your Pipeline Using the Coalesce Scheduler
The Coalesce Scheduler gives you the ability to schedule data pipeline refreshes directly in the Coalesce app. You no longer need to use a third-party solution simplifying your IT dependency and allowing you to generate data insights faster.
Before You Begin
- You must have an Environment Admin role.
- The Environment must have credentials added. The Scheduler uses the credentials of the user that created or last modified the Scheduled Job.
- A Job must be deployed before it can be scheduled. The Coalesce Scheduler only runs deployed Jobs, not workspace-only changes that are not yet committed and deployed. Learn more about deploying your pipeline.
If you change credentials, including changing authentication type, you'll need to edit each Job to use the new method. If not, the Jobs will fail.
Subgraph Changes, Commits, and Scheduled Runs
When you adjust a subgraph and that change should affect what a Job refreshes, commit the Job (together with your other Project changes) to version control, then deploy to the environment. Scheduled runs use the deployed Job definition. Until you commit and deploy, the Coalesce Scheduler keeps running the last deployed version.
For how subgraphs relate to Jobs and selector queries, see Using Subgraphs to Build Your Pipeline. For the commit and deploy sequence, see Creating and Run Jobs.
How to Schedule a Job
-
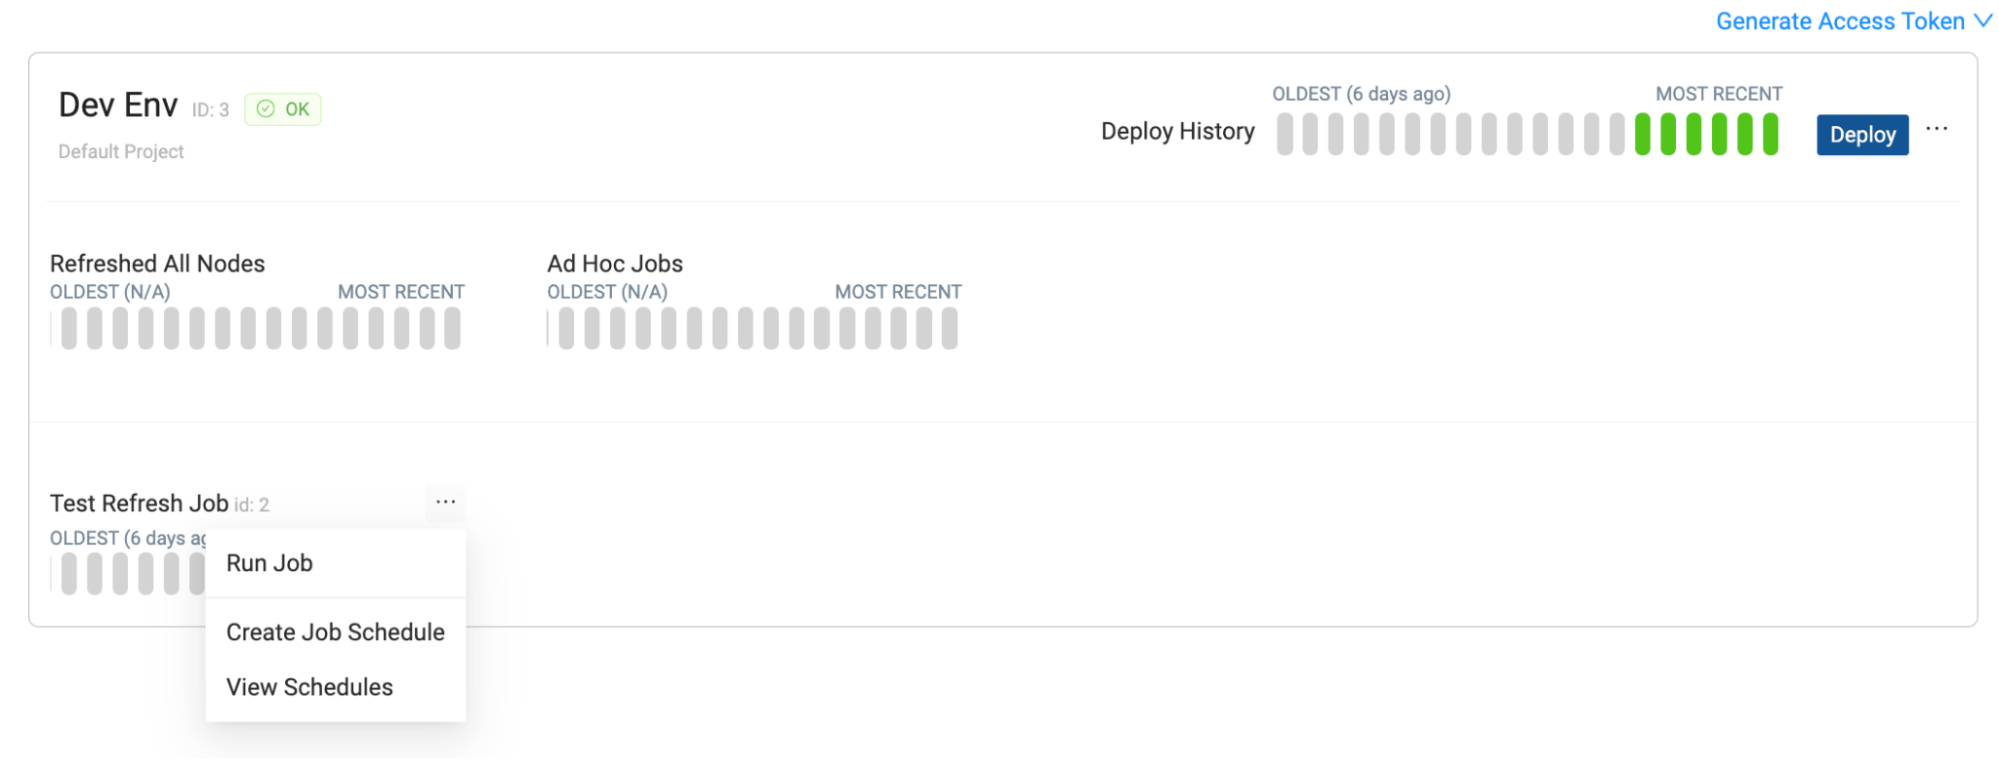
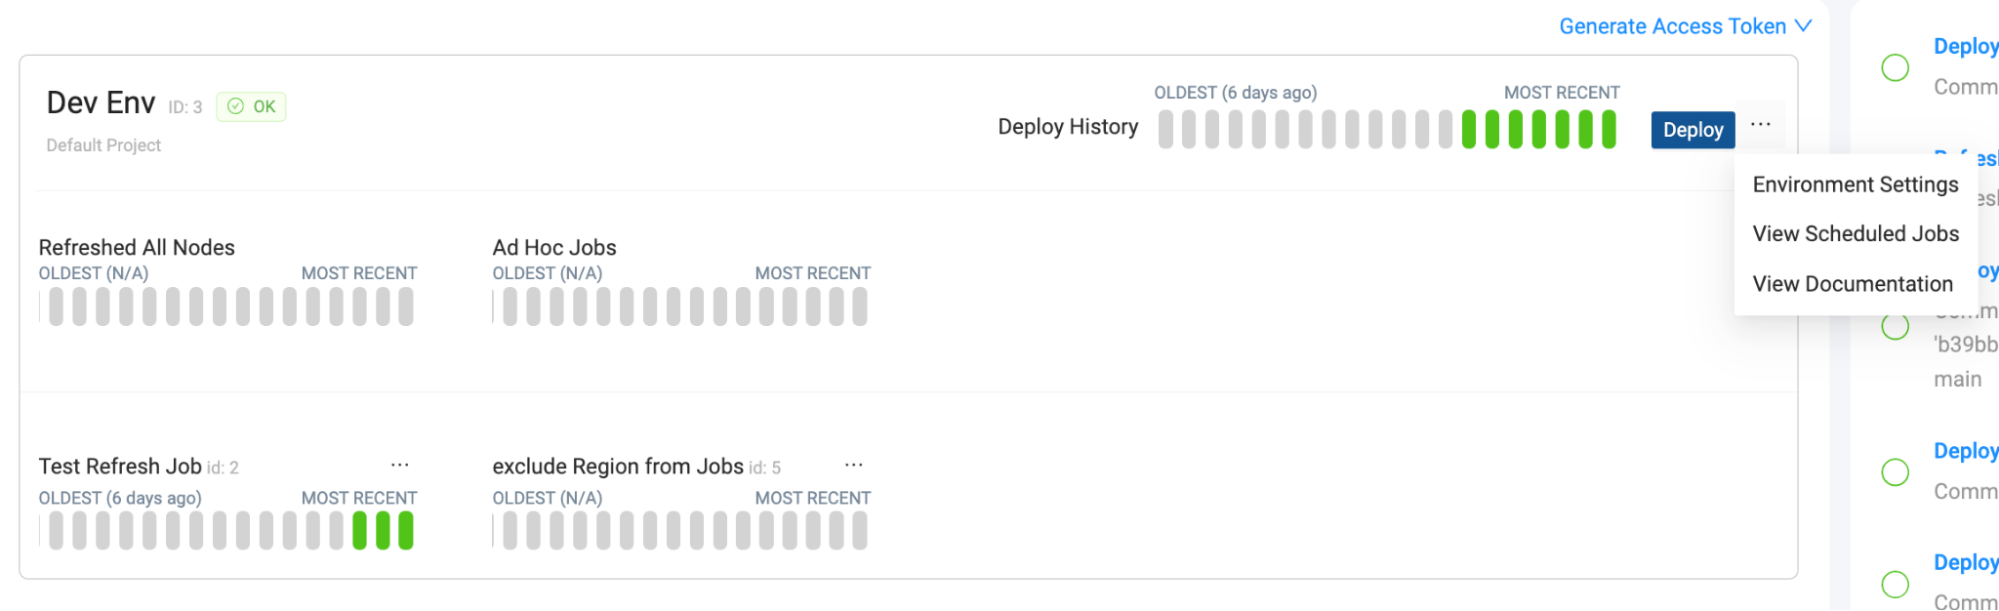
In your Coalesce App, go to the Deploy page.
-
Next to any Job, click the dropdown and select View Scheduled Jobs. Then click Create Job Schedule.
-
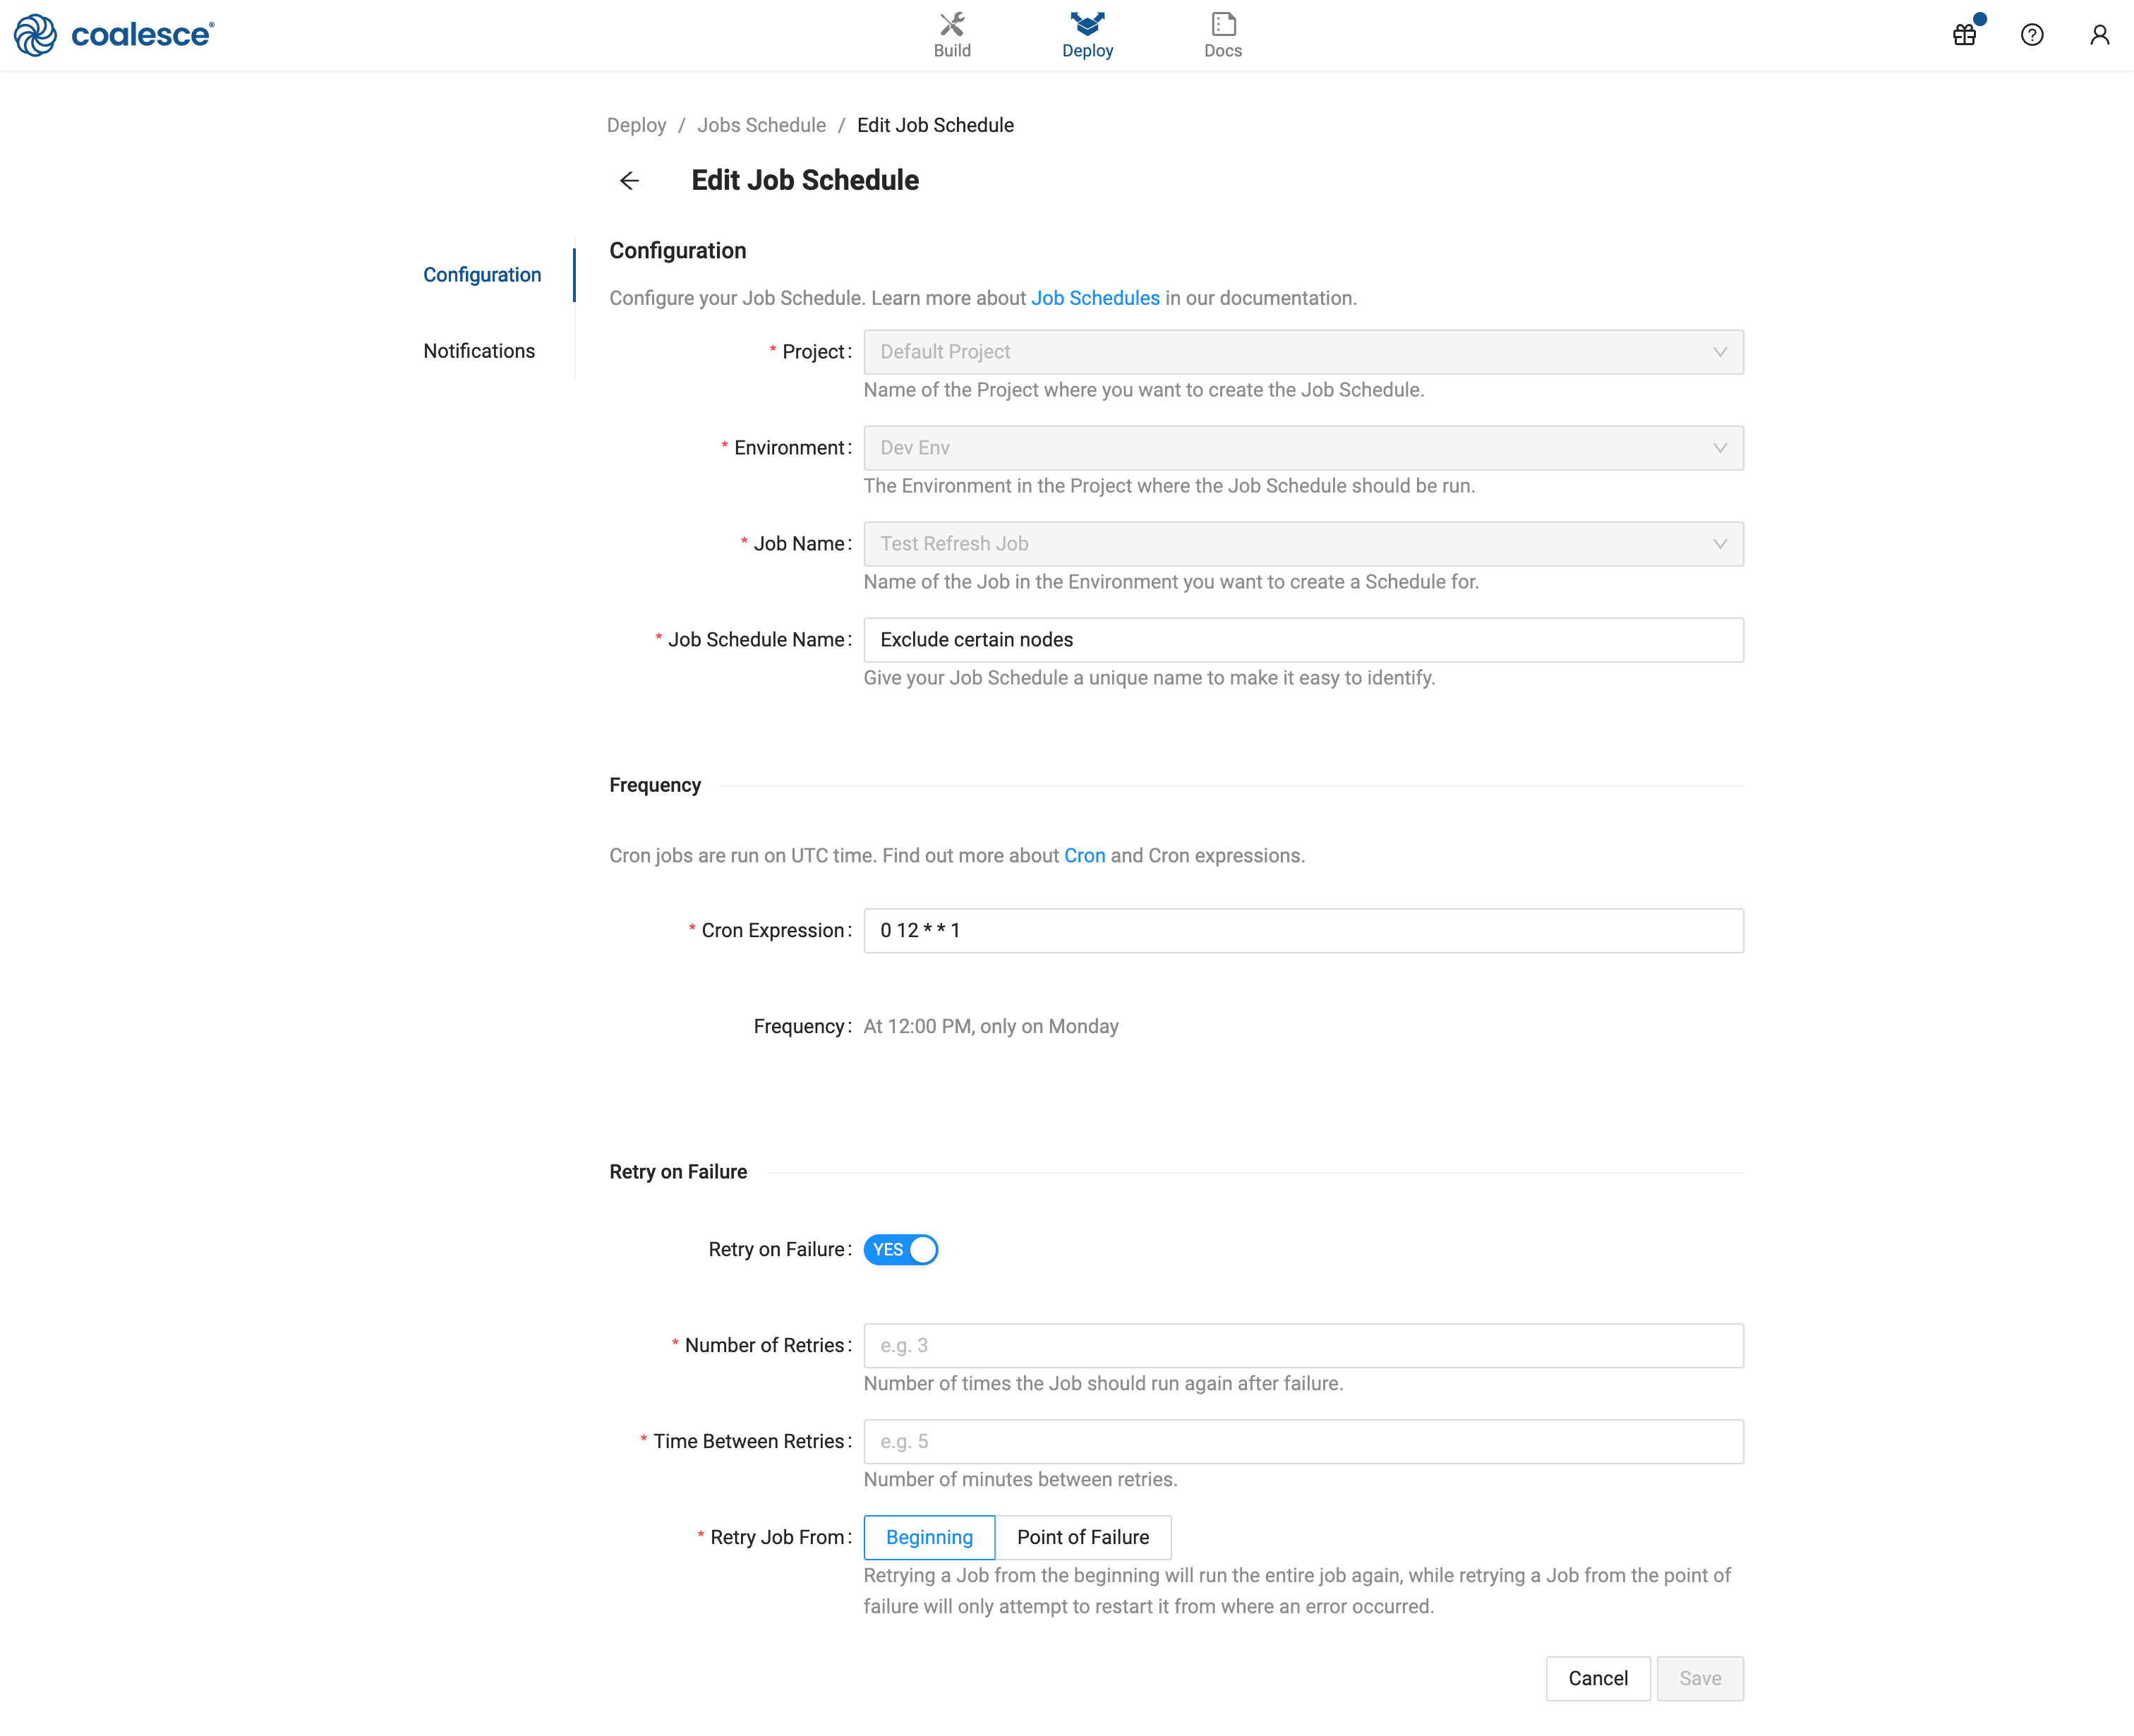
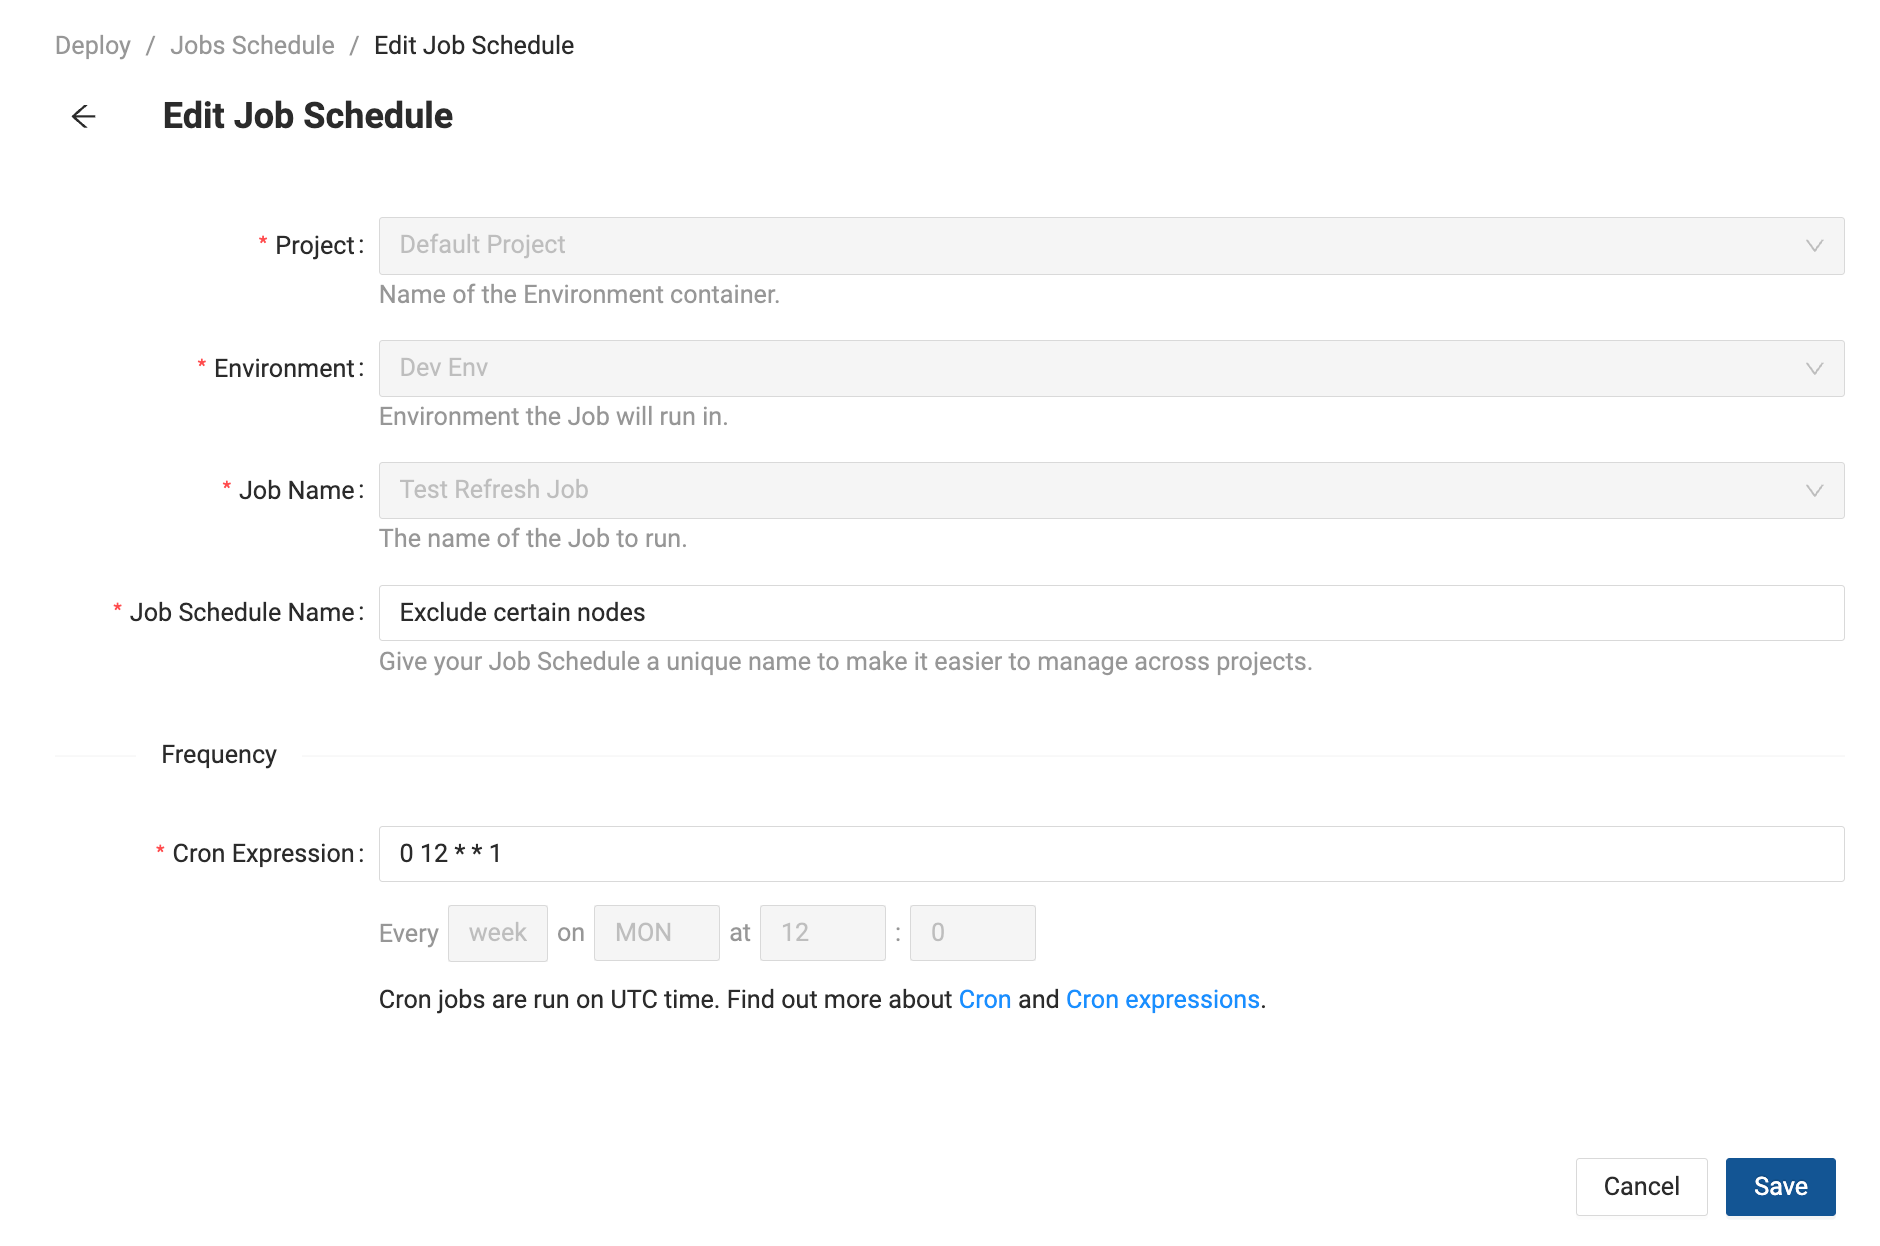
Configuration: Fill out the Job Schedule form. If you click on the Job to create a Job schedule, the Project, Environment, and Job Name will be pre-filled.
- Project - You’ll be able to create Jobs for any Project you have Environment Admin access to.
- Environment - Select the Environment in the Project.
- Job Name - Select an existing Job in the Environment.
- Job Schedule Name - Choose a unique name to make it easy to identify later.
- Cron Expression - Enter a Cron expression in UTC time for the Job frequency.
- Timezone - Set the timezone for Job runs.
- Automatic run on save - When this option is on, the Job runs once as soon as you save the schedule, then continues on the cron schedule. Turn it off if the first run should wait until the next scheduled time instead.
- Retry on Failure - Toggle to retry the entire Job if it fails. This will retry the entire Job.
- Number of Retries - Enter the number of times a Job will attempt to run if it fails the first time.
- Time Between Retries - Enter the number of minutes between each retry.
- Retry Job From - Beginning will run the entire Job again. Point of Failure will retry the Job from when it failed.
-
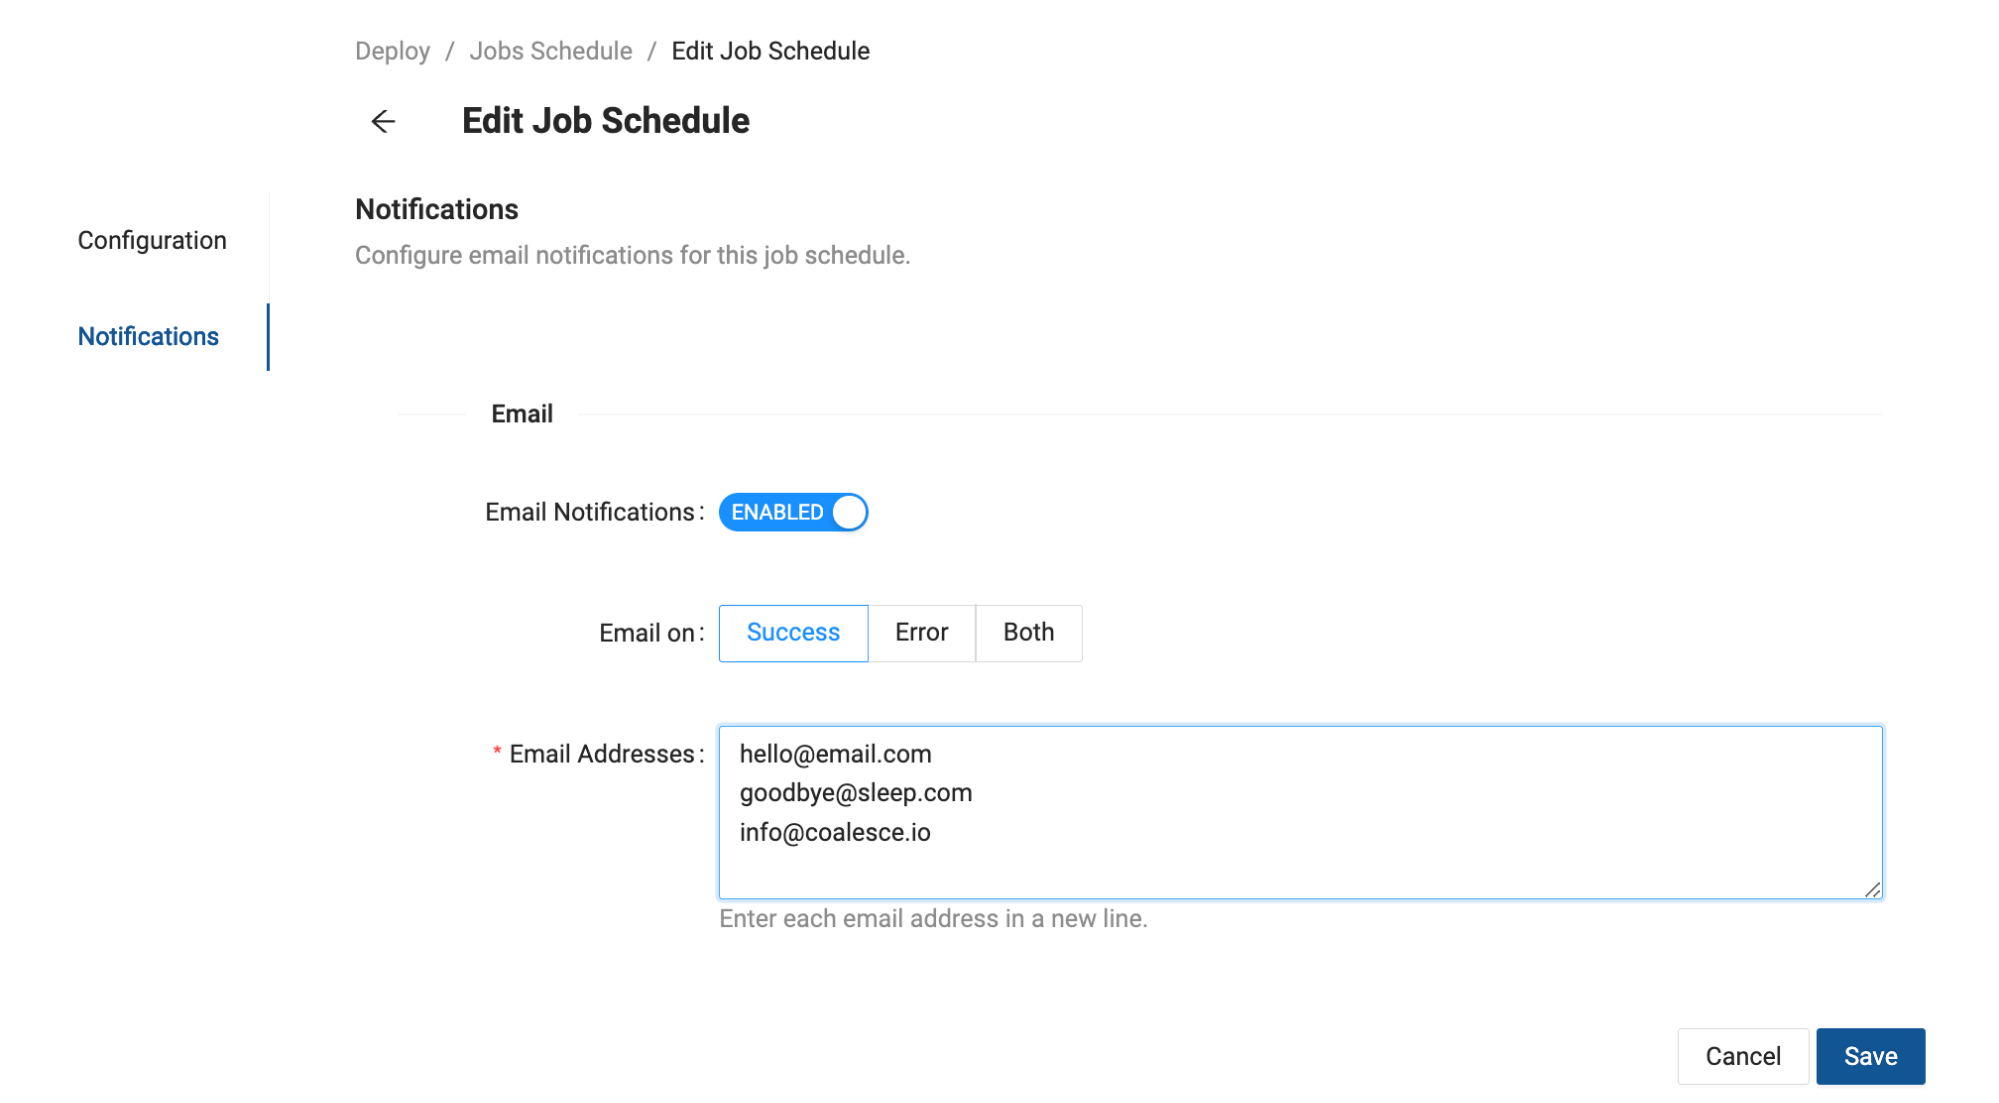
Notifications: Coalesce will send an email notification for successful, retries, and failed Jobs.
- Email on: Choose if you want emails to be sent for Success only, Errors only (includes retries), or both.
- Email Addresses: Each email address should be entered on a new line.
-
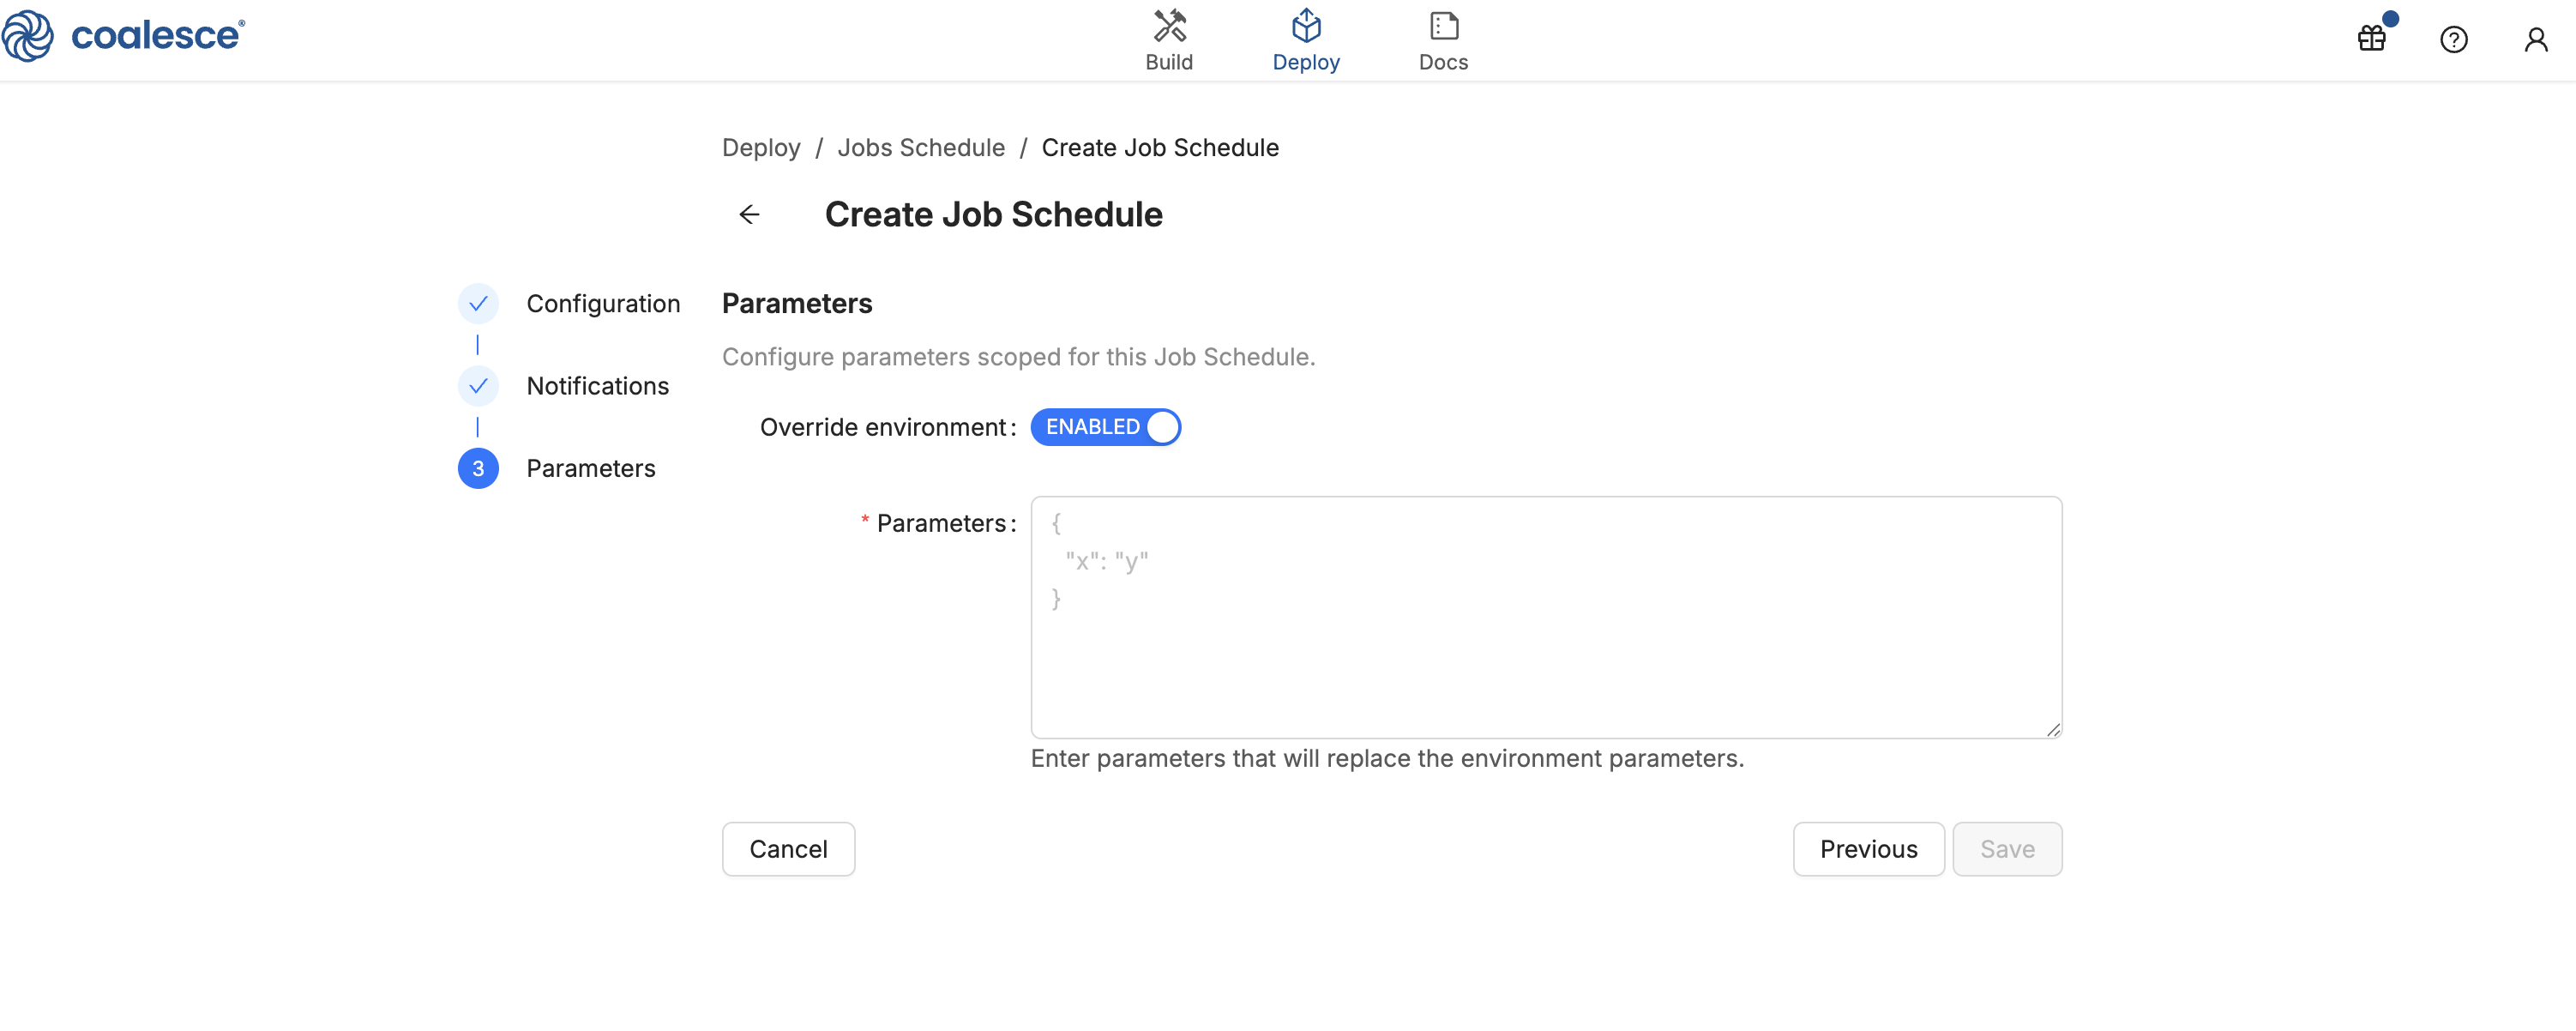
Parameters - Enter runtime parameters as JSON for each run this schedule triggers. If the Environment has default parameters, they appear in the editor and you can override them for this schedule. Coalesce validates the JSON the same way as in the Deploy Wizard. See Parameters for format and usage in templates.
-
Save the Job. You’ll be able to see the Job on the Job Schedules page.

Refresh the page to see the status of a Scheduled Job.
View Scheduled Jobs
You can view Scheduled Jobs in two ways.
-
Select View Schedules next to the Job you want to view the schedules for.
-
Select View Schedules Jobs next to Deploy to see all Scheduled Jobs for the Environment.
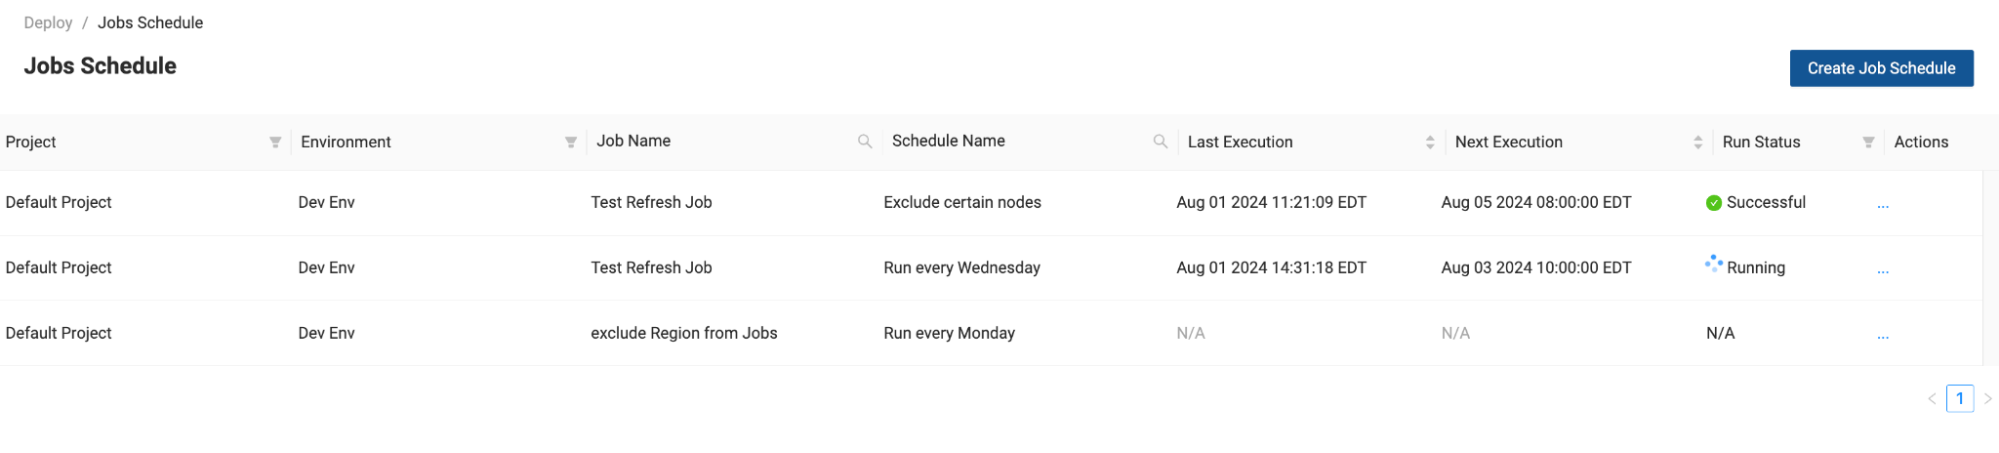
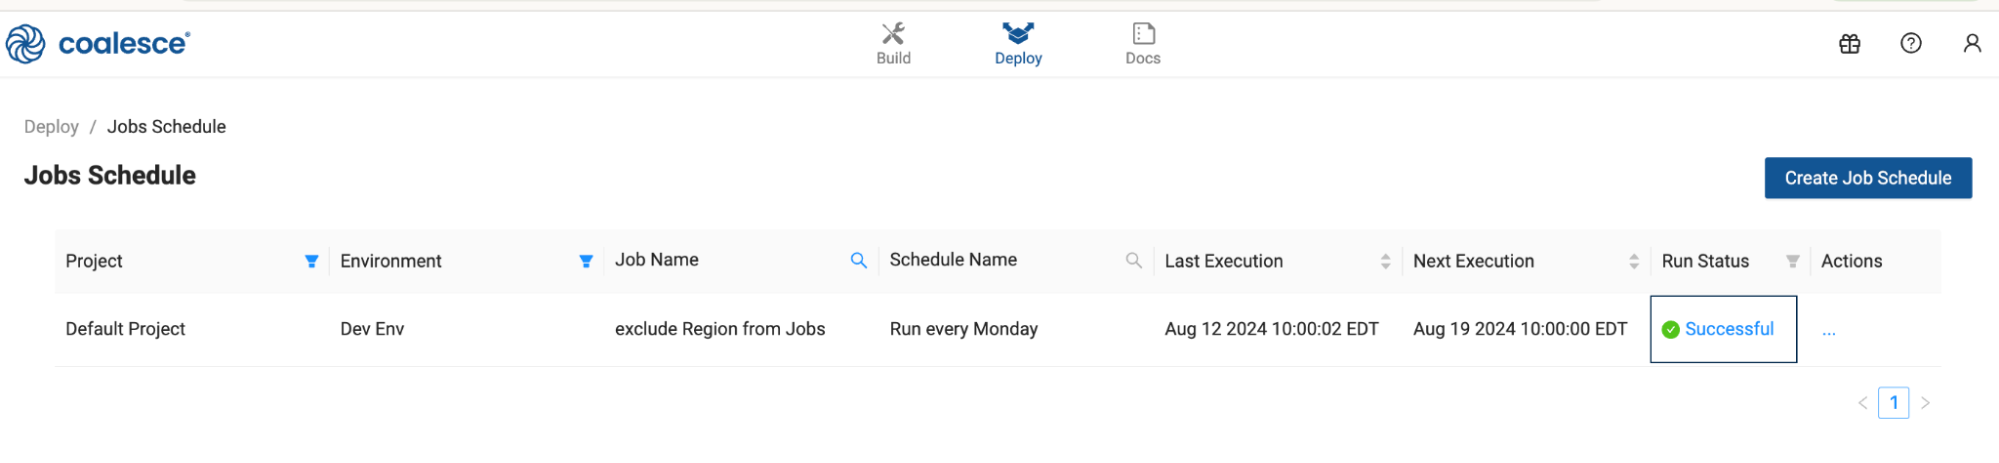
You’ll be able to view a list of Scheduled Jobs on the Jobs Schedule page.
Edit Scheduled Jobs
- On the Jobs Schedule page, in the Actions column, select Edit.
- You can edit the Job Schedule Name, Cron Expression, Automatic run on save, and Parameters. If you need to edit the Project, Environment, or Job, create a new Job Schedule.
Editing Scheduled Jobs created by another user, will use your Coalesce and Data Platform credentials to run the job
Scheduled Jobs Notifications and Alerts
Notifications can be sent using email. You can configure emails to be sent for Success, Error, or Both.
You can also edit the notifications at any time by editing the Job Schedule.
Notifications are sent for:
- Each successful Job Schedule.
- Each failed Job Schedule.
Pause or Resume Scheduled Jobs
If you need to stop a schedule without removing it, pause it instead of deleting the Job Schedule.
- On the Jobs Schedule page, in the Actions column, select Pause.
- To start runs again, select Resume from the same menu.
While a schedule is paused, Next Execution shows Paused. The Job does not run until you resume.
Delete Job Schedules
To delete a Job Schedule, go to the Jobs Schedule page, in the Actions column, select Delete. Pausing is a better option when you plan to use the same schedule again soon.
- You can delete a Scheduled Job at any time.
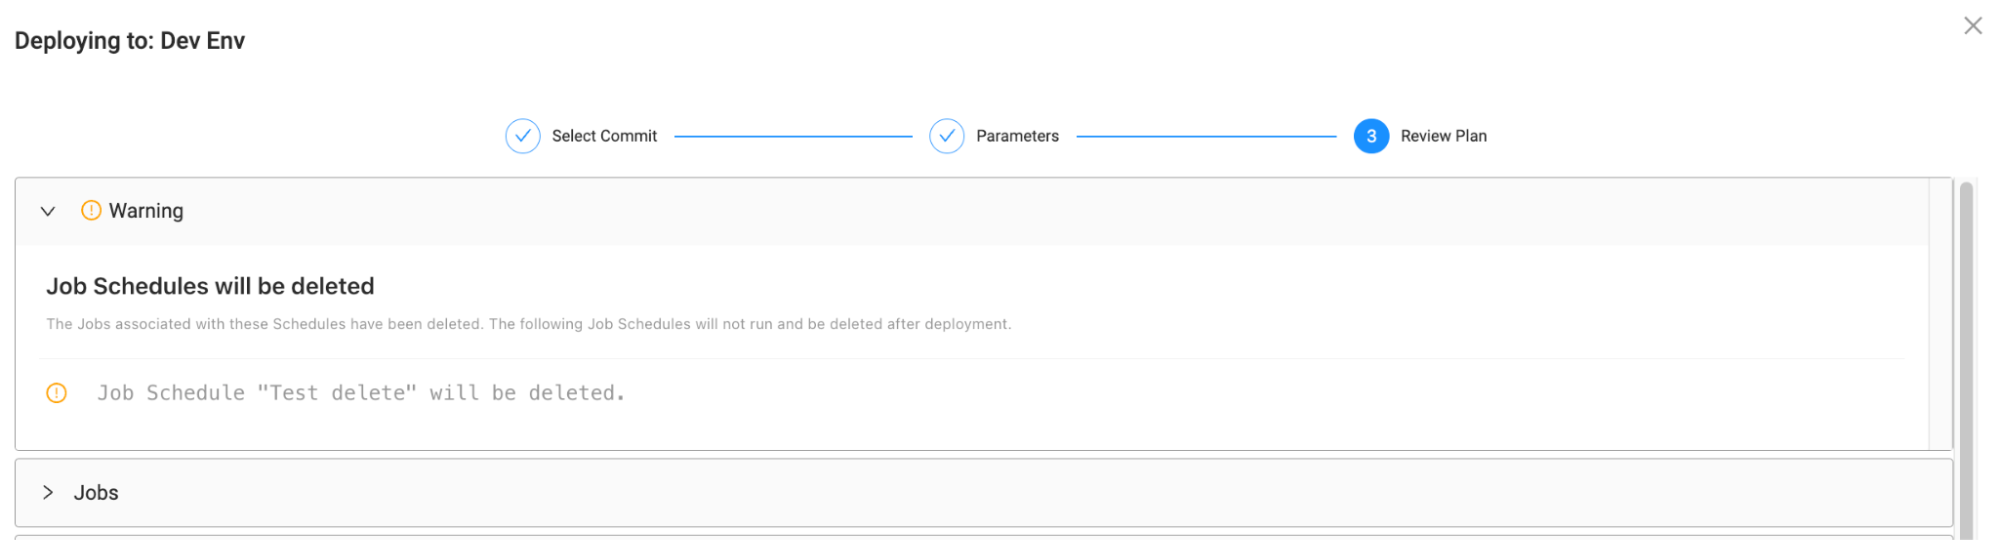
If you delete a Job attached to a schedule, then commit the deleted Job change to the deploy branch, then try to deploy, you’ll get a warning message in the Review Plan step. The Jobs Schedules for the deleted Job will be removed at the next scheduled run and won’t be part of the deploy.
Scheduled Job Status and Results
On the Job Schedule page, you can see:
- Last Execution - Last time the Scheduled Job was run displayed in system time.
- Next Execution - Next Scheduled Job run time, or Paused when the schedule is paused.
- Run Status - Most recent status of the Scheduled Job.
- Successful: The Job ran without issue.
- Running: Job is currently running.
- Failed: The Job failed to run.
- Test failed: The Job ran, but the Node tests failed.
To view the results click on the Run Status of any scheduled job.
Scheduler Permissions
- You must be an Environment Admin to create Scheduled Jobs.
- You must be an Environment Reader to view Job Schedules.
Important Scheduling Information
- You can create multiple schedules for each Job.
- Refreshed All Nodes and Ad-Hoc jobs aren’t part of the Job Scheduler and can only be run using the CLI or API.
- Schedules use Cron to run and they are in UTC time.
- By default, a new or edited schedule runs once when you save if Automatic run on save is on. Turn that option off so the first run waits for the next cron execution.
- Selecting Run Job from the Jobs menu will run the Job one-time. It will not change the Scheduled Job.
- You can pause a Scheduled Job from the Actions column on the Jobs Schedule page instead of deleting it or changing the cron expression.
- Scheduled Jobs run in parallel. If more than one Job is scheduled for the same time, they will run at the same time. If there is an ad hoc refresh during a Scheduled Job, they will run at the same time.
- Scheduled Jobs aren’t committed to your Git provider.
- The Coalesce Scheduler only runs deployed Jobs. Subgraph or Job changes in the Workspace do not affect scheduled runs until you commit, deploy, and the environment has the updated definition.
- Each Job Schedule can define its own parameter JSON so you can run the same deployed Job on different schedules with different runtime values without creating duplicate Environments.