Documentation index: llms.txt. This page is also available as markdown: append .md to this URL or send Accept: text/markdown.
Orchestrate Deployments with Bitbucket
Bitbucket is a version control tool offered by Atlassian that mimics the functionality of tools like GitHub and GitLab. Coalesce supports using Bitbucket repositories for project version control as well as CI/CD pipelines for automated deployment. In this article, we will go over how to set up a sample Bitbucket pipeline with Coalesce deployments.
Before You Begin
You'll need:
- GitLab: Bitbucket account with admin privileges to configure pipelines and manage secrets.
- Project: A Project with version control configured using your chosen platform.
- Environment: At least one Environment configured for deployment.
- Access Token: Your Coalesce access token for the CLI configuration file.
Create and Configure an Environment
- Create a new Environment for CI/CD deployments. It's recommended to use a dedicated Environment for automated deployments.
- Configure authentication for your Environment based on your data platform:
- Snowflake: Set up Snowflake Key-Pair Authentication with a service account.
- Databricks: Set up OAuth Machine-to-Machine authentication with a service principal.
- Configure Storage Mappings for your Environment.
- Deploy the Environment to verify configuration.
Data Platform Permissions
Snowflake
USAGEprivilege on the database and schema.SELECT,INSERT,UPDATE, andDELETEprivileges on tables involved in transformations.EXECUTEprivilege for procedures or functions referenced by Coalesce.- Ability to create Snowflake Key-Pair Authentication (recommended for automated deployments).
Databricks
- SQL Warehouse configured and accessible.
- Appropriate catalog and schema permissions.
- Ability to create OAuth Machine-to-Machine authentication (recommended for automated deployments).
Configure Your CLI
The Coalesce CLI orchestrates your deployments and refreshes within CI/CD pipelines. You'll create a configuration file with credentials required to authenticate the CLI.
- Follow the instructions in CLI Setup to install the CLI.
- Create a new text file, for example,
coa_config.txt, and save it securely. This file contains the authentication credentials your pipeline will use.
Your configuration file should include profiles for each Environment.
- Databricks
- Snowflake
[production]
token=your_coalesce_token
domain=https://app.coalesce.io
platformKind=Databricks
databricksAuthType=OAuthM2M
databricksClientID=client_id_here
databricksClientSecret=client_secret_here
databricksAccountHost=https://accounts.cloud.databricks.com
databricksWorkspaceHost=https://your-workspace.cloud.databricks.com
databricksPath=/sql/1.0/warehouses/abc123xyz
environmentID=456
[production]
token=your_coalesce_token
domain=https://app.coalesce.io
snowflakeAuthType=Keypair
snowflakeUsername=service_account_user
snowflakeRole=TRANSFORMER_ROLE
snowflakeWarehouse=TRANSFORM_WH
snowflakeAccount=xy12345.us-east-1
environmentID=123
Configuration Notes:
- Create separate profiles using
[profile_name]for different Environments. - Use service accounts or service principals rather than individual user accounts.
- For Snowflake, include the private key path when using key-pair authentication.
- Store this file securely - it contains sensitive credentials.
Configure Bitbucket
Bitbucket does not allow for direct file uploads, you'll securely pass this file into the Bitbucket pipelines is through base64 encoding the file locally.
-
Navigate to the folder that you saved your
cli_config.txtfile using the command line and then execute the following command. This will encode thecoa_configfile as a string that you can pass as a secure Bitbucket variable.- Window
- macOS
- Linux
certutil -encode coa_config.txt encoded_config.base64base64 -i coa_config.txt > encoded_config.base64base64 coa_config.txt > encoded_config.base64 -
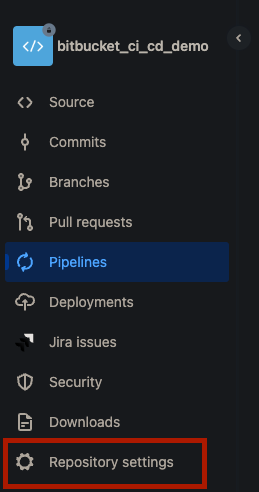
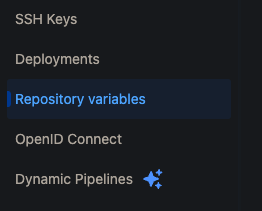
In your Bitbucket repo, navigate to Repository Settings > Repository Variables.
-
Add the following variables and make sure Secured is checked.
SECURE_FILE_BASE64 = <your base64 encoded coa_config.txt file>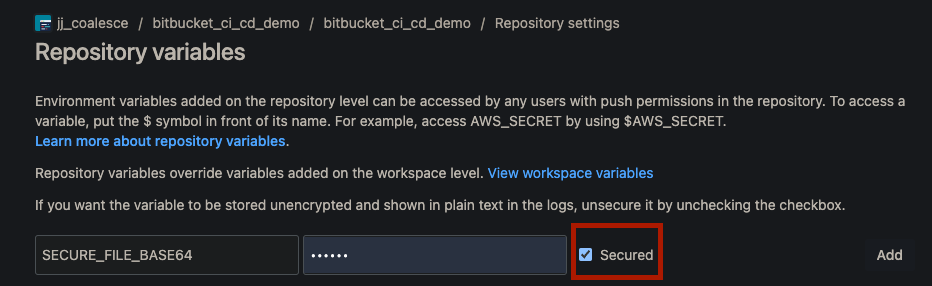
Build Your Pipeline
Now that you have your variables set up, you are ready to start building the CI/CD pipeline. In this section, you'll set up a CI/CD pipeline to trigger upon successful merges, commits, or pull requests in the main branch. If you want to modify this behavior, you can add an additional section under branches in the code in the next step to dictate the pipeline's behavior upon merges into other branches in your project.
- This pipeline runs a set of steps:
- Downloads the Coalesce CLI
- Prints the Coalesce CLI version
- Generates the Coalesce deployment plan
- Executes the Coalesce deployment to the default profile specified
Within your main branch in your repository, navigate to Pipelines > Create a New Pipeline and copy/paste the following code:
image: node:22

definitions:
  caches:
    npm: node_modules

pipelines:
  branches:
    main:
      - step:
          name: 'Download Coalesce CLI'
          caches:
            - npm
          script:
            - export COA_VERSION=${COA_VERSION:-latest}
            - npm install @coalescesoftware/coa@$COA_VERSION

      - step:
          name: 'Print Version'
          caches:
            - npm
          script:
            - npx coa --version

      - step:
          name: 'Generate Deployment Plan'
          caches:
            - npm
          script:
            # Decode base64 config file
            - echo "$SECURE_FILE_BASE64" | base64 -d > config.txt

            # Verify config file is not empty
            - |
              if [ ! -s config.txt ]; then
                echo "Error: Config file is empty"
                exit 1
              fi

            # Generate deployment plan
            - npx coa plan --config config.txt --profile default --debug
          artifacts:
            - config.txt
            - coa-plan.json

      - step:
          name: 'Execute Deployment'
          caches:
            - npm
          script:
            - npx coa deploy --config config.txt --plan coa-plan.json --debug