Documentation index: llms.txt. This page is also available as markdown: append .md to this URL or send Accept: text/markdown.
Orchestrate Deploys and Refreshes with GitLab and the CLI
GitLab is a popular open-source web-based DevOps platform that provides a comprehensive set of tools for software development, version control, continuous integration/continuous delivery (CI/CD), and project management. It was created by GitLab Inc. and is written in Ruby.
In this tutorial, we go through how to securely set up Coalesce Deployments and Refresh using GitLab.
Before You Begin
You'll need:
- GitLab: GitLab account with admin privileges to configure pipelines and manage secrets.
- Project: A Project with version control configured using your chosen platform.
- Environment: At least one Environment configured for deployment.
- Access Token: Your Coalesce access token for the CLI configuration file.
Create and Configure an Environment
- Create a new Environment for CI/CD deployments. It's recommended to use a dedicated Environment for automated deployments.
- Configure authentication for your Environment based on your data platform:
- Snowflake: Set up Snowflake Key-Pair Authentication with a service account.
- Databricks: Set up OAuth Machine-to-Machine authentication with a service principal.
- Configure Storage Mappings for your Environment.
- Deploy the Environment to verify configuration.
Data Platform Permissions
Snowflake
USAGEprivilege on the database and schema.SELECT,INSERT,UPDATE, andDELETEprivileges on tables involved in transformations.EXECUTEprivilege for procedures or functions referenced by Coalesce.- Ability to create Snowflake Key-Pair Authentication (recommended for automated deployments).
Databricks
- SQL Warehouse configured and accessible.
- Appropriate catalog and schema permissions.
- Ability to create OAuth Machine-to-Machine authentication (recommended for automated deployments).
Configure Your CLI
The Coalesce CLI orchestrates your deployments and refreshes within CI/CD pipelines. You'll create a configuration file with credentials required to authenticate the CLI.
- Follow the instructions in CLI Setup to install the CLI.
- Create a new text file, for example,
coa_config.txt, and save it securely. This file contains the authentication credentials your pipeline will use.
Your configuration file should include profiles for each Environment.
- Databricks
- Snowflake
[production]
token=your_coalesce_token
domain=https://app.coalesce.io
platformKind=Databricks
databricksAuthType=OAuthM2M
databricksClientID=client_id_here
databricksClientSecret=client_secret_here
databricksAccountHost=https://accounts.cloud.databricks.com
databricksWorkspaceHost=https://your-workspace.cloud.databricks.com
databricksPath=/sql/1.0/warehouses/abc123xyz
environmentID=456
[production]
token=your_coalesce_token
domain=https://app.coalesce.io
snowflakeAuthType=Keypair
snowflakeUsername=service_account_user
snowflakeRole=TRANSFORMER_ROLE
snowflakeWarehouse=TRANSFORM_WH
snowflakeAccount=xy12345.us-east-1
environmentID=123
Configuration Notes:
- Create separate profiles using
[profile_name]for different Environments. - Use service accounts or service principals rather than individual user accounts.
- For Snowflake, include the private key path when using key-pair authentication.
- Store this file securely - it contains sensitive credentials.
Creating Deployment Pipelines in GitLab
-
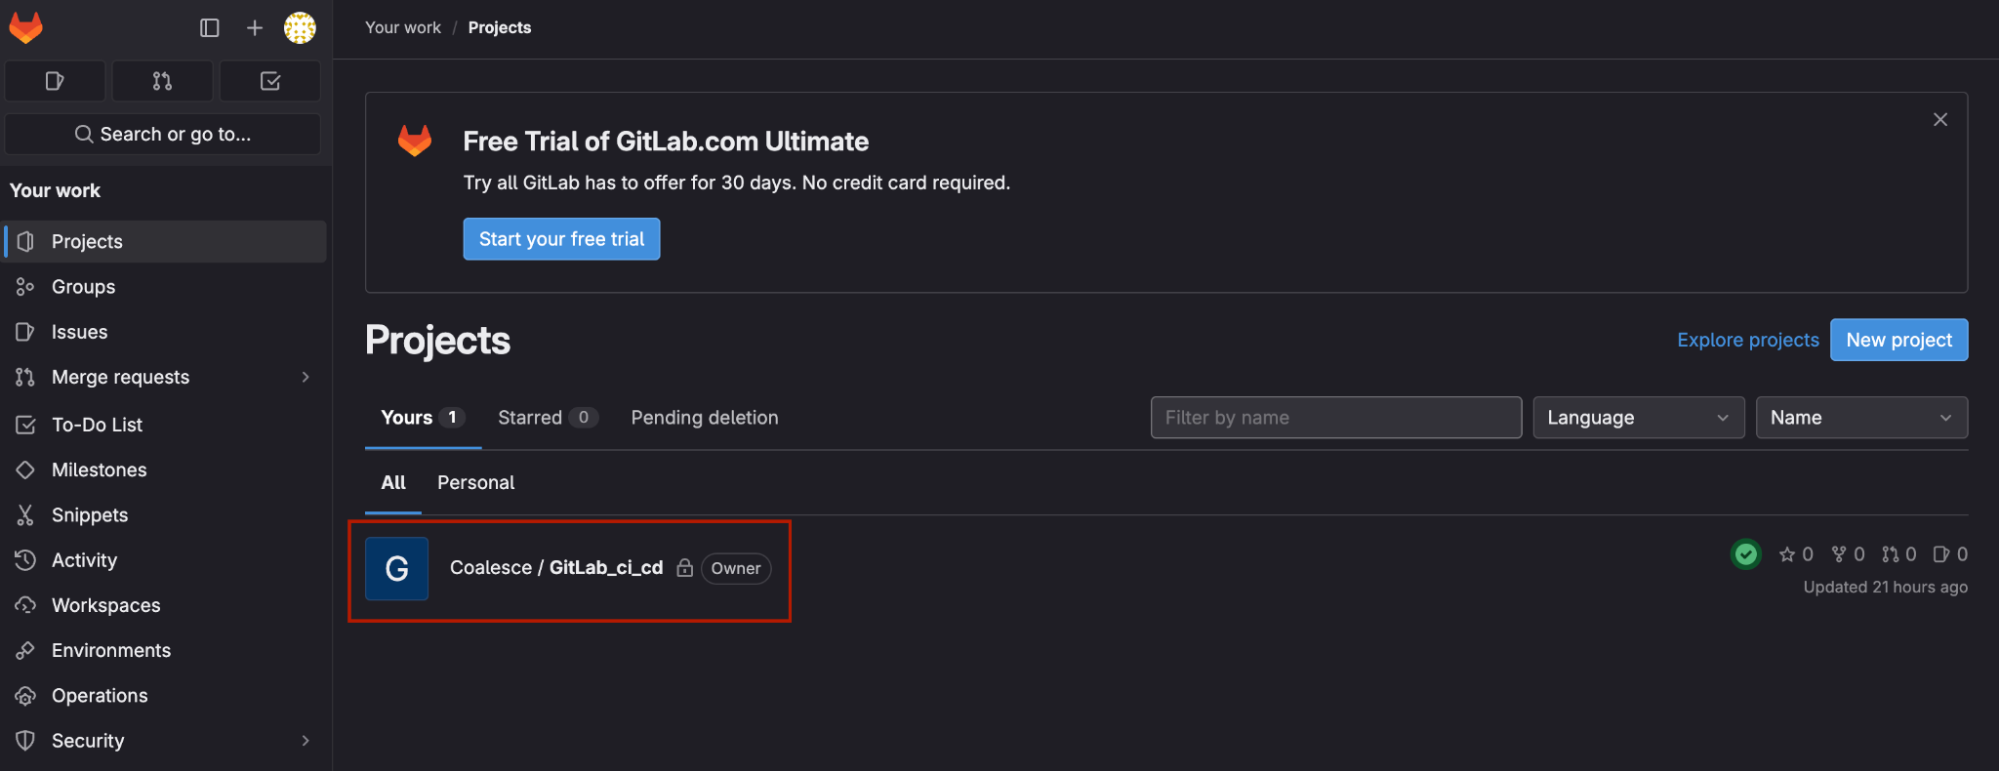
Within GitLab, Click Projects and navigate to your Project/Coalesce repo where you want to build your CI/CD pipeline.
-
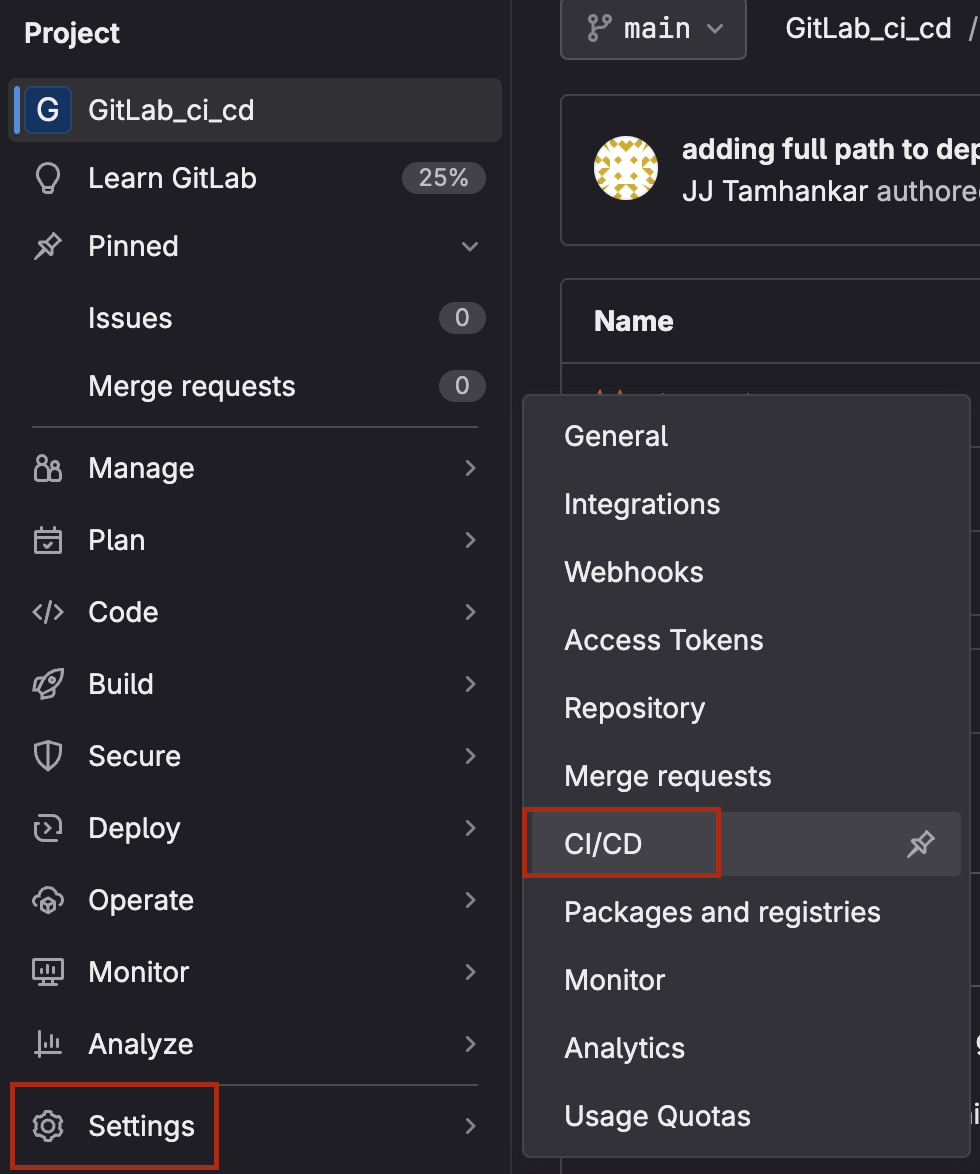
Navigate to Settings > CI/CD. Expand Secure Files.
-
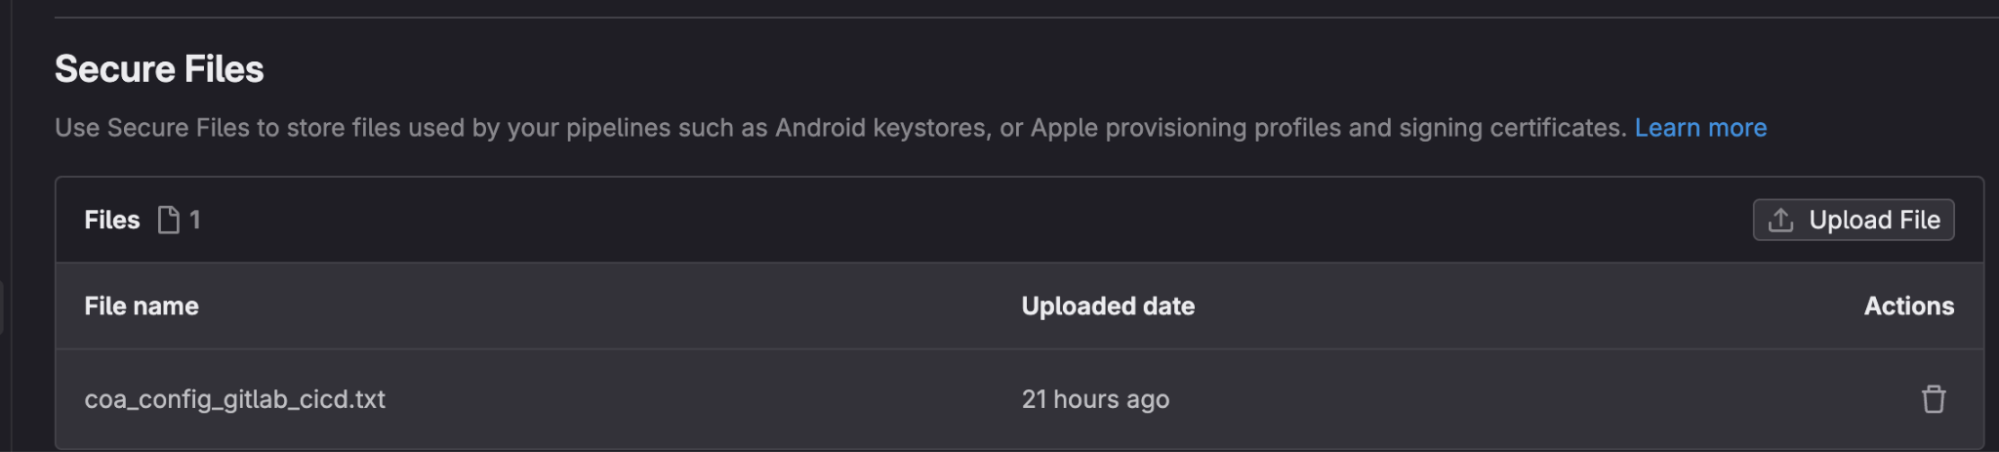
Click Upload File and upload the secure CLI config file that you saved locally.
-
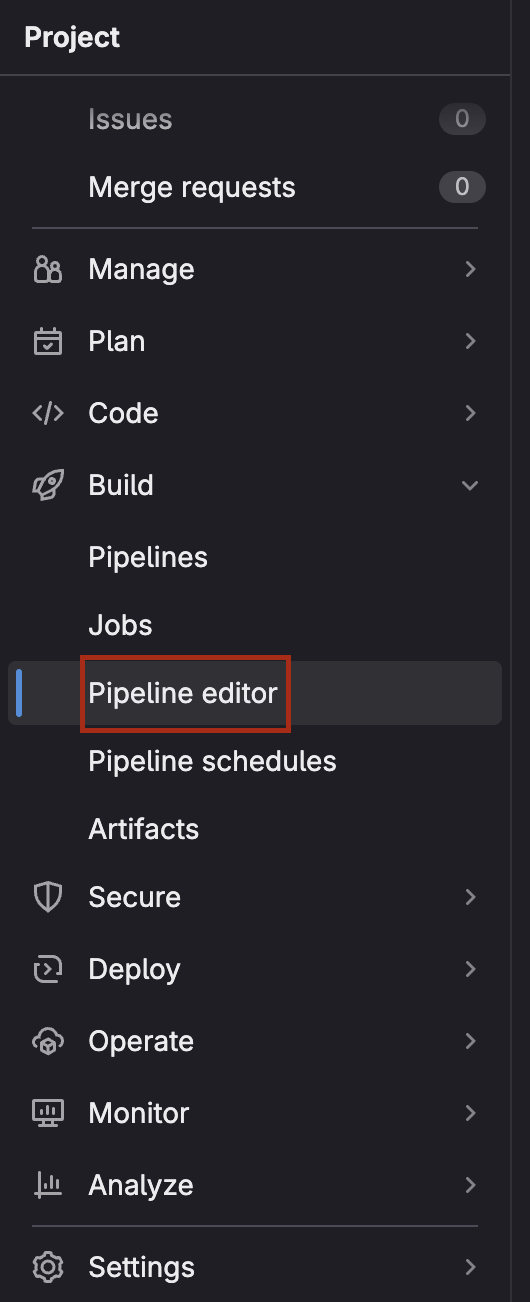
Navigate to Build > Pipeline Editor.
-
Ensure that the pipeline that you are trying to build “lives” in the branch you are trying to configure an automated deployment for. You can also edit the pipeline config to reflect the trigger branch for the pipeline you want to deploy.
-
Copy and paste the pipeline template below:
image: node:20.0.0stages: # List of stages for jobs, and their order of execution- download-coa- download-secure-file- print-version- coa-plan- coa-deployvariables:COA_VERSION: latest # Modify this value to reflect your CLI configuration fileCONFIG_FILE_NAME: coa_config_gitlab_cicd.txt # Modify this value to reflect your CLI configuration fileCOA_PROFILE: default # Modify this value to reflect your CLI configuration filecache:paths:- node_modules/download-coa: # This job downloads the Coalesce CLI.stage: download-coascript:- npm install @coalescesoftware/coa@$COA_VERSIONonly:- maindownload-secure-file: # This job downloads the secure file.stage: download-secure-filevariables:SECURE_FILES_DOWNLOAD_PATH: 'node_modules/demo-file-folder'script:- curl --silent "https://gitlab.com/gitlab-org/incubation-engineering/mobile-devops/download-secure-files/-/raw/main/installer" | bash- ls -lah node_modules/demo-file-folder/only:- mainprint-version: # This job prints the coa cli version.stage: print-versionscript:- npm coa --versiononly:- maincoa-plan: # This job creates the deployment plan.stage: coa-planscript:- npx coa plan --config /builds/coalesce1/GitLab_ci_cd/node_modules/demo-file-folder/$CONFIG_FILE_NAME --profile $COA_PROFILE --out /builds/coalesce1/GitLab_ci_cd/node_modules/demo-file-folder/coa-plan.json --debugonly:- maincoa-deploy: # This deploys the commit in the branch based on the configuration of the coa_plan.json created in the coa-plan step.stage: coa-deployscript:- npx coa deploy --config /builds/coalesce1/GitLab_ci_cd/node_modules/demo-file-folder/$CONFIG_FILE_NAME --plan /builds/coalesce1/GitLab_ci_cd/node_modules/demo-file-folder/coa-plan.json --debugonly:- main -
In the above code, the three variables
COA_VERSION,CONFIG_FILE_NAME, andCOA_PROFILEdefine the CLI version, the name of the configuration file, and the profile as configured in the configuration file that you want to use to generate the deployment plan. They have been given default values oflatest,coa_config_gitlab_cicd.txt, anddefaultbut you may modify these to reflect the name of your configuration file, the version of the CLI that you want to install, and the profile corresponding with the environment that you want to deploy into. -
Once this pipeline is saved and committed, any successful merge or commit to the main branch of this Coalesce will result in the execution of this pipeline, and subsequent deployment into the specified Coalesce environment.
-
This is a simple deployment pipeline, for more advanced configuration options, please see our CLI documentation.
Using GitLab Pipelines to Schedule Refreshes
You can also schedule refreshes with GitLab pipelines using a similar script to the one above. In addition, GitLab has a built-in scheduler that you can use to run the refresh at a cadence of your choosing.
-
Create a new pipeline using the previous section, Creating Deployment Pipelines in GitLab. Except in Step 6, copy the following code to set up your refresh pipeline.
image: node:20.0.0stages: # List of stages for jobs, and their order of execution- download-coa- download-secure-file- print-version- coa-refreshvariables:COA_VERSION: latestCONFIG_FILE_NAME: coa_config_gitlab_cicd.txtCOA_PROFILE: defaultJOBID:cache:paths:- node_modules/download-coa: # This job downloads the Coalesce CLI.stage: download-coascript:- npm install @coalescesoftware/coa@$COA_VERSIONonly:- maindownload-secure-file: # This job downloads the secure file.stage: download-secure-filevariables:SECURE_FILES_DOWNLOAD_PATH: 'node_modules/demo-file-folder'script:- curl --silent "https://gitlab.com/gitlab-org/incubation-engineering/mobile-devops/download-secure-files/-/raw/main/installer" | bash- ls -lah node_modules/demo-file-folder/print-version: # This job prints the coa cli version.stage: print-versionscript:- npm coa --versioncoa-refresh: # This refreshes the specified environment.stage: coa-refreshscript:- npx coa refresh --config /builds/coalesce1/GitLab_ci_cd/node_modules/demo-file-folder/$CONFIG_FILE_NAME --profile $COA_PROFILE --jobID $JOBID -
In the above code, the three variables
COA_VERSION,CONFIG_FILE_NAME, andCOA_PROFILEdefine the CLI version, the name of the configuration file, and the profile as configured in the configuration file that you want to use to generate the deployment plan.They have been given default values of
latest,coa_config_gitlab_cicd.txt, anddefaultbut you may modify these to reflect the name of your configuration file, the version of the CLI that you want to install, and the profile corresponding with the environment that you want to deploy into.The optional
jobIDvariable specifying the ID of the job that you want to refresh in the environment specified. If the$JOBIDparameter is removed, all the deployed nodes in the Environment will be refreshed. -
If you want to refresh multiple jobs sequentially, you will have to add additional stages that copy the
coa-refreshstage and specify a different$JOB_IDfor each one. For additional configuration options, please refer to the CLI documentation. -
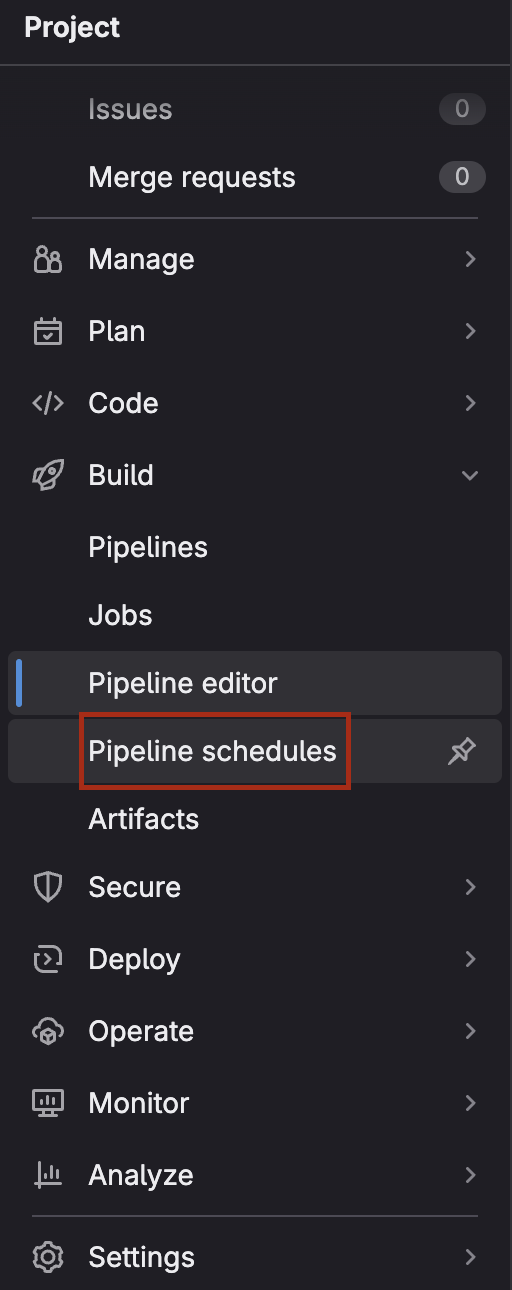
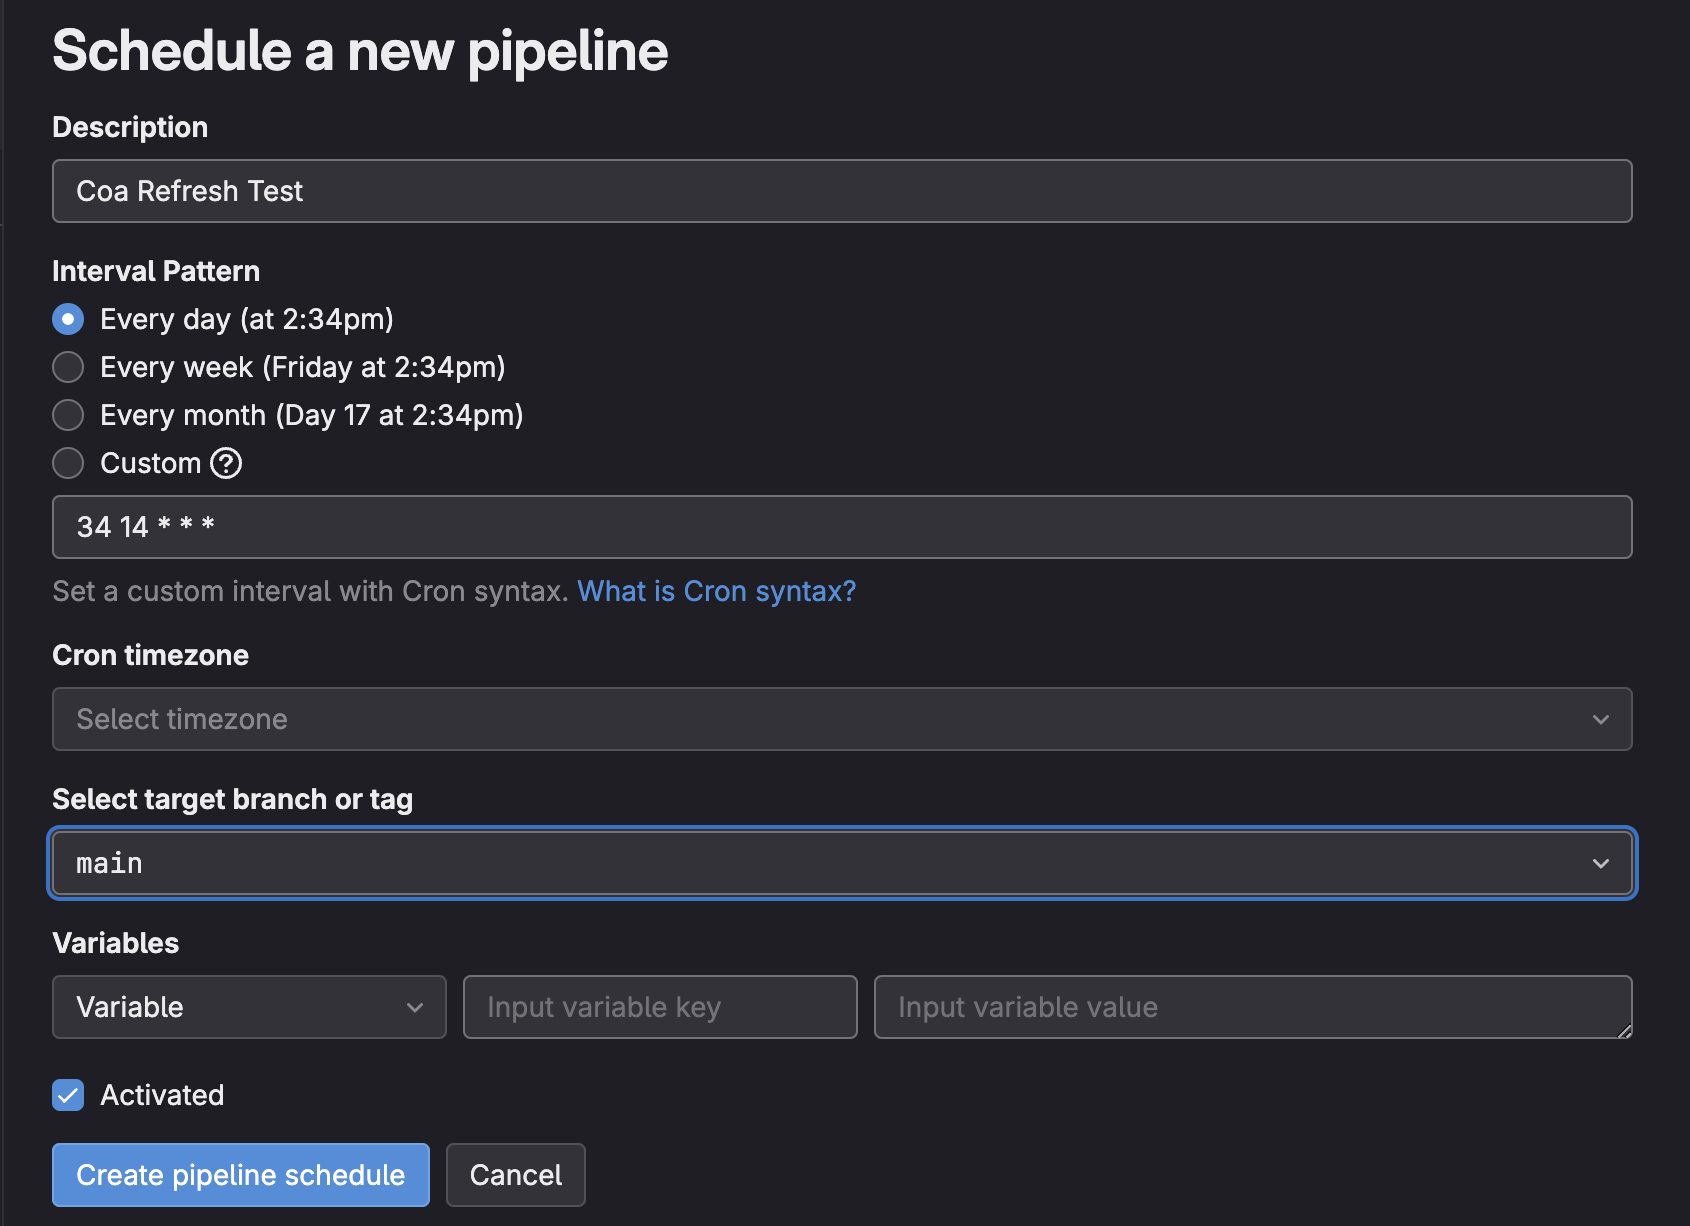
Once your pipeline is ready, you can set a schedule by navigating to Pipeline Schedules > Create a New Pipeline Schedule and set the desired cadence for your pipeline.
-
Click Create pipeline schedule and verify that the schedule and the pipeline branch is set properly in the next screen.
