Documentation index: llms.txt. This page is also available as markdown: append .md to this URL or send Accept: text/markdown.
Creating a Git Service Account
When you run automated processes (such as CI/CD pipelines, deployments triggered by Job Schedule, or GitHub Actions), using a developer's personal account is risky. If that person leaves, tokens expire, or permissions change, your automation breaks.
With Coalesce, creating a dedicated version control account tied to automated functions is best practice. This approach gives you:
- Stability: Automation isn't tied to any individual employee.
- Auditability: Commits from automation are clearly attributed to a dedicated account.
- Security: You can scope tokens and permissions to only what automation needs.
When to Use a Dedicated Git Account
Use a dedicated Git account for automation when:
- GitHub Actions or CI/CD runs deployments or refreshes. Store your Coalesce API token and other secrets in GitHub; Coalesce uses the Git account configured for that Project to perform deployments. See Orchestrate Jobs With GitHub Actions and the API or Orchestrate Deploys With GitHub Actions and the CLI for workflow setup.
- Job Schedule triggers deployments or commits. Select the automation account as the default Git account when creating the Project.
- CLI or API triggers deployments. The deployment uses the Git account associated with the Project and Environment.
- Shared Workspaces used by automation need consistent Git credentials.
For interactive development, developers can continue using their personal Git accounts in Coalesce. This guide focuses on the account used for automation.
Before You Begin
Complete the following before you begin:
- Review Coalesce Git Requirements before starting.
- Ensure you have admin access to your GitHub organization or repository.
- Have a Project in Coalesce with version control configured, or plan to add it during setup.
Create a Dedicated GitHub Account for Automation
Review Step: 1 Setup Version Control for detailed steps and videos.
You can create a dedicated account for automation. Many organizations use a pattern such as:
coalesce-bot@yourcompany.comcoalesce-automation@yourcompany.comdata-platform-ci@yourcompany.com
When setting up the account:
- Use a distribution list or shared mailbox so the account isn't tied to a single person.
- Add the account as a collaborator with the appropriate permissions (for example, Write access for the repository).
Step 1: Generate a Fine-Grained Access Token
Generate a fine-grained token in GitHub with these steps:
-
Click on your GitHub profile and go to Settings > Developer Settings.
-
Click Personal access tokens > Fine-grained tokens.
-
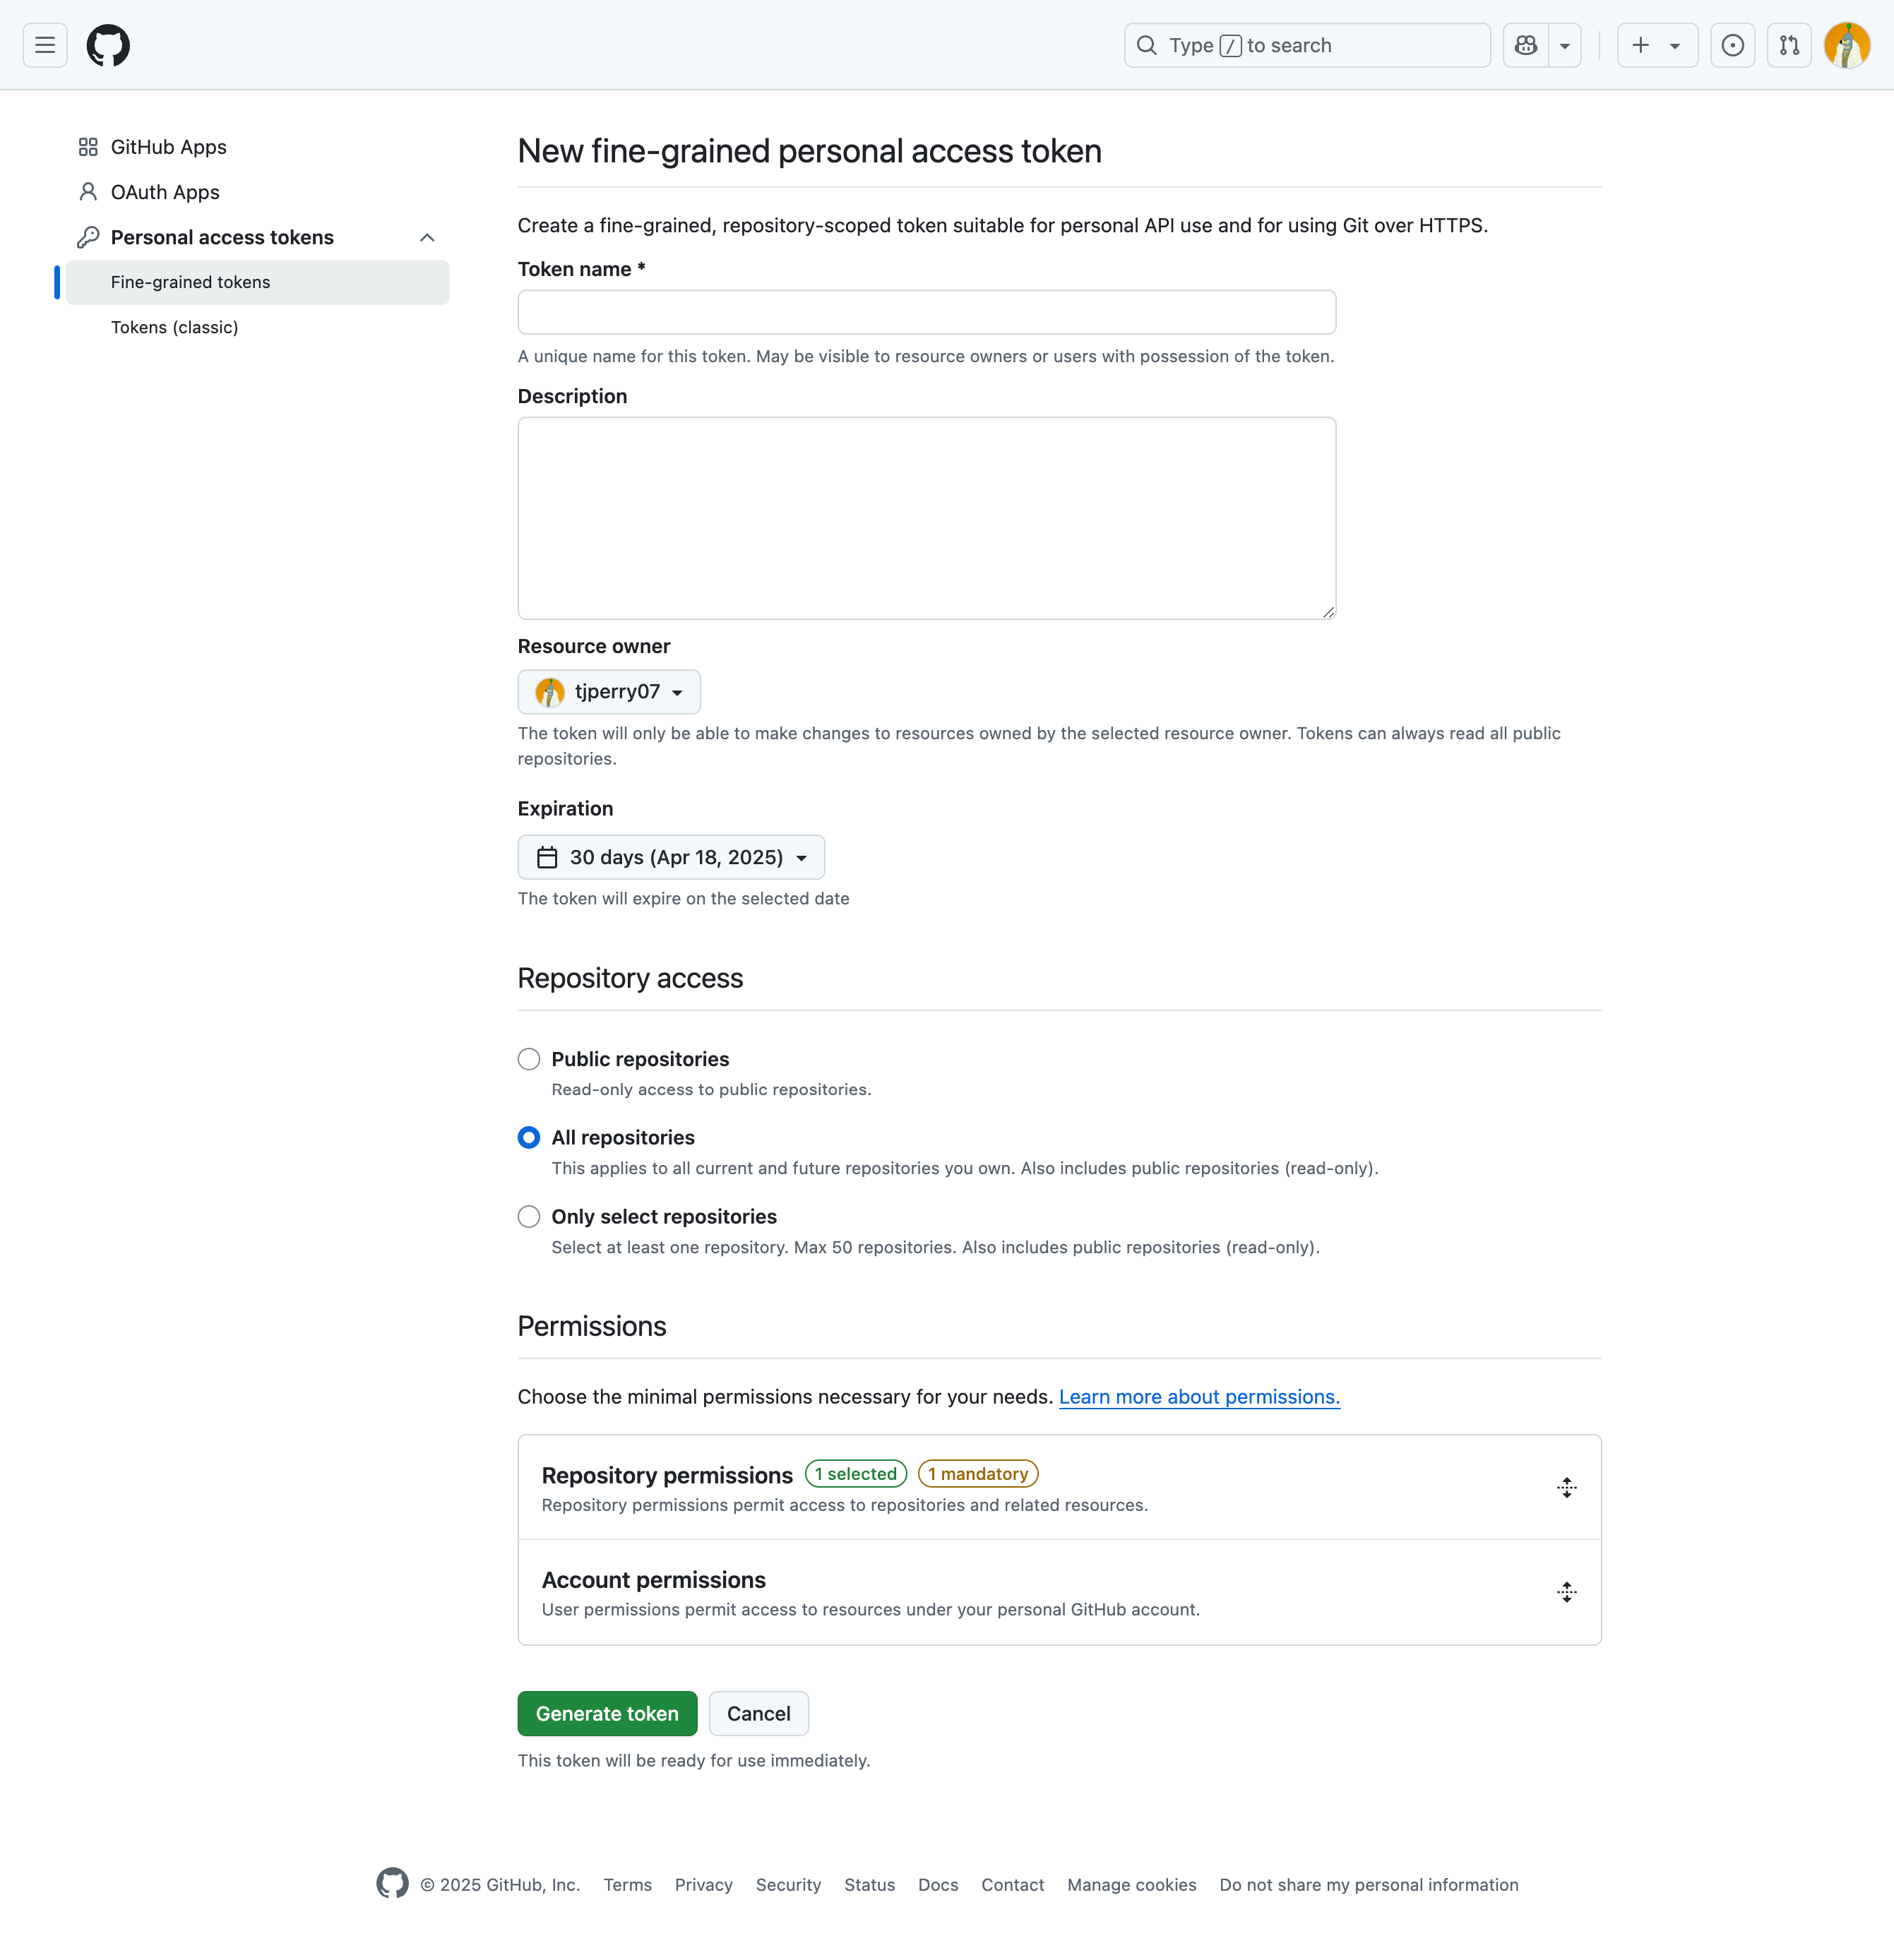
Give the token a name and description.
-
Set the following based on your company policy.
- Resource owner
- Expiration date
- Repository access should be either All repositories or Only select repositories.
-
Open Permissions > Repository permissions.
-
Set Contents to Read and write. GitHub will also automatically grant Metadata, which is required.

-
Save your access token somewhere secure. You won't be able to recover it.
For Coalesce, the token needs Contents: Read and write. This allows the account to push commits, pull changes, and manage branches. No other repository permissions are required.
Step 2: Add the Account to Coalesce
Add the automation account to your Project in Coalesce:
-
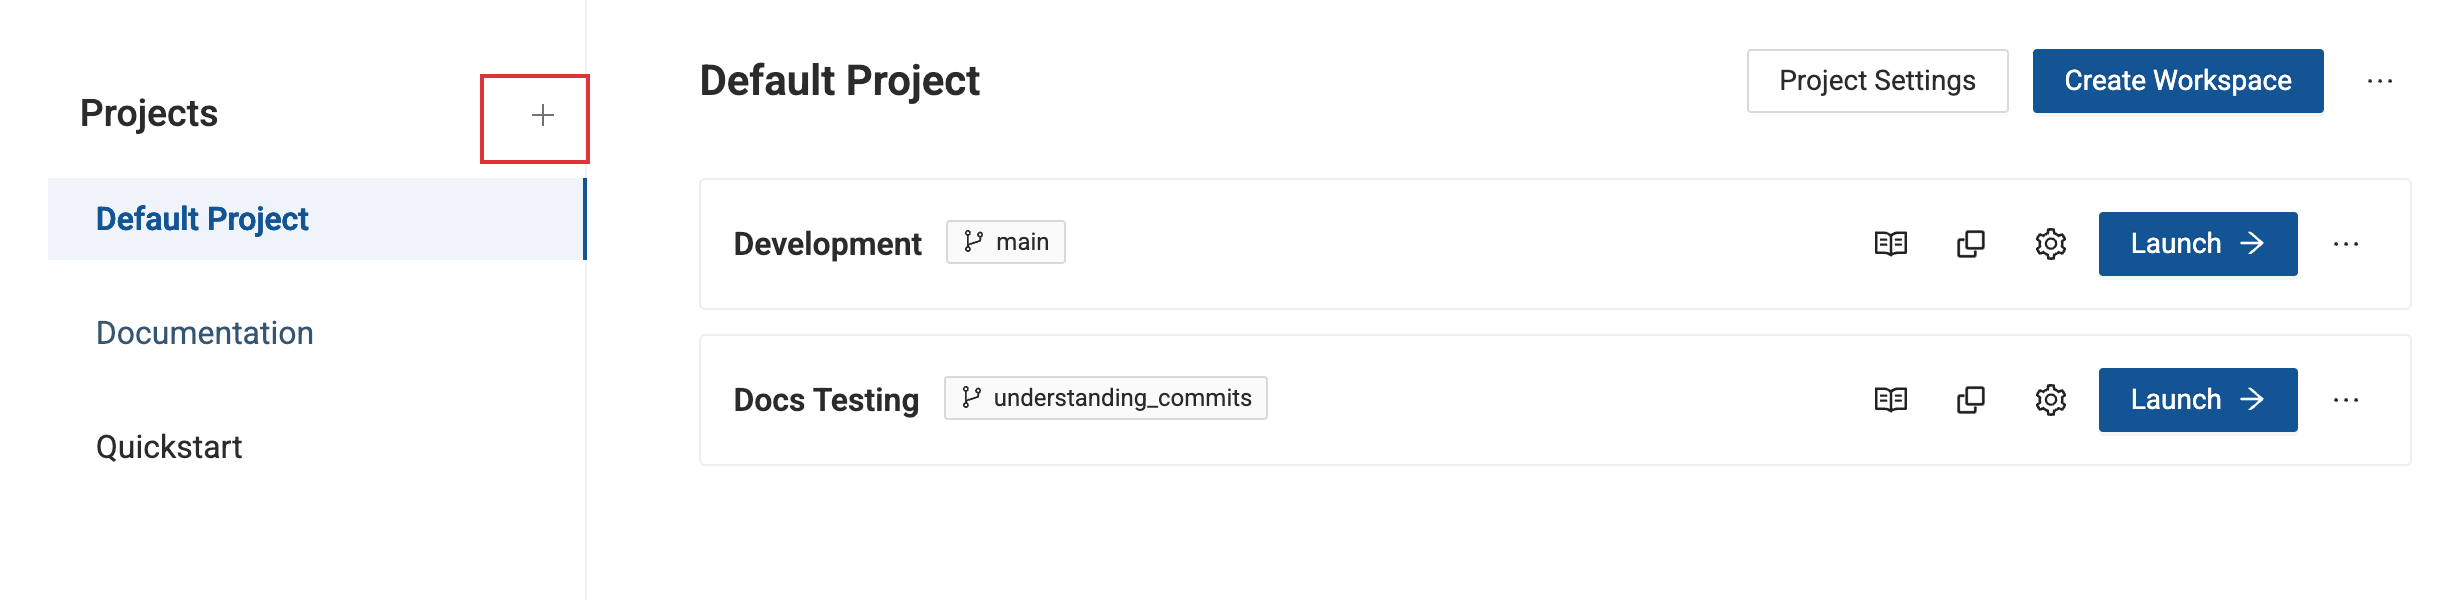
Go to the Project page. If you are on the Build page , click the back arrow.
-
Click the plus sign(+) next to Projects.
-
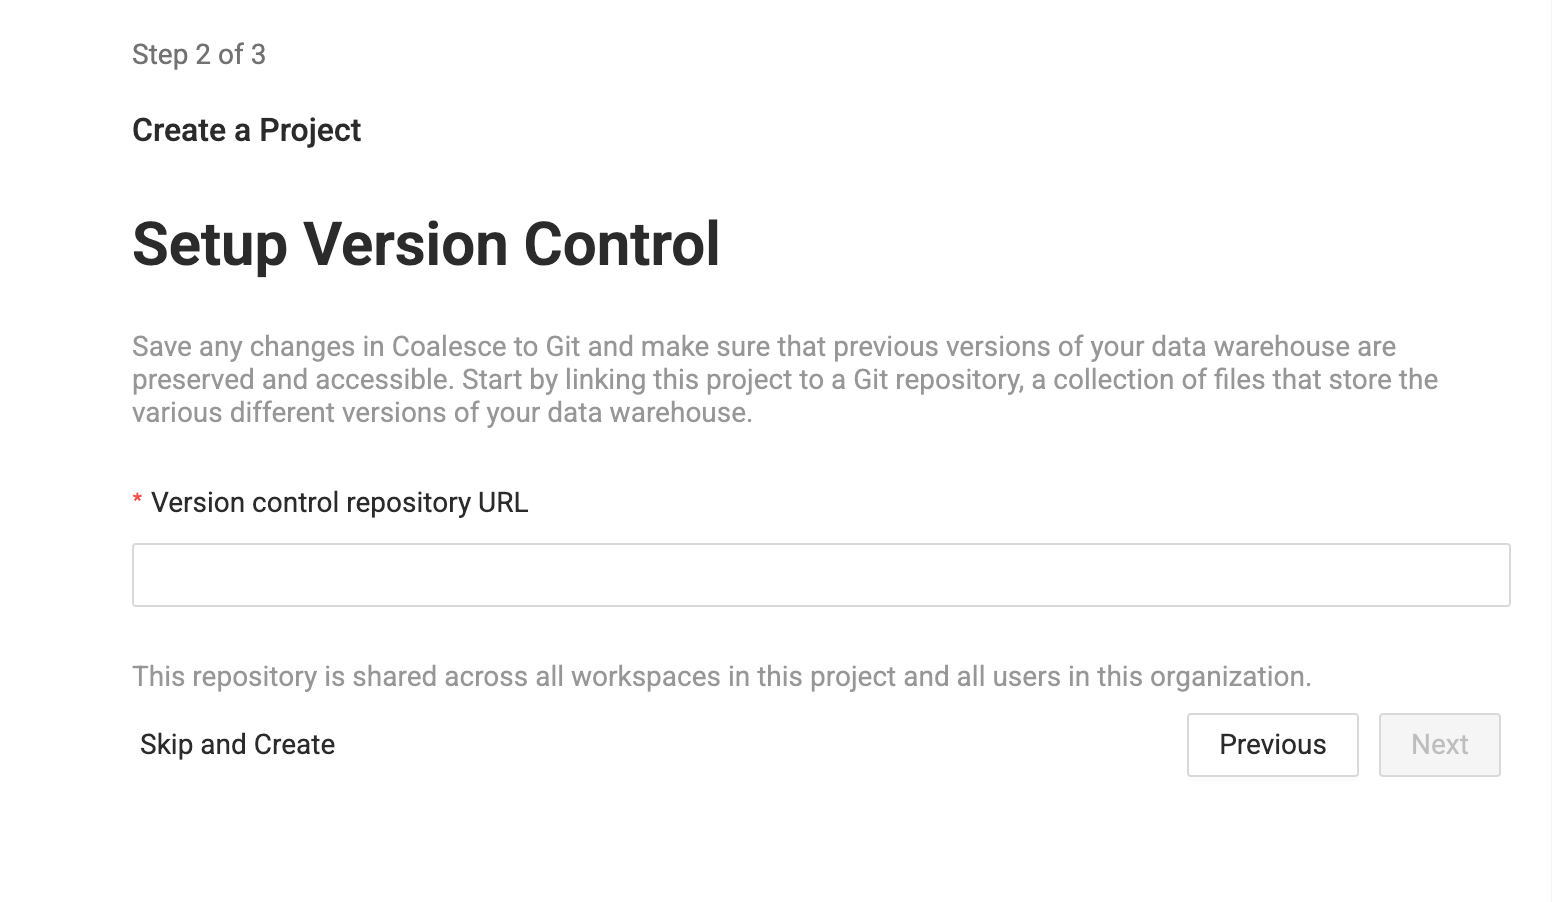
Enter the Project name and description. Click Next.

-
Enter your Version control repository URL.
-
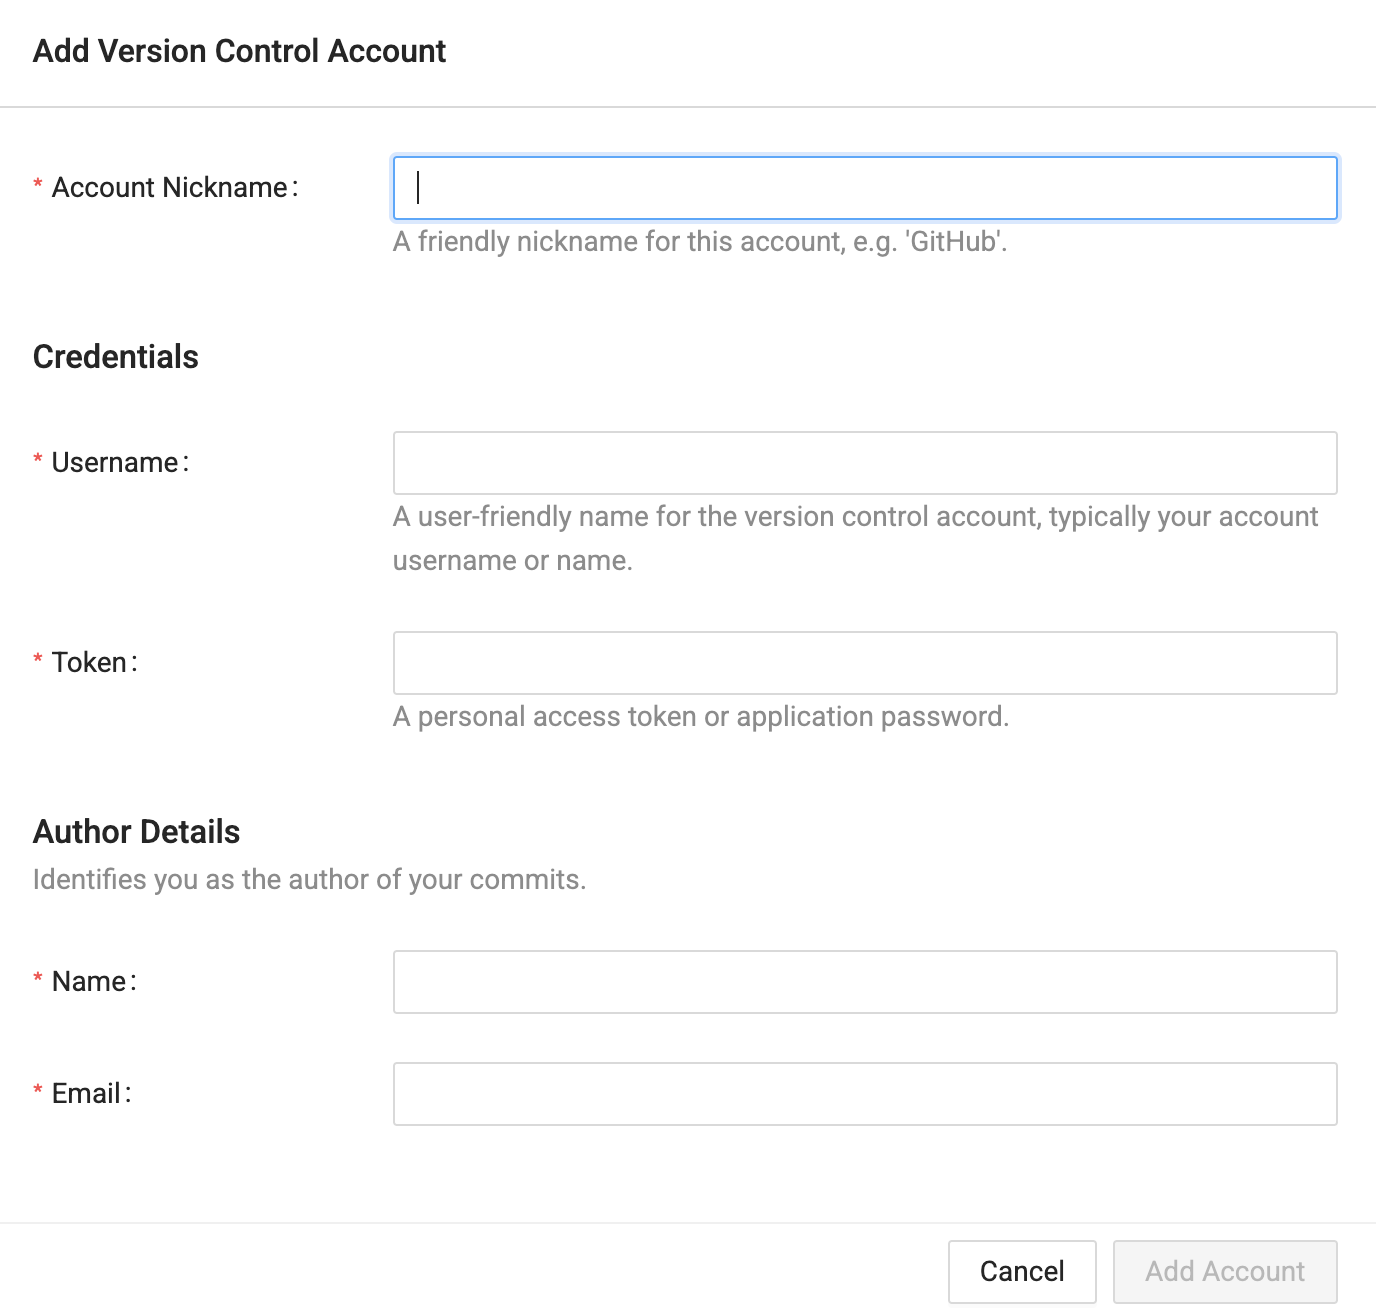
On the next page, Click Add New Account.
- Enter an account nickname. This will displayed in the interface.
- Enter your username. If you are using Bitbucket AND generated a repo access token, set
x-token-authas the username. - Enter your token. This will be either the GitLab token, Git token, Azure token, or Bitbucket Token
- Enter the Author Name, which identifies the committer. This doesn't have to match your version control account.
- Enter the Author Email, which identifies the committer email. This doesn't have to match your version control account.
- Click Add.
-
Select the Git account you just created in the drop down, then click Test Account.
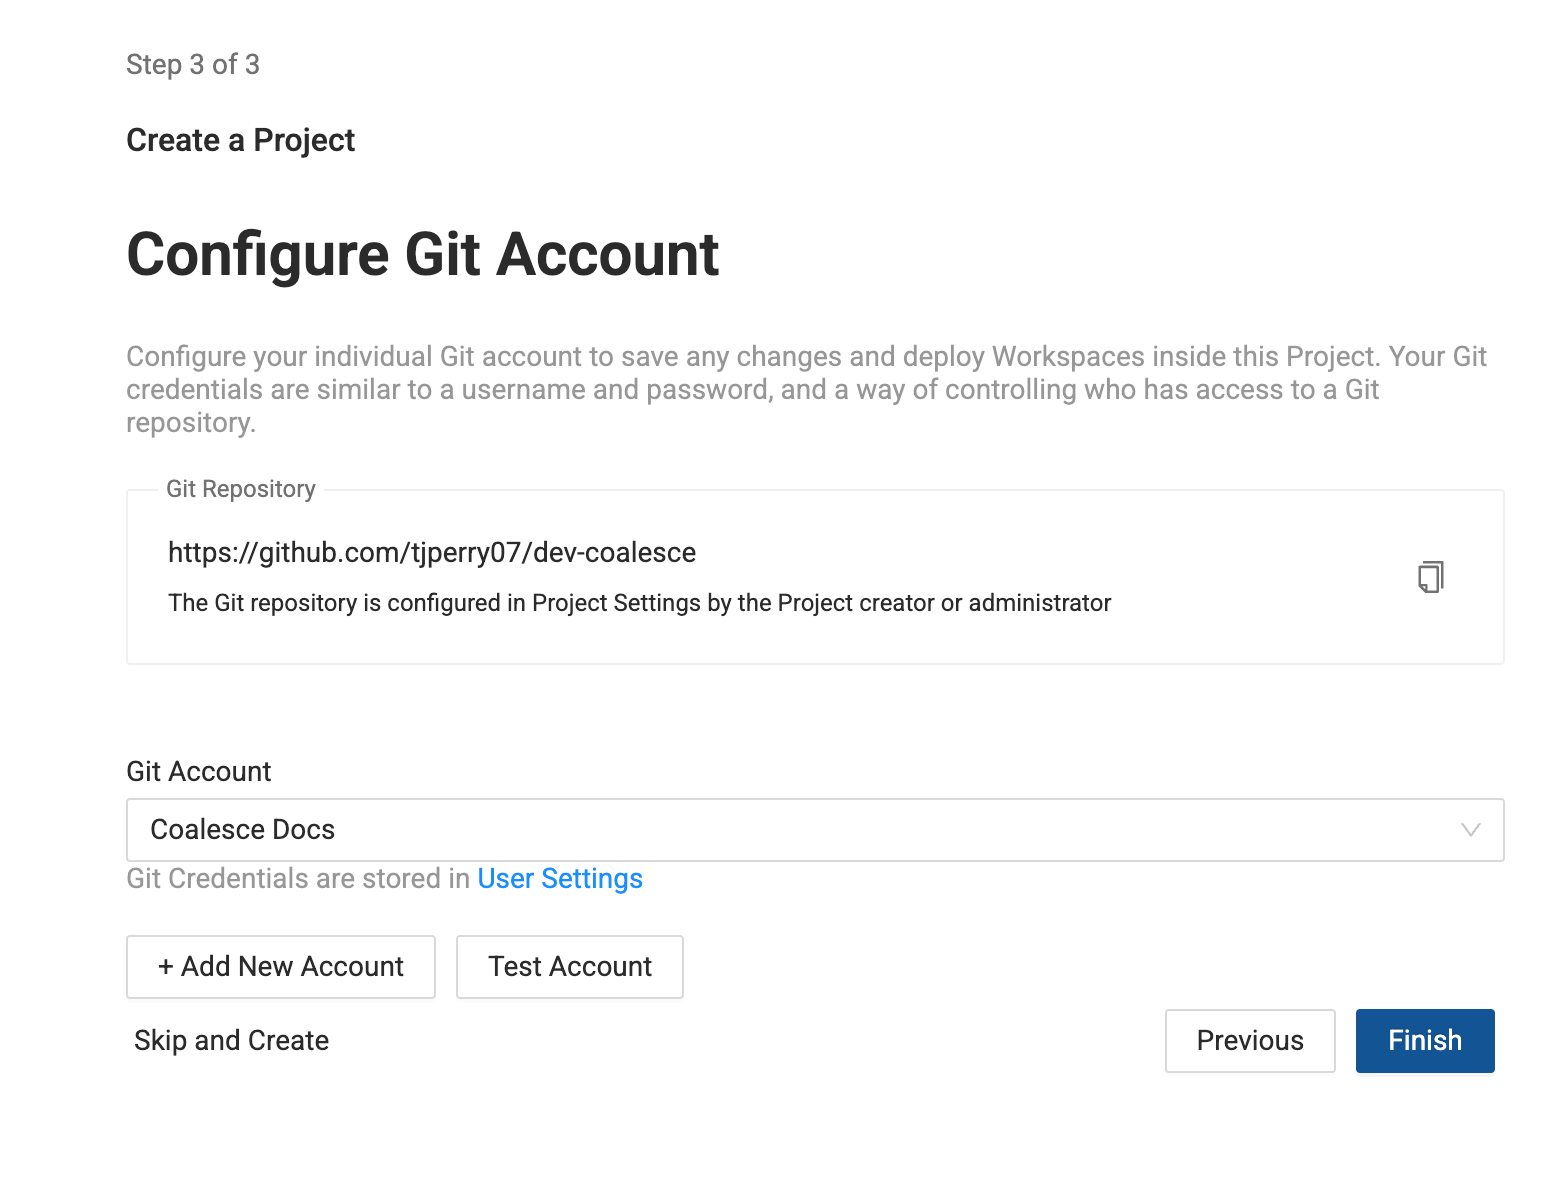
-
Then click Finish to create your Project.
If your Project already has version control configured, you can add a new Git account from User Menu > User Settings > Git Accounts. Click Add and fill in the same fields. Then select the new account when configuring the Project or Workspace used by automation.
Coalesce Service Accounts vs. Git Accounts
Coalesce has its own service accounts for running deployments, refreshes, and scheduled jobs in the Coalesce app. Those are separate from Git accounts:
- Coalesce service accounts: Log into Coalesce and perform deployments, refreshes, and other operations. They are created in Org Settings > Users and use key pair or machine-to-machine authentication. See Service Accounts in Coalesce and Adding Users and Setting Permissions.
- Git accounts: Authenticate with your Git provider (GitHub, GitLab, Bitbucket, Azure DevOps) when Coalesce commits or pushes code. They are created in User Settings > Git Accounts or during Project setup.
For a fully automated pipeline, you typically need both:
- A Coalesce service account with Environment Admin (or equivalent) to deploy and refresh.
- A Git account tied to a dedicated GitHub (or other provider) account for version control operations.
Best Practices
Follow these practices when managing automation accounts:
- Use a dedicated account: Don't use a developer's personal GitHub account for automation.
- Use distribution emails: Tie the automation account to a shared mailbox (for example,
coalesce-bot@yourcompany.com) so it isn't tied to one person. - Scope tokens narrowly: Use fine-grained tokens with access only to the repositories Coalesce needs.
- Rotate tokens periodically: Set an expiration and rotate tokens before they expire. Update the token in Coalesce when you rotate.
- Document the account: Record who manages the account and where tokens are stored so your team can maintain it.
What's Next
- Set Up Version Control—Full setup guide for GitHub, GitLab, Bitbucket, and Azure DevOps.
- Managing Git Accounts—Change repository URLs, add accounts, and update credentials.
- Service Accounts in Coalesce—Configure Coalesce service accounts for deployments and refreshes.
- Orchestrate Jobs With GitHub Actions and the API—Automate deployments with GitHub Actions.
- DataOps Best Practices with Git and Coalesce—Branching, merging, and deployment workflows.