Documentation index: llms.txt. This page is also available as markdown: append .md to this URL or send Accept: text/markdown.
Deploy Using the CLI
This guide goes over deploying your environment using the Coalesce coa CLI tool.
Before You Begin
Make sure you have the following setup before deploying using coa.
- Install
coaby following the instructions in CLI Setup. - You need to have a Git Repository with your pipeline information added.
Environment Configured
Each deploy targets a Coalesce Environment. You can create and configure an Environment in the Coalesce App or from the CLI.
Manage Environments from the CLI
Environment create, update, and delete commands require Coalesce 7.36 or later. See CLI Commands for flags and request file formats.
- Authenticate with a Coalesce access token in
~/.coa/configor your profile. See CLI Setup. - Ensure you have a Coalesce Project. If not, run
coa projects createwith a request file. See CLI Commands. - Run
coa environments create --inputFile <request-file>with the Project ID, Environment name,oauthEnabled, and platform connection fields (connectionAccountfor Snowflake oraccessUrlfor Databricks). Optional fields includedescription,runTimeParameters, andmappings. - Add warehouse credentials in the Coalesce App under Build Settings > Environments > User Credentials. Create and update requests do not accept passwords or OAuth refresh tokens.
- Run
coa environments listorcoa environments list --project <project-id>and note the Environment ID forcoa planandcoa deploy.
To change connection metadata or default parameters later, run coa environments update --environmentID <id> --inputFile <patch-file>. See Update Environment.
To remove an Environment you no longer need, run coa environments delete --environmentID <id>. The command prompts for confirmation unless you pass --skipConfirm.
Step 1: Open Your Repository
You need to be in the correct repository with the commit you want to deploy before moving onto Step 2.
Step 2: Create a Plan
This step assumed you've installed coa.
Before you can deploy, you need to create a plan. The plan details the environment, data platform credentials, and what will be deployed. You can create the plan as many times as needed before you deploy. It is based on the repo/branch and the environment configuration.
Run coa plan. This will generate a coa-plan.json. Open the file to review the plan information.
-
Review the
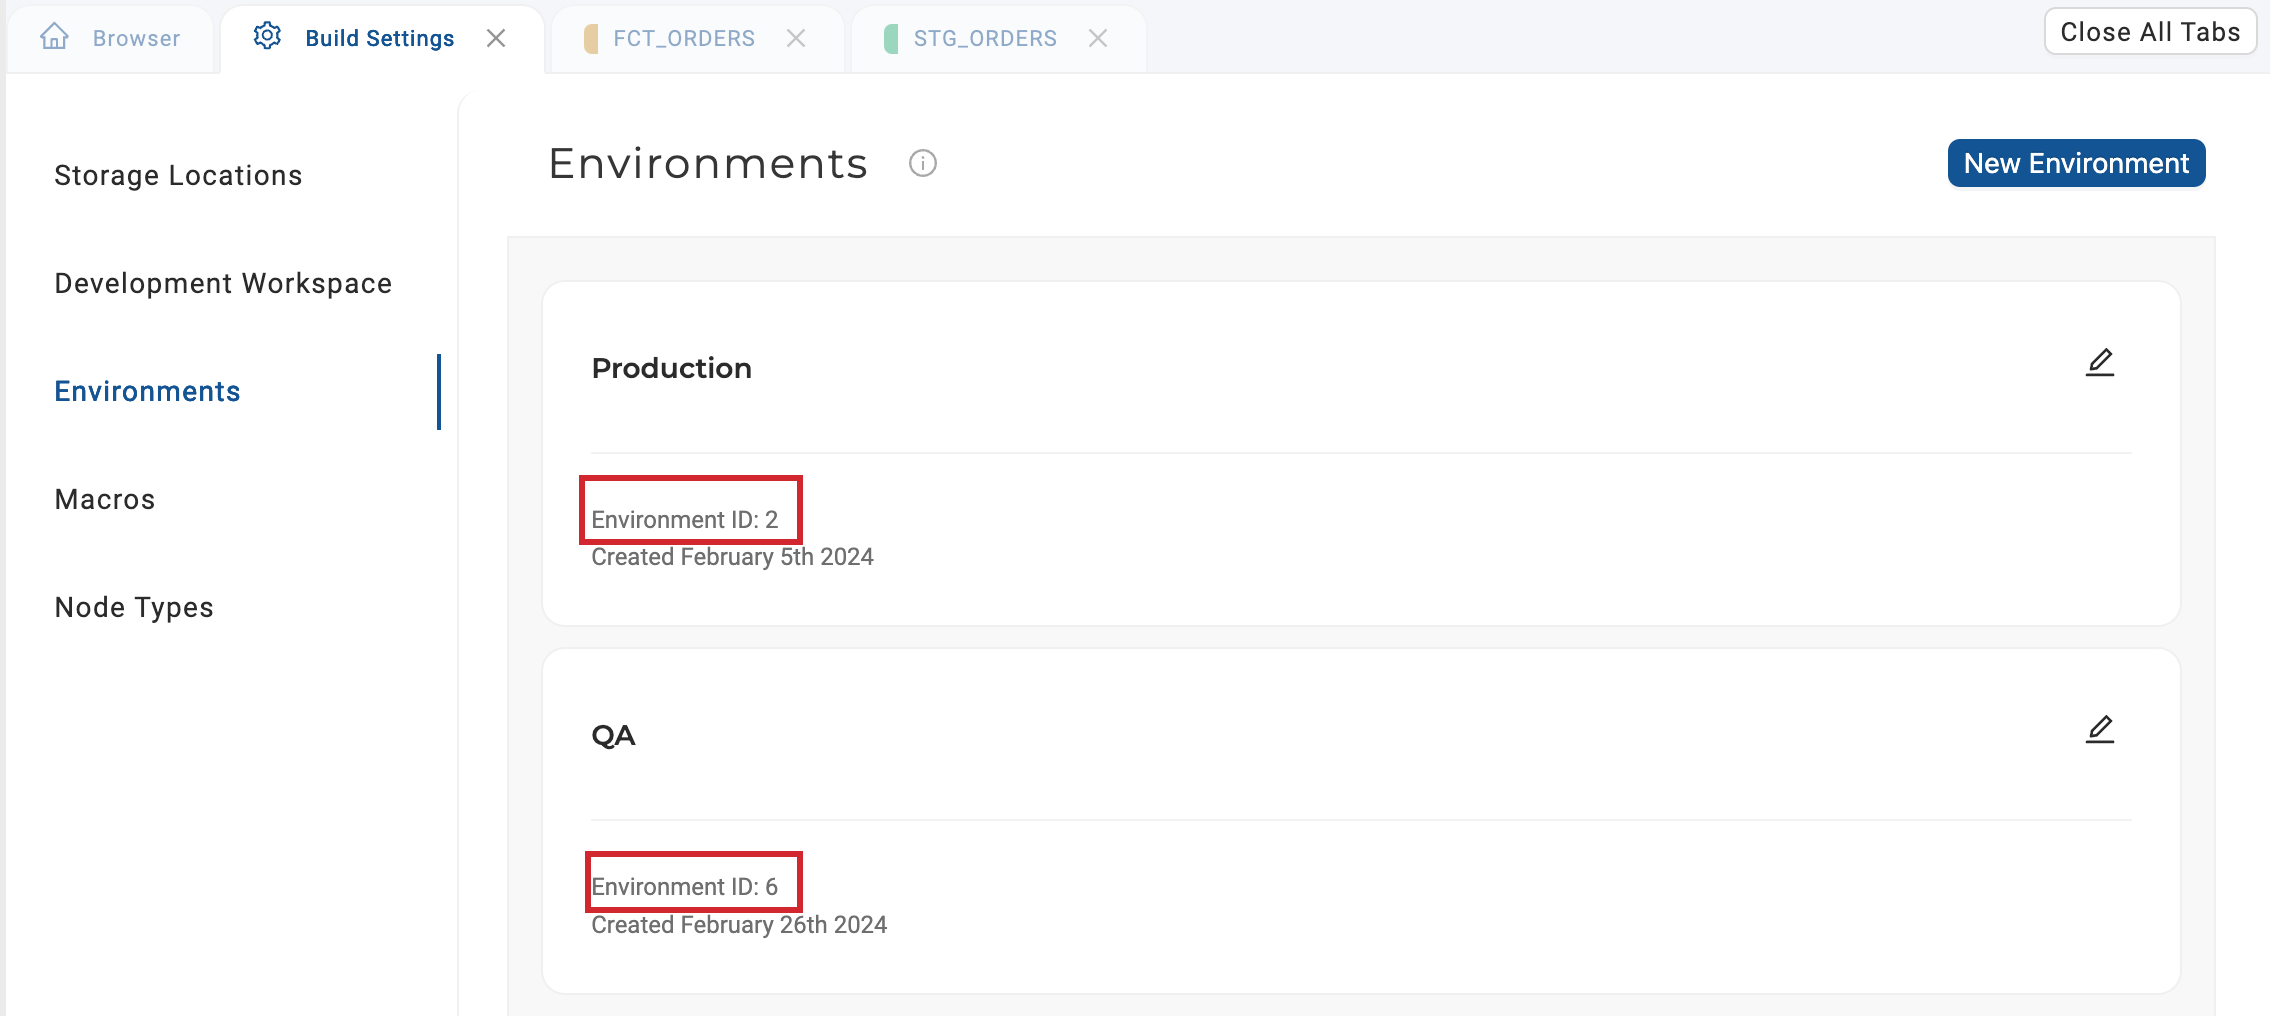
targetEnvironment, this is the environment where the deploy will happen. You can see the environment ID in multiple locations:-
The UI by going to Build Settings> Environments. The environment IDs are 2 and 6 in this example.
-
Run
coa environments listor use the List of Environments API. -
The environment ID is set by either:
- Hard-coding the information in the
.coafile - Setting it manually in the command line.
coa plan --environmentID 6. You can also override the.coafile by using the command line.
- Hard-coding the information in the
-
-
You can also review
planobject, which includes tables that have been deleted, added, or altered. You can also see jobs, parameters, macros, and other deployment information.- If you want to change the
planobject, make your edits in the Coalesce app then update your local branch. We don't recommend updating the plan file directly.
- If you want to change the
Parameters
Parameters inherit from the Environment and can be overridden for this plan. Values overridden for a deploy are omitted from runTimeParameters in run results. Pass --parameters with a JSON object on coa plan. During plan generation, Coalesce also warns on undefined {{ parameters... }} references; warnings do not block the plan. See Overwriting at Deploy.
Review the CLI Commands for a full list of command line options.
Step 3: Deploy Your Plan
Run coa deploy.This will execute the plan you just created.
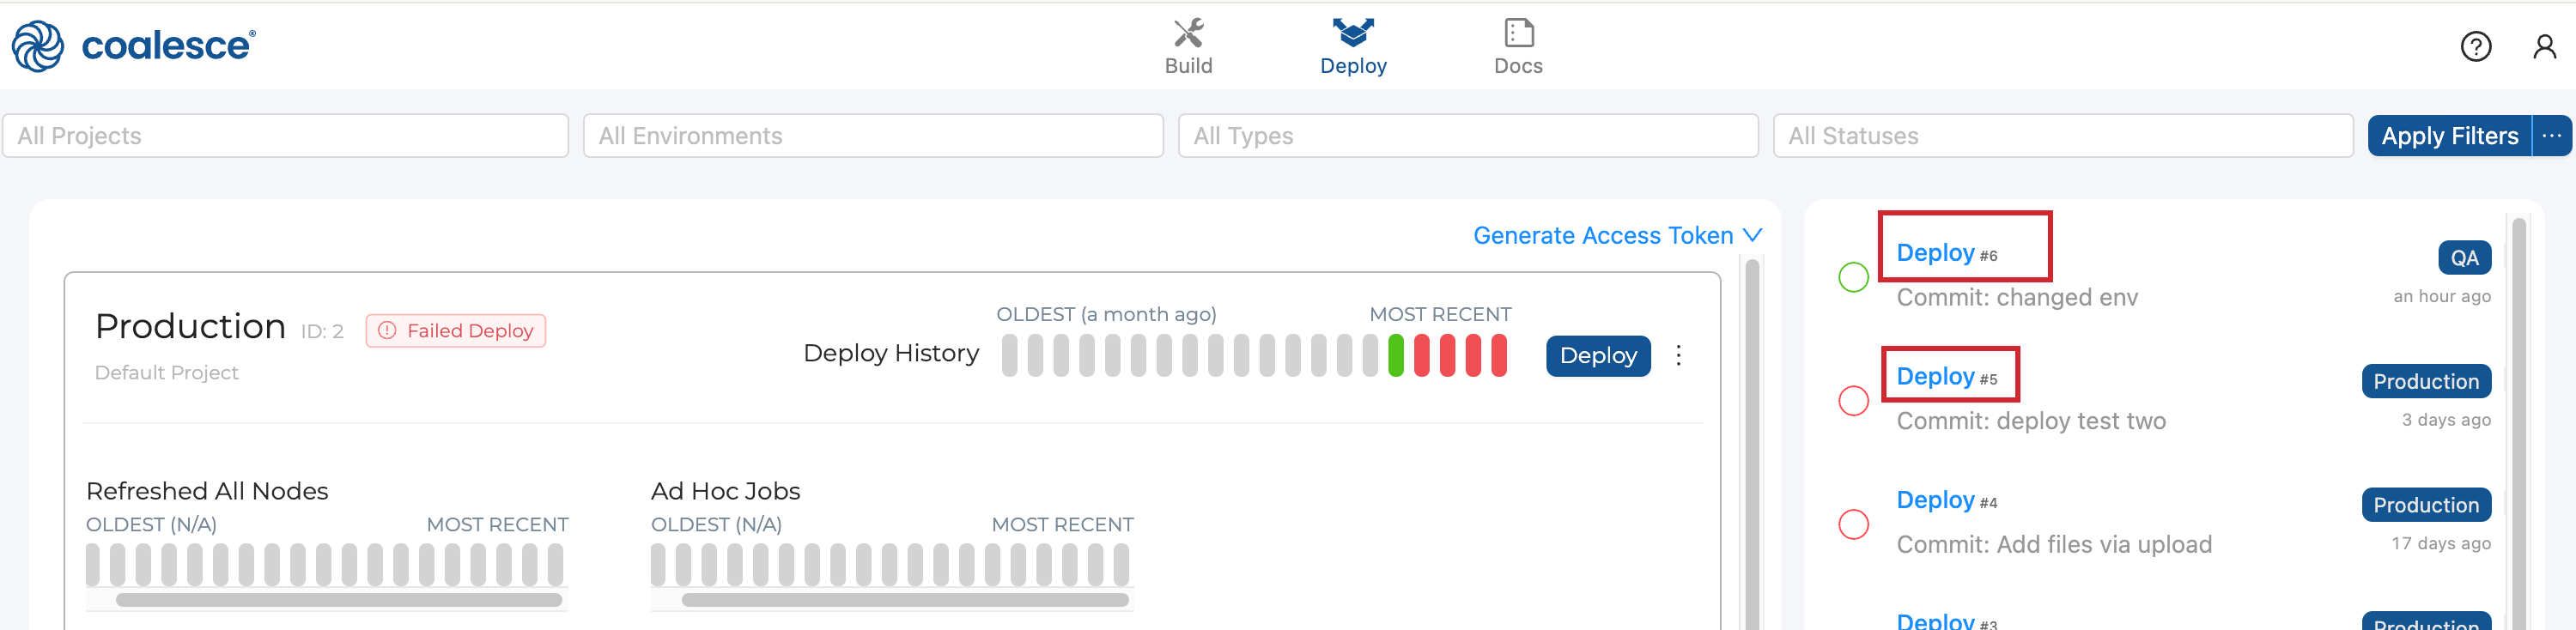
Review the Deploy Status
You can review the deploy status by:
-
Going to the run in Coalesce App and clicking on the deploy.
-
If you're using the cli, adding the
--outflag to print the results in JSON format. -
Using the API, List Run Results, using the
runID. The run ID is listed in the deploy information.