Documentation index: llms.txt. This page is also available as markdown: append .md to this URL or send Accept: text/markdown.
Column Lineage and Propagation
Coalesce includes a way to quickly view the lineage of each column as it is transformed throughout your Nodes.
View Column Lineage
To view Column Lineage:
-
Either open a Node or change to Column Grid view.
-
Right-click on any populated column and select View Column Lineage.
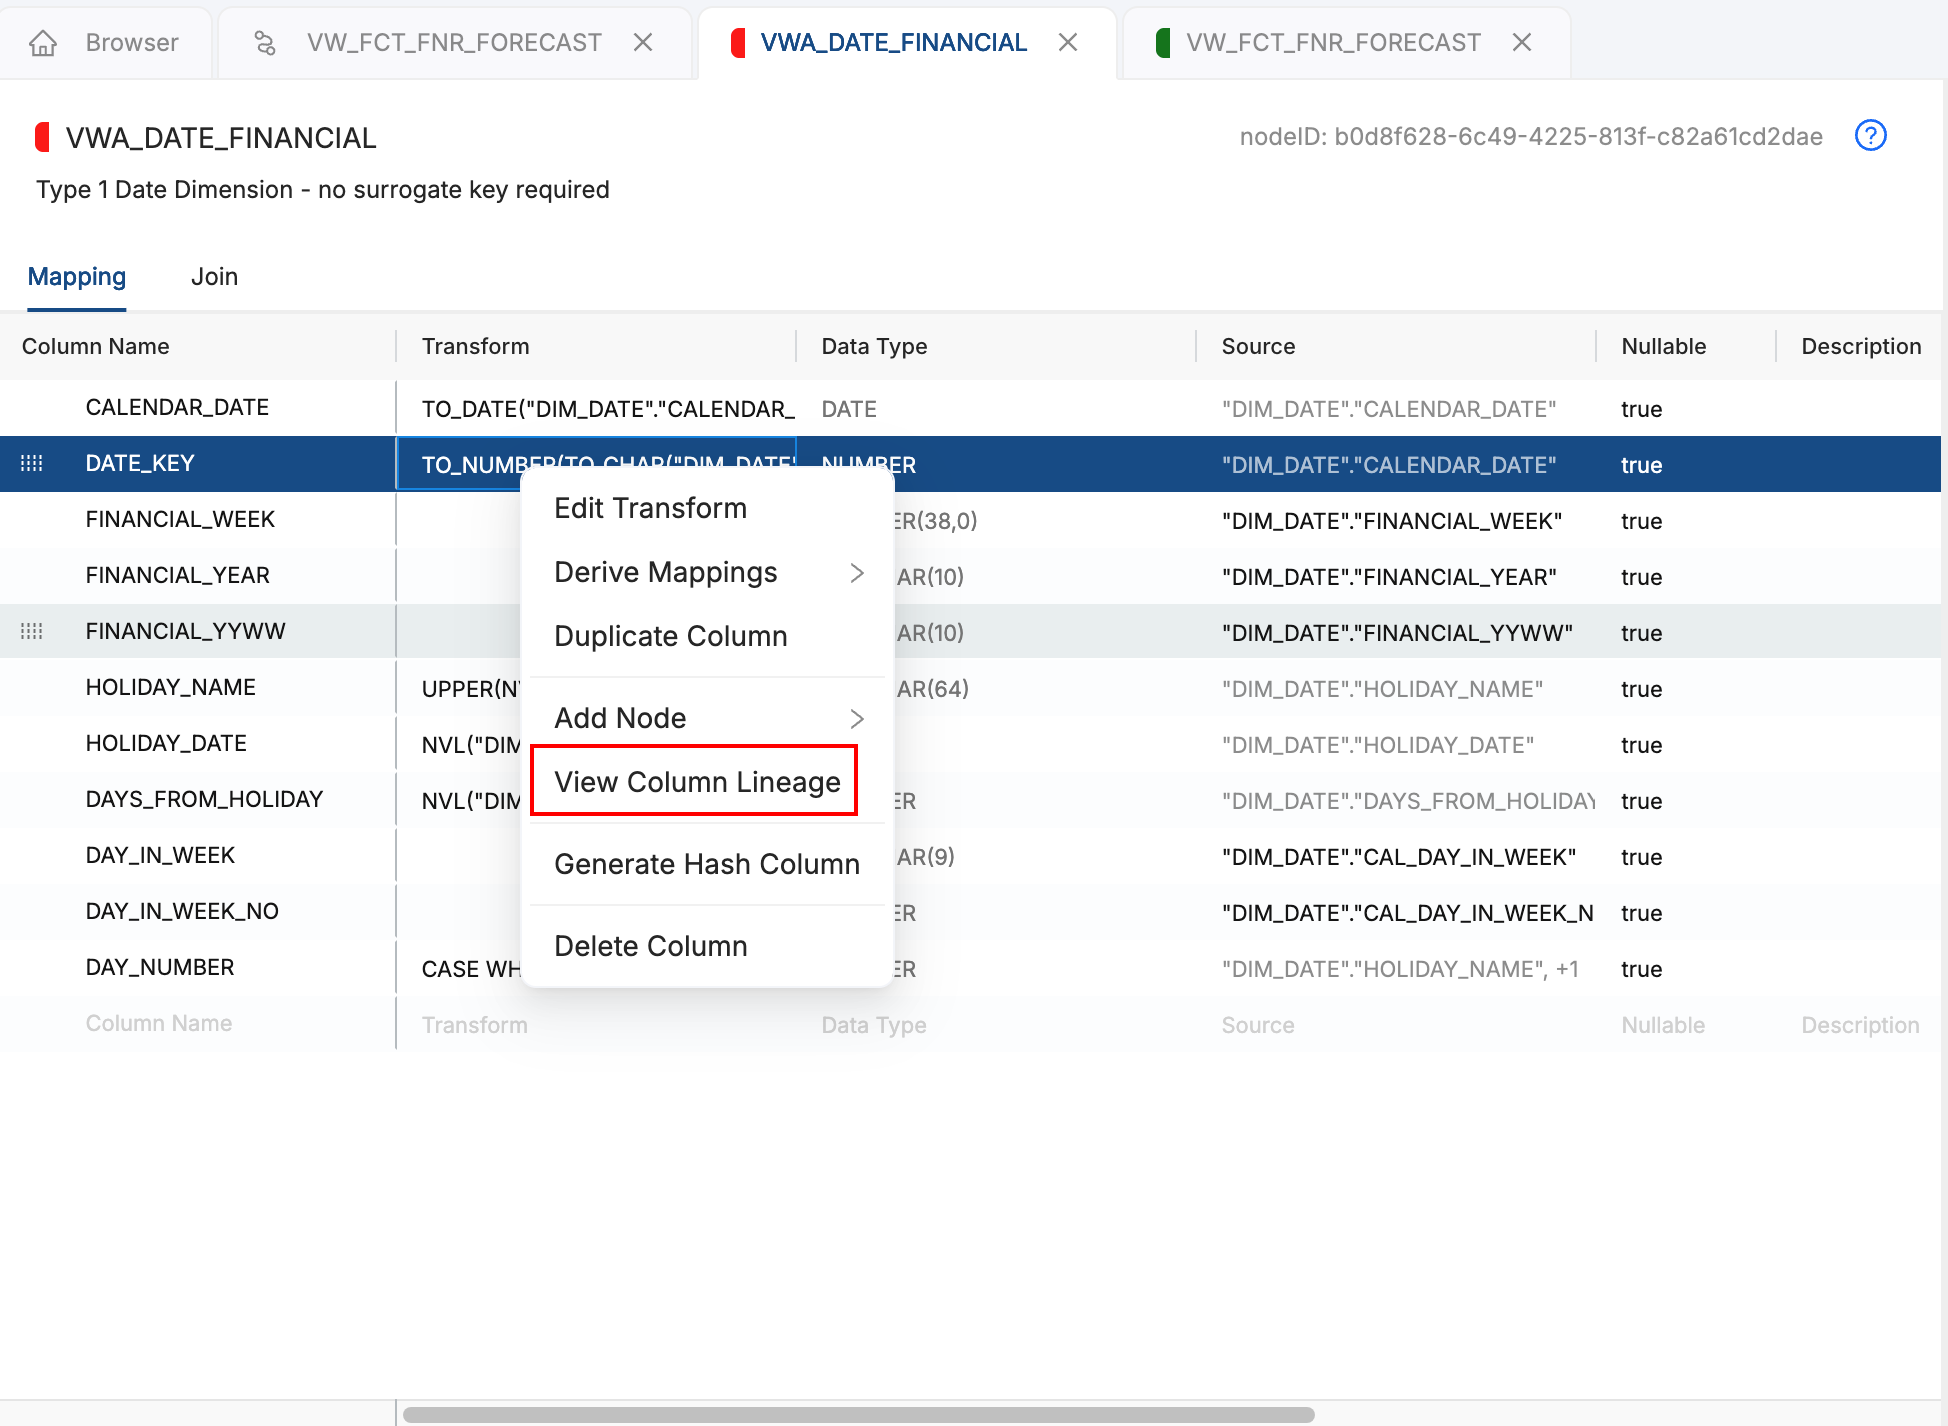
Mapping Grid 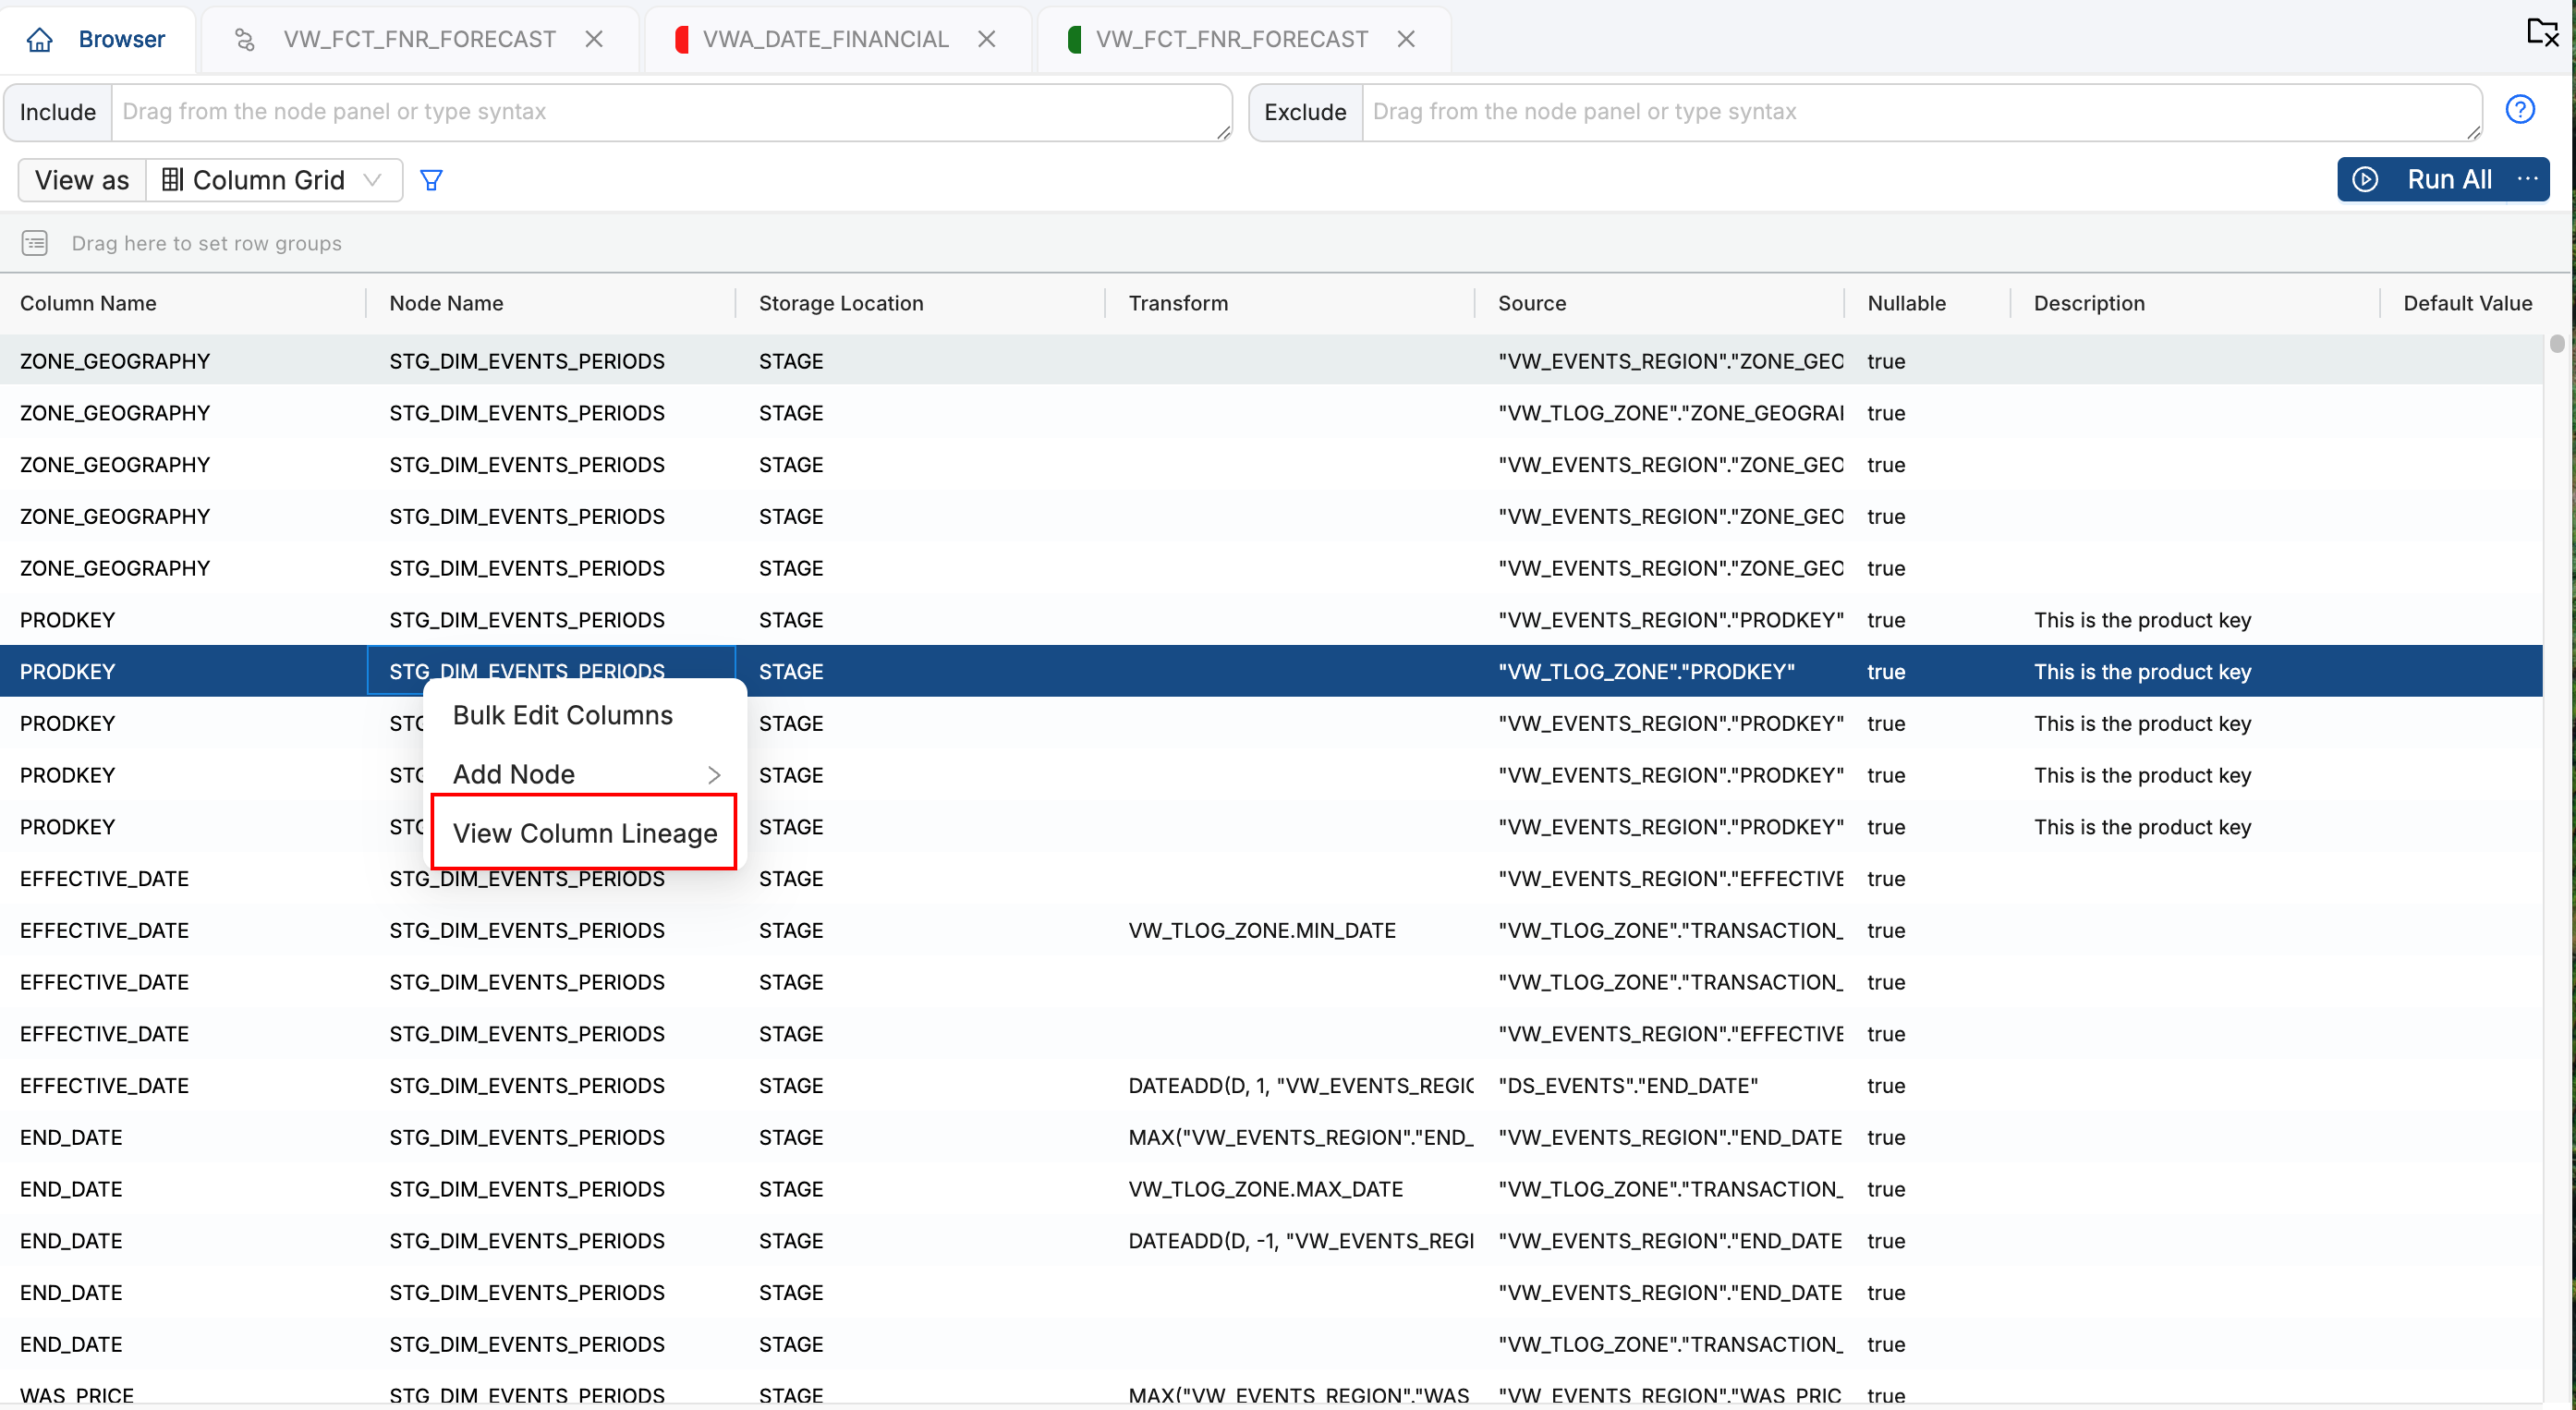
Column Grid -
A new tab with the column lineage will open.
Explore Column Lineage
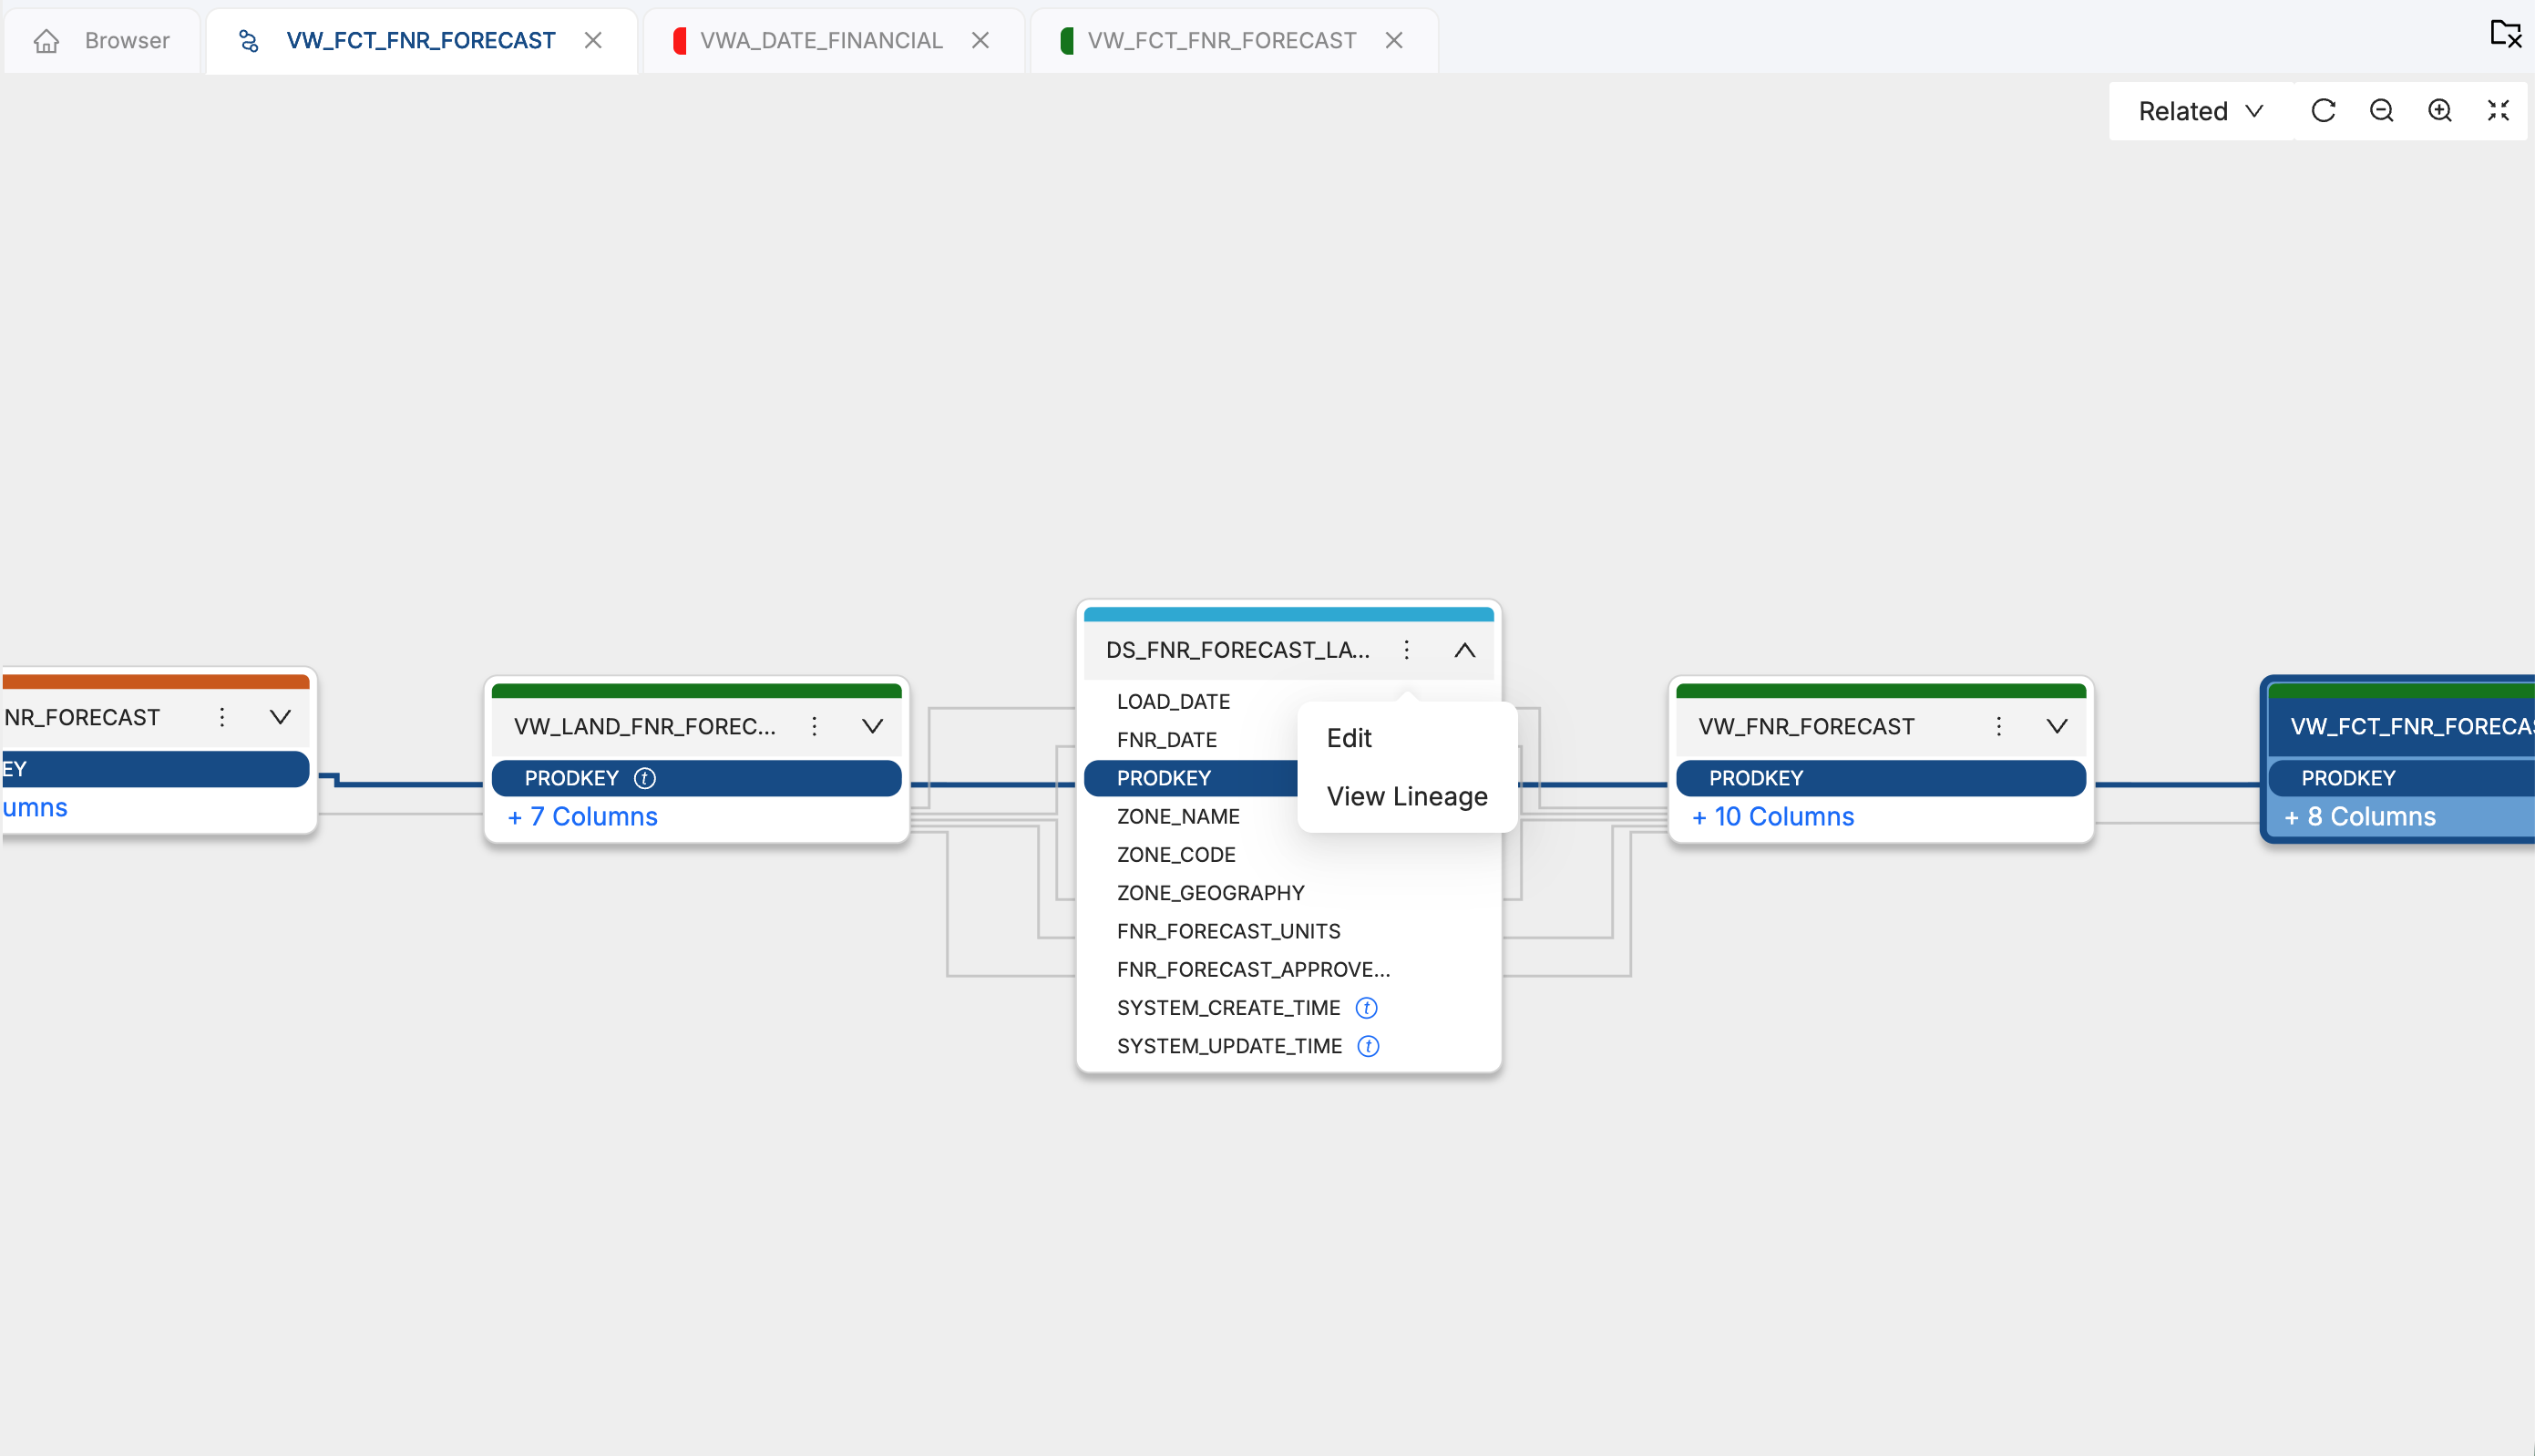
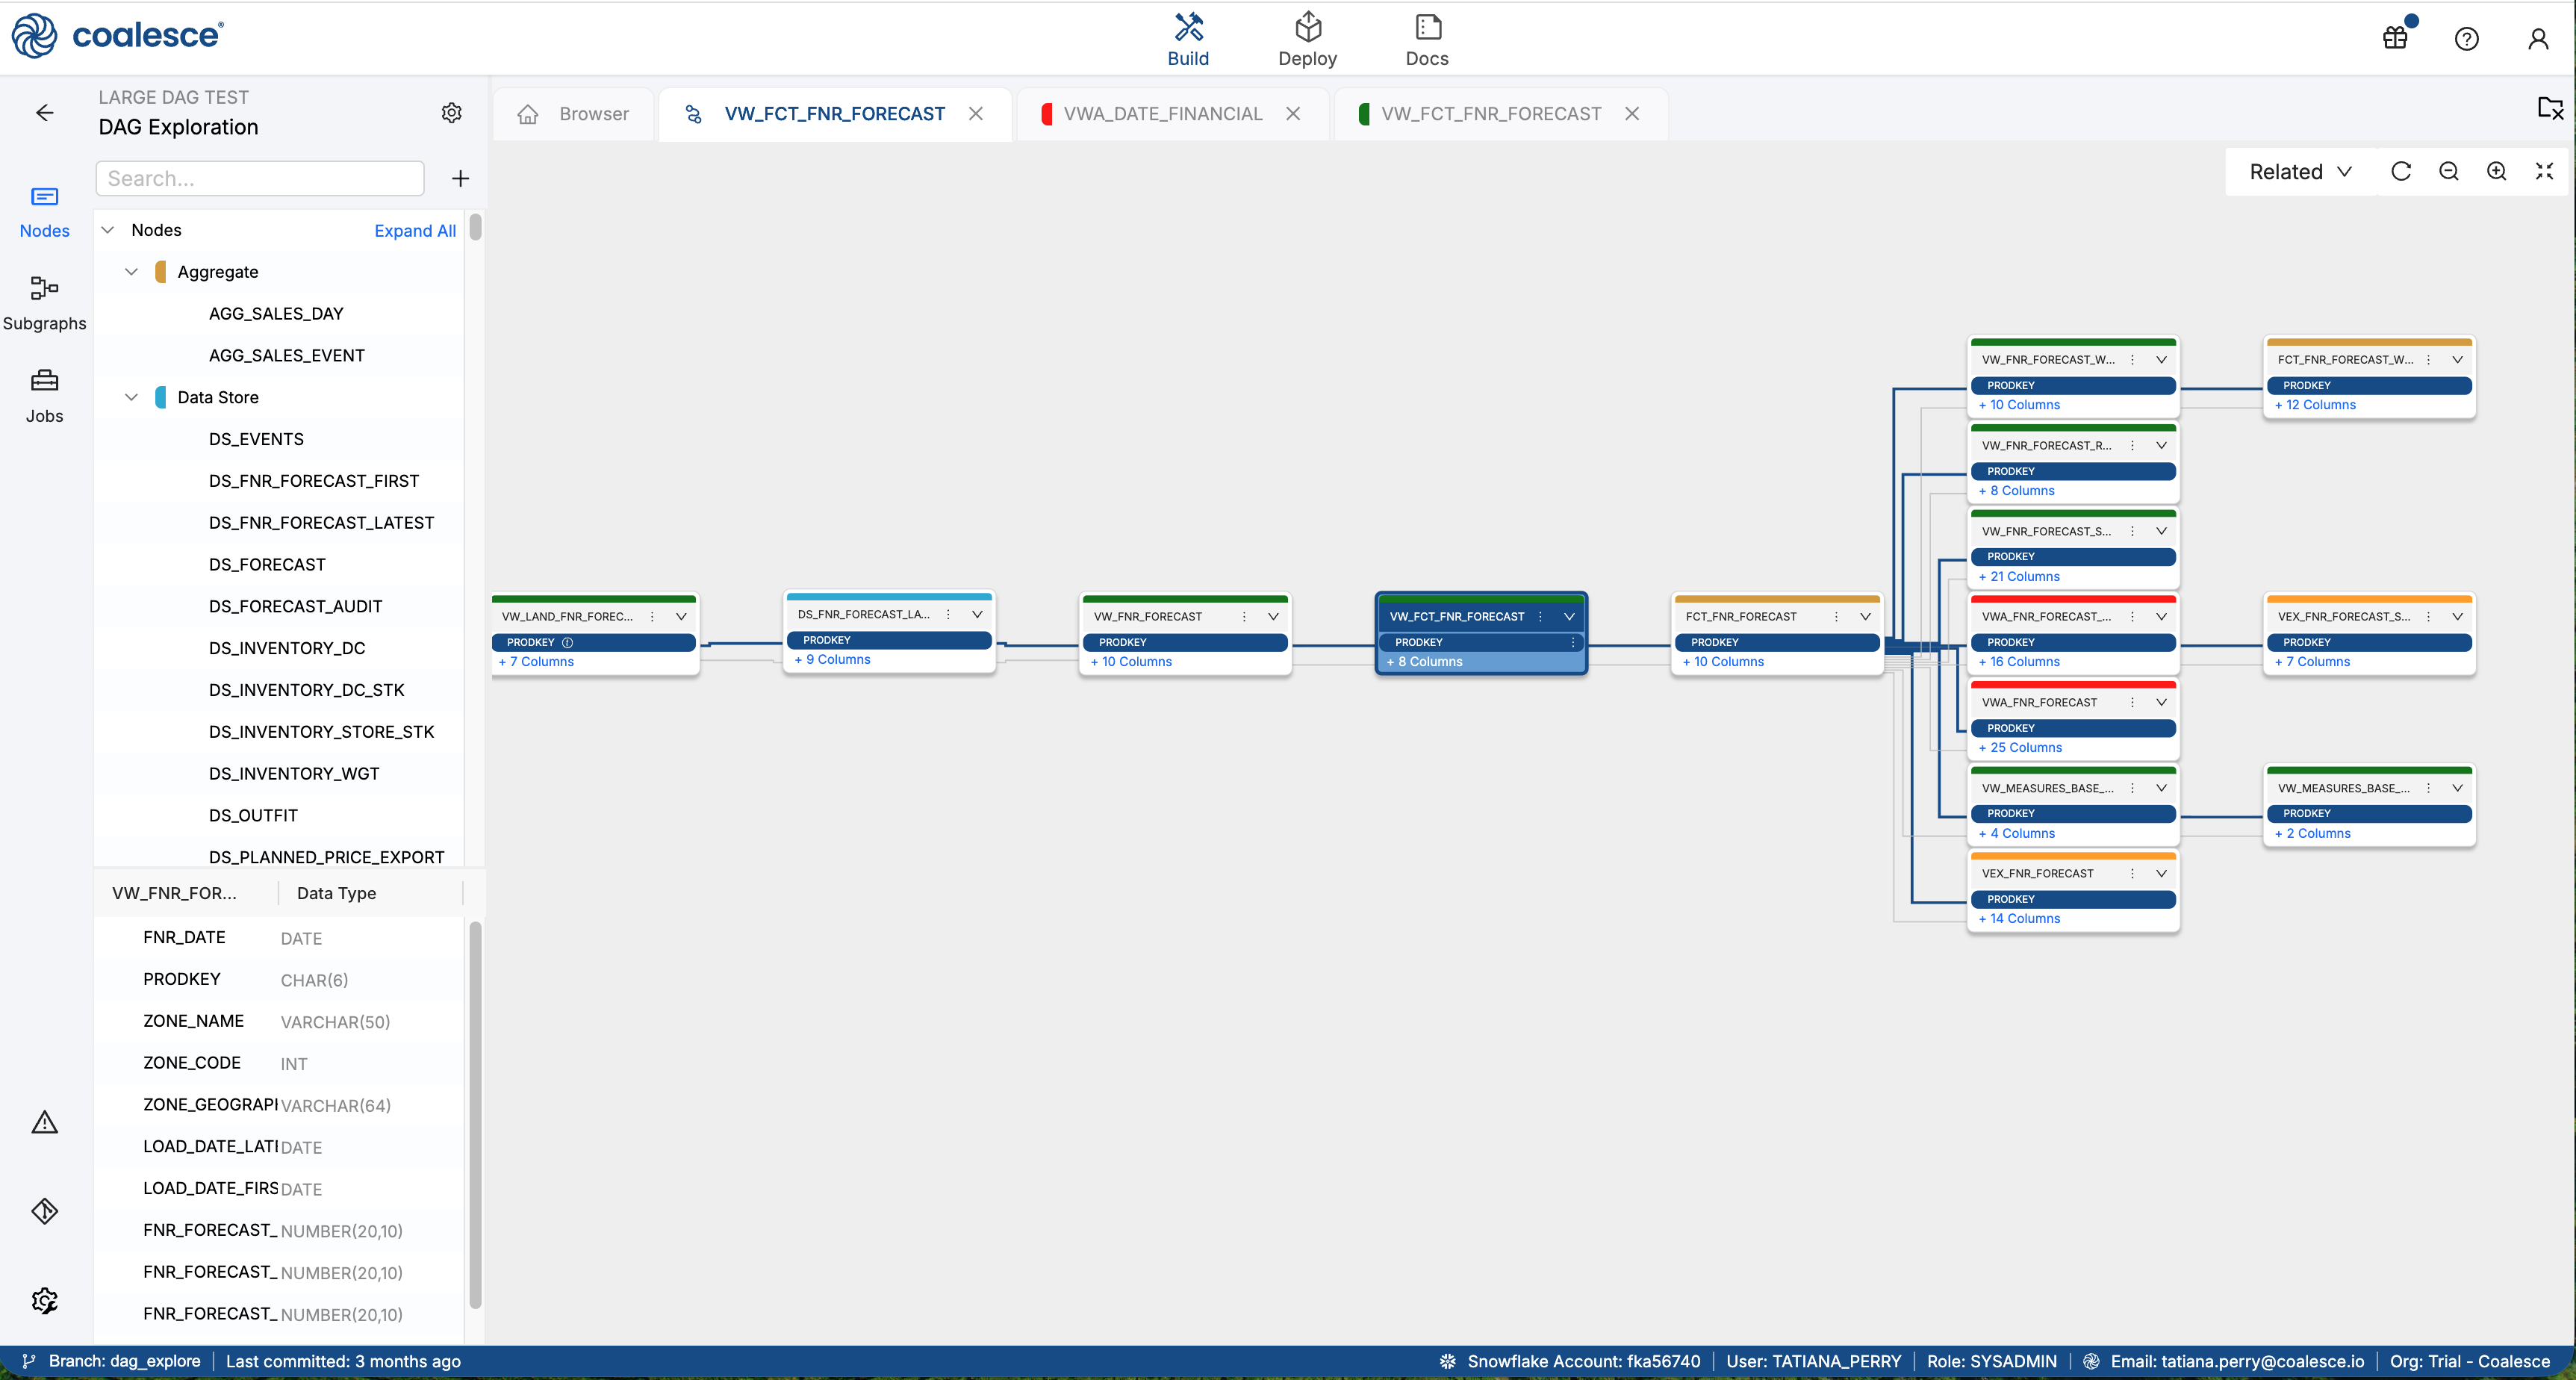
- Column lineage shows automatically opens with all Nodes collapsed to save on space. You can expand the Nodes one at a time.
- The
tnext to the column name indicates that a transformation has been applied. - Click the
:to edit and View Lineage.
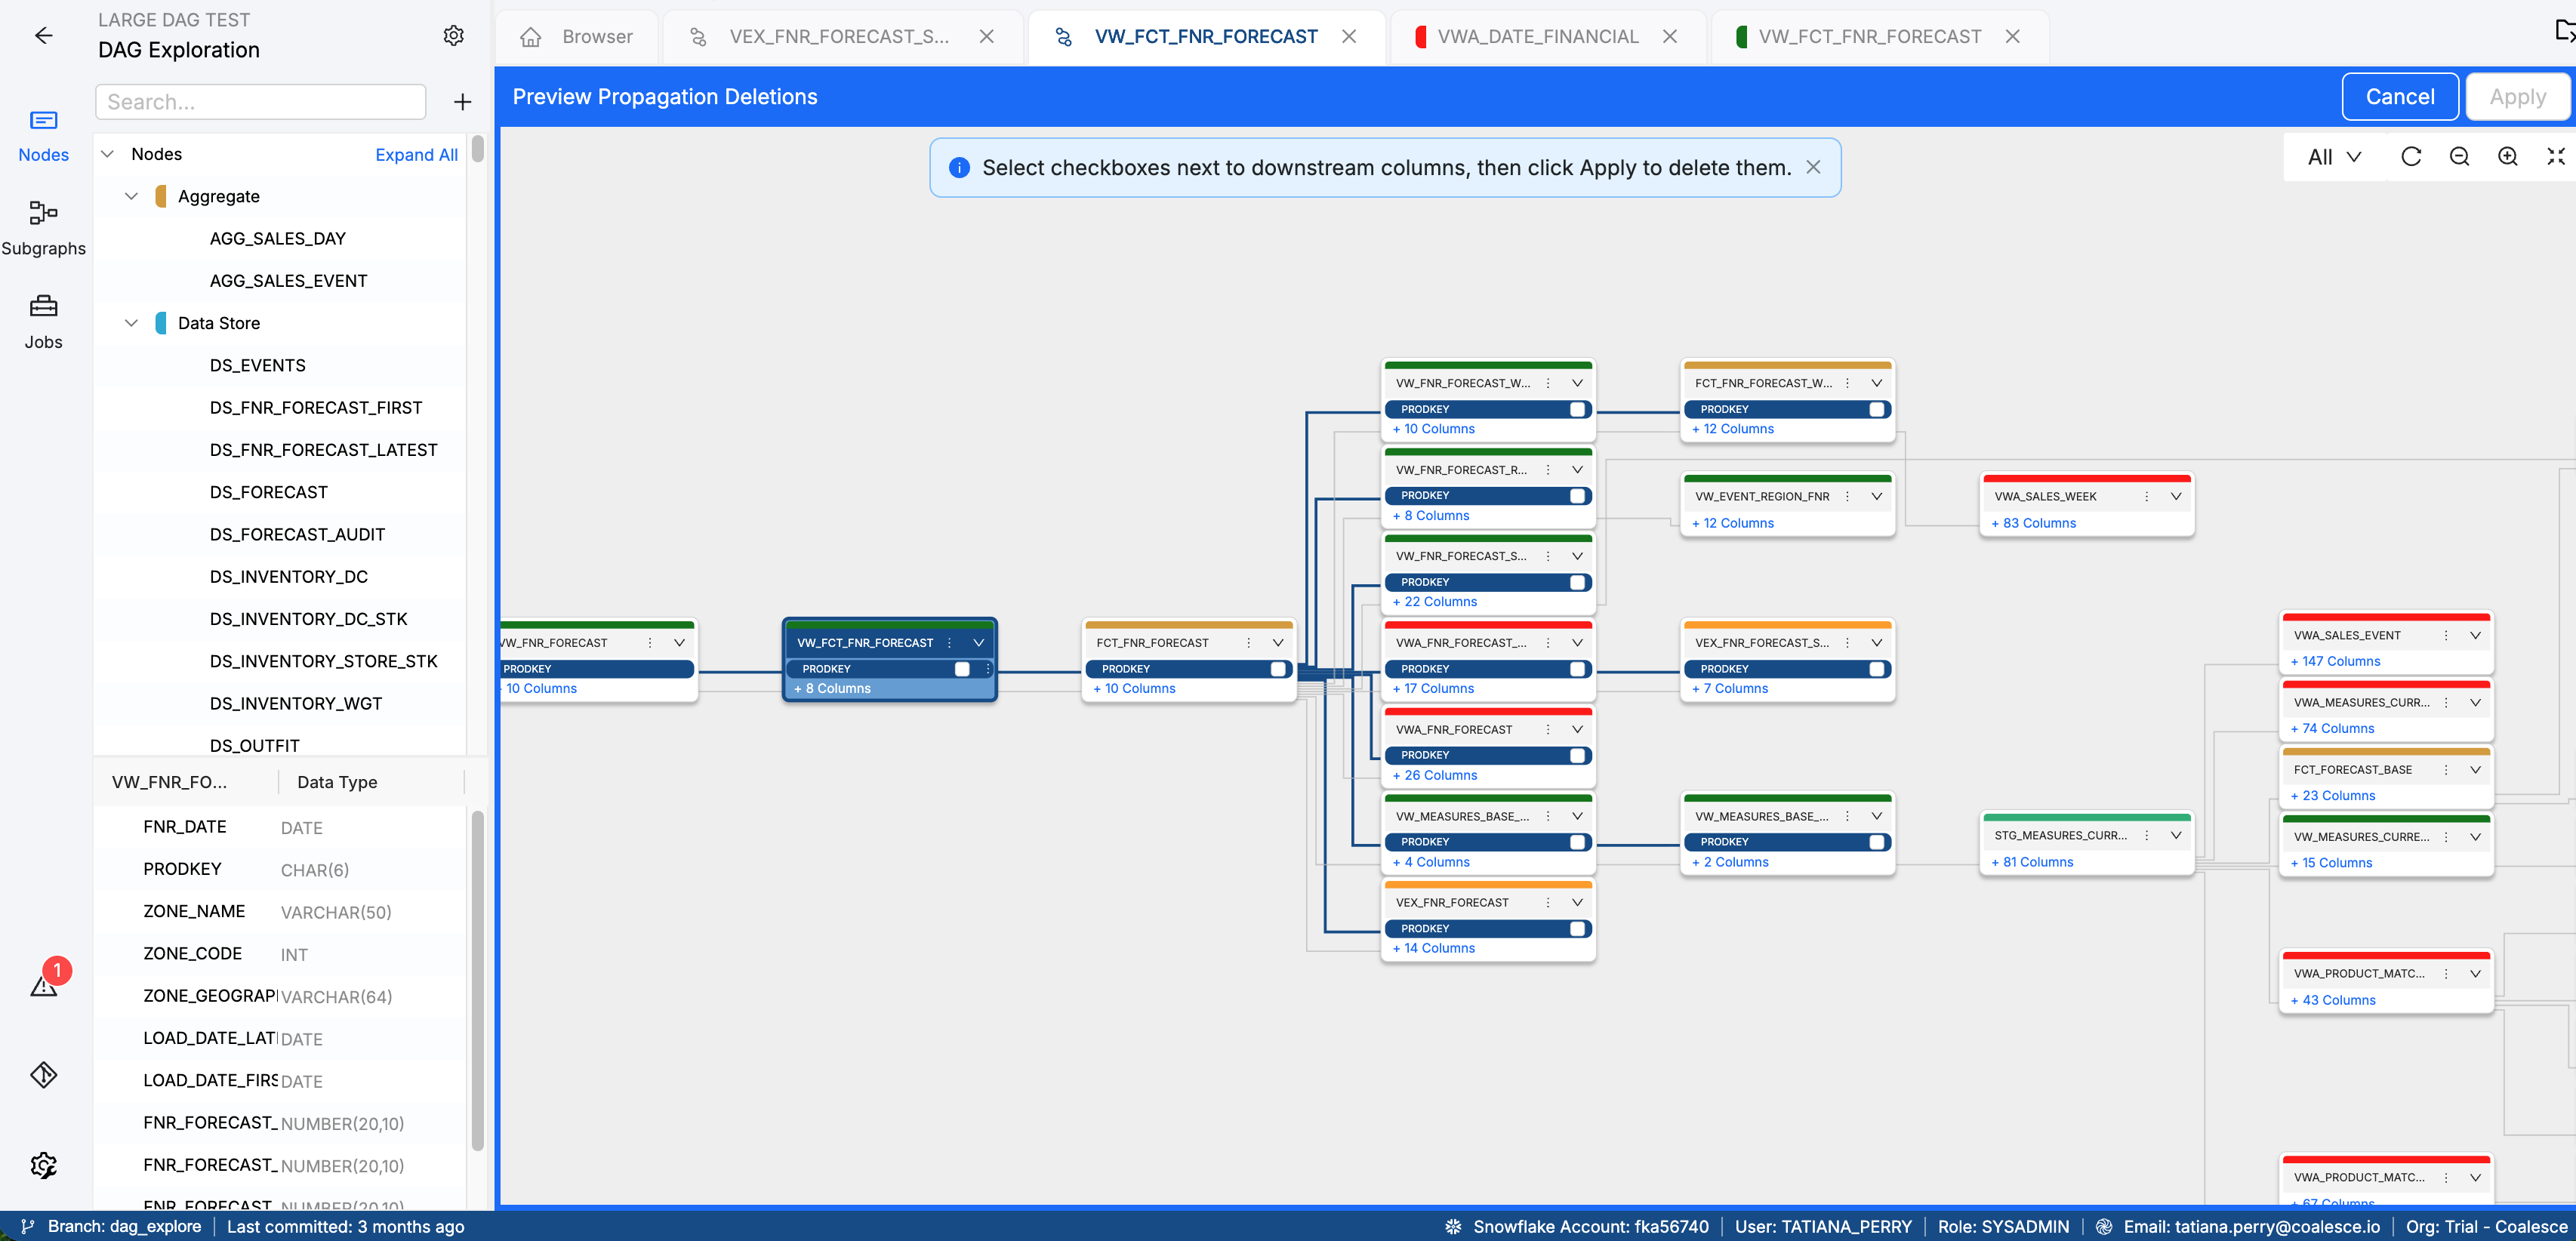
When viewing column propagation, the view changes to All, so all Nodes with that column can be shown.
Column Propagation
You can propagate column changes across nodes across Nodes with a few clicks. Each individual column can have its addition and deletion to other nodes propagated as well by clicking on the three dots next to a the column name and selecting the relevant option.
-
Open the Node with the changes you want to propagate.
-
Right-click on any populated column and select View Column Lineage.
-
You'll now be in a new tab with the current Node highlighted in blue.
-
To propagate column changes click
⋮and then select Propagate Addition or Propagate Deletion.
-
You'll then be able to select the Node you want to propagate the changes to, preview, and apply the changes.