
Workspaces
A Workspace is a sandbox environment where you can complete the development of your data, refine, and perform preliminary validation before merging them into the codebase. Each workspace has its own graph, storage locations, macros, node types, Snowflake connection configuration, and Git branch. You can create multiple workspaces to work on different tasks and merge them into the codebase using Environments. For example, a data engineer may be tasked with creating a new data mart. They could create a new workspace with its own git branch, separate from the main workspace. Once the feature is done, its code can be merged back into the main branch.
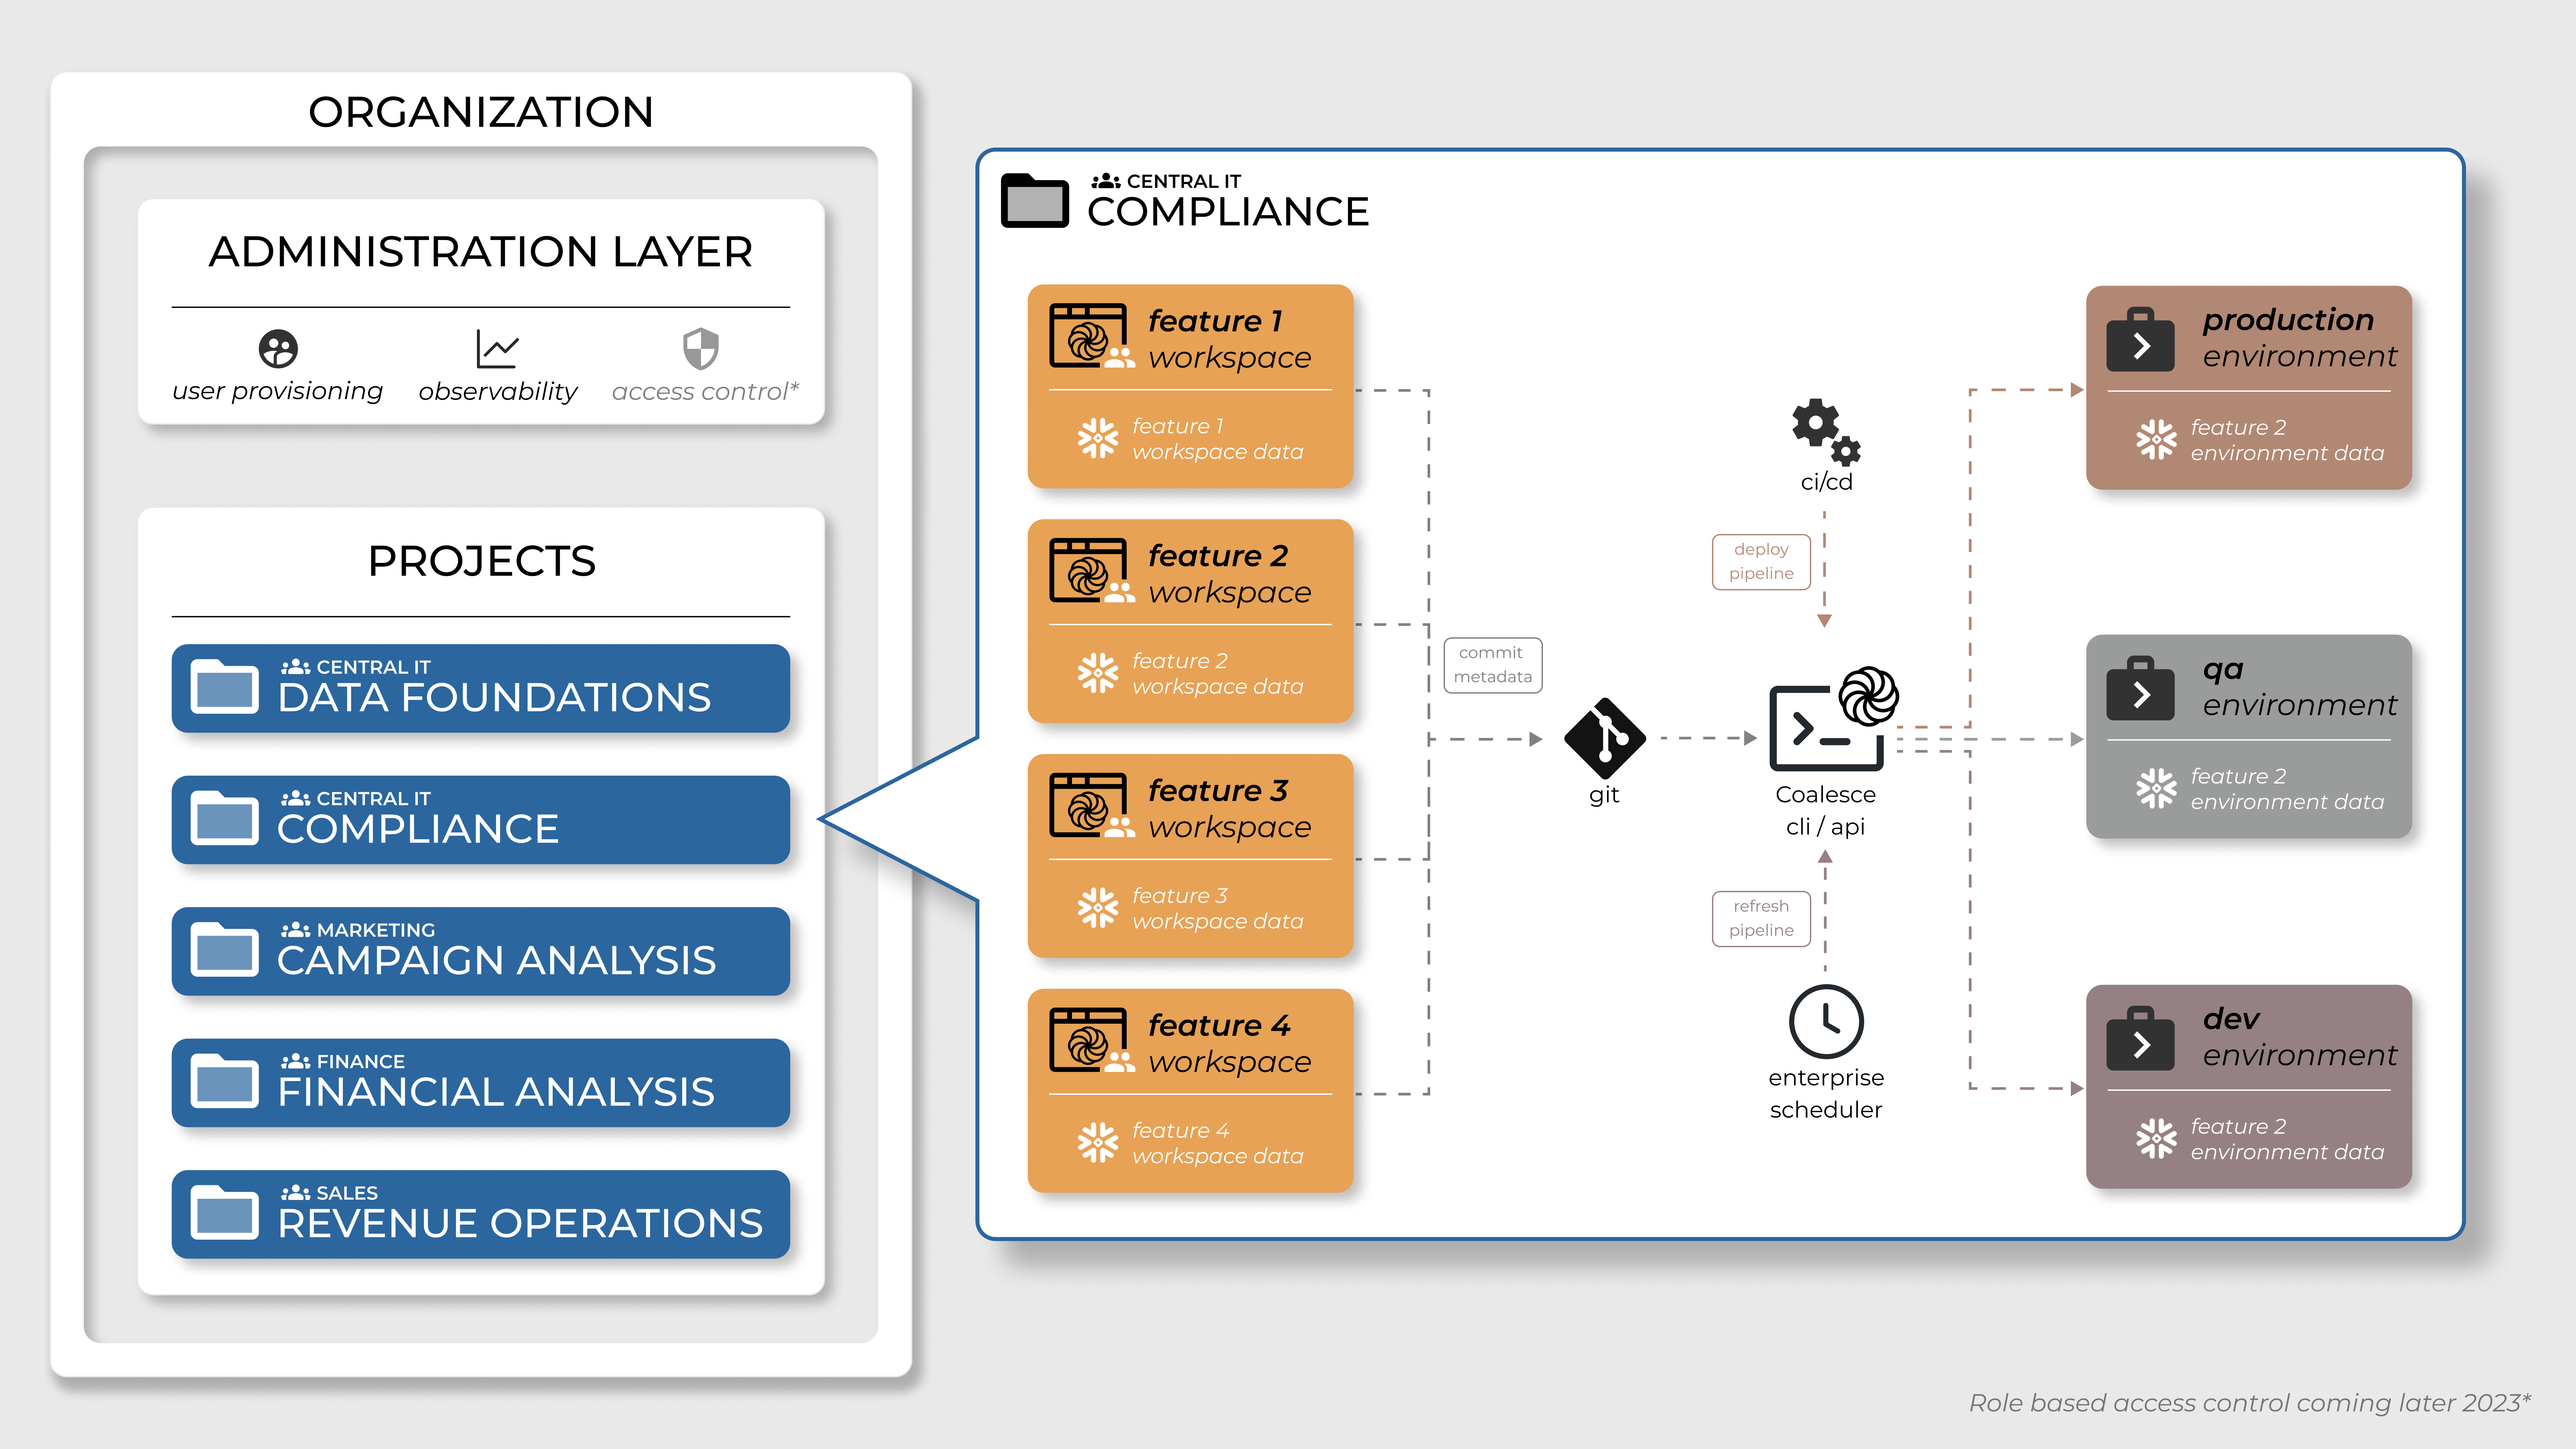
- All Coalesce development is completed in a Workspace.
- Objects are created and data is loaded and refreshed manually on-demand, either for individual objects or for subsets of or the full data pipeline.
- When a change is made to an object (e.g. adding or dropping a column, renaming a column, etc.), the object is dropped and recreated vs. ALTERed.
- Deleted objects are not cleaned up (DROPPED) in the backend Snowflake instance.
Create a Workspace
- Select the Project you want to create the Workspace in.
- Click Create Workspace.
- Give your Workspace a Name and Description(optional).
- Workspaces let you work in a branch in git. You will need to select a current branch to make a new branch from. For example, if you want to create a branch off main, select main and then in New Branch Name, enter the new branch name.
- Select Initial commit to start your first commit to your new branch.
- Then click Create.
- You're new Workspace will be created with the new branch.
- Next, add Storage Locations and Storage Mappings to your Workspace.
For a quick overview and setup instructions for your first Workspace, see the following video.
Edit a Workspace
To edit an existing workspace, click on the pencil icon for that workspace from the Workspaces Dashboard and you'll see a window with options for configuring it. You can also edit them by going to Build Settings → Development Workspace and clicking the pencil icon there.
Tag colors will show up on git windows and on Activity Feed runs and are there as a convenience for distinguishing workspaces. This same feature is also available on environments.
Duplicate a Workspace
To duplicate an existing workspace, click on the Duplicate Settings button on the desired Workspace on the Workspaces Dashboard and then follow the on-screen prompts. This duplicate carries over your storage mappings from the original Workspace you're duplicating.
Snowflake Passwords
Snowflake password are not copied.
Delete a Workspace
To delete a Workspace, click on the pencil icon from the Workspaces Dashboard to edit it and you’ll see the option to delete. If a user deletes all workspaces, a new blank workspace named DEV will be automatically created, as there must always be at least one development workspace.
Development Workspace
When users first sign in to a new Coalesce account, they will start on the Development Workspaces Dashboard, with only a single DEV workspace. Users can create their own additional development workspaces, do their work, and merge their work later into different git branches
Updated 4 months ago