
Git Commits
This guide goes over the commit tab of the Git Modal and making a commits to your repository.
Commits
When you open the Git Modal, it will show any changes made and automatically select all files to be staged. You'll need to deselect any files you don't want.
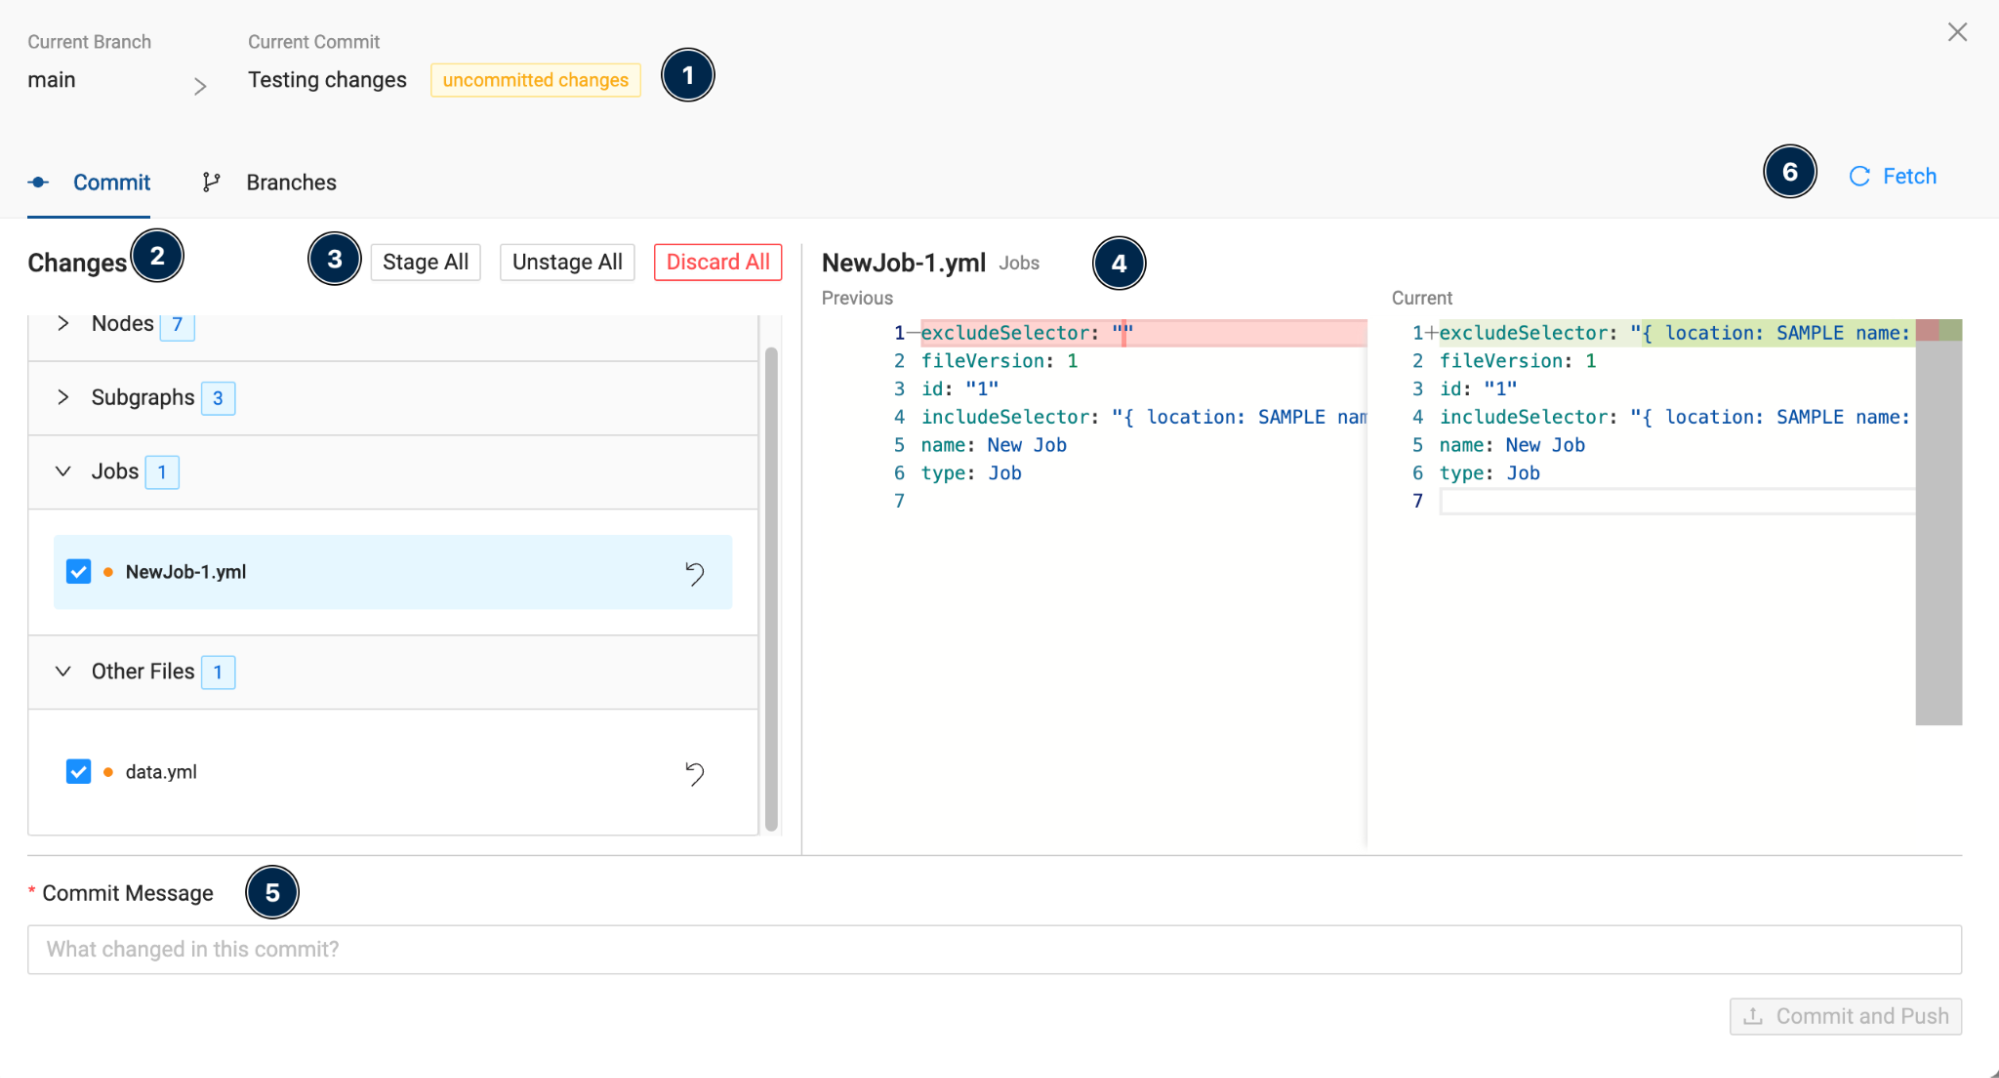
The commit tab of the Git Modal
- Git Modal Header - The header will always show the Current Branch, the Current Commit and if there are any uncommitted changes. It will also indicate if you are on the Commit or Branches screen.
- Changes - Changes shows any changes that were made to the current branch. Each one shows the number of files modified. Click each file to see the changes made. Learn more in What Gets Committed.
- Manage Changes:
- Stage All - All files under changes are selected to be part of the next commit.
- Unstage All - No files are selected to be part of the next commit. You’ll need to select the files you want to commit. At least one file needs to be selected to make a commit.
- Discard All - Discard all changes that were made to the Workspace.
- File Differences - Changes in red are deletions and changes in green are additions.
4. Previous will show the contents before changes were made.
5. Current will show the contents after changes were made, or what the file looks like currently. See Viewing File Differences for an example. - Commit Message - A commit message describes the changes that were made.
- Fetch - Fetch gets all changes from the repository. Including any changes made to the branch you are working on.
Viewing File Differences
To view changes to a specific file, click on it, and the two panes on the right will populate with the file's previous state in the left pane and its current state in the right pane. Scrolling through the file will show you patches of green and red, which denote where additions and deletions have occurred. In the following example, a LOWER() transformation was applied and the column N_COMMENT was deleted without a replacement.
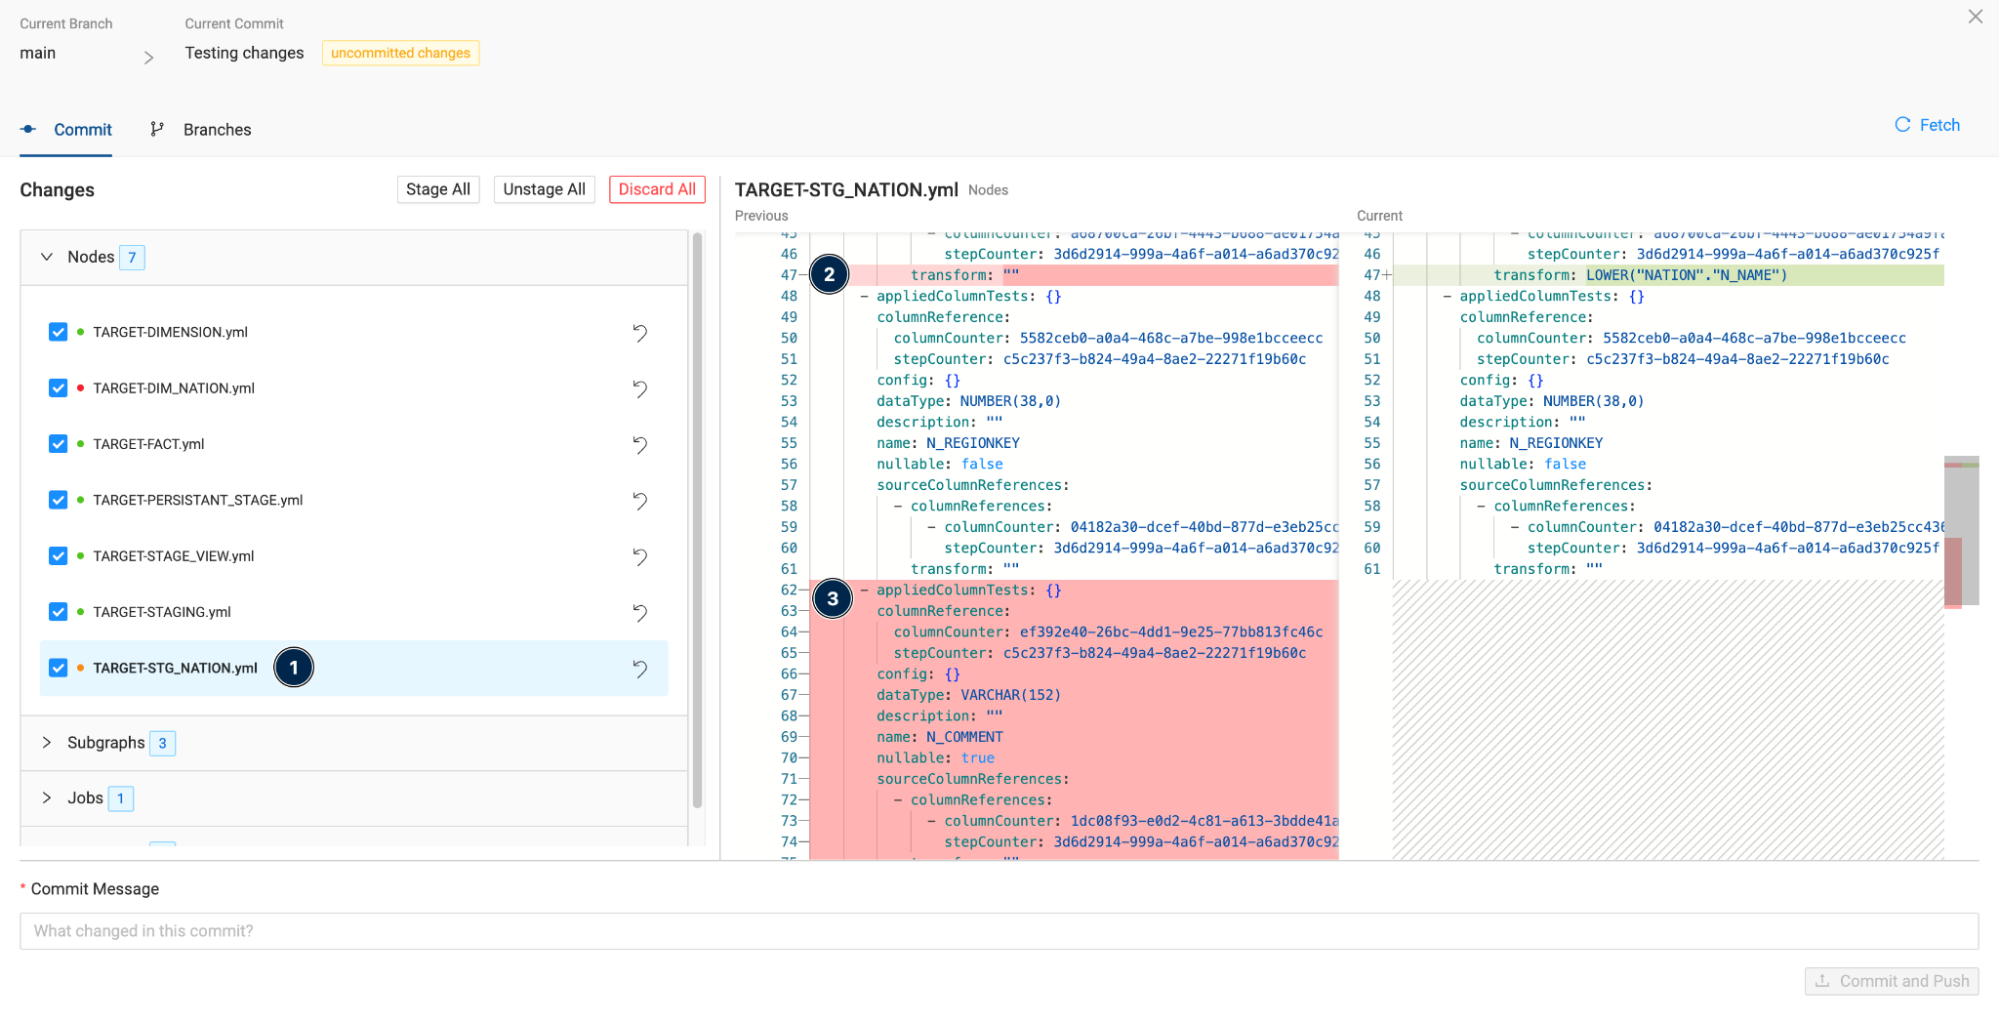
Viewing commit file differences
Making a Commit
- Select the files you want to Stage. If you need to make changes, you’ll need to make them in the Workspace. At least one file needs to be selected.
- Write your Commit Message. It should be short and descriptive.
- Commit and Push your changes.
If you have no more changes to display, the list on the left won’t have any files. If you didn't commit all files, the list will be reduced to show just those files. This will allow you to make multiple commits within one use of the Git Modal, following the same process outlined above. The uncommitted code will either need to be discarded or committed so that it no longer appears as a change when opening the Git modal in the future.
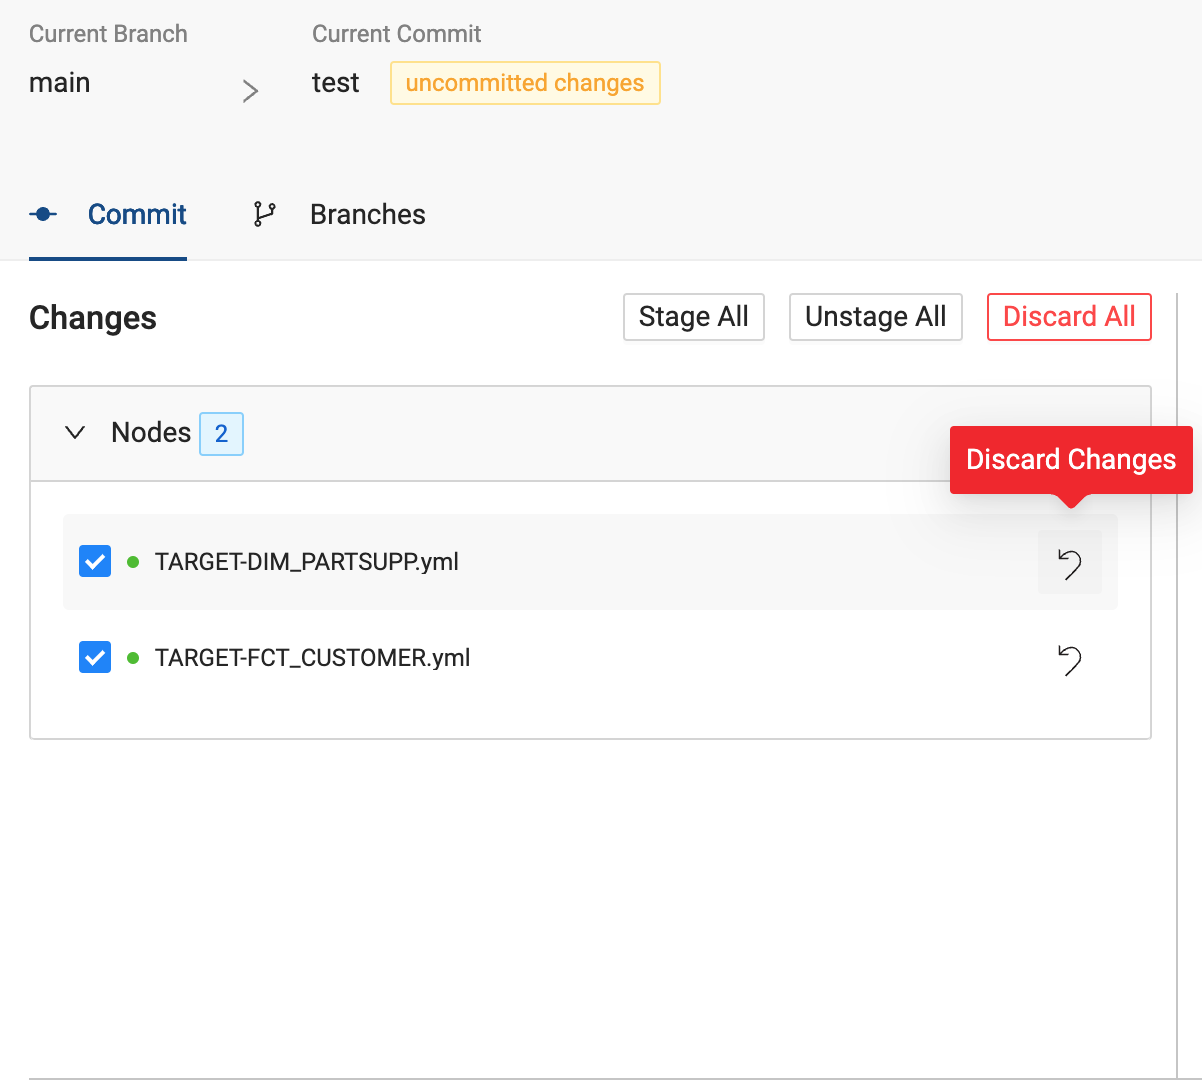
Discard Changes
- To permanently roll back all changes to the code since the last commit to the Current Branch, click on the Discard All button. After accepting the warning, all code will be rolled back and the list of yaml files will be empty.
- Individual yaml files can be rolled back, by clicking on the undo button.
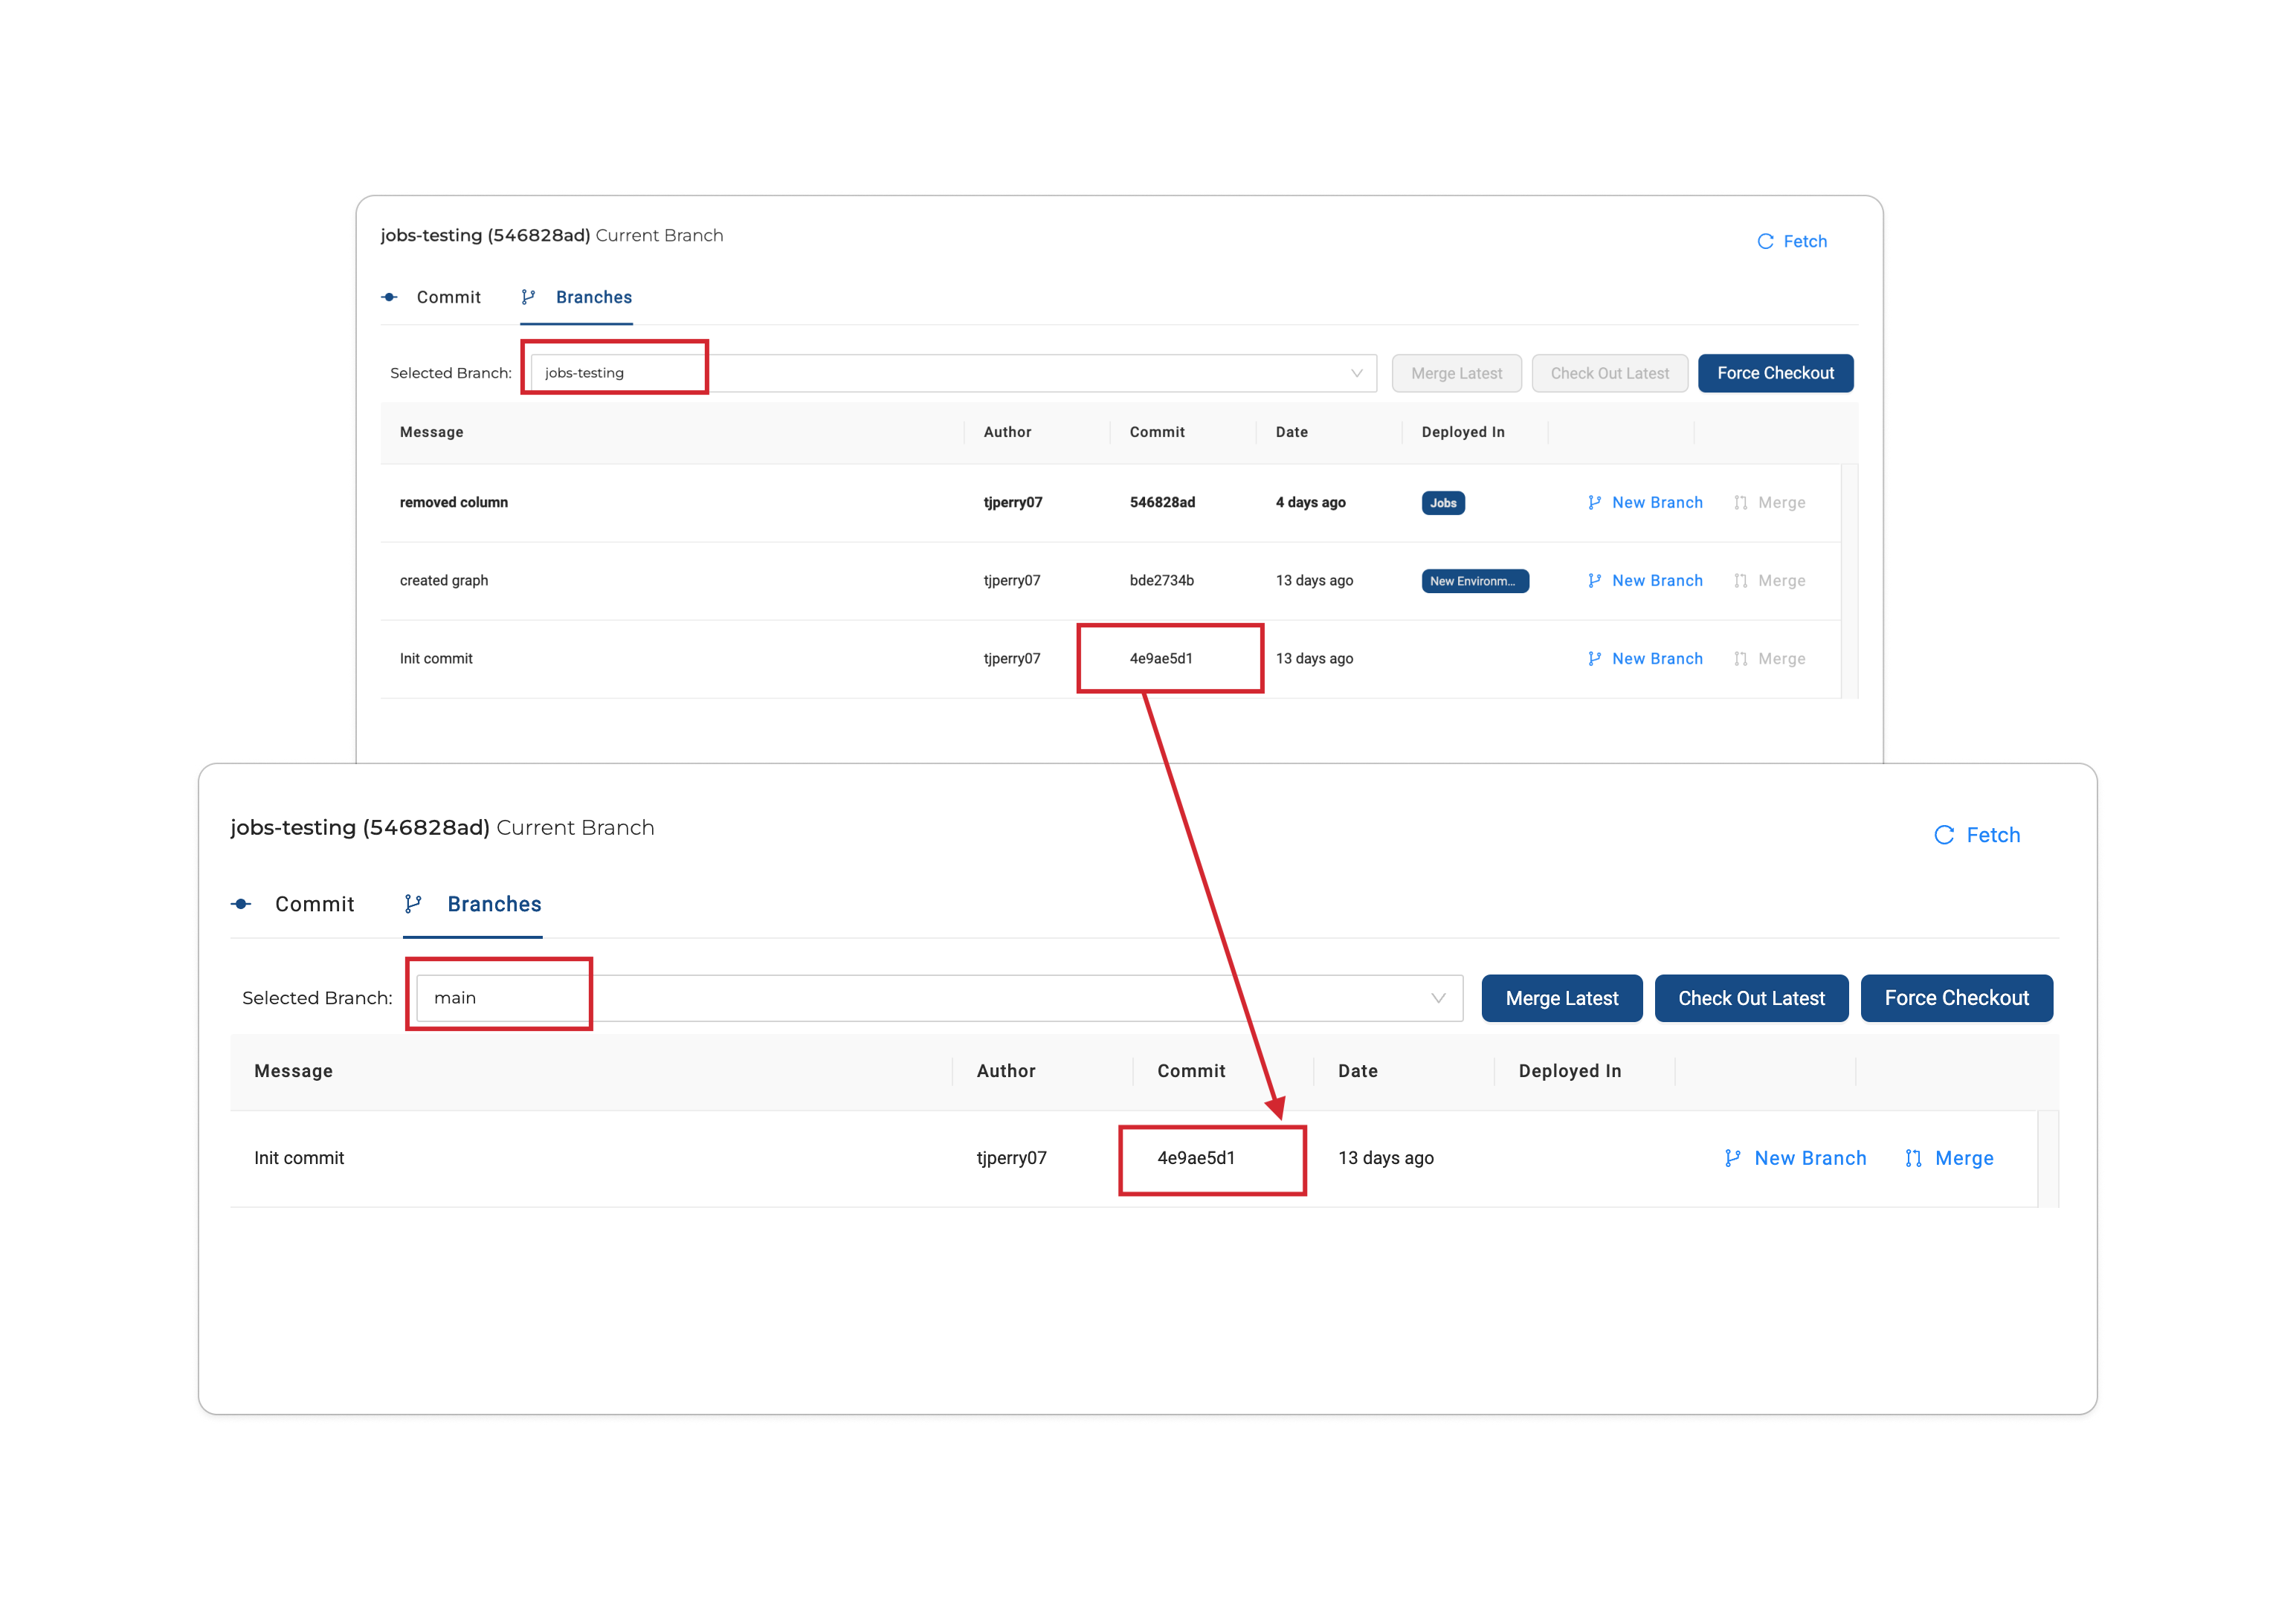
Understanding the Commits
Commit Init commit (4e9ae5d1) is available in both the jobs-testing branch and main branch. The branch jobs-testing was created from the main branch at commit 4e9ae5d1 . That means jobs-testing contains any changes made in the main branch at the commit snapshot 4e9ae5d1.
Git Commit Notes
- The changes to the yaml files seen in the list, will include everyone’s changes who are working in the same Workspace (connected to the same Git Branch). It's best practice that everyone has their own Workspace to prevent confusion or accidentally removing each others work.
- Opening the Git modal captures a snapshot of the code in the Workspace, at that particular time. There is no need to click on the ‘Fetch’ button, as this has already happened on entry to the page.
- While the Git modal is open, if code is being changed by another user using the same Workspace, this will NOT be reflected, even if the ‘Fetch’ button is clicked. To include any last minute recent changes, simply close and re-open the Git modal.
- When discarding changes, this will affect all other users who are working in the same Workspace. Therefore use this option cautiously and ideally only discard individual items rather than everything.
Updated about 1 month ago