
Making Commits and Creating Branches
For the most recent information, see Git Commits and Git Branches.
This guide goes over the commit and branches tab of the Git Modal, along with creating a branch and making a commit to your repository.
Commits
When you open the Git Modal, it will show any changes made and automatically select all files to be staged. You'll need to deselect any files you don't want.
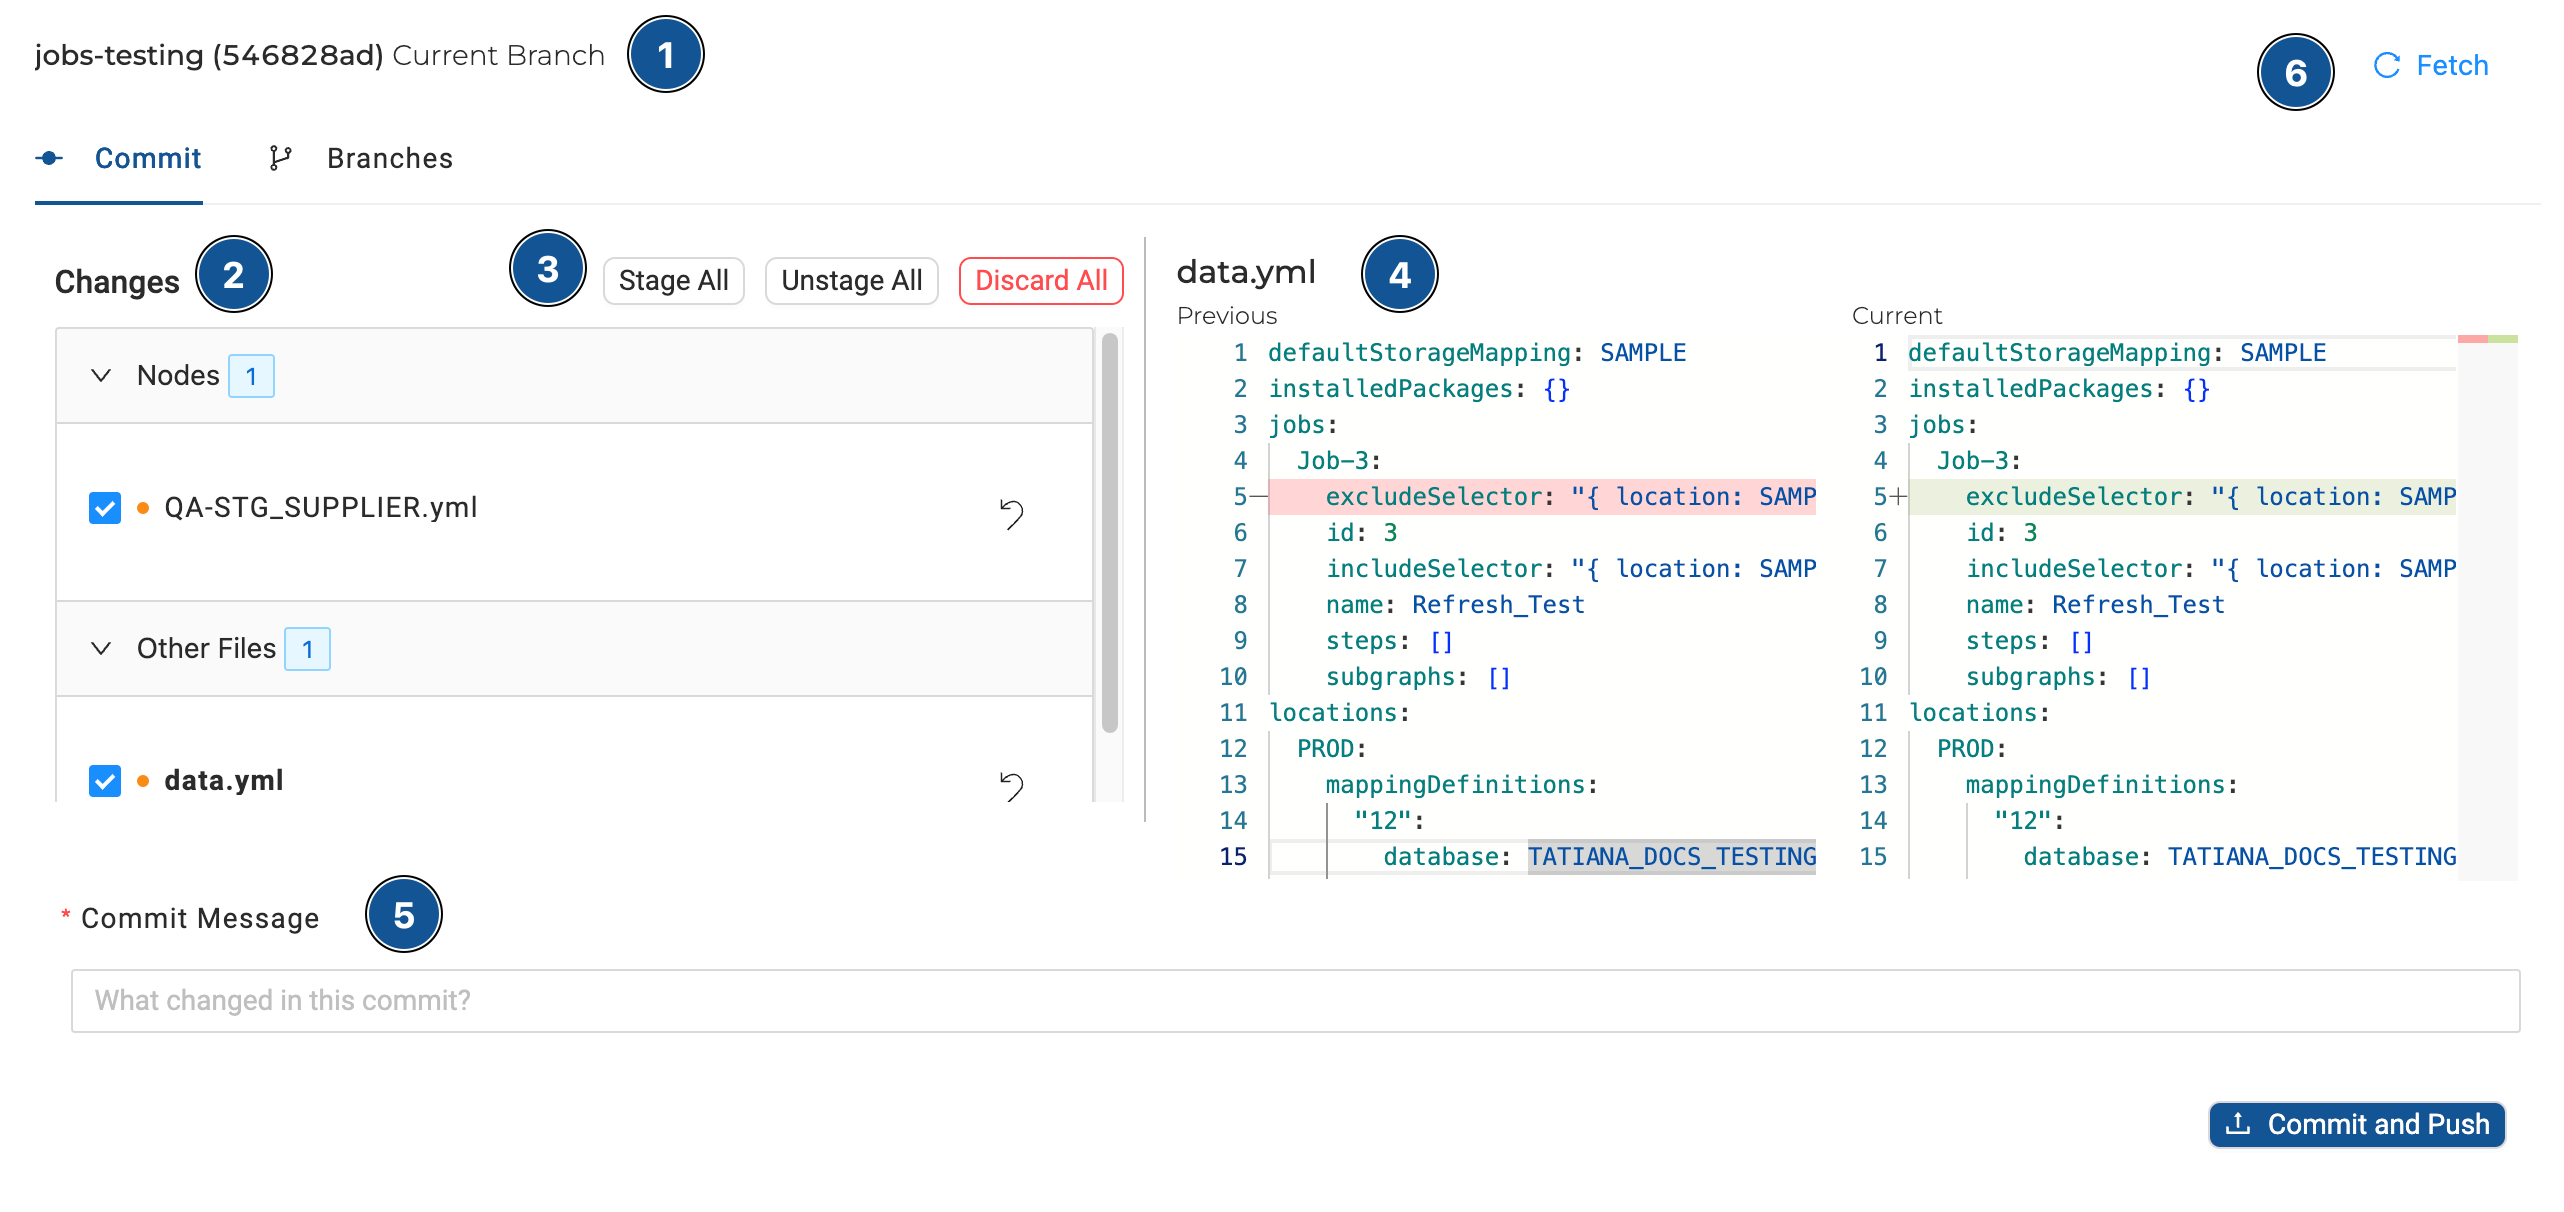
- Current Branch - This is the branch you have been working on.
- Changes - These are the files that have changed. It will separate them into each Node and a data.yml file which includes information such as Jobs and Macros.
- Manage Changes:
- Stage All - All files under changes are selected to be part of the next commit.
- Unstage All - No files are selected to be part of the next commit. You’ll need to select the files you want to commit. At least one file needs to be selected to make a commit.
- Discard All - Discard all changes that were made to the Workspace.
- File Differences - Any changes made to a Node or other metadata will be here. Green means additions and red means deletions. See Viewing File Differences for an example.
- Commit Message - A commit message describes the changes that were made.
- Fetch - Fetch gets all changes from the repository. Including any changes made to the branch you are working on.
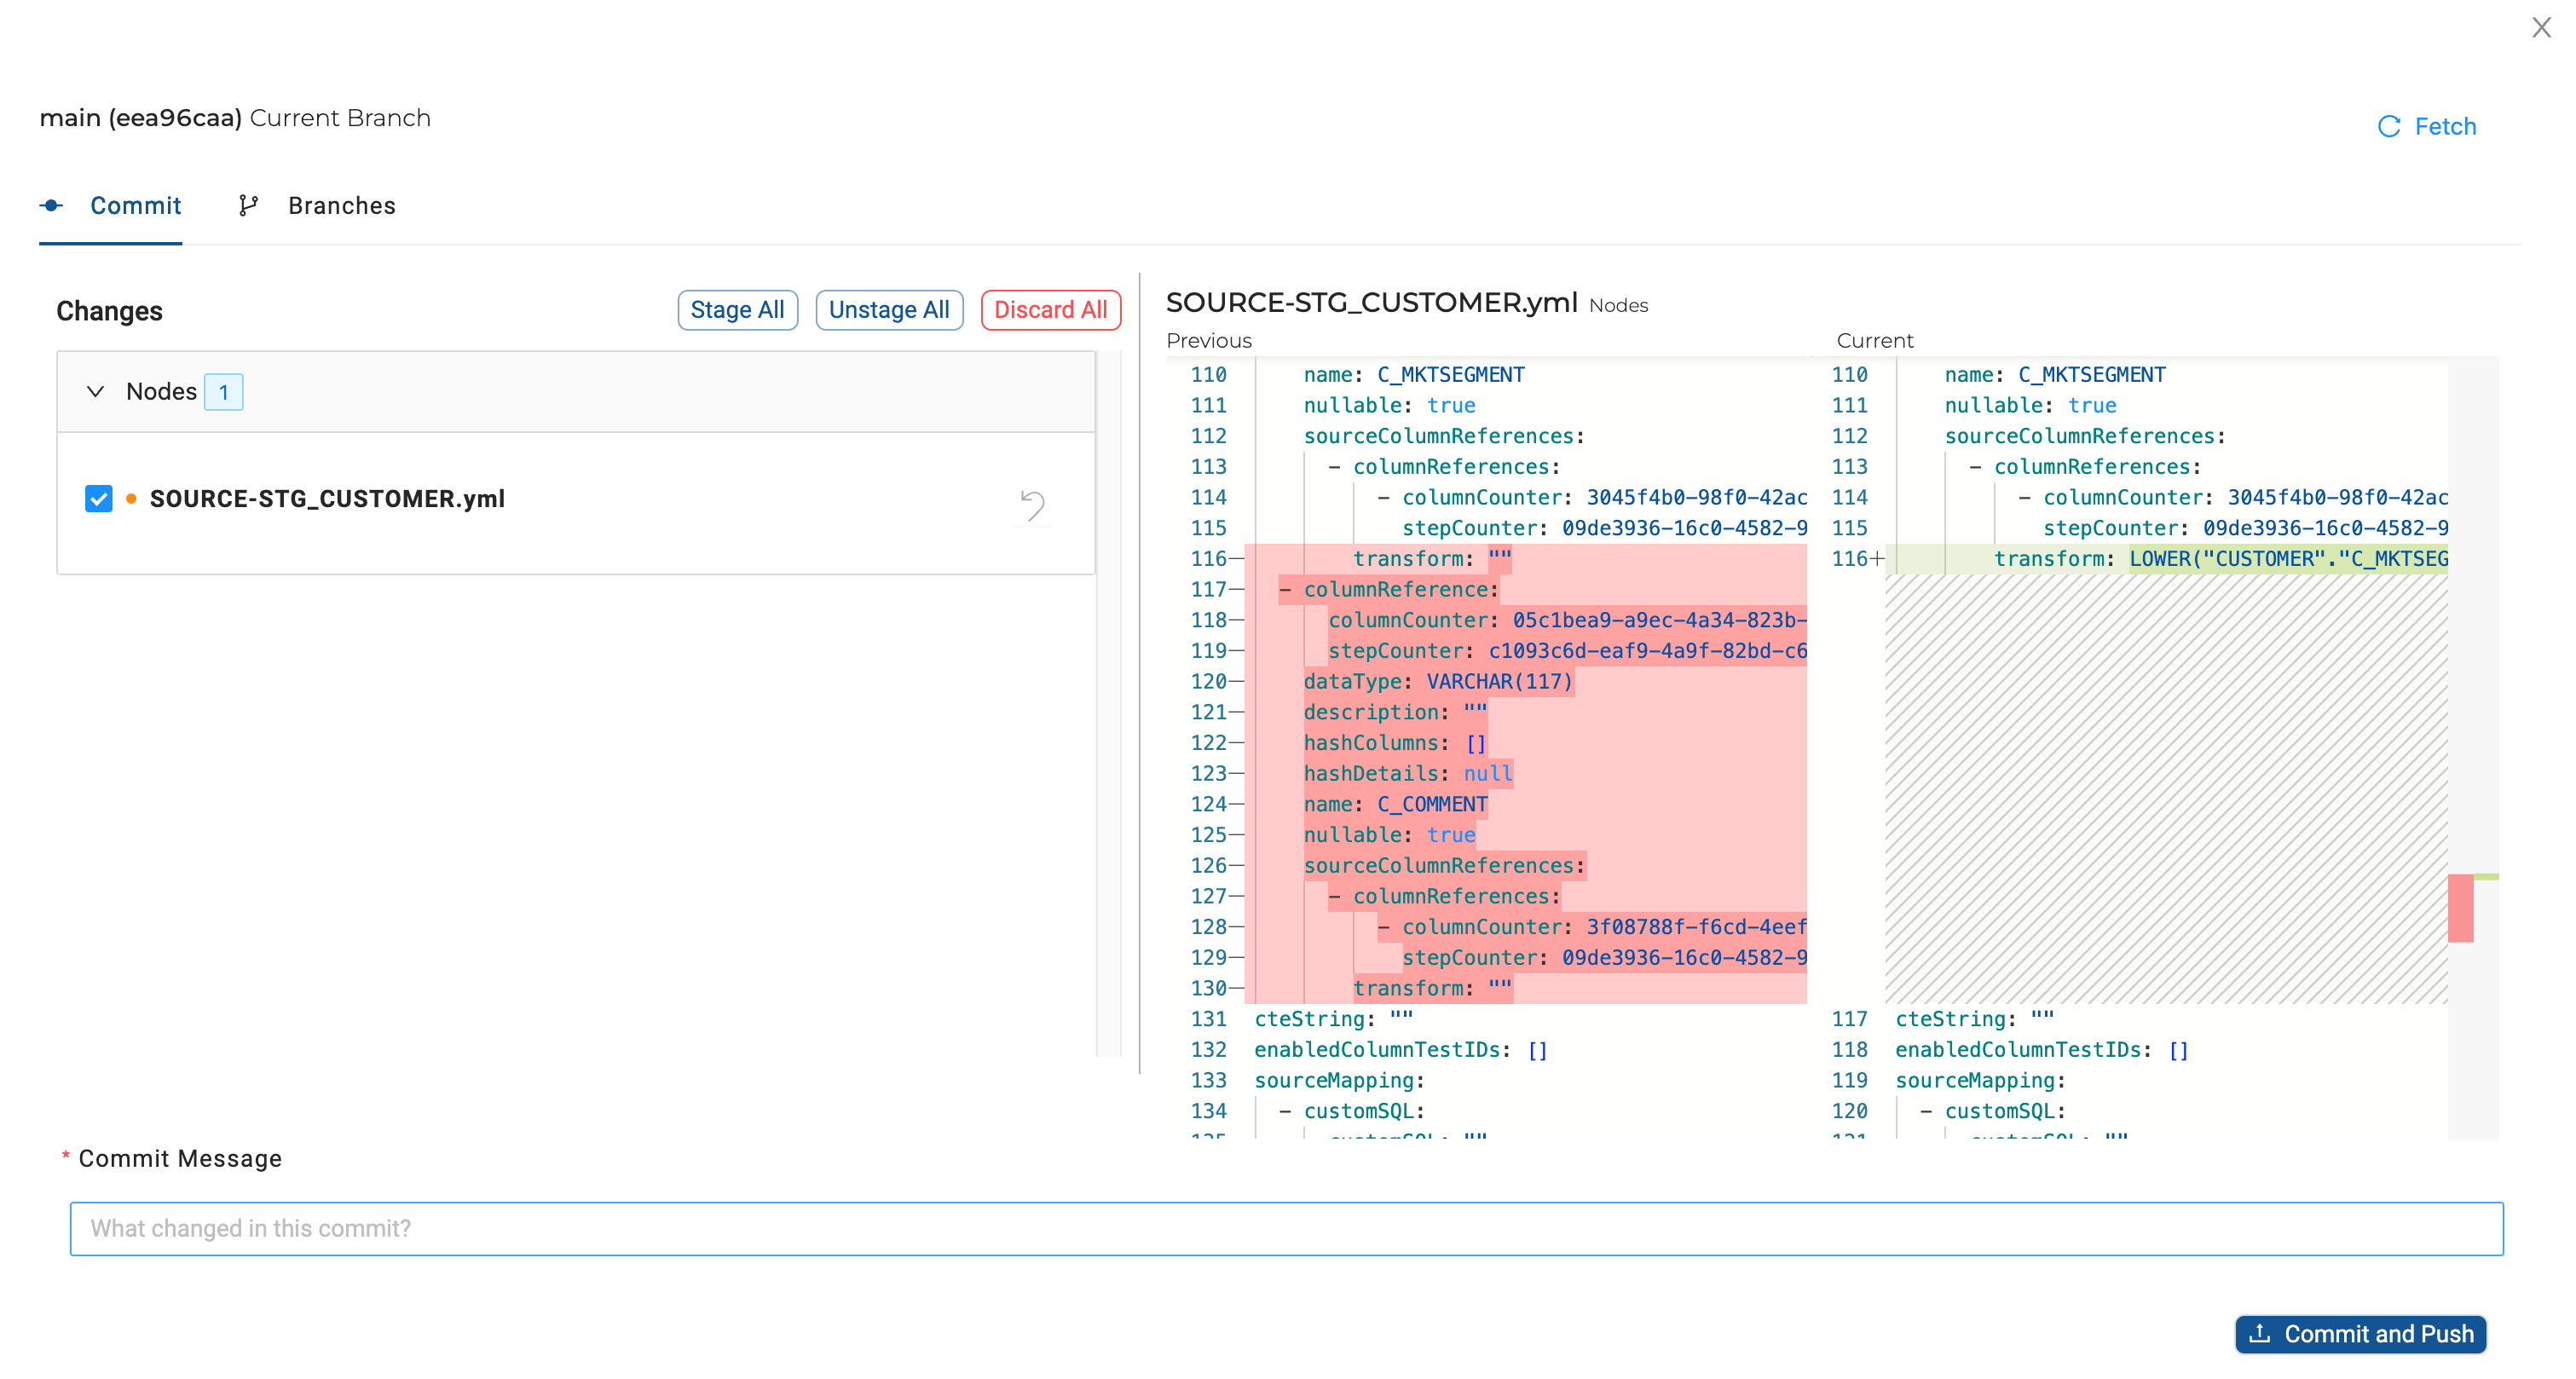
Viewing File Differences
To view changes to a specific file, click on it, and the two panes on the right will populate with the file's previous state in the left pane and its current state in the right pane. Scrolling through the file will show you patches of green and red, which denote where additions and deletions have occurred.
In this example, LOWER() transform was applied to C_MKTSEGMENT (Green). The C_COMMENT column was deleted (red) without a replacement.
Making a Commit
- Select the files you want to Stage. If you need to make changes, you’ll need to make them in the Workspace. At least one file needs to be selected.
- Write your Commit Message. It should be short and descriptive.
- Commit and Push your changes.
If you have no more changes to display, the list on the left won’t have any files. If you didn't commit all files, the list will be reduced to show just those files. This will allow you to make multiple commits within one use of the Git Modal, following the same process outlined above.
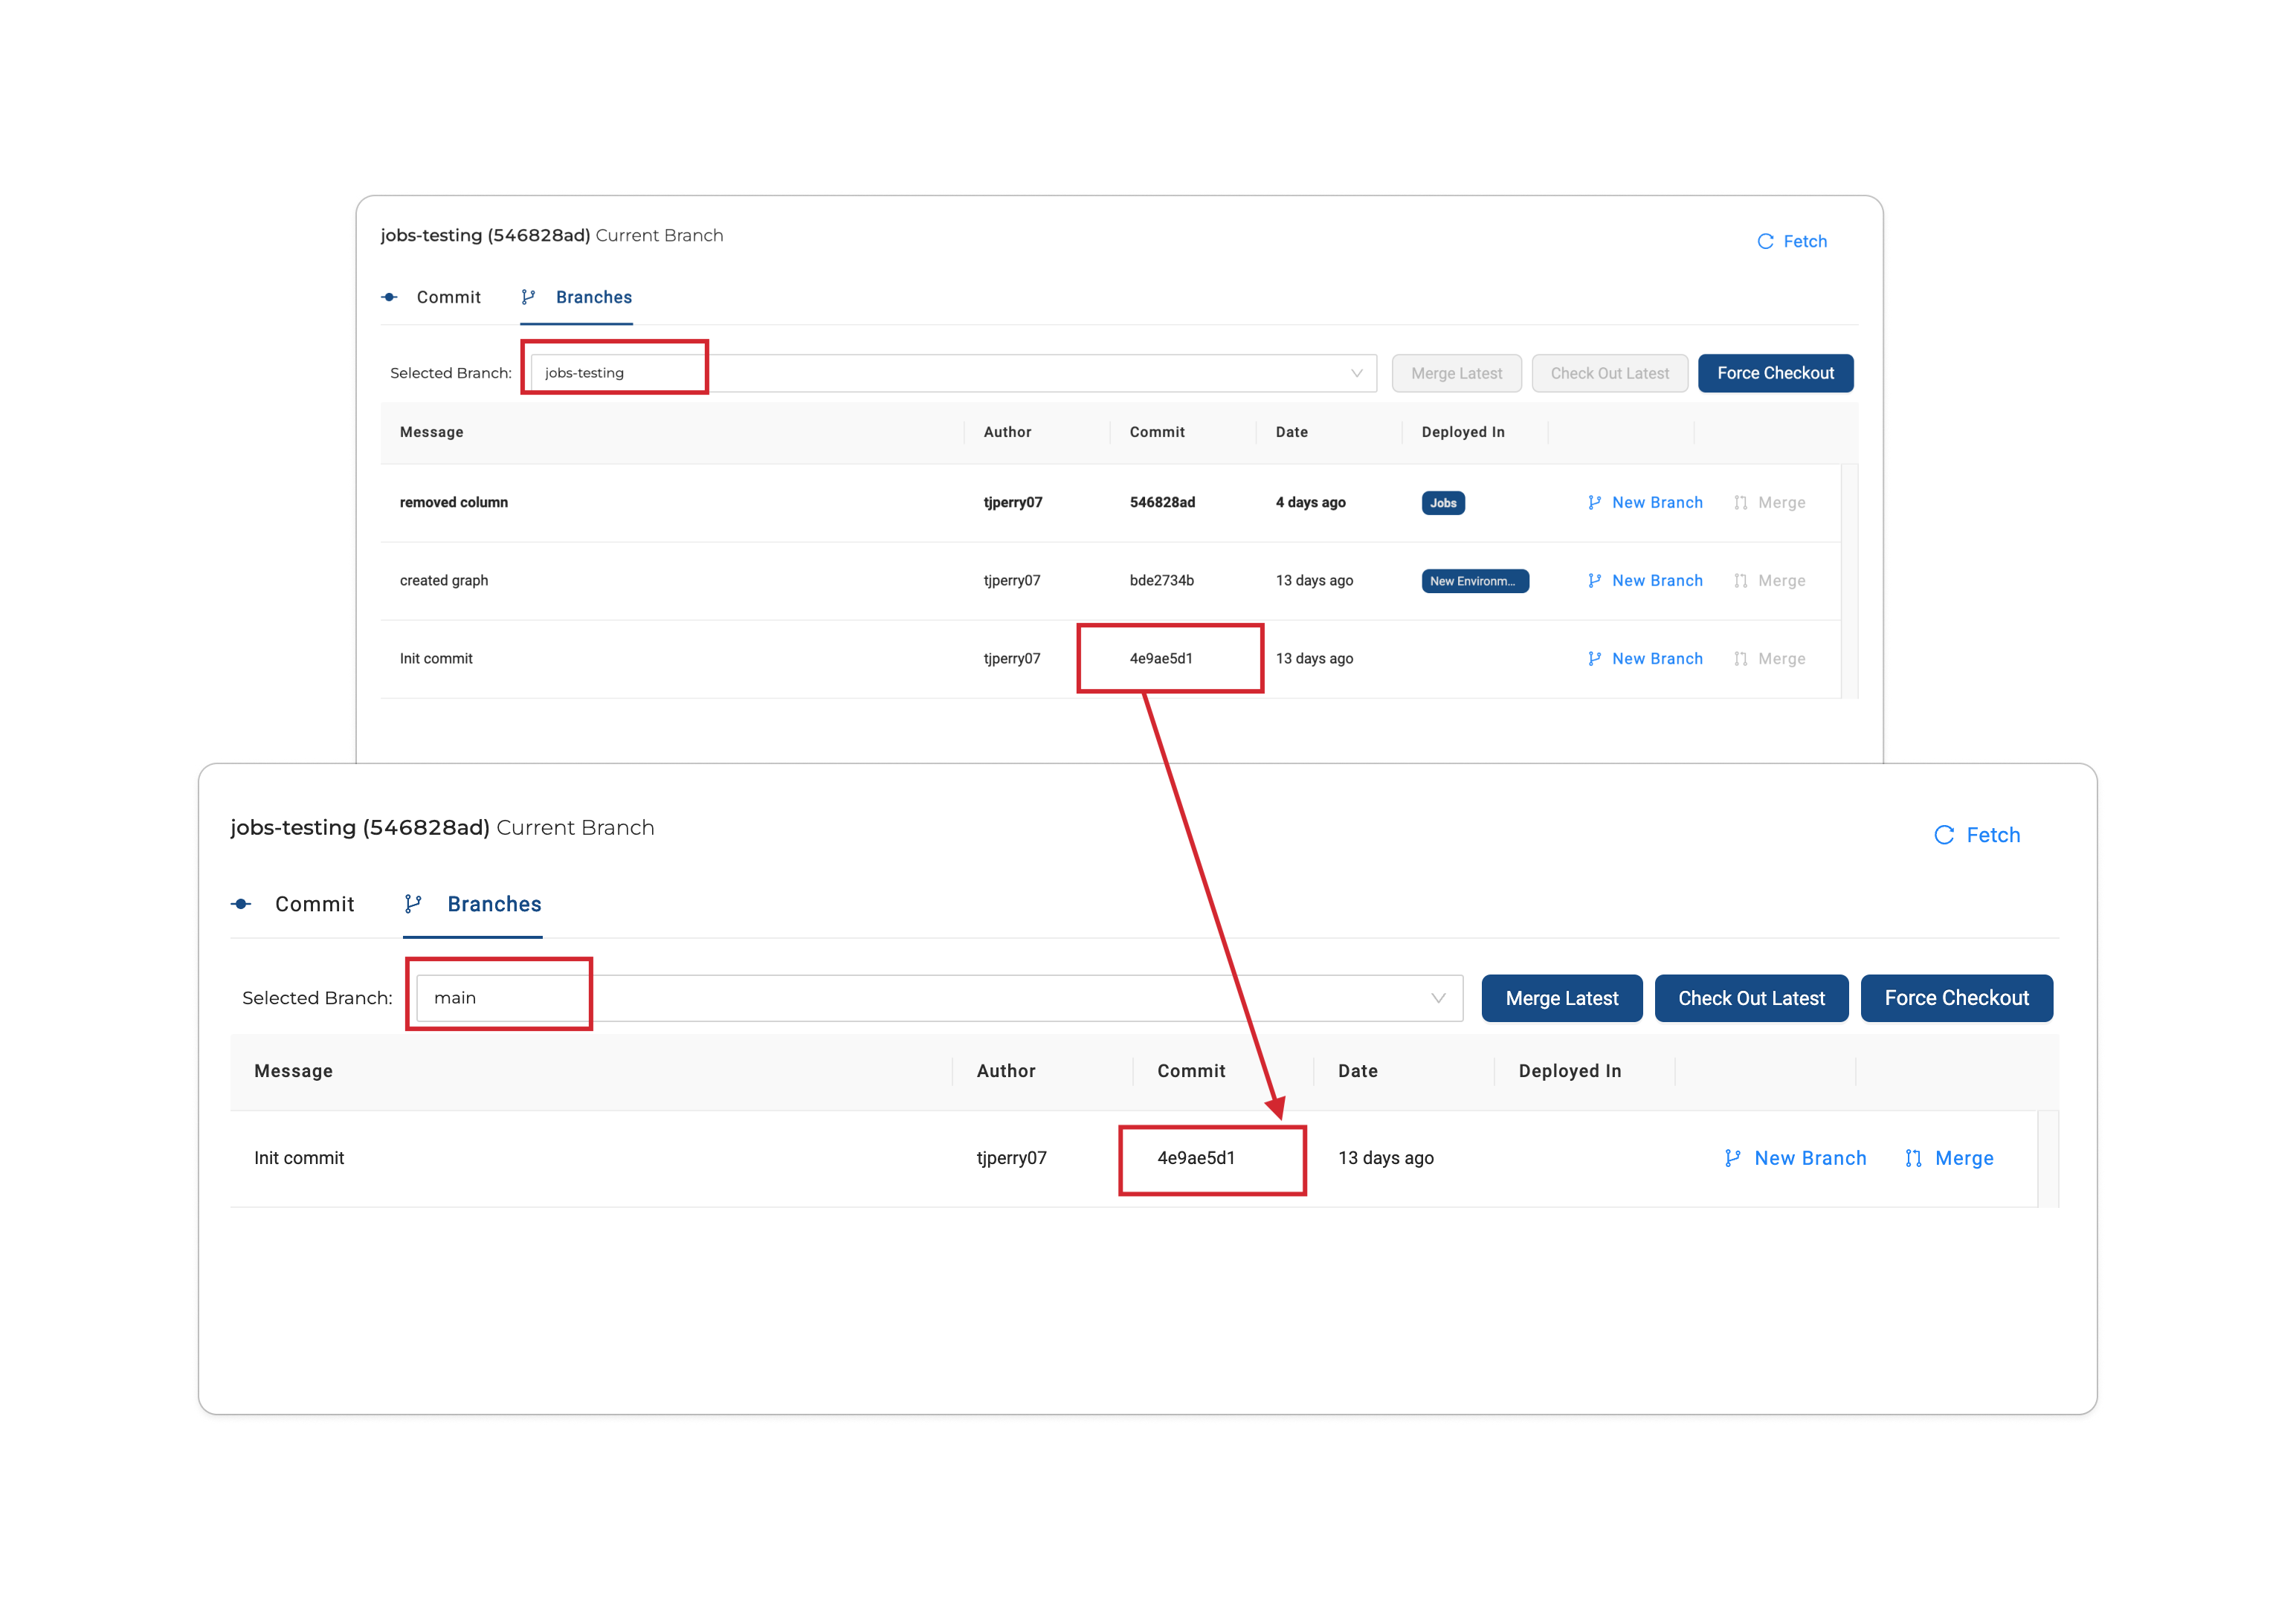
Understanding the Commits
Commit Init commit (4e9ae5d1) is available in both the jobs-testing branch and main branch. The branch jobs-testing was created from the main branch at commit 4e9ae5d1 . That means jobs-testing contains any changes made in the main branch at the commit snapshot 4e9ae5d1.
Branches
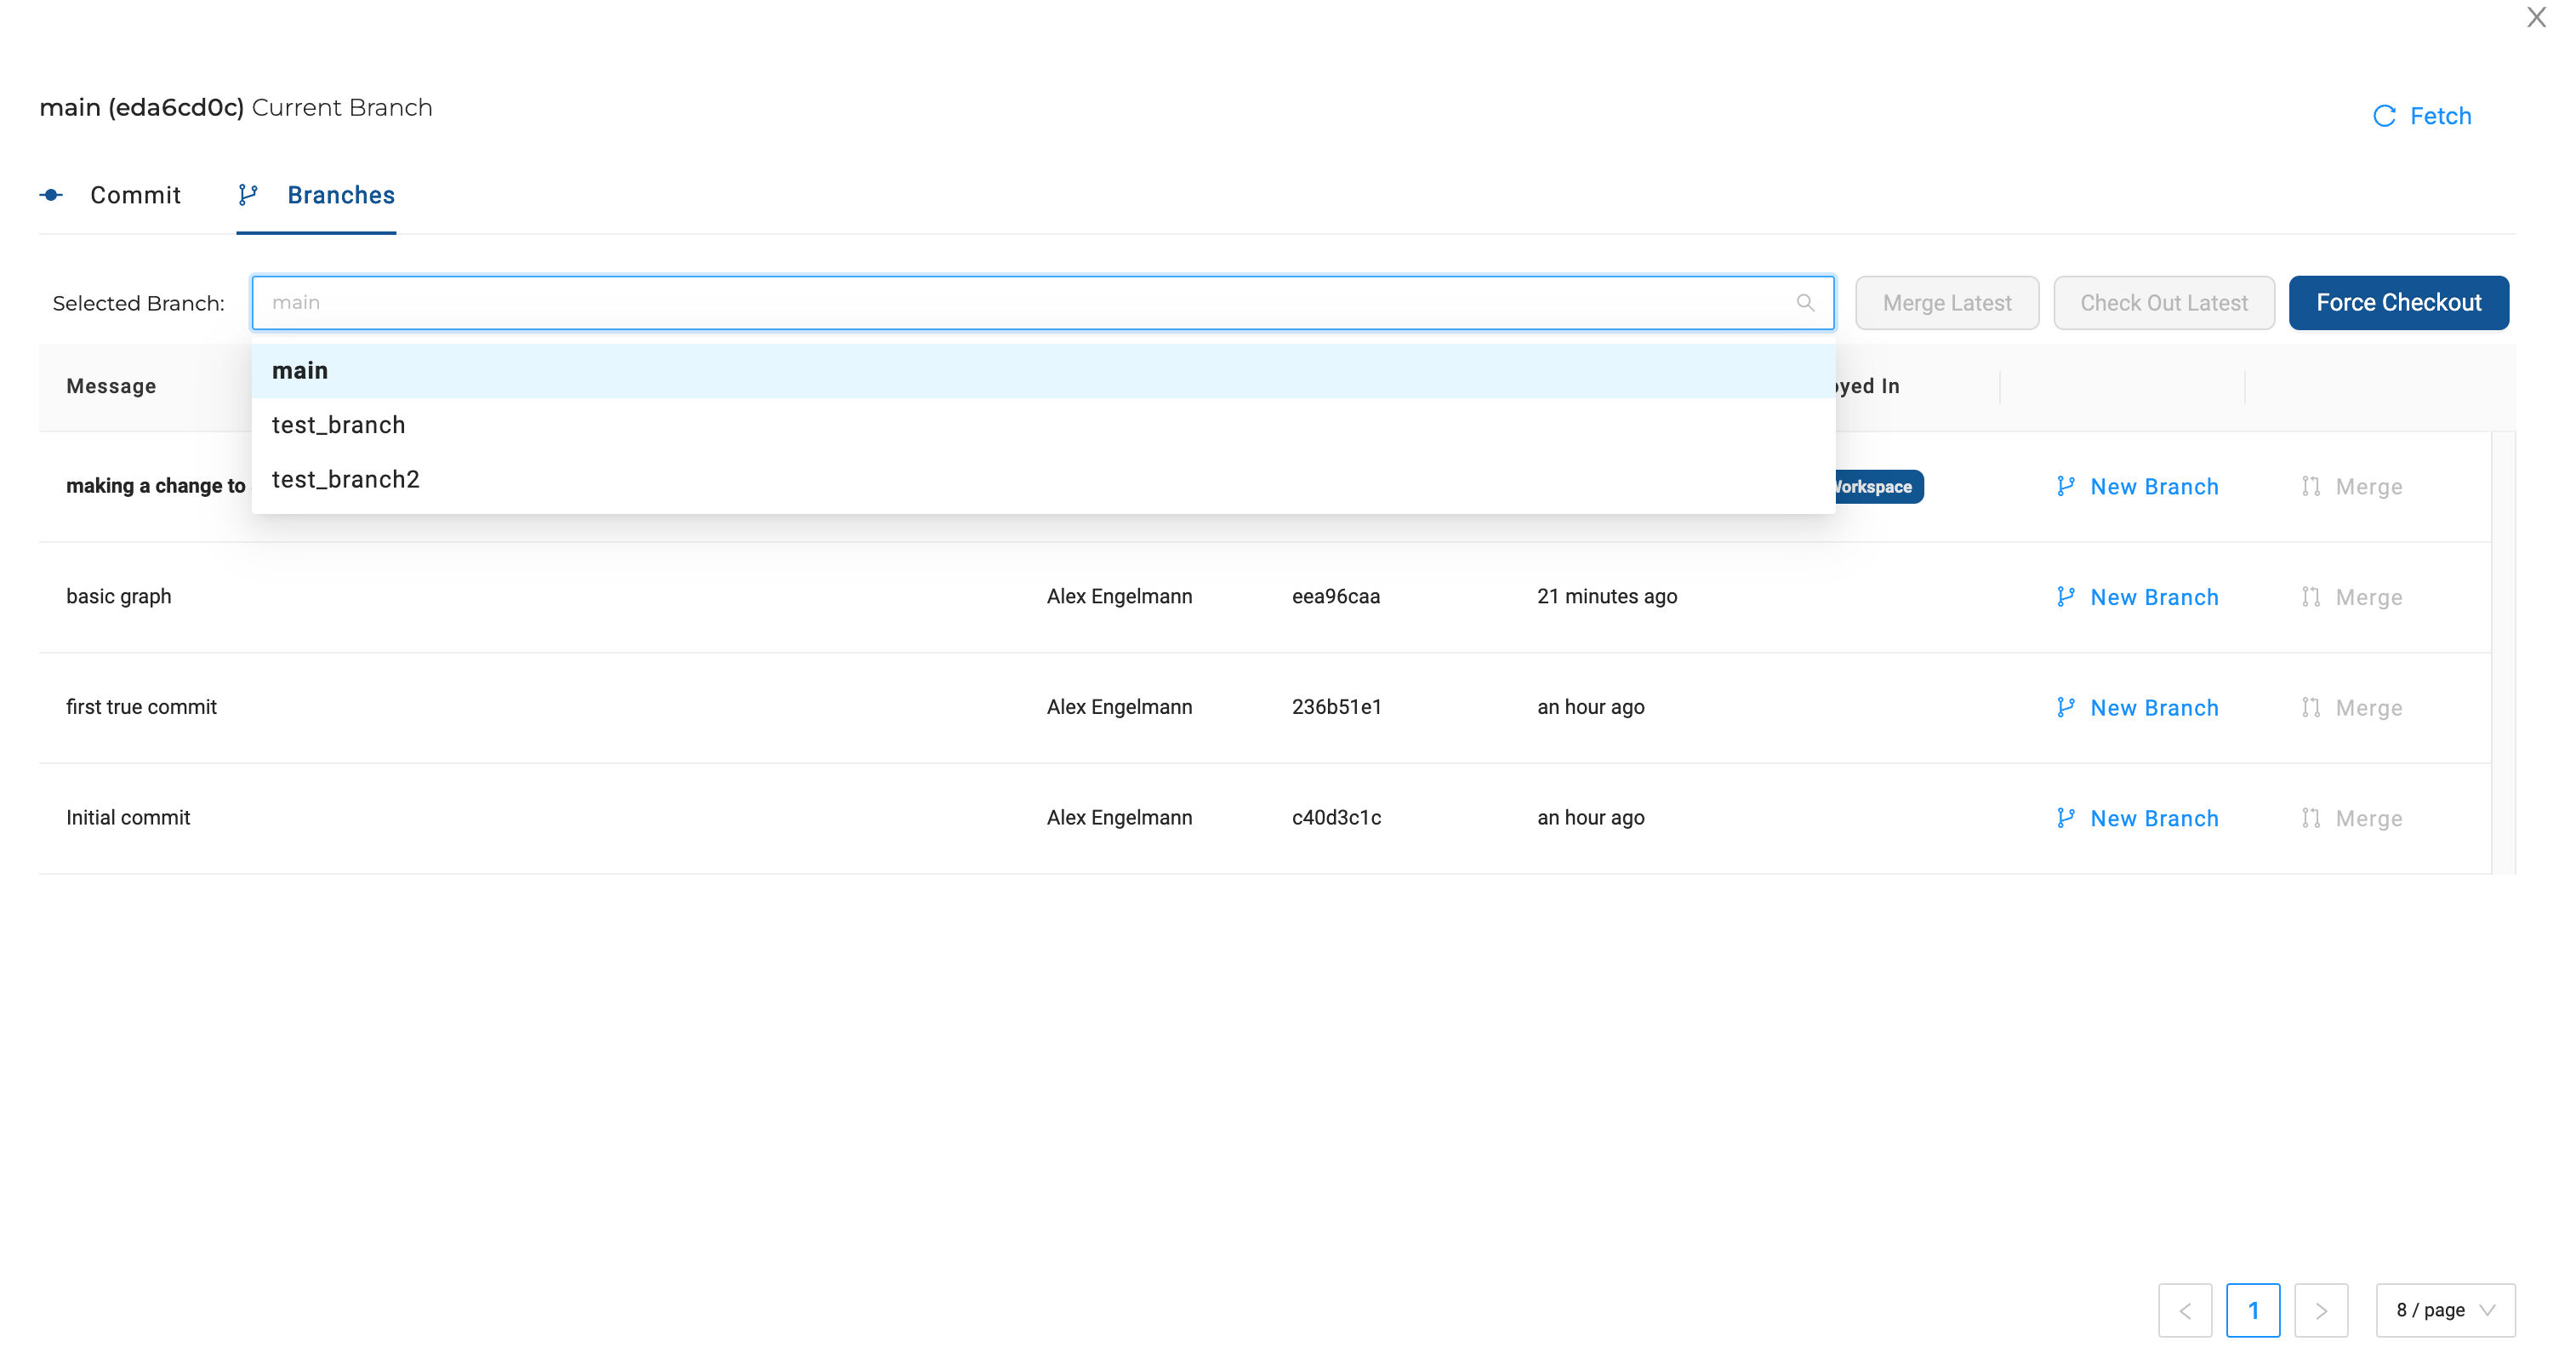
When you first open the branch tab, it will show the branch you are currently working on at the top. The Selected Branch will default to the branch you are working in. The drop down will list all available branches.
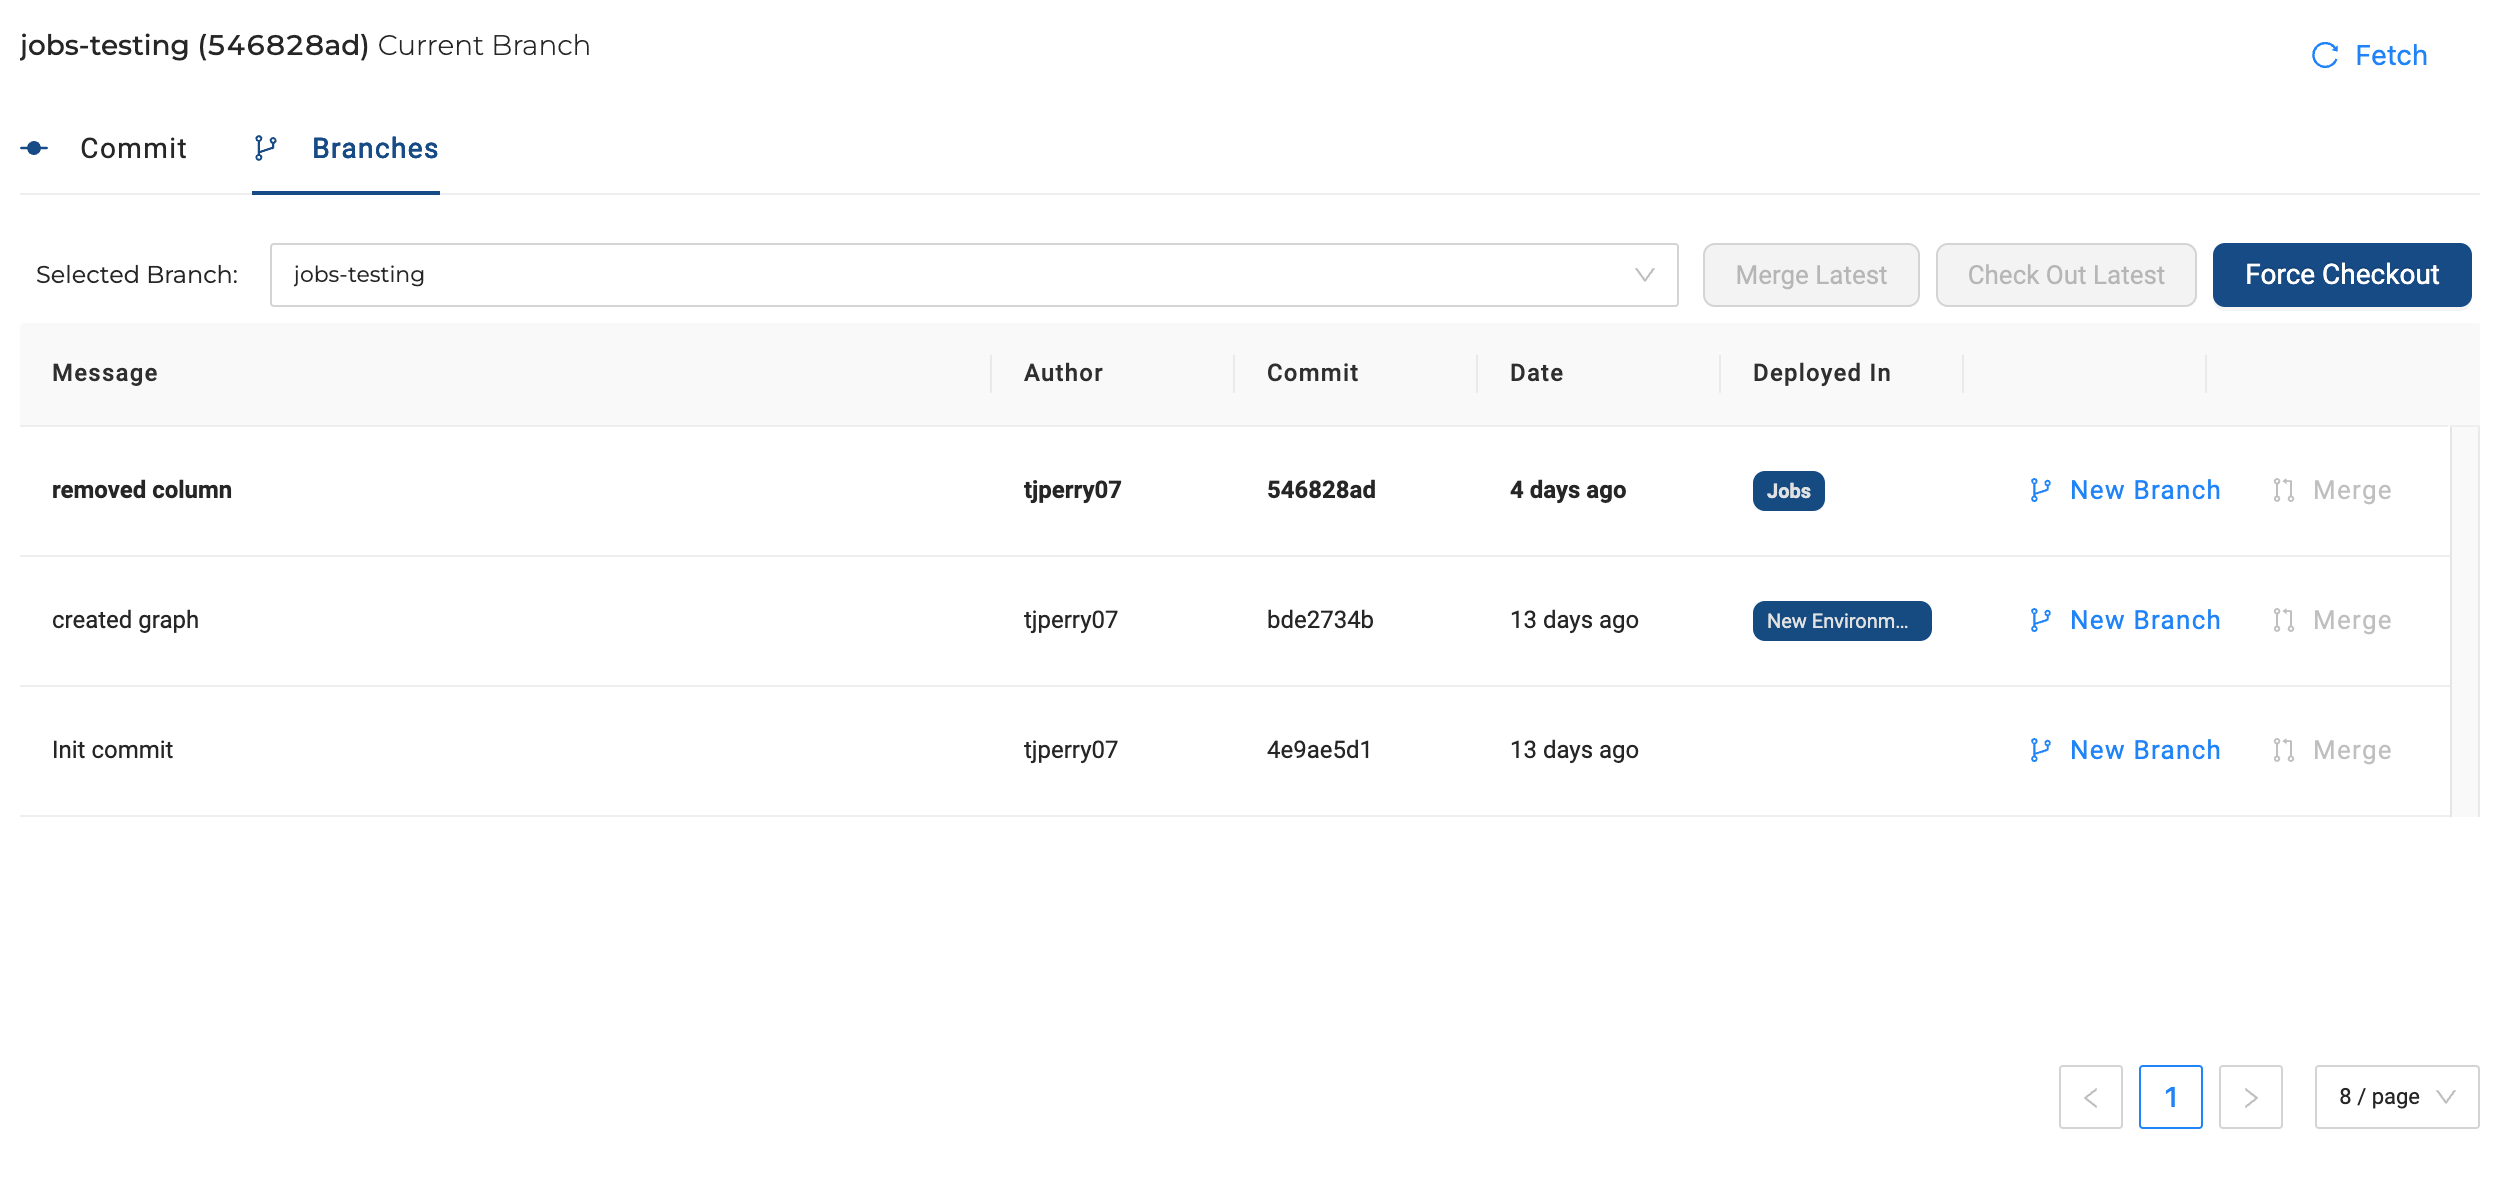
The image shows a branch called jobs-testing with commits listed.
- Message - The commit message
- Author - The username of the person who made the commit
- Commit - The commit hash. A unique commit ID to identify the commit.
- Date - When the commit was done
- Deployed In - The environment the commit was deployed in.
Branch Actions
- Merge Latest - Merge the latest changes from one branch to another. The modal will show which direction the changes are happening.
- Check Out Latest - Create a copy of the branch for you to work on in Coalesce. To make the changes available for everyone you’ll need to commit and push to either the remote main branch or to the remote branch you’re working on.
- Force Checkout - A force checkout means it will checkout any changes made on the remote to your local branch without checking to see if they are compatible. For example, if you made changes to your branch, but run force checkout, it will overwrite the local changes if they differ making it match the remote branch. You could lose local changes, so only use this if you are sure you want to overwrite changes.
- Fetch - Get any changes from the remote. It doesn’t overwrite the changes you’re working on. It’s a good way to get other branches and see what others have been working on or to get the most recent changes to the main branch.
- New Branch - Each commit will have the New Branch option next to it. You can create a new branch from that commit. For example, in our current branch, there are three commits. A commit is a snapshot of the branch at that point in time. If you decide to create a new branch from the created graph commit, then that means anything in the removed column commit won’t be available.
Create a New Branch
To make a new branch, click on the New Branch link on an existing commit, type in a name for it, and a new branch will be created from the current one.
Checkout a Branch
When you create a new branch, you will automatically check it out, but if you'd like to return to another branch, you can do so by selecting the branch from the dropdown and clicking Check Out Latest.
If you haven't committed your latest changes on your current branch, you will receive a warning message that checking out another branch could cause you to lose those changes. If you'd like to force the checkout, click on the three dots next to Check Out Latest and select Force Checkout.
Merge Branches
After making changes and making a commit to a branch, you can merge the changes back to another branch.
- Check out your destination branch to make it your Current Branch
- Select the source branch with the incoming changes from the Selected Branch dropdown.
- Click on Merge Latest or Merge next to the desired commit you would like to merge into the current branch.
All the changes from Selected Branch will be merged into your Current Branch.
Updated 2 months ago